Kale #3 with Apple

image

Check out more easy Kale recipes: Kale #1, Kale #2, Tomato, Kale and Cheese Omelette

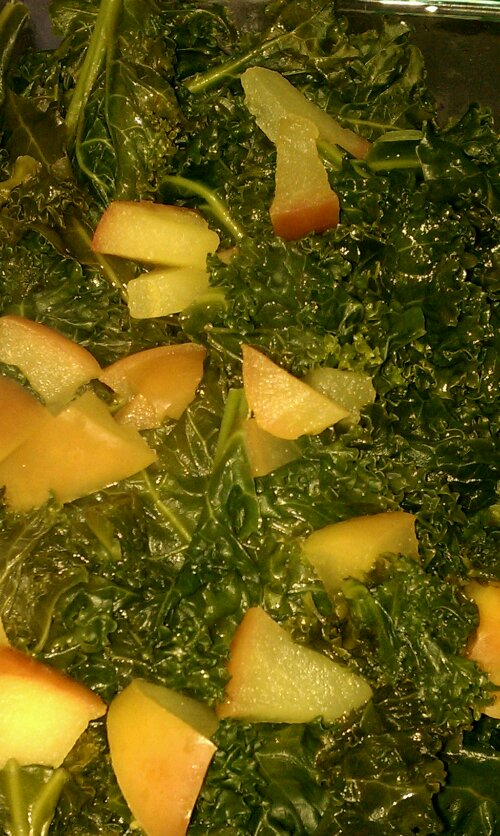
Another quick and easy kale recipe! Make sure the heat is up before adding the oil and then the kale , it should splatter when it hits the pan!
Besides being yummy, there’s several other good things about this: healthy, quick, and good way to ice up some apples that might have gotten forgotten on the bottom of your fruit basket for a little longer than ideal! Slice them dice them and add!
Simple, sweet and quick

Feeds 2 as a side(around here though, I have been known to polish off a bunch of kale by myself, so use your judgement)

Ingredients

1 bunch kale, washed and de-stemmed

1-2 small apples, diced

1/4 cup water

salt to taste

1 tbsp cider vinegar

image
Directions
°Wash and de-stem the kale
Heat a skilled, add little bit of oil, then and the kale and about 1/i4 cup of water.
° cover and cook for 8-10 minutes, depending on the tenderness of the kale.
°add the apple pieces, cover and cook 3 minutes when add the cider vinegar and steam for am additional 2 minutes
° ready to serve!
image

image
© 2012 SimpleHealthyHomemade

Granola Power Bars

image

Hiking or kayaking was on my list for the past weekend, but the weather has been a little , shall we say, un-cooperative. Since last night it literally thunderstorms every hour. So I have been limited to moving out onto the deck with book, cookie and tea, then back in, then back out with juice and book, then back in…  My poor kitty ‘Einstein’ is terrified of thunderstorms. He runs into the basement and hides. He’s been there pretty much all day 🙁 saw him once, I think I will take some water and food down to his little corner… Poor fellow.
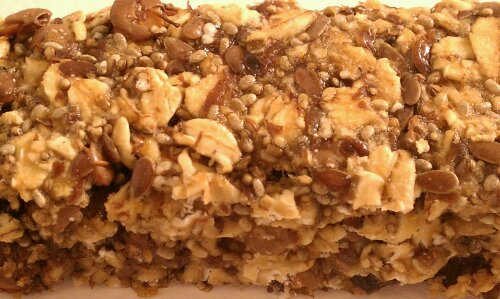
image

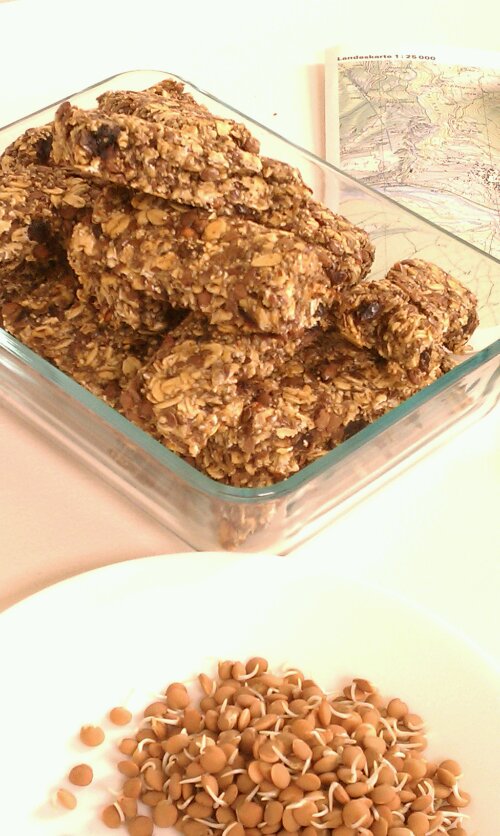
But on the upside of things, being limited to close to the house, I had plenty of time coming up with something that would be yummy (criteria number one), give me some sustained energy (i.e. complex carbs) and would be portable enough to take along, you know on hikes and such. Like a power bar. And since I really, really liked the granola I made recently (and this one), I started there with my ingredient list… And as an added bonus I supplemented with sprouted lentils for protein. To try lentils was an idea I got from Leanne’s Beach Bum Trail Mix Doesn’t that just look awesome? Heck, if they can go into trail mix, imagine how they would be sprouted and put into bars!
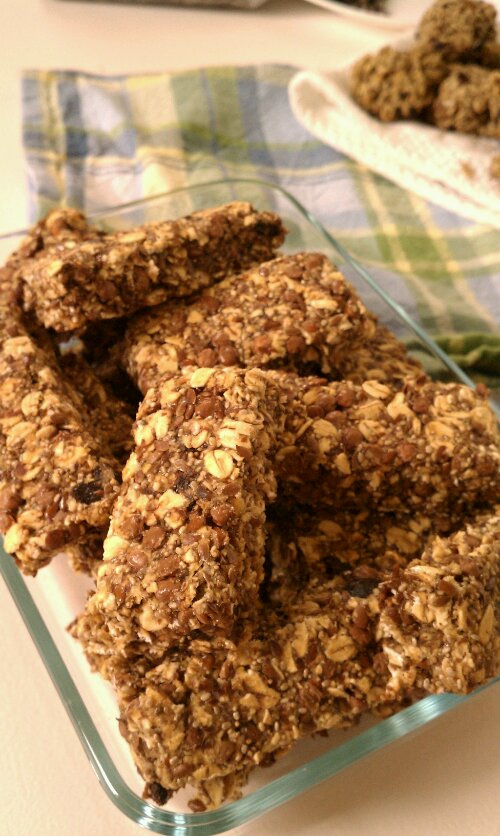
image

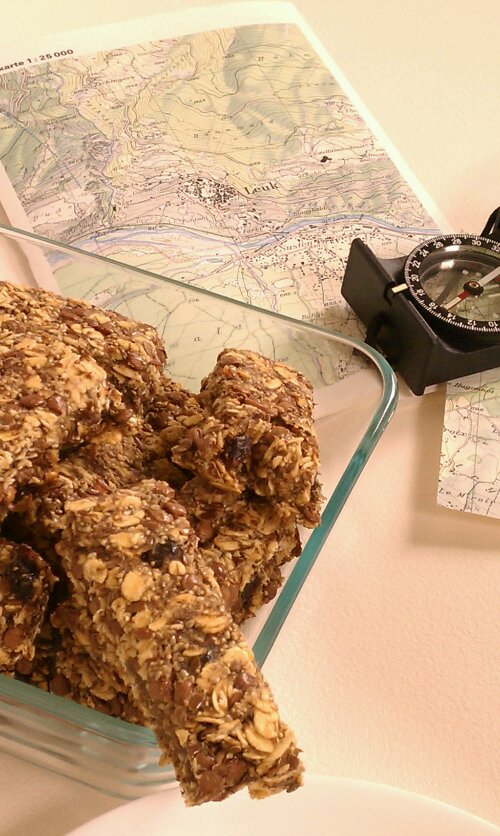
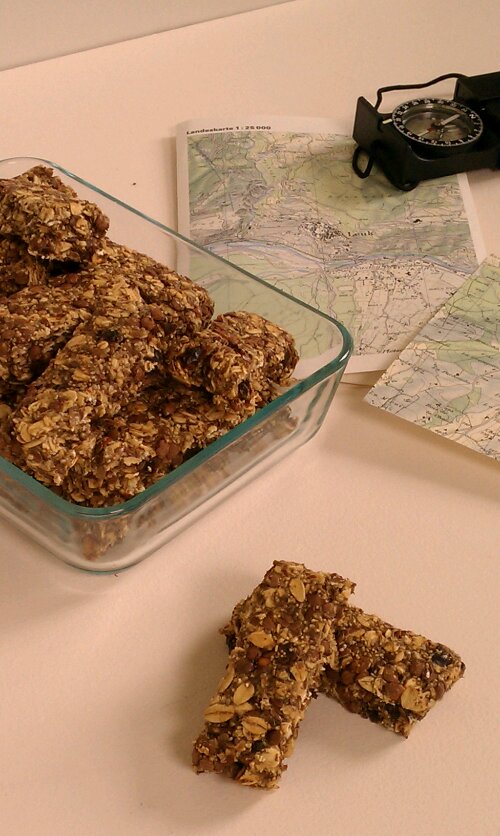
Ready for outdoor adventures! If only it stopped pouring…
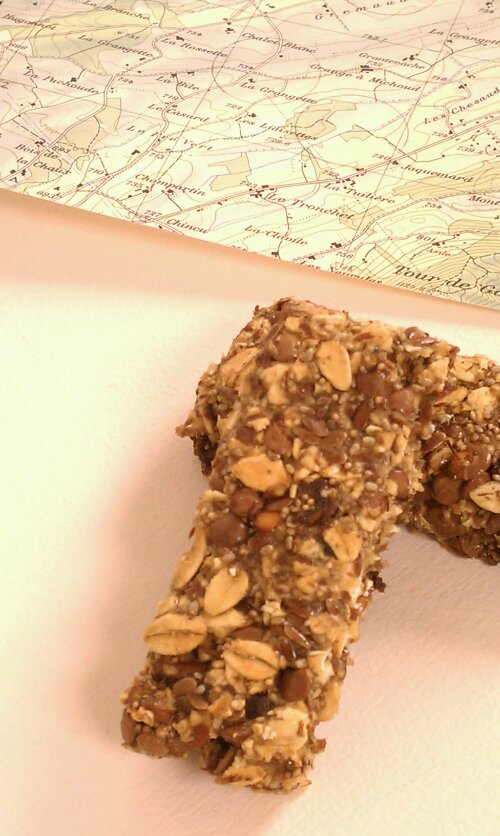
imageEven my boyfriend, who’s not all that concerned with healthy eating, loves these!
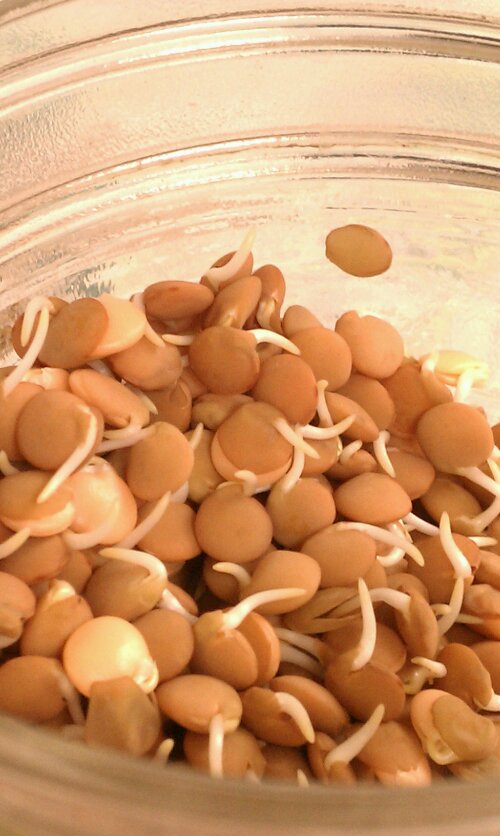
imageSprouted Lentils, before drying

Ingredients

  • 2 cups old fashioned rolled oats
  • 1/2 cup popped amaranth grain (buy or do it yourself)
  • 3/4 cup sprouted (and dried*) red lentils
  • 3/4 cup date pieces or chopped dates
  • 1/2 cup sweet brown rice flour
  • 1/4 cup flax seed
  • 1/4 cup flax meal
  • 1/4 cup chia seeds
  • 1/4 cup apple sauce
  • 1 cup water
  • 1/4 cup peanut butter
  • 1/4 cup rice syrup
  • 1/4 cup honey or agave nectar

* to dry the lentils after sprouting, preheat oven to 350F and place sprouted lentils out on a baking sheet. Cook for about 25 minutes, until crunchy. imageOk, so I got a bit picture happy. Did I mention, it was raining all day?
Directions

  1. Mix oats through brown rice flour in a large bowl, set aside
  2. Mix flax seed, flax meal, chia seed, water and apple sauce, let rest 20 minutes. Then add the sweeteners and the peanut butter and mix until well combined.
  3. Add the wet mixture to the dry ingredients in the bowl and stir until incorporated.
  4. Spread on a lined baking sheet (a US quarter sheet or half of a bigger cookie sheet works well) until about 3/4″ thick
  5. Bake at 350 for 60 to 65 minutes, checking and turning the sheet after 40. Then turn oven off and leave them in the oven overnight.
  6. In the morning, cut into rectangles roughly 1″x 4″, makes about 24

imageI used one side of a US half sheet size. Spread it out, it won’t go anywhere. And makes for some odd shaped bars at the end, you know, the ones YOU have to eat right away, to make it neat 😉
imageCopyright © 2012 Simple Healthy Homemade. All rights reserved

Strawberry Jicama Juice with Mint

image

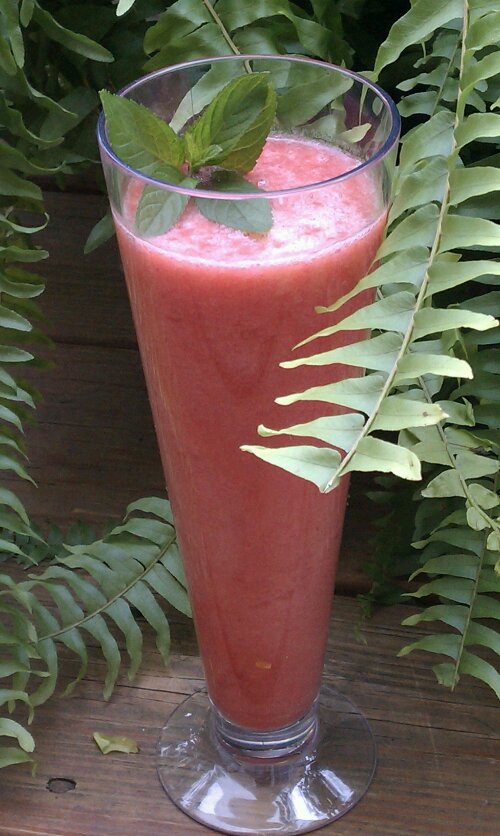
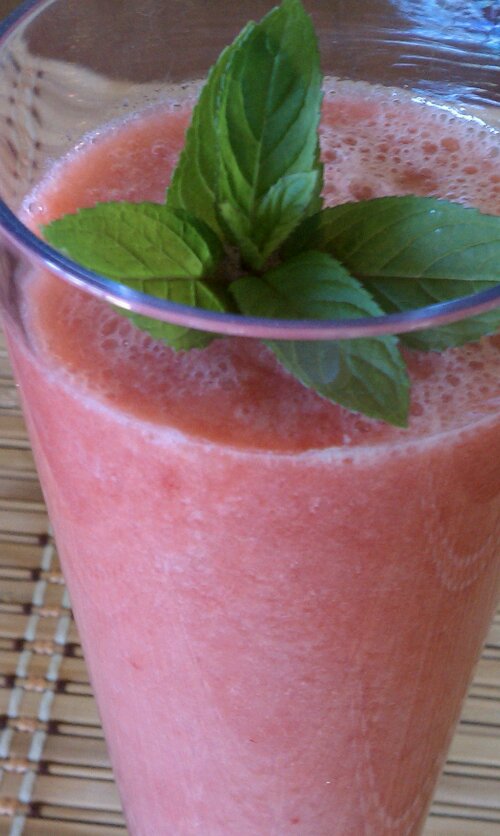
In  the last couple of weeks, I have re-introduced juices into my days again. No no, not OJ from a box. We all realize by now how not so good that might be for you. If you don’t yet, just think about the fact that diabetics are given orange juice when their blood sugar gets dangerously low, to quickly bring it back up… On some days juicing is an easy way to up my vegetable intake, and at least get to some of the nutrition I really should eat but don’t always have time for.

image

I will not get up on my soap box about sugar today, waaaaay to hot for climbing, but on hot days like this, eating is sometimes not something I feel like doing, but using my juicer always seems to come in handy. My general rule of thumb would be to use fruit only to sweeten your (green, yellow or red) vegetable juices, unless… unless of course you are making a desert. Well, here is more of a desert version, you know, to balance out the green juices in your life 😉

image

Ingredients

  • 1/2 lb strawberries
  • 1/2 medium Jicama, brown skin peeled off
  • 1/2 cucumber, peeled
  • 1 Chinese pear, quartered and seeds removed
  • 2 sprigs mint, plus some leaves for garnish

Directions

  1. Per your juicer’s guidelines, juice all the ingredients: I started with the softest things, the strawberries. Don’t push down, or you won’t get much juice from them, gently feed them through. Either juice the mint sprigs, or usig a wooden drink mottler, bruise them in the glass before serving the drink. Then juice the Jicama, the cucumber and the pear.
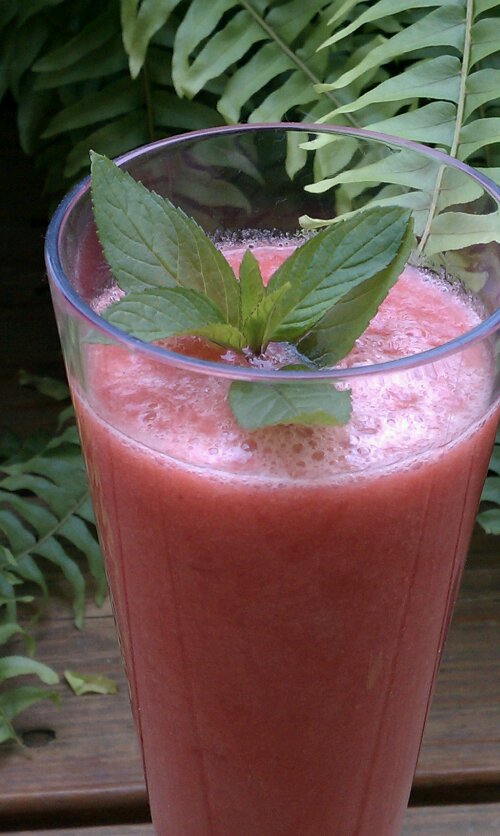
  2. Pour over ice, garnish with mint leaves and serve!
  3. Save the strawberry pulp for another use, unless you have a super Juicer and there is almost nothing left, you can use the rest for baking, pancakes or pop sicles

I bet this would be awesome spiked with lemon vodka… Tropical Island gettaway, here I come! …

image

Copyright © 2012 Simple Healthy Homemade. All rights reserved
Gluten-free Vegan Oatmeal Cacao Nib Cookies

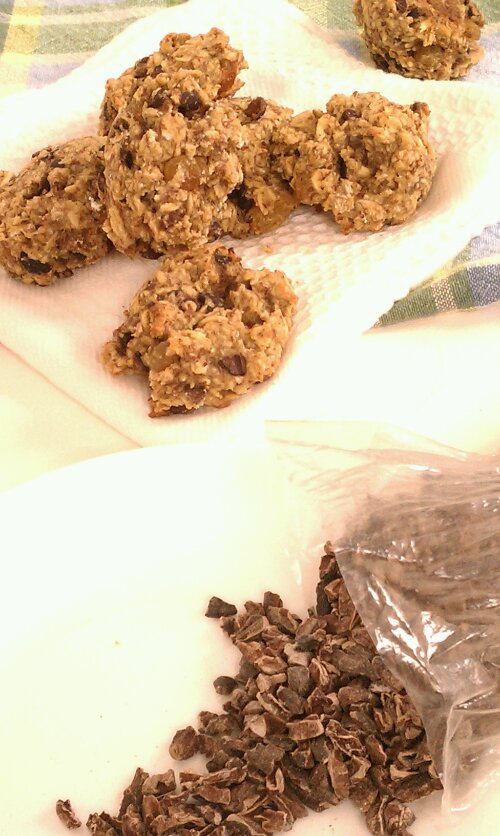
image Oh yeah, AND raisins!

These are so ridiculously awesome. The cacao nibs give them a dark chocolate flavor you can smell from the oven all while being gluten-free and low sugar! A quick word on cacao nibs/cacao bean: coming from the Theobroma cacao tree,  sometimes wrongly labeled cocoa nibs/cocoa bean, which from my understanding refers only to the extracted butter or powdered stuff. The mayan word is: kakaw, they might be on to something, I mean, they’ve only been using the stuff for ever. Just sayin’

Gosh, you have no idea, but just writing about those cookies makes my mouth water, and of course they are already gone… (I see some more baking coming up in this girl’s future) They are chewy and fragrant and yes, the texture is somewhat different than regular oatmeal cookies, after all there are mostly oats in there (and they are made without gluten flour).

imageDark cacao nibs (essentially pieces of cacao bean) 

If you are cultivating your sweet tooth, please feel free to use more ‘sweet stuff’. The cookies here are getting some of their sweetness from the raisins, but they would be a perfect treat for my Dad, who doesn’t really like sweets. I am a big believer in flavor over just plain sweet, or salty for that matter; and these cookies fit the bill perfectly.

image

Ingredients

  • 2 cups rolled oats
  • 1/2 cup millet flour*
  • 1/4 cup golden raisins
  • 1/2 cup cacao nibs
  • 1/4 cup flax meal
  • 2 tbsp chia seeds
  • 3/4 cup water
  • 1/4 cup almond or other nut butter
  • 1/4 cup agave nectar, maple syrup or honey**

* I used millet because of its sweet, nutty flavor, but you could most likely use other gluten-free flours

**if using honey, the cookies are no longer vegan

image

Directions

  1. Preheat oven to 350ºF
  2. In a large bowl, combine first four ingredients (oats through cacao nibs)
  3. In a separate bowl, mix flax meal and chia seeds with the water, set aside and let rest for 10 minutes.Then stir in the agave nectar and almond butter
  4. Stir the flax mix into the bowl with the oats, add up to another 1/4 cup of water if dough looks too dry.
  5. Drop cookies by the rounded tablespoon onto a prepared baking sheet, and bake until golden brown on the bottom and just starting to turn golden on top, about 8 to 11 minutes.

Makes about 30

imageCopyright © 2012 Simple Healthy Homemade. All rights reserved

Nüssli Salat (lambs lettuce, Mâche or Corn Salad) with Eggs and Orange

image

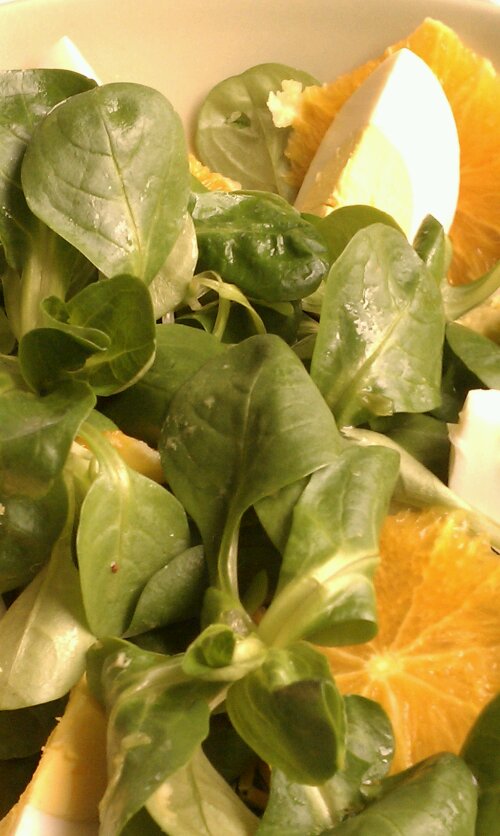
A filling lunch salad for a warm day. When I was  kid, my Mom made this a lot after Easter, it’s a good way to use up all the pretty Easter eggs. I am sure she still makes it, I am just not there to enjoy it that often 🙁  Over time, I have changed things around a bit, so for one I do not always use her creamy dressing, here I just made a simple vinaigrette  but it would sure would be awesome with Sour Cream Chive Dressing or Greek Feta Dressing! I also started adding part of an orange, to pep it up a bit, and really like it. Add a bit of the orange juice from peeling and cutting the orange to your dressing.

image

In my parents garden, we used to grow our own Nüssli Salat. In the early spring, and when we were going to get snow or a hard frost, my Dad would cover it with burlap bags. Wait, I am thinking, not totally sure on this, but I think, he grew the stuff  covered with bags all winter long… Hmm will have to check on that next time I talk to ‘Switzerland’, it might be that I was just a kid making winter looooonger than it needed to be in my Mom’s eyes. (My Mom did not really appreciate winter as much as I did)

image

Per person you will need:

Ingredients

  • a good plate full of Nüssli Salat, Mâche (Corn salad or Lambs lettuce)*
  • 2 hard boiled eggs
  • 1/2 orange, peeled pitted and sliced crosswise into rounds
  • 2-4 tablespoons of your favorite dressing (vinaigrette shown here)

* If you can’t find this delicious lettuce, it’s usually available in the winter and early in the spring, anything with some substance could be substituted

Directions

Arrange on platter and off you go!

image

Copyright © 2012 Simple Healthy Homemade. All rights reserved

Kale #2 with Garlic

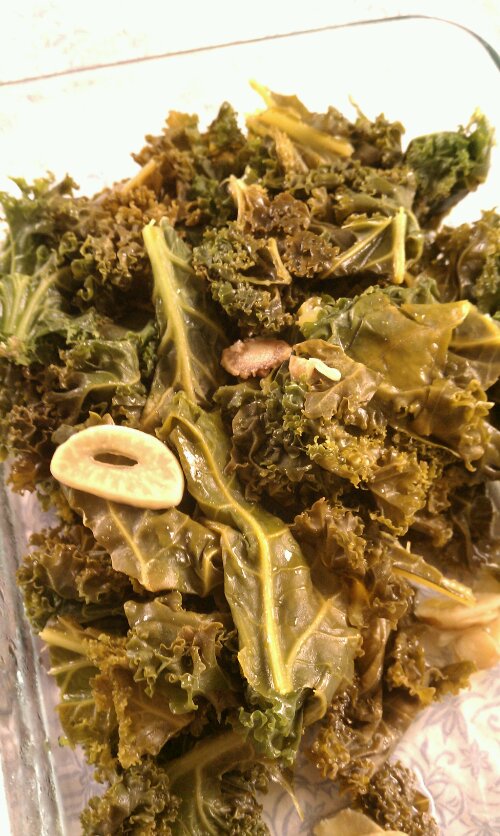
imagePan roasted garlic lends its flavor to this easy kale side dish.

My favorite kale, hands down is Cavolo Nero or Tuscan kale or Lacinato kale or dinosaur kale (Oh yeah, it has many names). It doesn’t have the frilly edges typical of other varieties, but almost a bubbly appearance. Dark green with a dusty sheen, I find it to be ideal for kale chips, in case you’re looking to make some. If it is young, like from my garden, I eat it raw in salads, it’s that tender! Unfortunately it seems that it is bit harder to get at the store than the curly variety that has become so common, so the picture here is just for recognition sake, and memories until I have more growing in my garden. I made the dish (this time) with the frilly, curly variety. Good either way!

Directions

  • 1 bunch of kale (curly or nero di toscana), cleaned, de-stemmed and chopped
  • 2 cloves of garlic, thinly sliced
  • 1-2 tbsp apple cider vinegar

Directions

  1. Remove stems and wash kale, chop or rip into pieces and spin dry.
  2. Heat oil in a large skillet over medium, add the sliced garlic and cook just until slightly golden (Don’t let it get black, or it will be bitter).
  3. Add the washed kale, toss, then add 1/4 to 1/2 cup water and cover with a lid. (If the kale is young and tender, you need less water/less cooking time)
  4. Cook until the kale is almost done, add the cider vinegar, cover and cook for another 2 minutes, then open the lid and let any excess water evaporate before turning off the heat.

Check these recipes for more kale ideas: Kale #1, Tomato Kale and Cheese Omelette, Kale, mushroom &meatball skilletimage

Copyright © 2012 Simple Healthy Homemade. All rights reserved

Mediterranean Lentil Salad

image

As it is getting towards the warmer times of year, at least the past Sunday afternoon made us here think that, I tend to shift the focus of my eating and start to crave more fresh and quick recipes that take advantage of all the seasonal produce available. On warmer days salads are a wonderful thing to make but they don’t always have enough staying power to make a full meal, unless you do it right. In come the lentils, from green to brown to orange, they even come in black, and I am not even talking about the Indian varieties that are usually referred to as lentils, but too me, look more like little beans. But no matter what color or shape, they are versatile and easy to prepare, none require pre soaking and all cook quickly. Lentils are great! Filling, low fat, high in fiber and a whole bunch of phosphorus and other minerals pack themselves away in there too!

imageHere I also had some Arugula and Egg salad on the side

This salad is also a great way to use up the rest of a bunch of parsley you bought for a recipe that only needed 2 tablespoons! Parsley contains lots of good things like iron, calcium, potassium and vitamin C to just name a few, but has huge amounts of vitamin K! So you don’t want to waste the precious green 😉

Ingredients

  • 1 cup lentils (preferably French Green)*
  • 3/4 cups tomato sauce
  • 1/2 red bell pepper, diced
  • 1 small (pickling) cucumber (or 1/3 of a big one), any large seeds removed, diced
  • 1/4 cup tomato paste
  • 1/4 cup bulgur wheat
  • 1 1/2 cups chopped parsley

* I’ve made it both with regular brown as well as du Puy lentils (french green), either one works, the French Lentils tend to stay a little firmer, which I prefer for salads.

Directions

  1. Bring 1 1/2 cups of water and 1 tsp salt to a boil, pour over the Bulgur wheat in a bowl, cover and let sit for 10-15 minutes or until Bulgur is softened. It will remain somewhat chewy, that’s what you want. Drain using a fine mesh sieve, gently press on it to extract some more water.
  2. In the meantime, cook the lentils in 1 cup of salted water, until just cooked, (not mushy), drain if there is water left and set aside to cool.
  3. Chop all the vegetables
  4. In a large bowl combine the lentils, bulgur, parsley, cucumber, pepper and tomatoes, stir to combine and let sit for a minimum of 20 minutes for flavors to blend before serving. This also allows the parsley to get a bit softer if, like me, you used curly leaf instead of flat leaf.

image

Copyright © 2012 Simple Healthy Homemade. All rights reserved

Mango Sweet Pepper Salsa

image

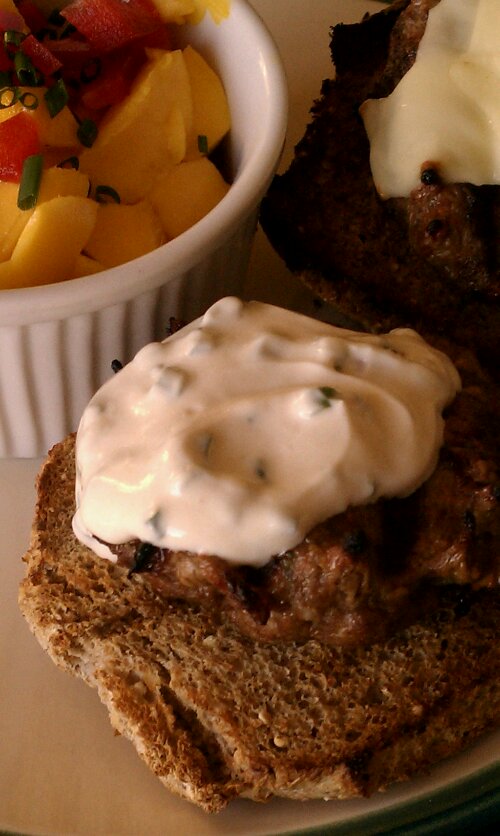
Chives and how to get rid of use them… Okay, one more… now I think I used almost a cup of chopped chives! I can feel a little better about using things up, I think. This one’s super easy and super yummy! Serve over or with chive burgers and guilt free chive sauce

image

Ingredients

  • 1 mango, peeled and pitted
  • 1/8th of a red bell pepper
  • 2 tablespoons lime juice
  • 3-4 tablespoons chopped chives

Directions

  1. Chop the mango, finely dice the red bell pepper
  2. Toss with 2 tablespoons of fresh lime juice and the chives

image

Copyright © 2012 Simple Healthy Homemade. All rights reserved

Guilt Free Yogurt Chive Sauce

image

I don’t like to waste things and have been practicing opportunistic eating the last few weeks. What I mean is I am really trying to only eat what is in my fridge, cabinets and seemingly bottomless freezer. Because, let’s face it, the more space one has the more ‘special buys’ find their way into said space. Hard to resist the buy-one-get-one deal on blueberries or roasts, whether you need them that week or not… I do claim complete innocence here and blame my ‘hunter-gatherer’ genes. More the gatherer part here, but hey, it’s not like I can change that, right 😉 And along with emptying out everything to make space for this years garden bounty, I am also trying to be more conscious of using the stuff as it grows instead of storing it for later. Not that I can eat all the chives, but heck am I going to try! And since we all got so many chives, here’s another recipe that will help accomplish that.

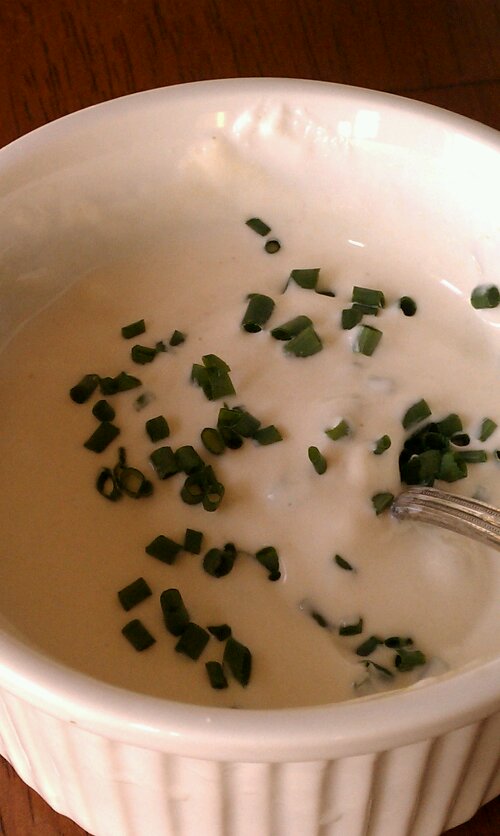
This one for  a burger sauce. Wait, it would probably be pretty awesome on baked potato as well… or fish! Hmmm I will have to come back to this one… Also a great one for Potlucks and Barbeques, much safer than any Mayo based stuff for sitting outside in the warmth. And totally guilt free, in fact it ups the protein since most of the sauce is Greek Yogurt, and believe it or not, the couple fo spoons of sour cream completely make it super creamy, you wouldn’t even know that you went for the much lower fat Greek Yogurt.

image

lighter accompaniment for burgers and more…

Ingredients:

  • 1/4 cup chives, chopped
  • 1/2 cup Greek yogurt, try not to use anything below 4%*
  • 2 tbsp sour cream
  • 2 tsp pickle juice (from your cucumber pickles)
  • 2-3 tsp mustard
  • 1/4 tsp salt

* for those of you not familiar with Greek Yogurt, it’s thicker and higher in protein because it is left to drain in cheesecloth. Yes, you could most likely drain your own yogurt and get a pretty good result.

image

Directions

  1. Mix everything except chives until smooth and homogenized.
  2. Stir in chives and serve! How’s that for easy?

imageCopyright © 2012 Simple Healthy Homemade. All rights reserved

Burgers (or what to do with all those chives)

image

The last two nights I had to cover up my garden and my two berry bushes with sheets and table cloths for lack of anything more fitting. They looked kinda like awkward ghosts in the morning sun. But they called for freezing and frost and what not, and since the warm weather made the currants burst into flower, I needed to protect them or they will be done and no berries for me this year. Red currants(and black or Cassis currants for that matter) are pretty hard to come by in these parts of the world and so I am wiling to go through all kinds of trouble to save them, including digging them up at my old house and transporting them in a pot, (poor things they lived in that pot for almost a year) or turning them into ghosts. This morning it was soooo cold inside I had to turn my fireplace on to stay warm (I did turn the heat off, it’s almost May after all, and I am keeping it that way, period.) Yes I will wear a fleece in my house, if need be. And need was definitely there this morning. Then this afternoon it heated up to the point where I removed half my clothes before my run for which I left the house seriously bundled up. AND I had dinner outside, on my deck.

imageWhat do you want? I had to make sure they were good, I watch out for you guys 😉

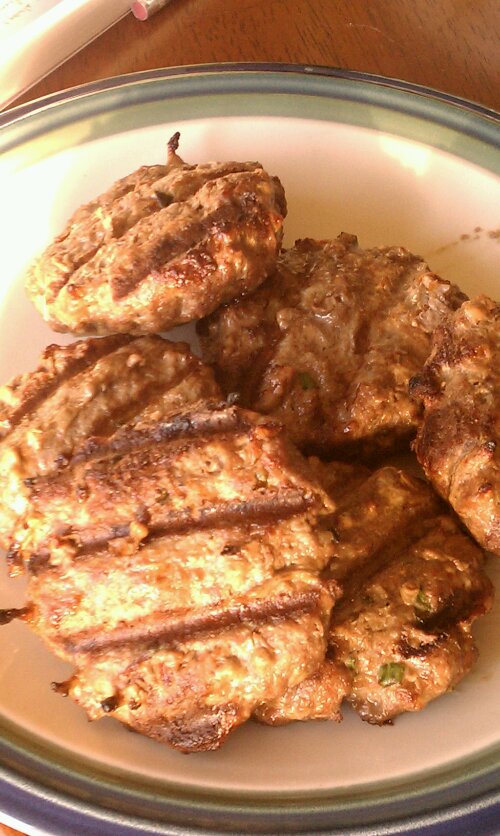
I had been looking to make use of the chives chive bush that erupted in my garden this spring. So when I just had to put something on the grill, I knew what to try. The try was successful and filled my tummy with super deliciousness!

image

I snip the chives with scissors, I find that the easiest way to go about it

Makes 6 burgers

You will need:

  • 1 1/4 lb ground meat (1 lb venison and 1/4 lb beef mixed, or all beef)
  • 1/2 cup chives, chopped
  • 2 small shallots, finely diced
  • 1 tbsp mustard
  • 2 tbsp tamari or soy sauce
  • 1 egg
  • Fresh ground pepper to taste
  • 3-6 burger buns (preferably sprouted grain such as these)

Serve with

Guilt Free Yogurt Chive Sauce and Mango Sweet Pepper Salsa

image

Directions

  1. In a bowl break up the ground meat using a fork.
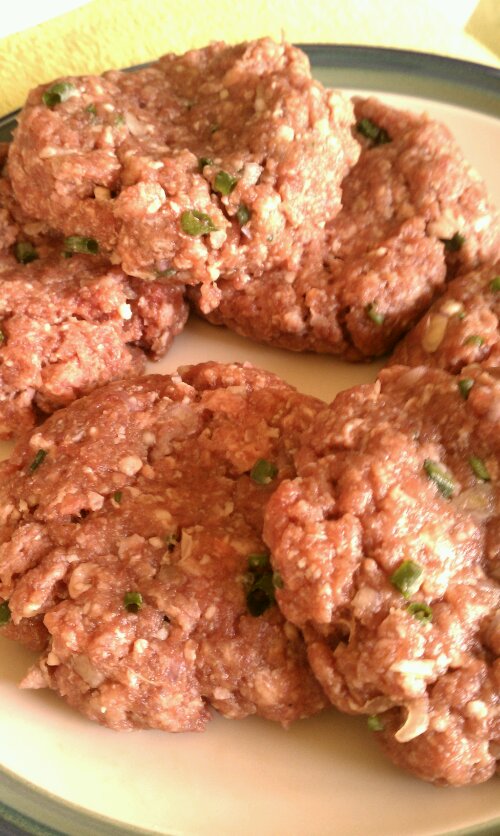
  2. Add mustard, tamari, shallots, egg, ground pepper and chives and stir gently until all mixed up (I did not include any salt here, since the tamari or soy sauce is pretty salty)
  3. With your hands, form into 6 balls then flatten out to make a burger patty, set aside.image
  4. Preheat your grill
  5. Grill the burgers to desired done-ness, flipping only once.
  6. Serve on a toasted bun, or half of one, if you like

image

Copyright © 2012 Simple Healthy Homemade. All rights reserved