Pickles

image

Swiss or German pickles, yes, German-speaking, mine are smart, they can talk. Haha, no, but they are different from what is served here in Pennsylvania (can’t speak too much for other parts of the country since pickles are not usually high on my list of local fare when I travel 🙂 ) But since I am not a big fan of dill, personally thinking it goes well with fish and fish dishes, and should remain there… needless to say, the classic ‘Dill Pickle’ is not my thing.

I will move my sandwich to higher ground to avoid cross contamination with pickle juice, if I was served a pickle after all (If I remember, I usually ask for it to be left off)

Where I am from, pickles are sour. Period. Yes, there are spices used, but none is so dominant that it overpowers all others. We like balance (or close to). Go figure we’re neutral, ha!

So after not eating pickles (besides cornichon) for years, finally the revelation came to me: ‘Make them yourself, it can’t be that hard.’ And it isn’t, in fact it is less work than making jams or preserves.

And now, since I waited the required week to allow the flavors to blend, and I tried the result… Finally, Ladies and Gentlemen, the moment you’ve all been waiting for (drum roll): I am sharing what I did and how to go about it!

image
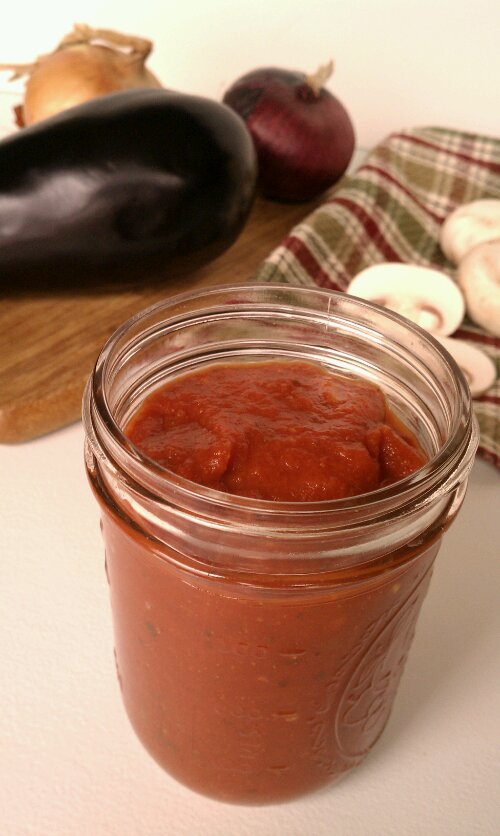
You can see the deviant pickle jar in the back left. I used carrots to completely fill the jar. Have not tried that one yet…

Ingredients

  • 4 cups apple cider vinegar
  • 4 cups water
  • 1/4 cup pickling salt
  • 20-25 pickling cucumbers, not waxed

Per Jar: (use quart size wide mouth jars)

  • 1/2 tsp yellow mustard seed
  • 1/8 tsp brown mustard seed (for pretty)
  • 1/8 tsp whole coriander seeds
  • 3-4 black peppercorns
  • 1 bay leaf
  • 1-2 small garlic cloves, peeled
  • 1-2 pieces of shallot (a piece here is about the size of a small to medium garlic clove)

Directions

  1. Bring water in a water bath canner to a boil, sterilizing the jars by cooking for 10 minutes.
  2. In a sauce pan in simmering water, sterilize the lids.
  3. In a large sauce pan, heat the water, cider vinegar and salt, stirring until salt dissolves. Bring to a simmer
  4. Scrub cucumbers and remove jars from water. Empty the water back into the canner,  fill jars with the cucumbers, then add the spices to each jar. Fill with vinegar mix, leaving a 1/2″ head space. Center a lid on top and secure with a band. Repeat with remaining cucumbers and jars, when all are sealed, place on canning rack and lower into the boiling water of your water bath canner. Process for 10 minutes, then turn of the heat and let sit in the water another 5 minutes, then gently remove the jars and place on a heat proof surface*, careful not to shake or tilt the jars
  5. Wait till next day to check for seal, place any jars that did not seal properly in the fridge and consume those first.
  6. Wait one week before eating.

*The best way for me is to place the jars on a big wooden cutting board, since they have to sit undisturbed for a week, I can move the whole lot of them without having to tilt and jiggle the jars

Makes 4-5 quart size jars

Copyright © 2011 Simple Healthy Homemade. All rights reserved.

Kabocha (or Butternut Squash) Chowder

image

There is simply nothing better than dipping your spoon into a steamy bowl of soup after being outside on a cold and windy day! I had sampled some fabulous roasted butternut squash at one of the grocery stores in the area, and it’s been working its way through my mind for re-creation and sharing soon 😉 However, when I came in after riding my bike today, there was no patience left for roasting anything. And since it was cold, I was hungry and I had a Kabocha squash sitting on the counter waiting for the perfect opportunity to turn into an awesome meal, soup it had to be!

If you’re not familiar with Kabocha Squash, it’s very similar looking to a Buttercup squash in that it has a dark green shell, but you could really use Butternut, Buttercup or Kabocha for this. Kabocha will be sweeter than  the other types and most likely it’s the brightest colored.

image

Ingredients

  • 1 md Kabocha or butternut squash, seeded, peeled and cut into pieces
  • 1 tbsp coconut or olive oil
  • 1/2 cup coconut milk (or regular cream*)
  • 1/2 red onion, chopped
  • 1 tbsp Madras curry powder
  • 1 tsp salt
  • water
* If using cream, recipe is no longer vegan or dairy free

Directions

  1. In a large pot, heat oil on medium and add onions and squash pieces. Cook stirring occasionally until onions are softened but not brown
  2. Add curry powder and cook until flavorful, then add enough water to cover squash by about 1/2″ (you can always add more to thin the soup, but cooking excess liquid off takes a long time.) Bring to a boil, cover half and simmer until squash is very soft.
  3. Remove pot from heat and using an immersion blender, blend until smooth and there are no more pieces (alternately you can blend in batches in your food processor or blender, but make sure you wait for the soup to cool down some first and don’t fill too much)
  4. Return to stove, add salt and 1/2 cup coconut milk (or regular cream) stir until dissolved.
  5. Serve each bowl garnished with a spoonful of coconut milk or cream, using a tooth pick, stir just a little to form a swirl pattern.

Makes 4 to 6 servings.

Pretty eats!

image

Go ahead, connect to your inner Picasso!

Copyright © 2011 Simple Healthy Homemade. All rights reserved.

Four Greens Vegetable Soup

image

Today I got myself a Crinkle Cutter! I know, I know that might not sound very exiting for you, but I am a sucker for kitchen gadgets, especially when they are on sale. And it just so happened that my local grocery store had them on closeout sale… what can I say

image

So now being the proud owner of a brand new crinkle cutter, I realize there are many, many things that could be ‘crinkled’ with this, but to start I decided to try it on something relatively soft, hoping to get an easy start, and picked zucchini. And since tonight they are calling for the first frost of the season a yummy vegetable soup seemed like the perfect fit.

As we are heading into the colder months with people worried about getting sick, many stay cooped up inside more than is good for them and a good many eat less vegetables than in the summer exposing them to higher risk of in fact getting sick, while also being exposed to more recycled air in a heated environment. Soooooo, I wanted to make something to give your system an antioxidant boost and what tastier and better way than greens could there be?

So for this mean-lean-green bad boy we are going to use kale, spinach, celery and zucchini (ok, ok, I know, not a ‘green’ but c’mon, you can see the color, right? 😉 )

image

Ingredients:

  • 1 tbsp oil
  • 1/2 red onion, finely diced
  • 4 stalks celery, chopped
  • 1 small zucchini (crinkle cut, or sliced into 1/4″ rounds)
  • 1 can or 1 qt size bag frozen tomatoes *(if using canned, pick one that is either no salt added or a low sodium version)
  • 1 can canellini beans, drained and rinsed or 1 portion frozen **(snack bag size)
  • 1 good quality vegetable buillon cube, for making 2 cups(I use Rapunzel no salt added)
  • 1/2 to 1 tsp salt
  • 2 good hand fulls lacinato kale, center stalk removed, washed and trimmed
  • 3 to 4 oz baby spinach
  • small amount of whatever other veggie you have on hand that could stand to get used up (I had a little broccoli left)
  • Parmesan for grating on top (optional, note that using Parmesan would make the recipe no longer vegan or dairy free)
* Note: I have had great success dicing and freezing a bumper crop of tomatoes in zip top bags and using it instead of canned for soups and stews in the winter. Leave cherry tomatoes whole.
**Note: To save time, money and cut salt from your diet, buy dried beans, soak and cook them, (I use my pressure cooker) and freeze in snack size baggies to be used like you would canned.

Directions

  1. Heat oil in a soup pan, add the onion and cook over low until glazed and starting to turn soft
  2. Add celery, stir and cook until you can smell the celery, then add the tomatoes
  3. Fill the pot with water until the vegetables are covered by about 2″ of water, add salt and bouillon cube and if using tomato paste and parmesan chunk.
  4. Bring to a boil
  5. Add kale, zucchini and beans, cook until kale is soft.
  6. Divide spinach into serving bowls, using about 1 cup per dish, ladle the hot soup over and serve, if desired, with fresh grated Parmesan.

Makes about 6 bowls ( Serves six as a first course)

image
Copyright © 2011 Simple Healthy Homemade. All rights reserved.

Roasted Red Pepper and Pumpkin ‘Cream’ Sauce

image

Glorious colors of fall! Here the leaves have finally turned color and as I am typing this I can see the red and yellow leaves glow in the sunlight, and the bronze and ‘still green’ leaves add depth to the shadows. The birds have returned to the bird feeder in droves, the nights finally have that crisp quality you only experience on an early morning in fall and I am enjoying the view to say the least.

image
To celebrate fall, with its vibrant orange of pumpkins, golden corn field and that last rest of summer’s warmth int he afternoon, I roasted up a brightly colored, mighty tasty and versatile sauce/dip/spread. Enjoy!

Ingredients

  • 1 red bell pepper
  • 1 cup chopped cooked pumpkin (or canned)
  • 1 tbsp olive oil
  • 1 pinch salt

Directions

  1. Roast whole red pepper until blackened in spots all over by holding it over a gas flame or placing under the broiler, then place in paper bag to cool a bit (the steam will loosen the skin making it easier to peel, added bonus, you won’t burn your fingers as much).
  2. Peel red pepper (don’t have a guy do this, for some reason their hands are not made the same as ours and they cannot handle heat, as per my experience 😉 ) , this works best using a paper towel and literally rubbing the skin off. Cut in half and discard the seeds, then chop flesh.
  3. Place pepper in your food processor or blender. I use a really cute mini processor for sauces and dips. And blend until you have a chunky mess, add the olive oil, blend until fairly smooth.
  4. Add the pumpkin and salt and process some more. The result should not have any chunks left in it but be smooooooth.
  5. Gently reheat to use over pasta, like the Pumpkin Goat Cheese Ravioli for example or chill and use as a spread for sandwiches or serve cold as a dip for veggies.                              Yields about 1 1/2 cups.

image

Copyright © 2011 Simple Healthy Homemade. All rights reserved.

Reena’s Amba Ma Smoothie

image

Version 1: Pineapple-Cantaloupe-Raspberry

During  the fall months, there is a particular Hindu Holiday ‘Navaratri’ during which believers perform several rituals and practice fasting. It lasts 9 nights and is devoted solely to the Mother Goddess — known regionally as Durga, Bhavani, Amba, Chandika, Gauri, Parvati, Mahishasuramardini…

File:Durgas.jpg

The story goes: After one of the Gods (Brahma) gave the demon Mahish the power not to be destroyed by man (including male Gods) because of doing a good deed for Brahma, Mahish started to cause all sorts of terror. So, the 3 forms of God, Brahma (birth or creation), Vishnu (life or preservation) and Shiva (death or destruction) combined their energies and powers and created a female form of God (Devi or Durga) to destroy the demon, (since no man could vanquish him). She represents the furious powers of all the male gods, and is the ferocious protector of the righteous, and destroyer of the evil. Durga is usually portrayed as riding a lion, and carrying weapons in her many arms.

I’ve also heard “Durga” means ‘invincible‘ and she is the personification of ‘shakti’ or divine feminine force!

Goddess of Victory of Good over Evil

For the fasting part of the ritual, nothing except Milk, nuts and fruit can be eaten during the day. And so I created this yummy smoothie in order to take advantage of all the goodness that’s to be had from milk, nuts and fruits

image

Ingredients

  • 1 cup milk (that can be almond milk or dairy milk**, your choice)
  • 1 tbsp almond butter (or other nut butter: remember peanuts aren’t really nuts)
  • 1 really ripe banana
  • 1 cup pineapple(fresh or frozen)*
  • 1 cup cantaloupe or mango pieces (fresh or frozen)*
  • 1-2 tbsp raspberries or strawberries (optional)

* Make sure that one of these is frozen. If it is still hot outside, both may be frozen or you could add some ice cubes before blending.

** If using dairy milk, the recipe is no longer dairy free or vegan

Directions

  1. Put all ingredients in the blender, starting with the banana, add fruit, then the almond butter on top and pour the liquid over top.
  2. Blend until smooth.
  3. Enjoy or pack in a cooler or lunchbox and take to work to have throughout the day.

Version 2: with Blueberries…

Ingredients, Version 2

  • 1 cup milk (that can be almond milk or dairy milk**, your choice)
  • 1 tbsp almond butter (or other nut butter: remember peanuts aren’t really nuts)
  • 2 really ripe banana
  • 1/4 cup blueberries (fresh or frozen)*
  • 1 cup peaches or pineapple (fresh or frozen)*

* Make sure that one of these is frozen. If it is still hot outside, both may be frozen or you could add some ice cubes before blending.

** If using dairy milk, the recipe is no longer dairy free or vegan

image

Directions

  1. Put all ingredients in the blender, starting with the banana, add fruit, then the almond butter on top and pour the liquid over top.
  2. Blend until smooth.
  3. Enjoy or pack in a cooler or lunchbox and take to work to have throughout the day.

And here’s a great thing to do with any leftover smoothie:

Pour into popsicle molds (or any small paper or plastic cups and add one of those wooden sticks they sell at craft stores) and freeze for a sugar free treat later.

Copyright © 2011 Simple Healthy Homemade. All rights reserved.

Grain Free Lasagna

image

Ahhh Lasagna! The whole house smells good after you make one of those…

image
Earlier this year, when I was plagued by seasonal allergies, I had been experimenting with a gluten free diet, at the time, I made some Lasagna using rice pasta, you could not even tell the difference!But I was ready for something new, so when I picked up some fantastic looking eggplant, zucchini and mushrooms, at the farmers market and walked past various types of squash, including spaghetti squash, (not ready for that one yet), inspiration hit me, a light came on and I heard a voice. Nonono no, not quite, but I said to myself, “what happens, if I just plain and simply leave out the pasta completely, replace it with thin slivers of veggie instead?” The result is not only gluten free, it is also almost Paleo 😉 (There is cheese, milk and potato starch in it, sorry folks) BUT it’s 100% grain free.

For a vegetarian version, replace the meat with diced zucchini, eggplant and shredded carrot. Adjusting the skillet time accordingly.

image

First I made a meat sauce, using homemade tomato sauce, ground bison and mushrooms…
image

Ingredients

  • 1 medium eggplant
  • 2 small zucchini
  • olive oil
  • 2 to 2 1/2 cups homemade tomato sauce (or good quality store bought)
  • 8 oz button mushrooms, cleaned and sliced
  • 1 lb ground meat (I used bison, but beef or turkey would work as well)
  • 1 med onion, diced finely
  • oregano  and basil(dry or fresh)
  • 2 tbsp butter
  • 2 tbsp potato starch/flour
  • 2 1/2 c milk
  • 1/2 tsp salt
  • 2 cups shredded mozzarella cheese

image

Directions

  1. Using a mandolin slicer, slice eggplant and zucchini into lengthwise thin ribbons (this is what you will be using instead of the pasta sheets). Set aside
  2. In a large skillet, heat a tbsp olive oil, add onion and cook over medium until softened, not browned, about 5 minutes.
  3. Add the sliced mushrooms, cover and cook on medium low until the mushrooms are starting to soften.
  4. Then add meat to skillet and cook, breaking up pieces with a fork until not pink anymore.
  5. Add tomato sauce and oregano and basil (depending on the sauce you choose, you might need less or more, suggestion for dried spices is 1 tsp oregano and about a tbsp basil), stir until mixed well and heated through. Set aside
  6. To make the Béchamel Sauce:  Heat 2 tbsp butter in a medium sauce pan over medium low until melted, add in 2 tbsp potato starch, stir until incorporated
  7. Whisk in milk and salt, and stirring continuously, bring sauce to a simmer (don’t turn up the heat, this should be done slowly), and simmer for 3-5 minutes until thickened. (Use when still warm/hot)
  8. Assembling the Lasagna: Using either one 9×13″ glass dish or several smaller ones ( I like to use dishes that are 2-4 servings and freeze several, for a quick week night dinner or lunch) start by spreading some meat sauce over the bottom of the dish, then a layer of eggplant or zucchini, followed by 3/4 cup of Béchamel sauce, a handful of mozzarella, another layer of vegetables (either zucchini or eggplant, I kept doing one layer zucchini, one layer eggplant, but you could mix and match), repeating the meat sauce and Béchamel/cheese layers, finishing with a layer of Béchamel and the rest of the mozzarella.
  9. Store in the fridge until ready to bake for dinner or bake right away: Preheat oven to 350F, bake in the middle of the oven for 30-40 minutes or until bubbly and the eggplant and zucchini are soft, when pierced with a knife. (Adjust baking time, if not storing in the fridge first)

image

image

Copyright © 2011 Simple Healthy Homemade. All rights reserved.

Grilled Mediterranean Eggplant with Hummus Spread

image

Yep, I am still clinging on to summer, end of summer denial? Maybe juuust a bit… In my defense, I have embraced fall at least as far a pumpkins go, so think I am alright. But with how the weather was this past week end and the beginning of the week, it was grillin’ time, baby! And farmers markets and road stand are all still loaded with eggplant and zucchini, and other late summer crops, it be a shame to not grill up some yummies!

Ingredients

  • 2 md eggplant
  • salt
  • extra virgin olive oil
  • 3-4 tbs Hummus

image

  1. cut eggplant into 1/4″ thick slices lengthwise, salt on both sides and place in a colander in your sink to drain for 20 minutes (you will remove the excess salt in the next step, so no worries)
  2. Preheat gas grill or light the charcoals!
  3. pat or wipe dry with paper towel, and spray with olive oil (using your ‘Misto’) alternately, you can also use a brush to lightly brush oil onto both sides of the eggplant
  4. Grill on medium until grill marks appear, turn over and grill, with the cover down, until tender
  5. Place on platter and serve drizzled with Hummus Spread
  6. For Humus Spread: In a small bowl mix together the hummus with 2-3 tbsp water, stir until smooth.

Goes well with ‘Roasted Salmon with Coriander-Paprika Glaze’ or a nice Bison steak.

And guess what’s for desert… Pumpkin Cheesecake Minis! (recipe soon)

image

Copyright © 2011 Simple Healthy Homemade. All rights reserved.

Roasted Salmon with Coriander-Paprika Glaze

Our Sunday night ‘still hanging on to summer’ dinner 😉


Salmon is one of those cold water fish, high in Omega-3’s, we all know by now we’re supposed to have more of ‘those ones’ in our diet, but how to go about it?

Last Weekend I created this quick and easy recipe that can be whipped up in a minute with minimal effort. And let’s face it, I haven’t met anyone that could not use another 10 minutes recipe! That’s how simple this roasted salmon is to make, although it tastes and looks like you labored in the kitchen for a lot longer 😉 And who doesn’t like to get some easy earned praise?

Ingredients

  • 2 pieces of salmon, about 3-4 oz each
  • 1 tbsp lemon juice
  • 1 tbsp olive oil
  • 1 tbsp whole coriander seeds, crushed in a mortar
  • 1 tsp honey
  • 1 tsp paprika (sweet)
  • 1/8 tsp salt

Directions

  1.  Crush the coriander seeds in a mortar or use a spice mill
  2. Combine lemon juice, olive oil and honey in a small bowl
  3. Add coriander, paprika, and salt, and stir well until incorporated
  4. brush the salmon fillets all over with the glaze and bake in the middle of the preheated oven at 400F for 10 minutes, or until opaque through, brushing tops one time at 7 minutes (10 minutes should be all it takes, unless you have an exceptionally fat pieces of fish)

You could use any extra glaze as seasoning for roasting red bell pepper slices alongside the salmon like we did here…

image

or just have the salmon with some grilled eggplant and hummus spread!

either way: make it.  It’s super yummy!

Hummus

image

A few years back, I decided to try and cook chickpeas instead of getting the canned variety. I got a pound bag, soaked them overnight, and cooked them the next day. I have never looked at legumes the same way again. The flavor is incomparable, the taste of freshly cooked chick peas is almost nutty, yummy!

Now what I do is I will soak a couple of different varieties of dried beans and go on a  bean cooking spree: Cooking a pound at a time in my Zyliss Pressure cooker (depending on the size cooker you got, you might be able to do more than one pound) after they are done and cooled, I portion them out in individual ‘servings’, usually in snack size zip top bags (have you noticed, they seem to only be available as store brand?) and freeze. Then whenever I want to make a bean soup, hummus or a salad, I just defrost what I need and can skip the high sodium and whatever else might live in those cans of beans. For soups, I literally just drop the frozen parcel in, hummus you gotta let it defrost in the fridge overnight or use your microwave.

image

Ingredients

  • 1 can chickpeas or equivalent frozen, defrosted
  • 3 tbsp lemon juice
  • 2 tbsp tahini ( sesame seed paste)
  • 1 tbsp olive oil
  • 1 tsp ground cumin
  • 1/2 tsp salt (use less if using canned)
  • 1/8 tsp ground white pepper
  • 1 dash cayenne pepper
  • 1 to 3 tbs water

Directions

Blend all ingredients in a food processor/blender, adding water until desired consistency is reached.

Serve as a dip with toasted pita chips or vegetables, or thin and use as a spread on grilled veggies

image


Unfinished Business: Grilled Mediterranean Eggplant with Hummus spread: taking advantage of the summer like weekend, we fired up the grill and had these puppies with a juicy, lean and clean bison steak 🙂


And Sunday night’s dinner, you ask? Oven roasted salmon with a coriander-paprika glaze… As I said, unfinished business, stay tuned, I will get to it 🙂

image

image

Copyright © 2011 Simple Healthy Homemade. All rights reserved.

Zucchini Griddle Cakes or Latkes

image

We all know someone who’s over productive zucchini plant fed the whole neighborhood.
One year, the seed company had messed up, and the Charantais Melon seeds turned into zucchini plants… And unfortunately for us ( and our relatives and neighbors) that was in addition to the 3 zucchini plants my parents purposefully planted. In their defense, this was when zucchini were still a fairly new thing to grow for the home gardener in my area.
We had zucchini steamed, filled, grilled, stewed, we gave a way zucchini, and after we could no longer get excitement out of people, we left them on their door step and tip toed away… We learned, after having 6 plants that summer… Have since never had more than 1 maybe 2 plants. I could not eat or smell zucchini for literally years. Thank goodness, I have since then recovered from my zucchini overdose and can happily eat it again. And here is one of my fun new ways of using up that bounty of summer, or since now it is early fall, maybe just conjure up that a last feeling of sun kissed earth!
image

Ingredients

  • 2 cups shredded zucchini
  • 1/2 cup Quinoa flakes
  • 2 Eggs, beaten (or for began option: flax seed ‘egg’ = 1tbsp ground flax seed, 3 tblsp water, let sit 3 minutes)
  • 2-3 tbsp chopped Onion
  • 1 tbsp chia seed (optional)
  • 1/2 tsp salt

image

Make them!

  1. Mix zucchini, onion and beaten eggs until combined.
  2. Add quinoa flakes, chia seed and salt, stir to incoropate.
  3. Drop by the heaped tablespoon into a heated skillet, flatten out each blob (yep, that’s a scientific term) to 1/4″ thickness.
  4. Cook until golden brown, flip over adding more olive or coconut oil to the pan, as needed.

They can also be baked instead.
Heat oven to 375 F and cook about 8 minutes per side.

Makes about 8. Serve them as a side or a savory breakfast.

Hmm, maybe I will try the rest with salsa…
image

They are light and I almost want to say fluffy, and the pictures DO NOT do them justice…

Copyright © 2011 Simple Healthy Homemade. All rights reserved.