Mediterranean Lentil Salad

image

As it is getting towards the warmer times of year, at least the past Sunday afternoon made us here think that, I tend to shift the focus of my eating and start to crave more fresh and quick recipes that take advantage of all the seasonal produce available. On warmer days salads are a wonderful thing to make but they don’t always have enough staying power to make a full meal, unless you do it right. In come the lentils, from green to brown to orange, they even come in black, and I am not even talking about the Indian varieties that are usually referred to as lentils, but too me, look more like little beans. But no matter what color or shape, they are versatile and easy to prepare, none require pre soaking and all cook quickly. Lentils are great! Filling, low fat, high in fiber and a whole bunch of phosphorus and other minerals pack themselves away in there too!

imageHere I also had some Arugula and Egg salad on the side

This salad is also a great way to use up the rest of a bunch of parsley you bought for a recipe that only needed 2 tablespoons! Parsley contains lots of good things like iron, calcium, potassium and vitamin C to just name a few, but has huge amounts of vitamin K! So you don’t want to waste the precious green 😉

Ingredients

  • 1 cup lentils (preferably French Green)*
  • 3/4 cups tomato sauce
  • 1/2 red bell pepper, diced
  • 1 small (pickling) cucumber (or 1/3 of a big one), any large seeds removed, diced
  • 1/4 cup tomato paste
  • 1/4 cup bulgur wheat
  • 1 1/2 cups chopped parsley

* I’ve made it both with regular brown as well as du Puy lentils (french green), either one works, the French Lentils tend to stay a little firmer, which I prefer for salads.

Directions

  1. Bring 1 1/2 cups of water and 1 tsp salt to a boil, pour over the Bulgur wheat in a bowl, cover and let sit for 10-15 minutes or until Bulgur is softened. It will remain somewhat chewy, that’s what you want. Drain using a fine mesh sieve, gently press on it to extract some more water.
  2. In the meantime, cook the lentils in 1 cup of salted water, until just cooked, (not mushy), drain if there is water left and set aside to cool.
  3. Chop all the vegetables
  4. In a large bowl combine the lentils, bulgur, parsley, cucumber, pepper and tomatoes, stir to combine and let sit for a minimum of 20 minutes for flavors to blend before serving. This also allows the parsley to get a bit softer if, like me, you used curly leaf instead of flat leaf.

image

Copyright © 2012 Simple Healthy Homemade. All rights reserved

Burgers (or what to do with all those chives)

image

The last two nights I had to cover up my garden and my two berry bushes with sheets and table cloths for lack of anything more fitting. They looked kinda like awkward ghosts in the morning sun. But they called for freezing and frost and what not, and since the warm weather made the currants burst into flower, I needed to protect them or they will be done and no berries for me this year. Red currants(and black or Cassis currants for that matter) are pretty hard to come by in these parts of the world and so I am wiling to go through all kinds of trouble to save them, including digging them up at my old house and transporting them in a pot, (poor things they lived in that pot for almost a year) or turning them into ghosts. This morning it was soooo cold inside I had to turn my fireplace on to stay warm (I did turn the heat off, it’s almost May after all, and I am keeping it that way, period.) Yes I will wear a fleece in my house, if need be. And need was definitely there this morning. Then this afternoon it heated up to the point where I removed half my clothes before my run for which I left the house seriously bundled up. AND I had dinner outside, on my deck.

imageWhat do you want? I had to make sure they were good, I watch out for you guys 😉

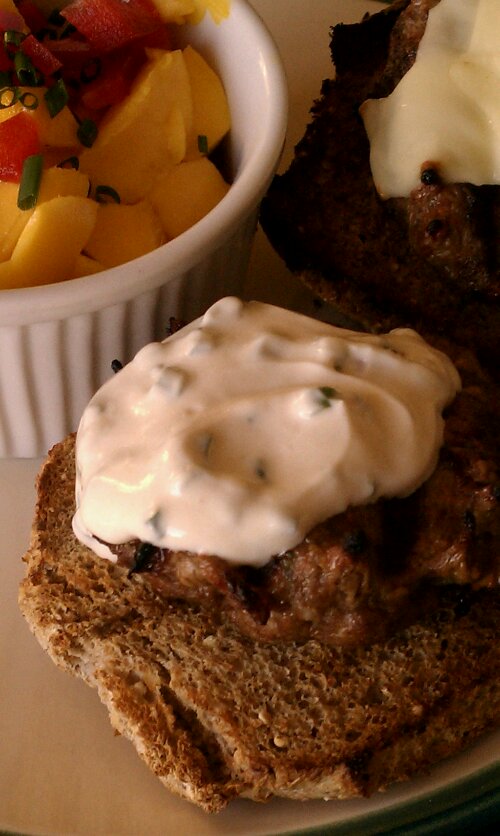
I had been looking to make use of the chives chive bush that erupted in my garden this spring. So when I just had to put something on the grill, I knew what to try. The try was successful and filled my tummy with super deliciousness!

image

I snip the chives with scissors, I find that the easiest way to go about it

Makes 6 burgers

You will need:

  • 1 1/4 lb ground meat (1 lb venison and 1/4 lb beef mixed, or all beef)
  • 1/2 cup chives, chopped
  • 2 small shallots, finely diced
  • 1 tbsp mustard
  • 2 tbsp tamari or soy sauce
  • 1 egg
  • Fresh ground pepper to taste
  • 3-6 burger buns (preferably sprouted grain such as these)

Serve with

Guilt Free Yogurt Chive Sauce and Mango Sweet Pepper Salsa

image

Directions

  1. In a bowl break up the ground meat using a fork.
  2. Add mustard, tamari, shallots, egg, ground pepper and chives and stir gently until all mixed up (I did not include any salt here, since the tamari or soy sauce is pretty salty)
  3. With your hands, form into 6 balls then flatten out to make a burger patty, set aside.image
  4. Preheat your grill
  5. Grill the burgers to desired done-ness, flipping only once.
  6. Serve on a toasted bun, or half of one, if you like

image

Copyright © 2012 Simple Healthy Homemade. All rights reserved

Zucchini Omelette with Prosciutto and Fontina

image

Quick and easy breakfast or lunch recipe you say? Coming right up!

image

As you all know I am not one to let things go to waste, if I can help it and from my Crab Asparagus Frittata the other day, I still have Fontina laying around my fridge deli drawer. Looking through the rest of said appliance, I also have eggplants, celery root, butternut squash and zucchini that I have to cook. I think sometime at the store my love for veggies gets the better of me, or my good intention to eat more produce, who knows that so exactly? Add some Prosciutto for flavor, and using zucchini seemed the easiest for a quick breakfast. Oh, a word on the zucchini. When I was little and my family first grew zucchini in our harden, it wasn’t called zucchini, no zucchetti is what they were called. And as I learned after some basic Italian, things that end with -etto/-etti should be small or little, (just like -ini as in= smaller, younger; fratello= brother, fratellino=little or younger brother) Uhhmm, so, we did not get that memo and let the darn things grow until they resembled some sort of prehistoric weapon, yep, exactly an edible club to go hunt some sabre-tooth with. Do yourself a favor, pick them small, if you grow them. They taste better and you won’t have them coming out your ears… But I digress, the 1/2 zucchini referenced to here is going to make about a cup grated.  Use a really fine mandolin slicer to julienne or shred the zucchini, otherwise you might have to turn the cooking temp down and cool a bit longer.
Ah I love my pastured hen eggs that I get every week at the farmers market 🙂 Now that the grass is getting lush with spring, you can see the color of the egg yolks intensify to almost an orange hue!

imageMakes 2 servings, unless you worked out really hard and are extra hungry 🙂

 Ingredients

  • 4 large eggs
  • 1/2 zucchini, grated finely using a mandolin sliver
  • (optional gulp of milk)
  • 1 slice Prosciutto (di Parma or San Daniele)
  • 1 0.5 oz piece Fontina, cut into small chunks (piece about 3″x 1″ x 0.5″ )

Directions

  1. Scramble the eggs in a bowl, adding a gulp of milk if you like or they are particularly thick
  2. Grate the zucchini into a separate bowl (I have done this both ways, right into the eggs=the omelette becomes a bit more fluffy and moist)
  3. Heat a little oil in a skillet, then add the scrambled egg, sprinkle/spread the grated zucchini on top, then quickly add the chopped cheese and tear the Prosciutto into pieces and drop on top
  4. Cover the skillet with a lid, and cook until the eggs are set on top and the cheese is melted.
  5. Add some freshly ground pepper, if you like. You don’t even need salt, the Prosciutto and Cheese give it enough flavor!

image

Copyright © 2012 Simple Healthy Homemade. All rights reserved
Spaghetti Squash Leftover Bake

image

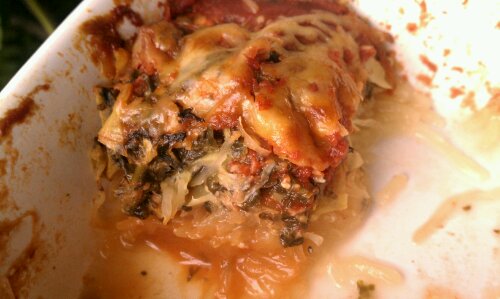
It’s a glorified leftover dish everyone will be exited about. It’s vegetarian, its cheap and it uses leftovers, option for no leftovers following as well. I mean, who has spinach artichoke dip leftovers? Pffffft!

For a long time I did not dare to eat this interesting item, it just seemed… wrong and I had no idea what to do with it once it would find its way into my kitchen. Stringy things are not usually a good thing when it comes to veggies, like stringy beans or the wire like strings in tough snowpeas that quite nearly strangle unsuspecting eaters. But finally curiosity won out and I have departed from the ‘just put spaghetti sauce over it’ approach that is generally the extend of creativity people come up with when confronted with the ‘what to do after it’s cooked’ question.

image

So while this particular squash can’t quite keep up nutrition wise with some of the other members of the winter squash family, its high water content kinda work against it there. Not to say it’s unhealthy, by no means, it’s just not as nutritionally dense as some of the other ones, but it’s a great low calorie, low carb choice!

One of the issues I have with this, like some of the other winter squashes as well, is what to do with it all? I am a one person household on most days and I really, really would like to not have to eat the same for lunch and dinner all week. Maybe I am weird that way, but hey, there’s worse 😉 Well, I have found that cooked spaghetti squash freezes quite happily for a couple of months, stored in zip top sandwich baggies. That way it’s ready to defrost in my fridge for whenever I need it.

So first, yes you do need to bake (or microwave) the thing to cook its interior.  Prick it with a fork all over so it doesn’t blow up on you, and either cut in half, scoop the seeds and discard and place cut side down on a baking sheet in the 350ºF oven until tender, or microwave without cutting in half until tender and easily cut in half (Careful, extremely freakin’ hot)

Once it’s cooled to an acceptable temperature, using a fork, scrape the stringy flesh into a bowl. Portion up as convenient and freeze until needed!

image

For two people as a side (or small meal) or 1 hungry eater

You need:

  • 1 cup cooked Spaghetti Squash (defrosted if frozen)
  • 1 cup Spinach Artichoke Dip (or 1/2 cup chopped artichoke hearts, 1 cup chopped fresh baby spinach, chopped & 1/2 cup italian cheese mix, microwave until cheese is melted and spinach wilted not quite as creamy, but works)
  • 1/2 of a 8 oz can tomato sauce
  •  1/4 cup of Italian cheese for the top (use a mix that has more than just mozzarella, so you get better flavor

Directions

  1. Preheat oven to 350ºF
  2. In an oven proof 2 cup square dish layer spaghetti squash, then top with Spinach Artichoke Dip, followed by tomato sauce by the spoonfuls. Top all of it with a handful of cheese.
  3. Bake until heated through and bubbly, cheese is melted and beginning to brown (about 15-20 minutes)

image

Copyright © 2012 Simple Healthy Homemade. All rights reserved

Fish Wellington

image

I have been eyeing these recipes for Beef Wellington for months now, but never had an occasion to try myself at it. But since this was going to be a Friday meal, fish seemed like the more appropriate (and quite honestly also quicker to prepare) route to take, and boy was it a good choice!

It looks so fancy and tastes super yummy! Shhht! don’t tell your guests just how easy it was to make! Just a heads up folks, this is not going to be an exact recipe, you might or might not use all the dough, depending on the size of the fish fillet. It took me a while to get this post done, because frankly, I don’t really know how much fish it was 🙁 I had three fillets, one long and narrow, but quite thick and the other two a bit more ‘regular restaurant piece of fish’ shaped. My best guess is that is was about two pounds? I am going backwards off of the half pound per person  It easily feeds four, if you want to make less, you only need one sheet of puff pastry. I froze the rest, since there were two people eating but there was about half leftover. Will update on whether or not baked puff pasty freezes well, once I try it out.

imageWhat it looked like coming out of the oven…
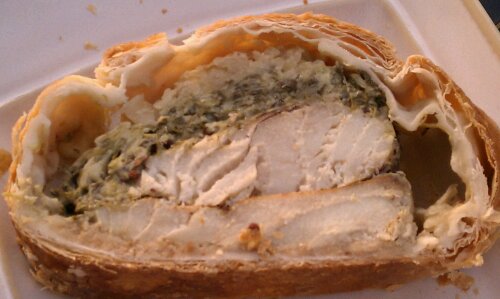
Fish Wellington, fancy was of saying: Fish in Puff Pastry, either way it is totally worth the time hunting the frozen food aisles for puff pastry. In Switzerland you can get this fresh in the dairy section, so it took me a few years of looking, hoping and experimenting with making my own until I found it, by chance sitting there in the frozen aisle. You can make your own and I do on occasion since it tastes soooo fantastic. And yes, there are versions that use the entire GDP of a small developing nation in butter, but there are also versions using various other dairy products that are not quite as ridiculously high in fat. Although I have to say to make croissants, the butter is a must. But back to our subject… Fish. For this recipe, you could most likely use salmon, (adjust cooking time according), haven’t had a chance to try that, so if you do, let me know how it works out!

image

Ingredients

  • 1 pack frozen puff pastry (you might not use all)
  • 2 lbs (about 3 pc) firm white flesh fish fillets such as pollock, cod or similar
  • 1 cup Spinach Artichoke Dip
  • 1 sweet onion
  • 3 tbsp bread crumbs
  • 1 egg, lightly beaten
  • 2-3 tbsp whole grain Dijon mustard (such as Maille à l’ancienne)

image

Directions

  1. Chop onions and cook over medium until translucent, then turn up to medium-high and cook until starting to brown. Set aside
  2. Pad fish dry with paper towel. Salt and pepper fillets all over, set aside
  3. Roll out pastry on a floured surface, sprinkle the center with bread crumbs then place the fillets on top. This depends on the shape and size of your fillets. If they have thinner and thicker ends, overlap the thin ends, and cut the third fillet in half, place on top. (What you are trying to do is make the fish layer uniformly thick, so it will all cook at the same time)
  4. Spread the mustard on top of the fish, then top with 1 cup Spinach Artichoke Dip, and layer all with the cooked onion.
  5. Brush edges of pastry with egg, the top with the second sheet of puff pastry, crimp edges using the tines of a fork to seal. (If your parcel is rather small after layering the fish, just fold up the edges of the pastry and crimp on top, or top with just part of a second sheet making sure you seal all the seams
  6. Preheat oven to 425ºF.
  7. Brush top of pastry with egg, cut several vents in the top to allow steam to escape while baking.
  8. Bake 30-40 minutes or until fish is cooked and contents are bubbly.

image

Copyright © 2012 Simple Healthy Homemade. All rights reserved
Asparagus Fontina Crab Frittata

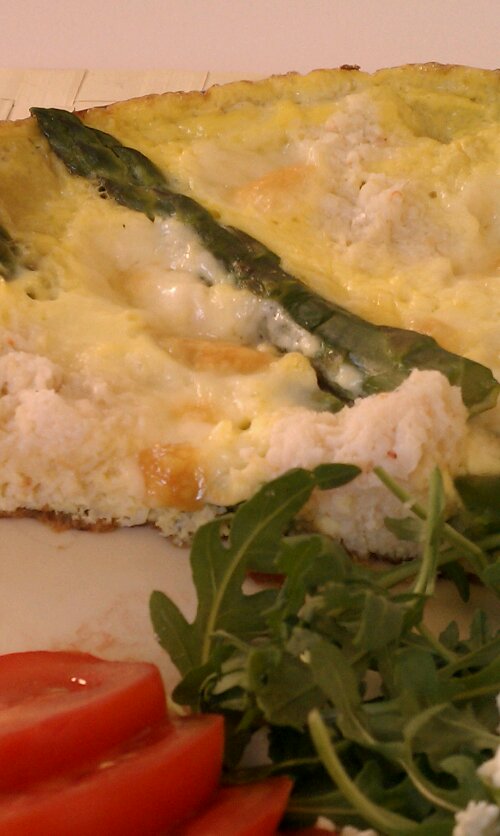
Elegant and special enough for a Sunday brunch, but easy enough for everyday. So indulge, treat yourself because you made it to Friday! With a side salad it also makes a great light lunch or dinner, in fact, why limit yourself? Have it any time you like!

image

Serves 2

Ingredients

  • 5 eggs, scrambled
  • 2 oz Fontina cheese, cubed
  • 1 can crab meat, 6oz, drained (I used a regular ‘fancy’ not jumbo lump, although that of fresh would certainly be tasty)
  • about 1/2 lb asparagus
  • freshly ground pepper

no really, that’s it 🙂

image

Directions

  1. Wash and cut the asparagus spears, then lightly steam them by adding to a saucepan, add 1 cup water, cover and heat until almost fork tender
  2. Heat a oven proof skillet with just enough oil to make it non stick, add eggs and cook for about 30 seconds before adding crab meat in heaped tablespoon portions, then spread the asparagus and the cheese over your eggs.
  3. Preheat broiler on low, when eggs are set, place skillet under broiler for 2-3 minutes, leaving door ajar, until top of Frittata is browned in spots and the eggs are cooked through.
  4. Serve with some greens on the side, or a full blown salad to make it into a bit more of a meal.

image

Yes, it’s THAT good!

imageCopyright © 2012 Simple Healthy Homemade. All rights reserved

Osso Buco ‘Slow Cooker Friday’

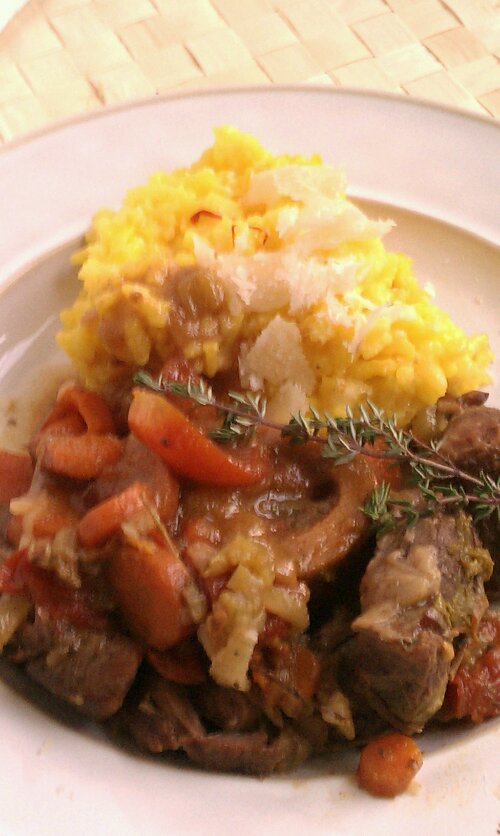
imageOsso Buco – Braised Beef Shank

This is part of the ‘Slow Cooker Friday’ Series, more recipes are Thai Red curry chicken, Turkey Provençal and Sausage and White Beans.

OMG, this is so super awesome, and easier than pie. And I swear there is no way anyone can tell that you did not labour over a hot stove for four hours or more. Go ahead, bask in the glory, no need to tell them. But it totally cooks itself while you’re at work, the only thing to do when you get home is to make the risotto (or I guess polenta or pasta in a pinch) and I have a maybe not totally authentic but very totally labor saving version for that as well 😉

The flavor factor is off the charts but for one person, well I guess it would have fed two, really, but I like leftovers and if you’re nice you’d probably want to serve one beef shank per person, so get this, the meat for one only cost me $3.55-$1 (coupon)=$2.55. And that really is for two meals. There are also a carrot, a piece of celery, onion and some tomatoes in there, but you all agree the big ticket item is generally the meat. Striving to be more frugal, like ‘K’ over at the $35 a week project. I admire how she can make a dollar last!

image

Even though the recipe tastes like a million bucks, it definitely isn’t one you have to crack the piggy bank open for, so put the hammer down… and get the crock pot out!

The trick to making this taste like the original, comes from two essential steps: browning the meat before cooking and thickening the sauce after cooking. The rest is taken care of while you are gone. Added bonus? The delicious smell all over the kitchen when you get home at night!

image

Ingredients

  • 1 beef shank (about .7lb) (Osso Buco is traditionally veal, but beef works wonderfully)
  • 1/4 cup flour for dredging
  • 2 tbsp butter or oil
  • 1 carrot, cut into 1/4″ rounds
  • 1 small celery stalk
  • 1/2 onion, diced
  • 1 pint of cherry tomatoes, halved, or 1 can (14oz plum tomatoes)
  • 2 sprigs thyme
  • 1 small sprig rosemary
  • 1 cup dry white wine
  • about 1  1/2 to  2 cups beef broth (depending on the size of your beef shank)
  • salt& pepper to tast
  • 1 tbsp lemon peel, finely diced
  • 1 tbsp fresh parsley, finely diced
  • 1 tsp minced garlic (from on small clove)

image

Directions

  1. Season beef shank all over with salt and pepper. Put flour in a wide, shallow dish, dregdge the beef shank in the flour, then shake off excess flour.
  2. Heat 2 tbsp butter (or oil) in a skillet, when hot, add the beef shank. Cook until golden brown, turning once (It is important you don’t go and turn it over multiple times, or it will not brown properly) about 8 minutes. Beef will cook more later, this is just to give it more flavor. Transfer beef to slow cooker.
  3. Add white wine and the broth to same skillet, scrape up any browned bits, then add the onion, carrot, tomato and celery. Bring to a boil, then transfer all to slow cooker insert.
  4. Cook for 6-8 hours
  5. To thicken the sauce, pour it out of the slow cooker (careful, insert is HOT, use gloves) into a sauce pan and boil on the stove top for 15 minutes or until thickened. No need to make sure it’s just the liquid, if the vegetables come along, that’s fine. (If you used too much broth,  and it is still very liquid after 15 minutes, you could always thicken it with some flour or corn meal)
  6. To make Gremolata: Finely chop the lemon zest, garlic and parsley, serve the Osso Buco topped with Gremolata and a side of Risotto Milanese

imageThis is when I remembered the sauce and the gremolata to put on top, with extra lemon peel, because it’s so good 😉

imageAnd yes, I did lick the plate… Shhht!, no one saw me…

Copyright © 2012 Simple Healthy Homemade. All rights reserved

Creamy Fennel Parsnip Soup

imageSuper easy and velvety smooth, even though there is absolutely no cream in it!
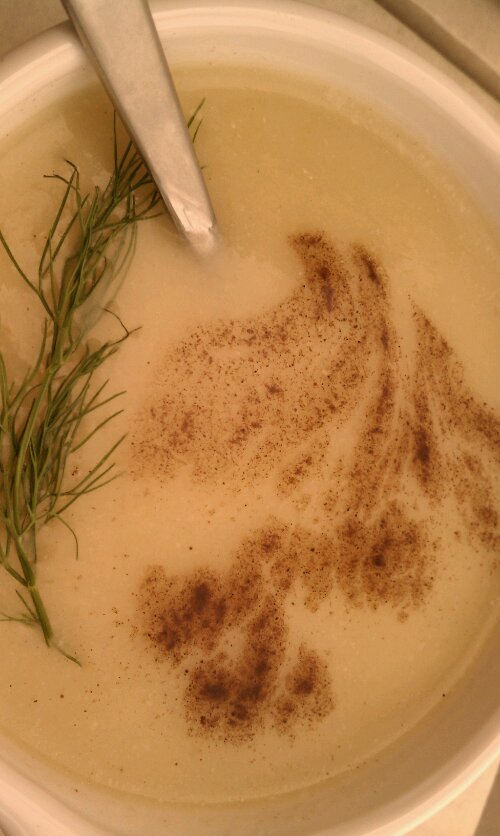
This is made after a recipe I found on a fellow blogger’s site ‘La Mia Cucina‘ from Basel, my hometown. Since I discovered the recipe, I have made it three times, in slightly different variations. I have never tried it with the liquors the original recipe calls for, mainly because I did not have them on hand, Noilly Prat and Pernot are not part of my regular arsenal of beverages and to hunt them down just for a soup seemed a bit outrageous to me. I was just gonna take my chances, and happily have since found, that it seems perfect even without. If this soup was any better with, that would almost be alarming. It’s oh so smooth and creamy, and that without any cream or potatoes. Depending on who you ask (as per the original blogger) thanks to the parsnip or thanks to the fennel. But I think the pureeing and passing it through a fine meshed sieve might have something to do with that as well. I mean, just maybe? 😉 Surprisingly to me, there wasn’t much fiber leftover in the sieve, even though the soup contains fennel.

image

Ingredients

  • 1 medium fennel bulb, trimmed and sliced
  • 1-2 medium parsnips, peeled or scrubbed well and diced
  • 1 shallot, diced
  • 1 1/2 quart vegetable or chicken broth (or water and salt)
  • water
  • allspice

image


Directions

  1. Heat a little oil or butter in a heavy soup pan. Add the shallot and cook until softened and glassy looking, but not brown.
  2. Add the chopped fennel and the parsnip, stir to get the shallot off the bottom of the pot so as not to burn itimage
  3. Add the broth, bring to a boil, reduce the heat and simmer until fennel is tender.
  4. Let cool slightly then tip soup into a blender, and puree until smooth. Rinse the soup pot, place a fine meshes sieve on top and strain the blended soup back into your soup pot. You can stir with a spatula to help get the soup through. Discard whatever is leftover in the sieve.
  5. Reheat the soup, thin with additional water as needed and serve garnished with liberal sprinkles of allspice (if you like), some leftover fennel fronds and a hearty slice of bread.

imageCopyright © 2012 Simple Healthy Homemade. All rights reserved
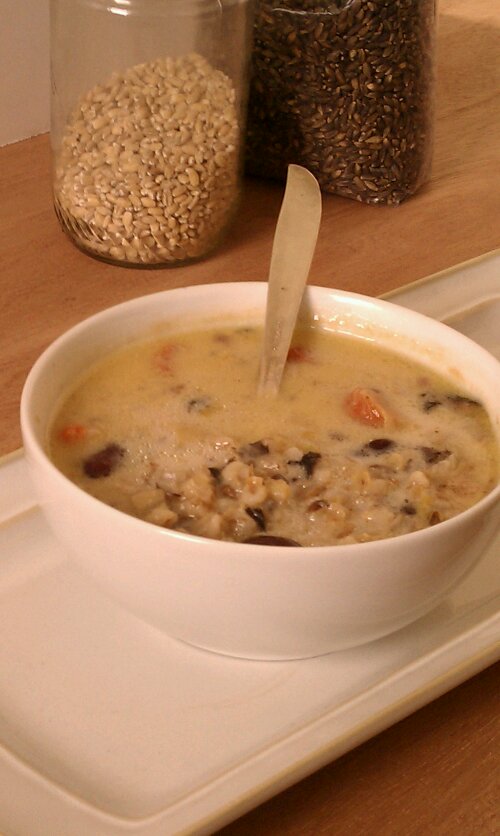
Swiss Barley Soup (Bündner Gersten Suppe)

image

Before winter is totally gone I wanted to make one of my favorite Swiss soups just oooone more time. This recipe is a traditional from the Kanton Graubünden, or Grison, the home of famous ski resorts such as Arosa, Davos and St.Moritz, a region that also hosts Switzerland’s fourth official language: Romansch (speak ‘romansh’ in english)

A very mountainous region in the eastern part of Switzerland (this is where Heidi in the original story is from, and no, she did not have blond tresses but black curly hair in the written story. Seriously, I’ve read it 😉

This region is also home to other yummy specialties, like ‘Tuorta da Nusch’ (Nut CAke or Tart) Bündner Fleisch (Air dried Beef that get’s sliced transparent thin), Pizokel and more… Now I am starting to get home sick 🙁

But back to today’s favorite: Soups. This one is a staple at most ski resort restaurants, and I would often have it for lunch, with a good slice of bread, what more do you need?  It’s hearty and filling and makes me think of home 🙂

I had to make mine a bit thicker so the picture would show something. But be careful it’s very easy to make this into a stew or even a solid-something. It doesn’t look like there is that much barley when you starts out, but it swells almost exponentially once cooked. The soup should end up being creamy-thick, if that’s a technical term. But not to the point where there is just barley, it’s  a soup after all.

image

It can be made totally vegan, but I usually prefer to have a sausage of sorts with it. In ski resort mountaintop restaurants, this is usually one of the cheaper lunch choices and comes with one, sometimes two franks.

image

Ingredients

  • 1 small red onion, diced
  • 1/2 cup barley
  • 1-2 Leeks, depending on size, white and light green parts only, cleaned and cut
  • 2 medium carrots, cut into rounds
  • (optional: 3 medium potatoes, diced)
  • 3 oz Speck (or pork belly, or salt pork, or thick cubed bacon), diced
  • 1 1/2 cups (or 1 can rinsed) dark red kidney beans
  • 4 cups Beef or vegetable broth
  • water
  • 1 cup milk or some cream to finish the soup
  • salt and pepper to taste
  • Optional: 2 Franks per person and some hearty crusty bread

image

Directions

  1. Heat a little olive oil in a large stock pot, add the onions and cook over medium until translucent, add the cubed speck or bacon, and cook until the onions are slightly browned
  2. Add barley and diced vegetables, stir to coat, then add the broth and about 2 cups of water
  3. Bring to a boil, reduce the heat and simmer, partially covered until barley is almost tender, adding additional water as needed.
  4. Add the beans and keep cooking until barley is tender but not falling apart.
  5. If you are going to have the Franks, add them to the soup at this time until they are heated through, or cook any other way you prefer.
  6. Season the soup with salt and pepper and stir in the milk or cream just before serving.
  7. (This soup can be frozen, in portions, before adding the milk or cream. To reheat, let it defrost in the fridge then heat stirring frequently, add the cream or milk just before serving.)

image

Copyright © 2012 Simple Healthy Homemade. All rights reserved

3 Pepper Bean Soup

image

Some days it just has to be a quick and easy soup. I literally made this one in between answering emails and studying. Like many soups the active time is minimal and the result is totally worth it.

For me soups can be eaten any time of year and day, for that matter (I had this one for breakfast the other day and it was delicious, and yes, I know I am wierd). And usually the ingredient list goes by the content of my refrigerator and freezer in the colder months, my garden or the farmers market the rest of the year.

This particular recipe ends with kind of a ‘build your own’ option, a more brothy one with hearty chunks or a little thicker and more creamy option. Depending on the mood and/or the outside temperature you can vary it accordingly. Okay, you can’t go back from creamy to chunky, but it works the other way round. Either way, you can’t go wrong.

If you feel like it, you can add some cooked, shredded or diced chicken or beef.

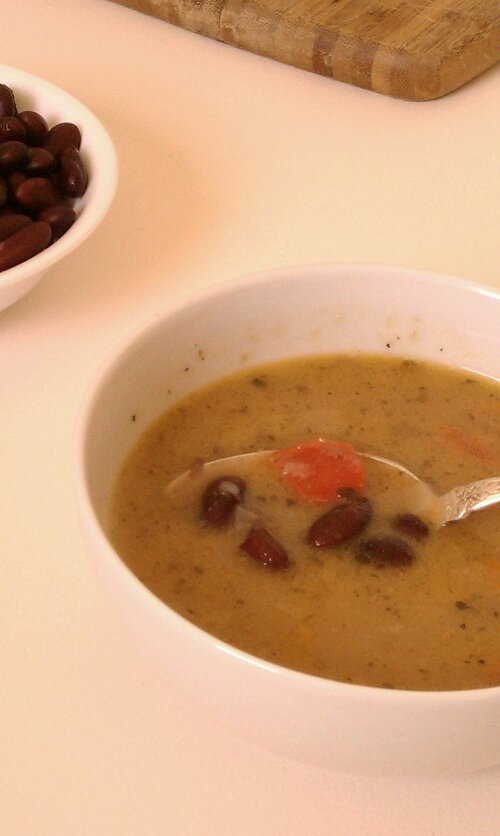
imageIt’s very hard to take pretty soup pictures 🙁 the taste will have to make up for it

Ingredients

  • 1 medium red onion, diced
  • 1 large garlic clove, thinly sliced
  • 1/2 red bell pepper
  • 1/2 yellow bell pepper
  • 1-2 small Thai chili peppers (or other hot pepper), sliced thinly
  • 4 cups beef broth (or vegetable broth for vegetarian option)
  • 2 1/2 cups red beans, cooked, such as dark red kidney beans, or small red beans (if you don’t cook them and freeze them, from 2 cans)
  • 1/2 tsp dried oregano
  • salt & freshly ground pepper to taste (I used 1 tsp, but the broth I used, has no salt in it)
  • 1 tbsp apple cider vinegar
  • water, to thin the soup if it get’s too thick

image

Directions

  1. In a large stock pot, heat up some oil over medium heat. Add onions and cook until translucent. Add garlic and cook juts until it changes color to light golden
  2. Add bell pepper and hot pepper, cook 8 minutes or until onions are tender.
  3. Add broth and beans. (If using canned beans, rinse them before adding)
  4. Cook about 10 minutes or until slightly thickened, then remove about 1 cups of the soup including beans, and puree, or mash the beans with a fork for a very chunky soup. If you want a thick and creamy soup, puree 2 cups.
  5. Add the cider vinegar and cook for another 2 minutes. (trust me on that one, it is essential)

image

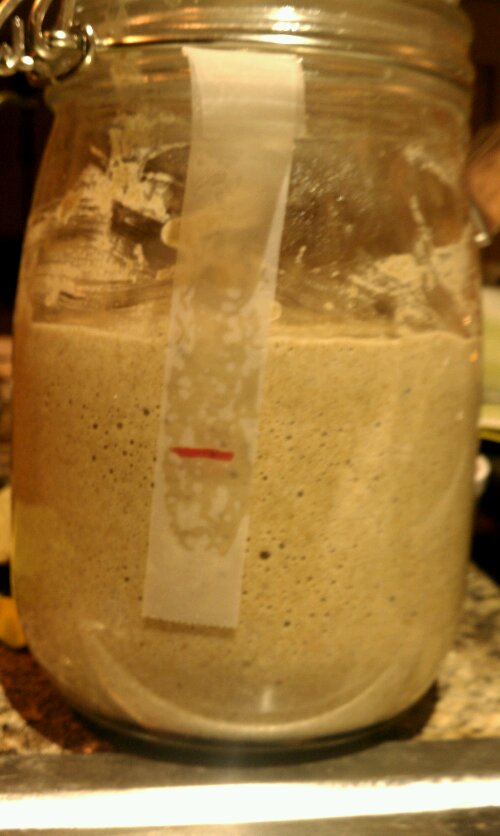
Happy to say that my Rye Sourdough seems to finally take off 🙂 More on that later though

imageCopyright © 2012 Simple Healthy Homemade. All rights reserved