Four Greens Vegetable Soup

image

Today I got myself a Crinkle Cutter! I know, I know that might not sound very exiting for you, but I am a sucker for kitchen gadgets, especially when they are on sale. And it just so happened that my local grocery store had them on closeout sale… what can I say

image

So now being the proud owner of a brand new crinkle cutter, I realize there are many, many things that could be ‘crinkled’ with this, but to start I decided to try it on something relatively soft, hoping to get an easy start, and picked zucchini. And since tonight they are calling for the first frost of the season a yummy vegetable soup seemed like the perfect fit.

As we are heading into the colder months with people worried about getting sick, many stay cooped up inside more than is good for them and a good many eat less vegetables than in the summer exposing them to higher risk of in fact getting sick, while also being exposed to more recycled air in a heated environment. Soooooo, I wanted to make something to give your system an antioxidant boost and what tastier and better way than greens could there be?

So for this mean-lean-green bad boy we are going to use kale, spinach, celery and zucchini (ok, ok, I know, not a ‘green’ but c’mon, you can see the color, right? 😉 )

image

Ingredients:

  • 1 tbsp oil
  • 1/2 red onion, finely diced
  • 4 stalks celery, chopped
  • 1 small zucchini (crinkle cut, or sliced into 1/4″ rounds)
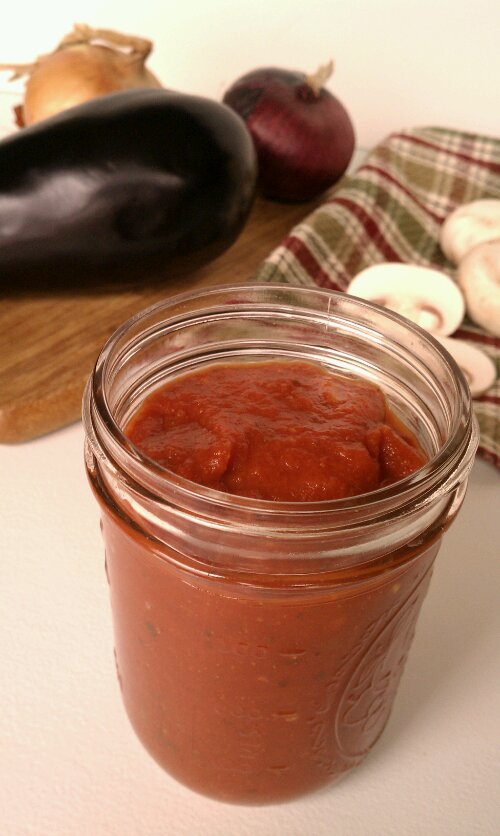
  • 1 can or 1 qt size bag frozen tomatoes *(if using canned, pick one that is either no salt added or a low sodium version)
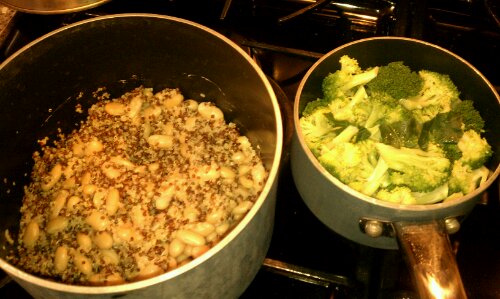
  • 1 can canellini beans, drained and rinsed or 1 portion frozen **(snack bag size)
  • 1 good quality vegetable buillon cube, for making 2 cups(I use Rapunzel no salt added)
  • 1/2 to 1 tsp salt
  • 2 good hand fulls lacinato kale, center stalk removed, washed and trimmed
  • 3 to 4 oz baby spinach
  • small amount of whatever other veggie you have on hand that could stand to get used up (I had a little broccoli left)
  • Parmesan for grating on top (optional, note that using Parmesan would make the recipe no longer vegan or dairy free)
* Note: I have had great success dicing and freezing a bumper crop of tomatoes in zip top bags and using it instead of canned for soups and stews in the winter. Leave cherry tomatoes whole.
**Note: To save time, money and cut salt from your diet, buy dried beans, soak and cook them, (I use my pressure cooker) and freeze in snack size baggies to be used like you would canned.

Directions

  1. Heat oil in a soup pan, add the onion and cook over low until glazed and starting to turn soft
  2. Add celery, stir and cook until you can smell the celery, then add the tomatoes
  3. Fill the pot with water until the vegetables are covered by about 2″ of water, add salt and bouillon cube and if using tomato paste and parmesan chunk.
  4. Bring to a boil
  5. Add kale, zucchini and beans, cook until kale is soft.
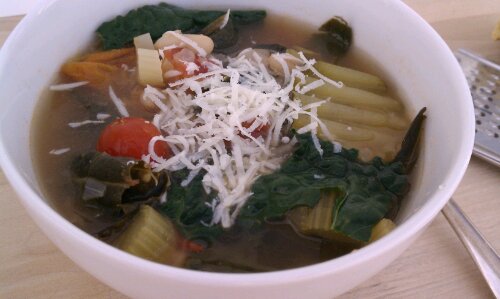
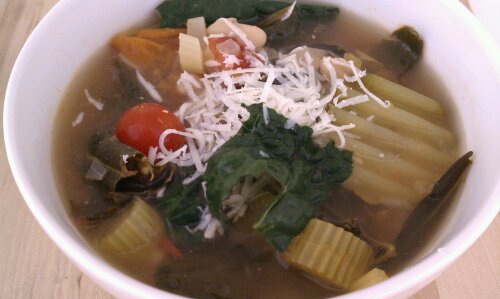
  6. Divide spinach into serving bowls, using about 1 cup per dish, ladle the hot soup over and serve, if desired, with fresh grated Parmesan.

Makes about 6 bowls ( Serves six as a first course)

image
Copyright © 2011 Simple Healthy Homemade. All rights reserved.

Pumpkin Goat Cheese Ravioli

image

As always, I am looking for creative ways to use seasonal produce and after getting some real life pumpkin (the convenience of canned could not keep me from trying this in the end) I had to use the resulting puree up, and trust me, it makes quite a bit. I had extra to put in the freezer! And it’s really easy to do (Tasty Yummies has a more detailed set of instructions, if you like), cut the pumpkin in half, scoop the seeds and stringy ‘innards’ out (keep the seeds, clean them and keep for roasting later) place halves cut side down in a baking dish, adding 1/2″ water, and bake in a preheated oven at 350F for 40-50 minutes, (depending on the size of your pumpkin), or until the flesh is soft when pierced with a fork. Scoop the flesh out, purée and voila!
Alternately, if you got a smaller pumpkin, you can also cut, scoop the seeds and cook it in the microwave until the skin is soft when pierced and peel the skin off the slightly cooled halves using a vegetable peeler!

Keep any seeds to make roasted pumpkin seeds later!

image
You can use the ravioli right away or freeze them for later use

imageServe with Roasted Red Pepper ‘Cream’ Sauce

Ingredients

  • 1/2 cup fresh pumpkin puree (you can use canned)
  • 2 1/2 to 3 oz fresh goat cheese
  • 1/2 tsp salt
  • 1/4 tsp white pepper
  • 1 pack Pot sticker wrappers or Wonton wrappers

Directions

  1. Mix the first four ingredients in a bowl
  2. Using 4 wrappers at a time, place them on work surface, place one teaspoon of filling in the center, brush edges with water and fold over and seal, crimping edges using the tines of a fork
  3. place all the ravioli on a wax paper lined baking sheet and cover with plastic wrap to prevent drying while you complete step 2 with the rest of the wrappers
  4. Either cook right away: Bring a pot of water to a boil and drop ravioli in, cooking until they float to the surface, about 3 minutes.
    You can also freeze them for later use: Freeze on the sheet and once frozen store in zip top bags until ready to use. Do not defrost, but cook from frozen
  5. Serve with Roasted Red Pepper & Pumpkin Cream Sauce.

image

or try a Tarragon Cream Sauce…

image

Copyright © 2011 Simple Healthy Homemade. All rights reserved.

Roasted Red Pepper and Pumpkin ‘Cream’ Sauce

image

Glorious colors of fall! Here the leaves have finally turned color and as I am typing this I can see the red and yellow leaves glow in the sunlight, and the bronze and ‘still green’ leaves add depth to the shadows. The birds have returned to the bird feeder in droves, the nights finally have that crisp quality you only experience on an early morning in fall and I am enjoying the view to say the least.

image
To celebrate fall, with its vibrant orange of pumpkins, golden corn field and that last rest of summer’s warmth int he afternoon, I roasted up a brightly colored, mighty tasty and versatile sauce/dip/spread. Enjoy!

Ingredients

  • 1 red bell pepper
  • 1 cup chopped cooked pumpkin (or canned)
  • 1 tbsp olive oil
  • 1 pinch salt

Directions

  1. Roast whole red pepper until blackened in spots all over by holding it over a gas flame or placing under the broiler, then place in paper bag to cool a bit (the steam will loosen the skin making it easier to peel, added bonus, you won’t burn your fingers as much).
  2. Peel red pepper (don’t have a guy do this, for some reason their hands are not made the same as ours and they cannot handle heat, as per my experience 😉 ) , this works best using a paper towel and literally rubbing the skin off. Cut in half and discard the seeds, then chop flesh.
  3. Place pepper in your food processor or blender. I use a really cute mini processor for sauces and dips. And blend until you have a chunky mess, add the olive oil, blend until fairly smooth.
  4. Add the pumpkin and salt and process some more. The result should not have any chunks left in it but be smooooooth.
  5. Gently reheat to use over pasta, like the Pumpkin Goat Cheese Ravioli for example or chill and use as a spread for sandwiches or serve cold as a dip for veggies.                              Yields about 1 1/2 cups.

image

Copyright © 2011 Simple Healthy Homemade. All rights reserved.

Grain Free Lasagna

image

Ahhh Lasagna! The whole house smells good after you make one of those…

image
Earlier this year, when I was plagued by seasonal allergies, I had been experimenting with a gluten free diet, at the time, I made some Lasagna using rice pasta, you could not even tell the difference!But I was ready for something new, so when I picked up some fantastic looking eggplant, zucchini and mushrooms, at the farmers market and walked past various types of squash, including spaghetti squash, (not ready for that one yet), inspiration hit me, a light came on and I heard a voice. Nonono no, not quite, but I said to myself, “what happens, if I just plain and simply leave out the pasta completely, replace it with thin slivers of veggie instead?” The result is not only gluten free, it is also almost Paleo 😉 (There is cheese, milk and potato starch in it, sorry folks) BUT it’s 100% grain free.

For a vegetarian version, replace the meat with diced zucchini, eggplant and shredded carrot. Adjusting the skillet time accordingly.

image

First I made a meat sauce, using homemade tomato sauce, ground bison and mushrooms…
image

Ingredients

  • 1 medium eggplant
  • 2 small zucchini
  • olive oil
  • 2 to 2 1/2 cups homemade tomato sauce (or good quality store bought)
  • 8 oz button mushrooms, cleaned and sliced
  • 1 lb ground meat (I used bison, but beef or turkey would work as well)
  • 1 med onion, diced finely
  • oregano  and basil(dry or fresh)
  • 2 tbsp butter
  • 2 tbsp potato starch/flour
  • 2 1/2 c milk
  • 1/2 tsp salt
  • 2 cups shredded mozzarella cheese

image

Directions

  1. Using a mandolin slicer, slice eggplant and zucchini into lengthwise thin ribbons (this is what you will be using instead of the pasta sheets). Set aside
  2. In a large skillet, heat a tbsp olive oil, add onion and cook over medium until softened, not browned, about 5 minutes.
  3. Add the sliced mushrooms, cover and cook on medium low until the mushrooms are starting to soften.
  4. Then add meat to skillet and cook, breaking up pieces with a fork until not pink anymore.
  5. Add tomato sauce and oregano and basil (depending on the sauce you choose, you might need less or more, suggestion for dried spices is 1 tsp oregano and about a tbsp basil), stir until mixed well and heated through. Set aside
  6. To make the Béchamel Sauce:  Heat 2 tbsp butter in a medium sauce pan over medium low until melted, add in 2 tbsp potato starch, stir until incorporated
  7. Whisk in milk and salt, and stirring continuously, bring sauce to a simmer (don’t turn up the heat, this should be done slowly), and simmer for 3-5 minutes until thickened. (Use when still warm/hot)
  8. Assembling the Lasagna: Using either one 9×13″ glass dish or several smaller ones ( I like to use dishes that are 2-4 servings and freeze several, for a quick week night dinner or lunch) start by spreading some meat sauce over the bottom of the dish, then a layer of eggplant or zucchini, followed by 3/4 cup of Béchamel sauce, a handful of mozzarella, another layer of vegetables (either zucchini or eggplant, I kept doing one layer zucchini, one layer eggplant, but you could mix and match), repeating the meat sauce and Béchamel/cheese layers, finishing with a layer of Béchamel and the rest of the mozzarella.
  9. Store in the fridge until ready to bake for dinner or bake right away: Preheat oven to 350F, bake in the middle of the oven for 30-40 minutes or until bubbly and the eggplant and zucchini are soft, when pierced with a knife. (Adjust baking time, if not storing in the fridge first)

image

image

Copyright © 2011 Simple Healthy Homemade. All rights reserved.

Roasted Salmon with Coriander-Paprika Glaze

Our Sunday night ‘still hanging on to summer’ dinner 😉


Salmon is one of those cold water fish, high in Omega-3’s, we all know by now we’re supposed to have more of ‘those ones’ in our diet, but how to go about it?

Last Weekend I created this quick and easy recipe that can be whipped up in a minute with minimal effort. And let’s face it, I haven’t met anyone that could not use another 10 minutes recipe! That’s how simple this roasted salmon is to make, although it tastes and looks like you labored in the kitchen for a lot longer 😉 And who doesn’t like to get some easy earned praise?

Ingredients

  • 2 pieces of salmon, about 3-4 oz each
  • 1 tbsp lemon juice
  • 1 tbsp olive oil
  • 1 tbsp whole coriander seeds, crushed in a mortar
  • 1 tsp honey
  • 1 tsp paprika (sweet)
  • 1/8 tsp salt

Directions

  1.  Crush the coriander seeds in a mortar or use a spice mill
  2. Combine lemon juice, olive oil and honey in a small bowl
  3. Add coriander, paprika, and salt, and stir well until incorporated
  4. brush the salmon fillets all over with the glaze and bake in the middle of the preheated oven at 400F for 10 minutes, or until opaque through, brushing tops one time at 7 minutes (10 minutes should be all it takes, unless you have an exceptionally fat pieces of fish)

You could use any extra glaze as seasoning for roasting red bell pepper slices alongside the salmon like we did here…

image

or just have the salmon with some grilled eggplant and hummus spread!

either way: make it.  It’s super yummy!

Zucchini Griddle Cakes or Latkes

image

We all know someone who’s over productive zucchini plant fed the whole neighborhood.
One year, the seed company had messed up, and the Charantais Melon seeds turned into zucchini plants… And unfortunately for us ( and our relatives and neighbors) that was in addition to the 3 zucchini plants my parents purposefully planted. In their defense, this was when zucchini were still a fairly new thing to grow for the home gardener in my area.
We had zucchini steamed, filled, grilled, stewed, we gave a way zucchini, and after we could no longer get excitement out of people, we left them on their door step and tip toed away… We learned, after having 6 plants that summer… Have since never had more than 1 maybe 2 plants. I could not eat or smell zucchini for literally years. Thank goodness, I have since then recovered from my zucchini overdose and can happily eat it again. And here is one of my fun new ways of using up that bounty of summer, or since now it is early fall, maybe just conjure up that a last feeling of sun kissed earth!
image

Ingredients

  • 2 cups shredded zucchini
  • 1/2 cup Quinoa flakes
  • 2 Eggs, beaten (or for began option: flax seed ‘egg’ = 1tbsp ground flax seed, 3 tblsp water, let sit 3 minutes)
  • 2-3 tbsp chopped Onion
  • 1 tbsp chia seed (optional)
  • 1/2 tsp salt

image

Make them!

  1. Mix zucchini, onion and beaten eggs until combined.
  2. Add quinoa flakes, chia seed and salt, stir to incoropate.
  3. Drop by the heaped tablespoon into a heated skillet, flatten out each blob (yep, that’s a scientific term) to 1/4″ thickness.
  4. Cook until golden brown, flip over adding more olive or coconut oil to the pan, as needed.

They can also be baked instead.
Heat oven to 375 F and cook about 8 minutes per side.

Makes about 8. Serve them as a side or a savory breakfast.

Hmm, maybe I will try the rest with salsa…
image

They are light and I almost want to say fluffy, and the pictures DO NOT do them justice…

Copyright © 2011 Simple Healthy Homemade. All rights reserved.

Sprouted Quinoa Broccoli and White Bean Salad with Pesto Dressing

In the colder months I do rarely eat salad. It just seems to go against my nature. And since the temperatures suddenly dropped below 50, (last week it was 80-some in the afternoon) I prefer something warm right now. You can enjoy this both warm or cold, we had it warm as a main dish first, and then as a side cold from the fridge the next day. Taking advantage of late summer’s bounty of fresh broccoli and if you’re lucky enough to get some fresh shelling beans, that would probably be double awesome! I didn’t and it is fantastic no matter what. I do generally like to cook my own beans, instead of using canned. For a lot of the varieties, the flavor is incomparable, so be warned, once you start there is no going back… If you use canned beans, be sure to rinse them real good to get some of that excess salt off of them before using.

Ingredients

  • 1/4 cup red quinoa
  • 1/4 cup white quinoa
  • 2 cups chopped broccoli ( stems and florets)
  • 1 cup white kidney beans (cannellini)
  • 3 heaped tblsp homemade pesto (or a good store bought variety)
  • 5 tblsp Greek Feta dressing with Buttermilk

image
…soaking the quinoa until it sprouts…

image

Directions

  1. Rinse and then soak Quinoa in enough water to cover by 1/4″, cover, let stand overnight or up to 20 h(You could skip this step and just use the Quinoa plain out of the box)
  2. Pour Quinoa and water into a sauce pan and add water to just cover the sprouted grains ( If you skipped the sprouting, you most likely need a bit more water), bring to a boil and cook until tender and all water is absorbed, about 10 minutes.
  3. In the meantime, steam the broccoli pieces in a seperate sauce pan until crisp-tender and bright green, drain and set aside
  4. When the Quinoa is just done (the white grains will look translucent) add the beans to heat them up.
  5. Mix the pesto and the greek feta dressing in a large bowl, add the quinoa and beans, and the broccoli, gently mix until the dressing is mixed in

image
Enjoy hot or cold!

Serves 2 as a main, 4 if used as a side dish/salad

Yum!

Copyright © 2011 Simple Healthy Homemade. All rights reserved.