Kale #1 with Golden Raisins

image

Kale is one of my favorite no-brain vegetables. Not because it isn’t good for your brain or you, no, but because I find it’s so easy to make it yummy that there isn’t a whole lot of thinking involved in figuring out how to prepare it.

In case you’re doubting me on the healthiness of kale, here are some facts:

  • One cup of kale contains 36 calories, 5 grams of fiber, and 15% of the daily requirement of calcium and vitamin B6 (pyridoxine), 40% of magnesium, 180% of vitamin A, 200% of vitamin C, and 1,020% of vitamin K. It is also a good source of minerals copper, potassium, iron, manganese, and phosphorus.
  • Kale’s health benefits are primarily linked to the high concentration and excellent source of antioxidant vitamins A, C, and K — and sulphur-containing phytonutrients.
  • Carotenoids and flavonoids are the specific types of antioxidants associated with many of the anti-cancer health benefits. Kale is also rich in the eye-health promoting lutein and zeaxanthin compounds.
  • In fact, researchers can now identify over 45 different flavonoids in kale. With kaempferol and quercetin heading the list, kale’s flavonoids combine both antioxidant and anti-inflammatory benefits in way that gives kale a leading dietary role with respect to avoidance of chronic inflammation and oxidative stress.
  • Beyond antioxidants, the fiber content of cruciferous kale binds bile acids and helps lower blood cholesterol levels and reduce the risk of heart disease, especially when kale is cooked instead of raw.

Now that’s quite a track record, don’t you think?

This time, I sweetened the deal with some golden raisins that I found hiding in my cupboard, it was just a little handful, had to be used up, as space can be at a premium around here, with all the different food things I want to try. And have you ever noticed how you can almost never find just enough for one meal, as in ‘just to try it’? Yep, so I end up with a whole box of this and a bag of that, barley couscous and mochiko (sweet rice flour) are prime examples of that. So using up and finishing up things always makes me feel good since I might get to try something else!

So simple, healthy and quick, here we go!

image

Feeds 2 as a side (around here though, I have been known to polish off a bunch of kale by myself, so use your judgement)

Ingredients

  • 1tbs oil
  • 1 bunch kale, washed and de-stemmed
  • 1-2 tbsp golden raisins
  • 1/2 cup water
  • salt to taste
  • 1 tbsp cider vinegar

Directions:

  1. Strip the leaves off of the stem (discard hard stems) and tear into smaller pieces if necessary. Wash and spin dry using a salad spinner
  2. Heat the oil in a large skillet, then add the washed and torn kale leaves. Sprinkle some salt over top.
  3. Add water and raisins and cover with a lid (even if the lid does not fit down onto the pan, juts balance it atop the kale)
  4. Cook until the kale is soft and reduced in volume. 5-10 minutes. (This depends on the age of the kale plant: If you have fresh kale from your garden in the early spring, it will take a lot less than mid winter, kinda tough plants that overwintered in your garden)
  5. Add cider vinegar, cover and cook another minute or two, then uncover and finish cooking until most of the liquid has evaporated.

image
Copyright © 2012 Simple Healthy Homemade. All rights reserved

Cumin Roasted Carrots

image

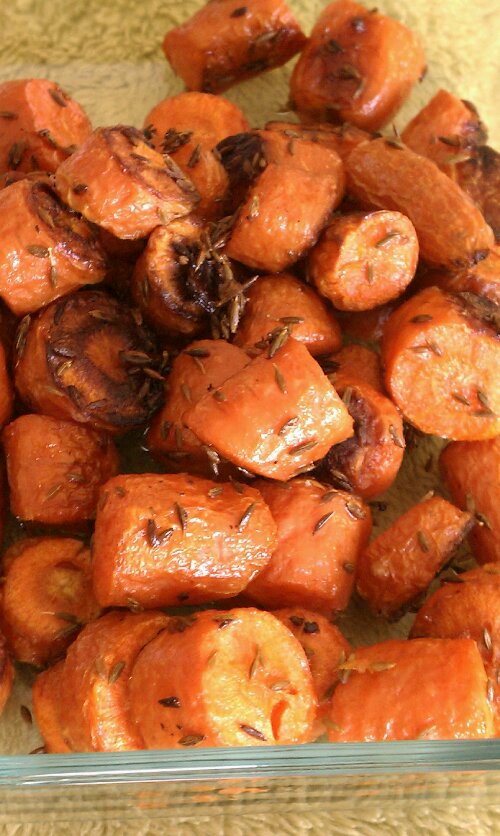
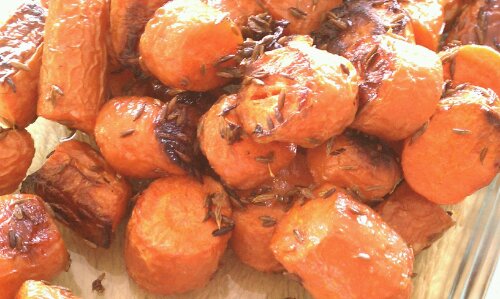
I have to admit I was addicted to this recipe for a while last year. Yep, ‘Addictive veggies’, who would have thought? Somehow the way the coarse salt flakes make the cumin taste on those carrots is just beyond description. You have to try it to believe it, but around here, I always make extra so I have leftovers.

And it’s so easy, in fact it only takes 4 ingredients, including the carrots!

I love to bake and roasting is, uhm, almost like baking. Riiight, you’re saying. Well maybe it’s a bit wishful thinking. I have been going sugar and grain free for a while, that sorta limits the baking. One thing you start noticing is your taste buds rejuvenate and become more sensitive. You will be able to taste the natural sweetness in carrots or beets for example, or even milk. It’s quite astonishing how dulled our senses have become to sugar, (read a 1996 study on sugar preference and consumption  between rural and urban population groups in Iraq) apparently the more sugar you eat, the duller your senses become to it and the more you need over time. Works kinda like drugs that way, a  bit scary, ain’t it? But I digress. The roasted carrots are a must try, even if you’re not a big carrot fan, roasting them caramelizes the sugars and renders them sweeter. Part of why roasted carrots have a higher glycemic index than raw or even steamed carrots.

image

Ingredients

  • 1 lb Carrots (about), cut into pieces
  • 2 tbsp olive oil
  • 1 1/2 tsp coarse flake salt (such as french grey sea salt, or fleur du sel)
  • 2 tsp cumin seeds

Directions

  1. Preheat oven to 380°F
  2. In a bowl, drizzle the carrot pieces with the 2 tbsp olive oil, and toss to coat. (Trust me, you don’t want to skip this step and just drizzle them on the baking sheet, won’t work, I tried, take it from a cumin roasted carrot addict), then add the cumin seeds.
  3. Line a baking sheet with aluminum foil (easy clean up makes me happy)
  4. Transfer the carrots to the baking sheet, making sure you scrape out all the cumin seeds. Sprinkle with the salt and place in the preheated oven
  5. Bake for 35-45 minutes, depending on the size of your carrots and the desired softness. (Mine usually are perfect after 40)
What’s your favorite vegetable to roast?

Copyright © 2012 Simple Healthy Homemade. All rights reserved

Roasted Brussels Sprouts

image

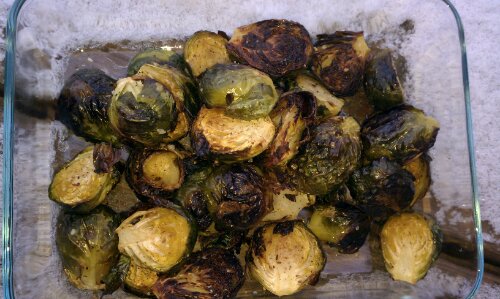
It snowed yesterday. Not much really, but steady from about 1 o’clock until 11pm. And what does one want to do when snow is falling? Eat stuff that makes us feel warm. Like yummy roasted vegetables. Granted it wasn’t all that cold, but roasting vegetables never needs much convincing in the form of good reasons, sooo…

image

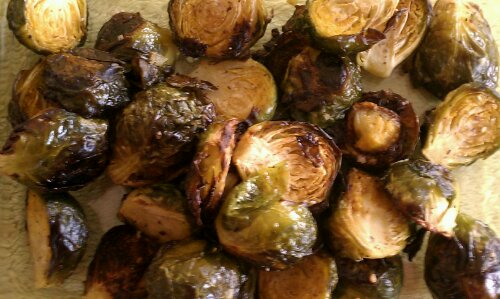
Roasted vegetables it was, and soup, and more roasted vegetables 🙂 Ahhh, the way the heat of an oven transforms simple, lowly vegetables into something so utterly delicious, it almost melts in your mouth!

imageSee the snow?

Ingredients

  •  1 lb Brussels Sprouts, cleaned and cut in half
  • 1-2 tbsp olive oil
  • 1 1/2 tsp flake salt (fleur de sel, french grey sea salt or kosher)
  • 2 tsp zahtar seasoning (Middle Eastern spice blend, or you could add a sprinkle of lemon juice, sesame seeds and some thyme)

Directions

  1. Preheat oven to 380°F
  2. In a large bowl, toss the cut Brussels sprouts with the oil until evenly coated
  3. Transfer to foil lined baking sheet (easy clean up), sprinkle with salt, and zatar seasoning.
  4. Roast for about 30 -35 minutes, or until tender and browned in spots. Stirring once halfway through.

Other great things to do with Brussels Sprouts:

And next I made some roasted carrots. I mean why stop, when we’re having so much fun??

image

Copyright © 2012 Simple Healthy Homemade. All rights reserved
Spinach and Pomegranate Salad

image
What to take for lunch? Since most of us here don’t get to go home and have a home cooked meal, and PB&J really isn’t a healthy option (I can hear you all scream right now), take out and fast food… well I don’t think I need to go into detail on that (no, salad from McDonald’s isn’t health food either). I got the idea to add pomegranate seed to a spinach salad from a local Mediterranean deli. But at a whopping $4 for a small container, what’s a girl on a tight budget supposed to do? You got it, try to make a similar concotion myself! And let me tell you, the flavor combination it amazing, it’s definitely a winner!

image
So here is a fun and yummy winter lunch box salad that would be a great side for the chicken with pepper and mushrooms, or add some fromage blanc to make it a light lunch, like I did the other day. No good picture exists to proof that, was too good, didn’t stick around long enough 🙂 And, please, don’t use just any dressing, make your own it will be infinitely better, I will of course give you one that will fit this salad perfectly!

image
Spinach  and Pomegranate Salad with Pine Nuts

Serves 4

* to get the seeds out of a pomegranate, cut in half and gently pry the seeds out of the white flesh/lining using your fingertips. I usually do this over the sink in a colander. Careful with the splatters if you pop a seed, it’s highly staining. Totally worth the effort.

image

Copyright © 2012 Simple Healthy Homemade. All rights reserved
Portable Chicken Meatball ‘Muffins’

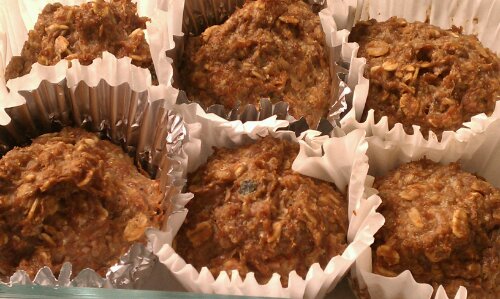
imageChicken Turkey Meatball Muffins

I came to thinking about this the other day. Can you name a snack that would deliver protein versus carbs, just one thought, on top of your head, …nothing? Right, thought so. Short of  protein bars (mostly containing sugar=CARBS and soy), there really isn’t much we ‘snack’ on that would fall into this category. So when I came across a recipe for a turkey meatloaf a light went on,  and I tinkered around in the kitchen until I came up with this variation.

I’ve made two versions so far, one with chicken breast meat and venison, (all ground) the other with turkey thigh meat and chicken thigh meat with the addition of vegetable.

imageChicken Venison Meatball Muffins, (I think I added some jalapeno, see the green?)

I notice using breast meat and venison makes the muffins denser, the second version is a bit softer and juicier due to either using only thigh meat, or the additional vegetables. For vegetables I used the pulp from my juicer. I like having fresh squeezed vegetable juice in my diet, since the micro nutrient content of fresh homemade vegetable juice is out of this world, but having no compost, feel bad throwing out the dry pulp that is left over. Well, I stuck it in these and let me tell ya, it tastes awesome! If you don’t have a juicer, I am sure you could just shred and/or blend some vegetables, if juicy, squeeze in some paper towels and reduce the egg whites a bit or add some additional oats. Have not tried that, but don’t see why it wouldn’t work.

image

Meatballs to go, now who wouldn’t love that??

Eat them cold or microwave for 20-30 seconds to warm up. You could also put them on a salad as a protein addition, if you like.

Chicken Venison Meatball Snackie

Ingredients

  • 1 lb lean ground chicken thigh meat
  • 1 lb ground turkey thigh meat
  • 1 cup rolled oats
  • 1/2 cup quinoa flakes (optional)
  • 1 cup liquid egg whites (about 5-6)
  • 2 tsp paprika, sweet
  • 1 tsp salt
  • 1 tsp white pepper
  • 1 tsp chipotle* pepper, ground (optional, makes it spicy, yum!)
  • 1/2 tsp ground cumin
  • 1/2 tsp dried thyme

* if you don’t have chipotle pepper, use cayenne

Chicken Turkey Vegetable Meatball Muffins

Ingredients

  • 1 lb lean ground chicken meat (I used breast meat)
  • 1 lb ground venison (which is always lean, you know, no junk food or CAFO’s in nature)
  • 1 cup mixed vegetable pulp (I used a mix of celery,kale, kohlrabi, carrot and golden beet)
  • 1 cup rolled oats
  • 1 cup liquid egg whites (about 5-6)
  • 2 tsp paprika, sweet
  • 1 tsp salt
  • 1 tsp white pepper
  • 1 tsp chipotle pepper, ground (optional, makes it spicy, yum!)
  • 1/2 tsp ground cumin
  • 1/2 tsp dried thyme

Directions

  1. Preheat oven to 375°F
  2. Place meat, egg whites (if using, vegetable pulp and quinoa as well) and oats together in a large bowl.
  3. Mix the spices and salt in a small dish, add to the large bowl and mix into the meat using a fork until well incorporated.
  4. Line a muffin pan with (jumbo) muffin cups or grease well
  5. Form into 12 balls, about baseball sized and place in muffin pan
  6. Bake 30-35 minutes or until cooked through.
  7. Cook in muffin pan for 5 minutes, then place on cooling rack
  8. Keep in the fridge or freeze for later use

Each chicken venison muffin has 20 g protein,  3 g fat, and 5 g carbs, 123 calories

Each chicken turkey muffin has 18.3 g protein,  5.3 g fat, and 8.3 g carbs (includes fiber from the vegetable pulp) 156 cal  (with Quinoa 18.8 g protein)


image

Copyright © 2012 Simple Healthy Homemade. All rights reserved

Braised Brussel Sprouts

image

Winter and all I seem to be eating lately is cabbage, in its various forms. Like Sauerkraut, or this Napa, Kumquat Salad, or Turkey Cabbage Rolls, or Lemony Brussels Sprouts, the list goes on… For versatility of use, the Brassica family of veggies is almost unsurpassed. I am just saying, ‘almost’ because there might be something else out there that I have not come across yet 🙂

image

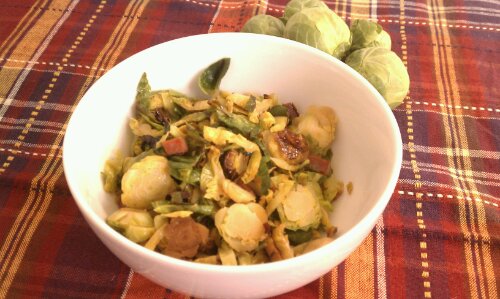
For the Braised Brussels Sprouts, I added just a bit of Speck and some Thyme Garlic Basting oil for flavor, the rest of the dish is accomplished by the main player, the Brussels sprouts. If you’re worried, the flavor here is not strong, the braising really mellows the flavor and brings out an almost creamy quality in this lovely vegetable.

image

This is soooo good, I think I could live on it for the rest of my life!

Ingredients

  • 1 lb Brussels Sprouts, cleaned
  • 2″ piece of thick cut Speck (or Bacon, 1/4″ thick by 2″ long)
  • 2-3 tblsp garlic thyme basting oil
  • 1/2 tsp salt

Directions

  1. Cut the cleaned Brussels Sprouts into 3-4 slices, (usually I cut from top to stem, length wise, so they don’t totally fall apart, but as you can see in the pictures it works the other way, too)
  2. Dice the Speck piece into stick and then into 1/4″ cubes
  3. Heat a skillet over medium, add the Speck or bacon bits and cook for a minute or until the fatty parts begin to look transparent and start releasing some of the fat. (If you use bacon, there most likely is more fat on the bits and you could reduce the amount of basting oil you add)
  4. Add the Garlic Thyme Basting Oil
  5. Add the Brussels Sprouts and stir. Cook 2-3 minutes, then  add 1/4 cup water and cover the pan. Cook for 6-7 minutes, stirring occasionally or until the Brussels sprouts are tender (Depending on your taste, you can cook them until they still have a bit of a bite to them or cook further until creamy soft)
  6. Uncover, season with salt, stir to combine and serve!

Serves 3-4 as a side dish (depending on love of Brussels Sprouts, here it’s more like 3)

image

Copyright © 2012 Simple Healthy Homemade. All rights reserved
Napa, Kumquat and Asian Pear Salad with Cashews

image

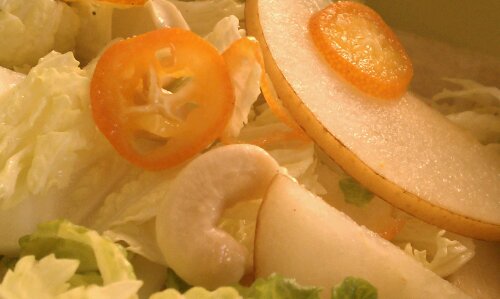
Unless I am warm I am not drawn to cold foods, so in the colder months it can be a challenge to get exited about eating raw vegetables or salads. Unless I am working out or running and my body temperature goes up, me and salad are not usually friends this time of year. So in order to make me want to eat cold things like raw vegetables, it has to be pretty special, texture, taste, all of it. This a little unusual salad combines crunchy Napa Cabbage, citrusy (is that a word, really?) Kumquats and crispy fresh Asian Pears along with cashews into an explosion of flavor without too much of the weight you too often find in rich winter salads. The dressing is simple and light and accentuates the sweetness of the Kumquats with a refreshing lime dressing.

image
If you’ve never tried Kumquats, you’re in for a treat. They are an about pecan sized member of the citrus family, but the whole fruit is edible, including the shell which is not bitter (like in an orange for example).

image

Crispy salad with creamy cashews, yummy!

Ingredients

  • 1/2 of a small Napa Cabbage
  • 1 Asian Pear
  • 6 Kumquats
  • 1/2 cup raw cashews
  • 1 lime, juice and pulp only
  • 2 tblsp olive oil

Directions

  1. Cut Napa cabbage into 1/2 wide slices.
  2. Core and slice Asian pear thinly.
  3. Slice kumquats into 1/8″ thick slivers, remove any seeds and reserve Amy juices.
  4. In a large salad bowl, combine Napa, Asian pear, kumquats and juices.
  5. Juice the lime into the same bowl.
  6. Toss to combine.
  7. Drizzle the olive oil over top and sprinkle with cashews.

image
Copyright © 2012 Simple Healthy Homemade. All rights reserved
Colorful Vegetable Soup with Celery Root

image

Celery Root or Celeriac is what we use back home as winter vegetable for soups, salads, stews, you name it. It’s cheap, readily available and has a great flavor both raw and cooked. You could most definitely use regular green celery, which has a bit more of a pungent flavor, compared to the almost a bit nutty or earthy flavor of the root crop.

Cerliac

Making vegetable soup from scratch could not be easier, and I am giving you a basic recipe that can be made in as many variations as there are cooks.

For this particular soup I chose colorful veggies, and I am foregoing the usual potato for the sake of the ‘getting lean in the new year’ and all the paleo eaters out there and I am using, as I just said, celery root instead, which has a much lower Glycemic Index (GI) than a potato. choosing vegetables (and foods in general that are low on the glycemic scale keeps you full longer, therefore helping to control your appetite. In very simple words (yes there is more to it, but I’ll spare you) the idea behind the glycemic index is to measure how quickly a particular food affects your blood sugar/insulin response, meaning how quickly the sugars in it get digested and find their way into your blood stream.
image

Alright, now that we fed the brain, let’s look at our tummy 🙂

Ingredients

  • 1/2 medium onion, peeled and chopped
  • 1/2 celery root, peeled and cut into chunks
  • 3-4 large tomatoes, diced * see note
  • 2 carrots, diced
  • 1/4 to 1/2 a head of cauliflower, separated into florets (depending ont he size of the cauliflower you get)
  • 1/4 of a head of a medium savoy cabbage, cut into chunks (or use some leaves off a large one)
  • 4-5  stalks Swiss Chard, chopped(any color you like, rainbow colors look pretty)
  • 1 tsp salt

* I used frozen ones from my Garden in the summer: when they are at the peak of ripeness, just chop and put in zip top bags for soup in the winter. Alternately you could use a can of no salt added diced tomatoes)

Makes one 3 1/2 qt pot full

Directions

  1. In a stock pot (mine is 3 1/2 qts, or so it says on the bottom) heat one tablespoon on olive or coconut oil over medium, then add the onions,a dn cook until translucent but not brown
  2. Add the celery and carrots, stir and cook until the onions are beginning to brown
  3. Add the tomatoes, with any juice that collected on the cutting board (if using frozen, partially thaw in the fridge overnight) stir and allow to cook 5 minutes to allow some of the juices to come out
  4. Add water to cover the vegetables and bring to a boil, cook 5 minutes, then add the cauliflower and chopped Swiss Chard, bring to a boil again,then reduce the heat, add the salt and simmer until celery, carrot and cauliflower are tender when pierced with a fork.
  5. Serve hot with some crackers or a slice of rustic bread, or enjoy as a first course.

To make this your own:

  • Instead of celeriac, use 2-3 stalks of celery and a medium potato
  • Use kale instead of Swiss Chard (but remove the tough stems)
  • Use spinach,  but add right before serving into individual bowls, ladle hot soup over
  • Don’t like cabbage? Leave it out
  • Instead of cabbage and kale, use thin cut or quartered Brussel sprouts
  • Add green beans or snow peas towards the end of cooking time
  • Leave out the tomatoes
  • Go through your fridge, anything vegetable can most likely be used up in your yummy soup, the potions are endless 🙂

image

Copyright © 2012 Simple Healthy Homemade. All rights reserved

Thai Green Papaya Salad (Som Tum)

image

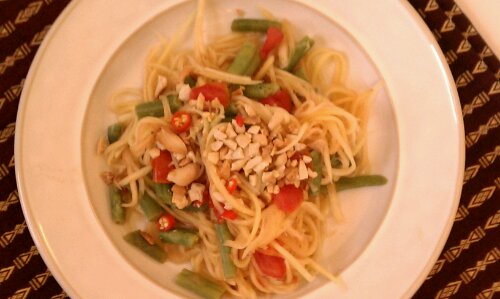
One of my favorite Thai Salads has to be Som Tum. Ever since my brother had me over for dinner one night and made this super delicious and fiery hot salad I have been hooked. (and he was nice enough to share the perfect recipe he brought back from Thailand the summer after the big Tsunami)

I like it equally with green papaya or green mango, the latter giving it a bit more of a tart flavor. You can find green (unripe) papaya at Asian food specialty stores, the regular grocery store will only carry ripe ones, yes they also look green outside, but have turned ‘fruit’ on the inside, and we need them to be ‘vegetable’ for this. ( They look white or slightly green after they are peeled, if the papaya is pinkish or the mango yellow, it’s too ripe and soft for this and the flavor is different)

image

I have adapted the original recipe a bit to adjust for our non Teflon coated tongues and intestinal tracts. The original recipe is so hot, it should have a name like Ten Thousand Chile salad or Eternal Purgatory salad. When my brother first made this we made steamed sticky rice to go along with it, to douse the fire. My version is still hot and you are most welcome to add more chillies if you like. But don’t say I didn’t warn you. I have also adjusted the preparation method (normally the salad is made in a big earthenware mortar ) and left out the dried shrimp, which are pretty hard to find and are a pretty foreign item for most folks here, although they are deliciously crispy and a bit salty, kinda like chips 😉

image

Ingredients

  • 1 green papaya (or mango, see note)
  • 2-3 cloves of garlic
  • 1 cups diced string beans or snake beans (if your papaya is big, you can use 1 1/2 cups)
  • 2 plum tomatoes, on the unripe side, diced
  • 3/4 cup raw, shelled peanuts
  • 2-3 Thai chilies ( the original asks for 9!!!)

Dressing

  • 2 tbsp Palm sugar
  • 8-10 tbsp fresh lime juice (from experience that’s about 5 small or 3 large limes)
  • 4 tbsp Fish Sauce
  • optional: Cilantro, sliced Kaffir Lime leaves and dried shrimp for garnish

Directions

  1. Dry roast peanuts in a skillet or alternately in the oven or toaster oven until slightly brown, set aside to cool
  2. Halve the papaya, seed and peel, then slice into a big bowl using a julienne cutter. (If you don’t have a julienne cutter, you can grate the papaya)
  3. Using mortar and pestle, crush half of the roasted peanuts, then add the chilies and garlic and mash together.
  4. Combine the lime juice, fish sauce and sugar, stir until the sugar dissolves.
  5. Add sauce to mashed spices, mash all of it a bit more to mix flavors, then add to the julienned papaya and mix well
  6. Serve garnished with cilantro leaves and crush the remaining peanut and server alongside to top the salad as desired.

Note: If using a green mango, you can reduce the lime juice by 3 tablespoons since the mango has a tartness of its own.

image

Copyright © 2012 Simple Healthy Homemade. All rights reserved

Lighter Asparagus Quiche

image

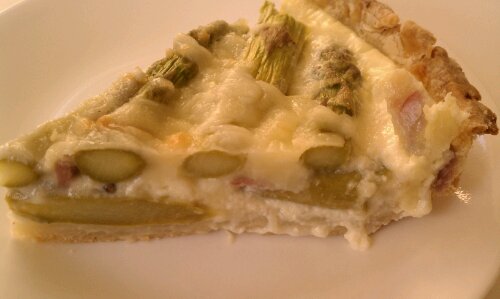
Asparagus Bacon and Cheddar, what better combination could there be? Oh I know, a crispy pie crust to encase it all. A Quiche in this country a lot of times feels like an ‘egg pie’ to me, which can make it pretty heavy and rich. So for this recipe I only used 1 egg, and by adding greek yogurt, we up the protein content without adding a ton of fat or weighing down the filling. Serve with a big salad for a light lunch or dinner or with a side salad as a first course for a leisurely, sit down dinner.

image

Okay so after all that pretty talk, here’s the truth: I made so many different traditional Swiss cookie dough recipes (you know, for Christmas I get homesick if I don’t have ‘my’ cookies), that I ran out of eggs, well, besides the one used here. So I had to make due with what I had on hand: 1 egg, flour/pie crust (there’s always pie crust), asparagus and some odds and ends.

Well, as so many times, when you find yourself in a tight situation, it leads to the discovery of something much better than expected…

image

Ingredients:

  • Single pie crust
  • 1 lb asparagus
  • 1 oz Speck *, diced
  • 2 oz Gruyere (or cheddar), grated
  • 1 cup milk
  • 1 egg
  • salt to taste
  • 2 heaped tbsp Greek yogurt

Directions

  1. Preheat oven to 380°F
  2. Roll out pie crust 1″ bigger than pie pan, fold to place into pan, and roll edges under to make a thicker edge.
  3. Mix milk through Greek yogurt
  4. Cut any hard ends off of asparagus, then place them into the crust in two layers, the second layer at a right angle to the first. Break any asparagus that are too big into smaller pieces
  5. Distribute the Speck over the asparagus, then pour the milk egg mixture over everything, and sprinkle with the grated cheese.
  6. Bake in the middle of the oven for 35-40 min
  7. Serve hot or warm

*often translated as bacon, it however has much more meat than fat on it, but plain old bacon would do as well, just have the butcher cut you a thick piece you can then dice into cubes)

Serves 4 as a lunch/light dinner, or 8 as an appetizer.

image
Copyright © 2011 Simple Healthy Homemade. All rights reserved