Wild Rice Stuffing with Plums and Chestnuts

image

Happy Thanksgiving everyone!

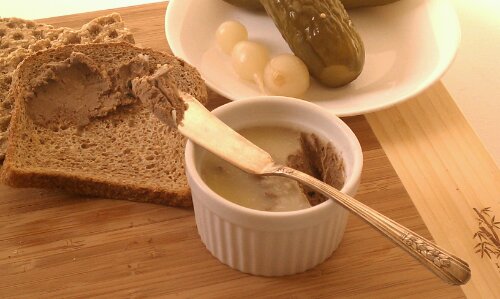
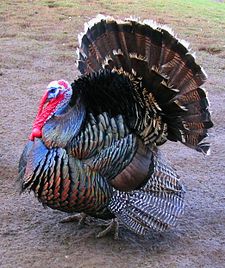
you’re safe, you’re not on my menu today

I am thankful for so many things in my life 🙂 I like to take a moment or two every day to count my blessings, I feel it sets the tone for the day and sometimes even lifts a gloomy mood. Today I am thankful for my friends, my family back home in Switzerland, my adopted family in NY (Nelson’s fam), my health, being in a position to inspire others to lead a healthier life, my ability to create great food and share it with others, the roof over my head, having a job, and living in a free country (huge).

What are you thankful for?

Since it was just going to be me this year, I made a roast chicken, not a turkey for ‘Thanks Giving’. With my work schedule, (yesss! Boot Camp Friday morning at 5:30 am, while the rest of you still wait in line for those elusive deals at the department store) going somewhere other than my own kitchen, just wasn’t going to happen this year. I am glad to say that Nelson’s Dad is doing somewhat better though and there’s hope he might get released from the hospital back to the nursing home soon.

So having all sunny day to myself, I slept in (yay, don’t get to do that very often), had a leisurely breakfast and a not so traditional Thanks Giving feast!

On the menu:

  • Roast chicken with wild rice stuffing (I had gotten an organic, pastured chicken at the Fairgrounds Farmers Market) enough for 2 people, or one plus leftovers 😉
  • Roasted vegetables (carrots, asparagus, parsnips and onions, lazily used as a roasting rack for the chicken= adds flavor to the chicken, and the chicken in turn adds flavor to the veggies, added plus: no extra pan to clean)

(I ended up skipping these two, got too tired from the back splash tiling adventure, and realized, I’d have food for a week)

  • Fresh homemade cranberry sauce
  • Streuseled sweet potato casserole

The advantages of having a Thanksgiving by yourself? I ate the skin off the chicken while carving it, it was soooo good, like the best, crispiest skin ever. Ha! try explaining that to dinner guests “Well, it’s this new thing at the grocery store… you know, ‘skinless chicken’ , muuuch healthier.”

imageIt’s kinda hard to take a pretty picture of stuffing, it’s just so … brown

Wild Rice Stuffing:

makes 3 cups, enough to stuff 1 chicken, plus some extra you can cook on the side. If using for a turkey, triple or quadruple the recipe.

  • 1/4 cup wild rice, uncooked (see note)
  • 1/2 cup chopped roasted or cooked chestnuts
  • 1/4 cup chopped dried plums
  • 2 slices of toast bread,(I used Ezekiel brand) toasted, torn into rough pieces
  • 1 tsp fresh thyme (or 1/2 tsp dried)
  • 2 tsp fresh parsley
  • 1/2 tsp salt

Note: alternately use either a store bought wild rice mix, the wild rice will be pre-cooked and the process will take less time or use 1 cup of leftover cooked wild rice

Directions

  1. In a saucepan, bring 2 cups of water and the wild rice to a boil, reduce the heat and simmer  covered until cooked through about 45 minutes
  2. Don’t drain (unless the wild rice is still swimming in water, then drain off excess) add the chopped chestnuts and chopped plums, spices and salt, cover and let stand for about 20 minutes to soften.
  3. Stir in bread crumbs, mix with a fork
  4. Stuff the chicken cavity, roast the chicken, then remove the stuffing and serve alongside the bird (or add chicken stock until desired moistness is reached and reheat in the oven.

I was really debating adding cranberries to the stuffing, for a all in one kinda deal, maybe next time…

image
Copyright © 2011 Simple Healthy Homemade. All rights reserved

Cocoa Post Workout Recovery Drink

image

I am not a big believer in supplements, protein powders and bars, thinking that most anything you need, you can get from proper nutrition. I resort to recovery drinks and an occasional protein bar, if I really don’t have the time to have something real. And since many of  y clients always ask me what to take, and what to do, I decided to share this post workout recovery drink with you. Can you add a scoop of protein powder? If you like, sure. But the mainstay of this is the D-Ribose. Ribose is a special carbohydrate that is used in the body for energy production in the cells as it plays a critical role in the production of adenosine triphosphate (ATP). ATP is the energy unit that fuels our cells and bodies. It  provides energy needed for short burst of power movements during physical activity, is needed to help our muscles squeeze, heart pump, brains think and countless actions that we don’t consciously control.

Ribose provides a raw material to facilitate ATP production. Many doctors believe that at least part of the problem with chronic illnesses, such as fibromyalgia and chronic fatigue, is a lack of energy production to keep the organs, like the muscles and brain, happy. If the muscles have adequate energy available = less stiffness and cramping. This is similar to having enough money in the bank. If the money is gone, and the roof springs a major leak, no funds are available to fix it. In the end, the whole house is affected. Similarly, if the muscles are undernourished and energy production is down, the muscles will tighten, causing pain. Tight muscles can often pinch nerves, causing greater pain and starting a vicious cycle. One of the main goals of ribose supplementation is to improve symptoms by aiding energy production.

As I said, I generally don’t supplement, but after an extra hard workout, with a full day still ahead of me, I might help myself out a bit by having one of these!

Ingredients

  • 1 cup milk (almond milk is fine, if you are vegan)
  • 1/2 tsp D-Ribose powder
  • 1 tbsp almond butter
  • 1 tsp cocoa powder
  • (optional 2 tsp chia seed, for added protein and fiber, but will turn this in to bubble tea)

Directions

Put everything (except chia seed) into a blender or shaker and mix well. Add chia seed, if using and enjoy!

Copyright © 2011 Simple Healthy Homemade. All rights reserved

Savory Sweet Potato Cheddar Pie

image

Make something different this Thanksgiving!

image

Ingredients

  • 2 Pie crusts  (either home made or store bought)
  • 6 oz cheddar cheese, grated (using the coarse side of a grater)
  • 2 cups chopped onions (from 2 med cooking onions or 1 lg sweet onion)
  • 3/4 lb (about 1 md) sweet potato, grated using the coarse side of your grater
  • 1/4 cup milk or half-and-half
  • 1/4 tsp ground white pepper
  • 1/2 tsp salt
  • 3 eggs, beaten, plus 1 egg for glaze (total 4)

Directions

  1. Preheat oven to 425 F
  2. In a large skillet, heat 2 table spoons oil over medium, add the chopped onions and cook, stirring occasionally, until softened but not browned, about 8 minutes.
  3. Add the grated sweet potato, cook stirring to mix contents for an additional 5 minutes, to soften the sweet potatoes slightly. Remove from heat, let cool slightly
  4. In a bowl, combine the grated cheese, 3 eggs, milk and spices, stirring with a fork to combine.
  5. Combine the cooled sweet potato mixture with the cheese, eggs and milk mix, using a fork to stir until mixed evenly.
  6. Place crust in a deep 9″ pie pan, fill with sweet potato cheddar mix. Beat remaining egg, brush edges with egg wash, then place second pie crust on top, crimp edges to seal, cut 6-8 steam vents into the top crust and brush with remaining egg wash.
  7. Bake at 425 for 40 min or until the top is golden brown and filling is set.
  8. Serve warm or at room temperature with a large green salad or as part of your Thanksgiving dinner.

image

Copyright © 2011 Simple Healthy Homemade. All rights reserved

5 minute Snack Cakes

image
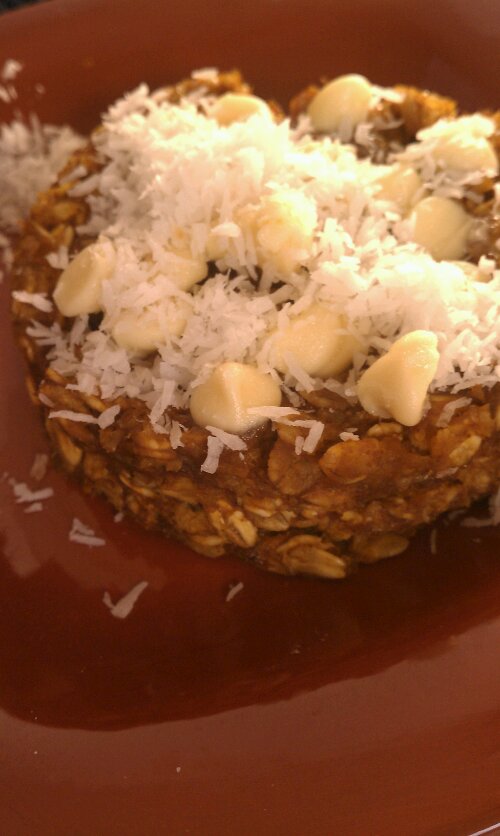
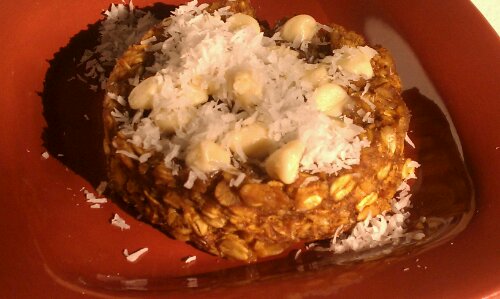
Pumpkin White Chocolate version here shown made with rolled oats…

image
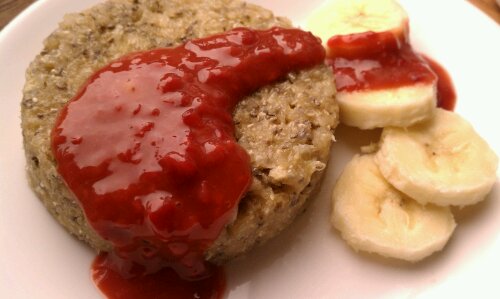
and Tropical Mango version with Raspberry Mango Sauce, shown made with Quinoa   (I know, it looks like Ketchup; Trust me it tastes TOTALLY different!)

For breakfast, as a snack and the best part, it’s utterly delicious cold as well AND when cold, they are portable (minus the garnish)

You can make these with rolled oats or any other flakes such a quinoa or barley flakes. You might have to adjust cooking time a little, but whatever is on hand works for these!

As an easy alternative to getting a mango, peeling and pureeing it, I have used mango baby food. One of my friends turned me onto the idea of using baby food as a flavoring for plain greek yogurt. Check the ingredients, but the brand I use has no added sugar, some flavor varieties use fruit juice to add extra sweetness. Don’t like mango? Make it juts with apple sauce or maybe a pear baby food?

image
Tropical Mango Banana Cake

Ingredients

1/2 cup quinoa or oat flakes,
1/2 ripe banana (1/4 cup)
1/4 cup mango purer (use 1 small glass of mango baby food, 4 oz)
1 tbsp sugar (palm sugar, etc)
(1 tbsp Chia seeds, optional)
1/4 cup rasbperries, frozen or fresh
Mix 1/4 cup of the mango, banana, oats (or quinoa), sugar, and Chiang seeds if using in a bowl
Grease two 8 oz ramekins with some oil on a piece of papertowel
Fill and smooh the top
Microwave on high for 3-5 minutes, depending on the power of your device. It’s done when the top does not look liquid anymore and the sides gently separate from the bowl.
Run a knife around the edge, inverted on a plate and serve with raspberry mango sauce (below), or your favorite topping. Such as maple syrup, almond butter, Apple sauce.
Or eat out of the bowl

For the raspberry mango sauce, heat the raspberries in a small saucepan then stir in the remainder (1/4 cup) of the mango puree

image
Pumpkin White Chocolate Oat Cake

Ingredients

1/2 cup rolled oat or quinoa flakes
1/2 cup pumpkin puree
1 tbsp sugar
1 dash cinnamon
1 dash pumpkin pie spice
1/4 tsp vanilla
White chocolate chips  and coconut for garnish (optional)

Mix all ingredients except chocolate and coconut in a bowl, then divide into two 8oz prepared ramekin forms.
Microwave on high for 2 min 30 sec to 3 minutes.

Run a knife around the edge, inverted on a plate and decorate with white chocolate chips, cover with the just removed ramekin and allow heat to steam the chocolate until soft (you can also re-microwave for 30 seconds), serve with coconut, or your favorite topping.

Copyright © 2011 Simple Healthy Homemade. All rights reserved

Creamy Mushroom Soup

image

One thing that I really love about the colder months is soup! I could live on soup. If all I could eat for the rest of my days is soup, I’d be happy. Ok, maybe something crunchy to go on the side…

Soups are warming when it is cold, easy to make, easy to reheat and mostly pretty cheap to make as well. A lot of times when it is cold, I do not drink as much water as I should and as I do in the summer, I am just not as thirsty and I think soup has that added benefit of liquid 😉

To achieve the creamy consistency without added fat, I used some sweet potato, but since the mushrooms are braised and caramelized first to intensify their flavor, you can’t tell that there is anything except mushroomy goodness in the soup!

image…shown here with Garlic Thyme Sweet Potato Straws

Ingredients

  • 12 oz crimini or baby bella mushrooms, cleaned and sliced
  • 1 md shallot, minced finely
  • 1 md sweet potato, peeled and chopped
  • 2 tbsp Olive oil
  • Salt

Directions

  1. In a heavy pot, heat oil over medium. Add the diced shallot and cook until softened and browned.
  2. Add the sliced mushrooms, sprinkle with salt, stir, cover and turn heat to medium low. Cook for 15 -20 minutes, stirring every couple of minutes. The mushrooms will start to release their juices and cook.
  3. Uncover and cook, stirring occasionally until the liquid is reduced and the mushrooms start to caramelize and brown in bits, about 5 minutes.
  4. Add water and the sweet potato to the pot. Add enough water to cover the mushrooms and sweet potato by 1″ to 1 1/2″ (remember, you can always add more water, trying to boil it off, is much harder). Add 1/2 tsp salt (or to taste) and bring to a boil.
  5. Cook until the sweet potato is very soft.
  6. Remove from the heat, let cool slightly, then using a handheld blender/immersion blender (if you don’t have one, you NEED one, seriously), puree the soup. (alternately you could use your food processor/blender and blend the soup in batches, being careful not to overfill the container)

Serve with Garlic Thyme Sweet Potato Straws, croutons or a slice of hearty home made bread.

If you really want your soup to be super creamy, you could add 1/2 cup half-and-half (or coconut milk to keep it vegan).

Makes 4-6 servings

image

Copyright © 2011 Simple Healthy Homemade. All rights reserved

Chicken Liver Paté

image

I find it interesting how so many foods that back in the day were most likely eaten because people would not waste any part of an animal, are now either gourmet foods or at least they sell for a lot more at the store than you should reasonably be asking for them. Let’s take chicken wings for example. Definitely a ‘what are we going to do with this’ kinda food, but go check the price of wings on the meat section… As for me, I am not a fan of liver at all, in fact you could chase me with calf liver, but I love good Paté or Mousee Trufée, goose duck, chicken, it’s all good. But as with so many things, it is generally either out of budget or there are too many ingredients in it I am trying to avoid, or both, like in this case. I for one think that a chicken liver paté, does not need any pork in it, thank you very much. Or soy, or hydrolyzed plant protein or whey or even egg. Paté is, I know, not everybody’s thing, but this spread is fantastic, even if you go with the basic version and omit the truffle paste. No need to like liver, I don’t.

image
When I first looked into making this, I had looked through my old recipe books, and all I found was seriously time consuming recipes, where you bake stuff in a water bath in the oven. Who has time for that, I ask? So off I went into the kitchen and after a little tinkering, came up with a version, maybe not 100 % traditional in its preparation and technique, but tasty? check, and quick? check. So if you like some good gourmet food on occasion, you’ll be happy to know that it is easy to make and very much every day affordable (although you might want to curb that habit just a bit, liver paté is a pretty rich food)

image

Ingredients

  • 1/4 cup butter
  • 8 oz chicken liver
  • 3/4 tsp green pepper corns
  • 3/4 tsp black pepper corns
  • 1 tsp salt
  • 1 small clove garlic
  • 2 tbsp Cognac or Calvados*
  • (optional: 1 tsp truffle paste )

* Calvados is a French spirit distilled from apples, basically an apple brandy from a specific region

Directions

  1. Melt all but 1 tbsp of the butter over low heat in a heavy sauté pan.
  2. Add the peppercorns and turn heat up to medium.
  3. Chop the chicken livers into pieces and add to the pan, stirring occasionally. Cook until browned on the outside, but still slightly pink inside (unless you really like your meat well done, then go for it, cook it more)
  4. With a fork, pick out the cooked liver pieces, let cool slightly then put them into your food processor.
  5. Add 1 tbsp Cognac or Calvados to the pan and scrape up any browned bits, then remove most of the peppercorns from the pan and set aside.
  6. Crush the garlic into the same pan, roasting until golden, then tip the butter and garlic into the food processor with the chicken livers.
  7. Pulse a few times to combine, then add the remaining 1 tbsp Cognac or Calvados, and the salt, blend until smooth
  8. Add the truffle paste (if using) and the pepercorns and pulse a few times to combine
  9. Melt the remaining butter. Spread chicken liver mix from blender into several small ramekin forms and pour the molten butter over top.
  10. Refrigerate for at least a half hour before serving. Whatever you are not going to eat within 3-4 days, freeze for later.

Copyright © 2011 Simple Healthy Homemade. All rights reserved

Roasted Pumpkin with Thyme Basting Oil

image

The Farmers market had a glorious amount of pumpkins! So much to choose from so many varieties. From your standard orange sugar or pie pumpkin to gray and hazy green looking varieties, they had it all. After roasting a quarter of the one I settled on and since it was an exceptionally beautiful (and BIG) representative of the pumpkin family, I made gnocchi with another quarter and pumpkin puree with the rest.

If your pumpkin seems very juicy, you might want to save that one for a soup or puree and use for pie. This dish works best with a firm pumpkin or squash. I tried it with one that was ‘liquid’, …results not convincing. Not sure why but that one time, I got one of those fairy tale pumpkins, kinda like the one in the picture and it was the juiciest pumpkin ever. Cleaning it out, it was running orange down my hands. I should have known better and turned that into, I don’t know, Pumpkin juice?

image

Ingredients

Directions

  1. Chop squash or pumpkin into 1″ cubes,
  2. Preheat oven to 450 F
  3. Toss, squash in a large bowl with 2 tbsp basting oil, then spread on a rimmed cookie sheet or roasting pan, season with salt and pepper to taste and place on the middle rack.
  4. Bake for 15 to 20 minutes, or until fork tender

Note: Any leftover pumpkin can easily be turned into a yummy soup: Just blend and add broth or milk, bring to a boil and serve hot with a slice of crusty bread on the side and some fresh toasted pumpkin seeds for garnish!

image

Copyright © 2011 Simple Healthy Homemade. All rights reserved

Simone’s Basting Oil

image

One of the local grocery stores, always has yummy samples. Often they cook stuff up right in front of you, and then, here is the part where they get you: To make the yummy stuff, you gotta get the ready made sauce, the basting oil, the finishing butter, the frozen this, the prepared that. Pffff, I am  not buying all that stuff, not only because it can get quite pricey for a girl like me who likes to cook and eat good things :), but also because often times there are unwelcome additions in some of those prepared dishes. Let’s take for example the basting oil, which makes very yummy things. I have sampled at least three so far and have ideas for, like twenty a hundred more!

The official ingredient list goes something like this: Grapeseed Oil, Canola Oil, Dried Thyme, Dried Parsley, Natural Garlic Flavor.

I see two problems with that. First, why ‘Natural Garlic Flavor’? How about some real old fashioned garlic?  And Second, I personally don’t like to use Canola oil, it’s made from a plant called Rapeseed (part of the mustard family) that was genetically engineered in Canada (The name “canola” was derived from “Canadian oil, low acid” in 1978). I am not a fan of GMO crops and avoid them, again, my personal choice.

image
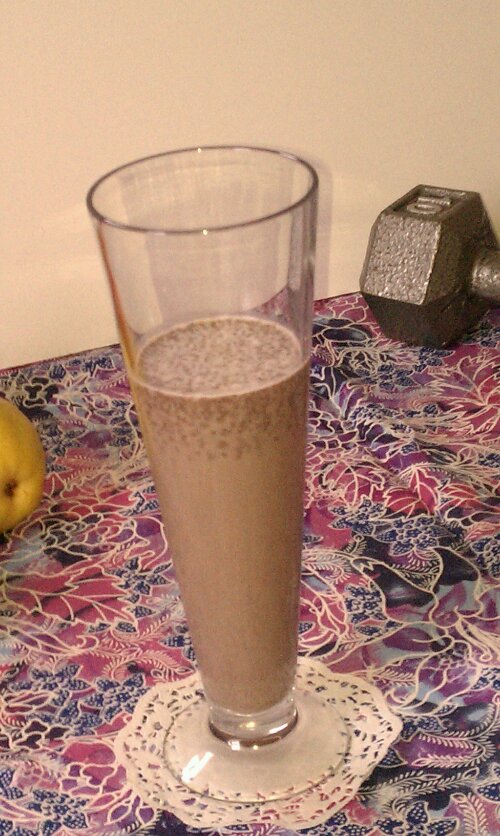
Haha, see the window? 😉

But that said, basting oil is a great thing 🙂 You can use it on veggies, to flavor meats, to add some kick to a sauce, you name it, it can do it, and then some, it even washes your dishes while you sleep. Ok, now I am exaggerating just a little. So to avoid having to go without or having to go with a choice I am unhappy with, why don’t I just make that stuff? It’s cheaper and you get to control what goes in it, win and win!

Here’s my version:

  • 1 3/4 cup grapeseed oil
  • 1/4 cup extra virgin olive oil
  • 2 tbsp dried thyme
  • 1 tbsp dried parsley
  • 1 small to medium garlic clove, crushed

Directions

  1. Using a funnel, fill a glass bottle with half the grapeseed oil, then add the crushed garlic, dried thyme and parsley, stuffing it in using a chop stick, if necessary.
  2. Wash whatever got stuck in the funnel down into the bottle using the remainder of the grapeseed and olive oil.
  3. Store in a dark cool place for a week before using.
  4. Shake it up before using

image
The oil starts to turn green as it sits, and the flavors blend. Use 1-2 tbsp to baste meat and vegetables for grilling or roasting, or add to pan braised dishes. Refrigerate

Copyright © 2011 Simple Healthy Homemade. All rights reserved.

Pear Vanilla Butter

image

Lately I have just been feeling like changing things. From putting summer clothes away, ‘Tiffany-ing’ my bathroom windows,

image

and just generally fixing up and changing things around the house. Home Depot has been my friend (if not my wallet’s…) and I will soon be the proud owner of a real garage door opener! Hey, it only took four and a half years of living here, but now in the winter, in the snow or rain, I can actually use my garage for what it was meant for. Right now I have to leap out of the car, unlock the garage door, (had to get a separate key chain for that), open it, run back to the car and drive in = Completely useless when it pours as it literally takes less time to run to the front door. Yay! Can’t wait 🙂

I also have been thinking about adding a tile back-splash in my kitchen, currently debating on colors.

image
But here’s what I’ve come across looking for some paperwork filed away in a box in the basement… I though I ate it all, but there it was: Pear Vanilla Butter, 2008.

I have been waiting forever, ok maybe not, almost two weeks, to share this with you. It was inspired by a recipe in a cook book on preserving, but for the love of me I can’t find where it was. Luckily I had jotted down some notes and can therefore (hopefully * I was saying a prayer here*) recreate it. Trust me, it is totally worth the time spent. It is the smoothest, most delicately flavored preserve you will ever make! If the best and most beautiful parts of fall turned into a single food, it would be this elegant and sophisticated jam! Move over pumpkin and apple! ( At least for a little while)

image
I vaguely remember the original recipe saying something about ‘keeps for 3 months’, but this little gem I found smells and tastes just like I remember and while I won’t recommend you try this at home, it seems perfectly fine to me (if this is the last post on this blog, you’ll know why 😉 )

Ingredients

  • 4 lb pears, peeled, cored and diced
  • juice of 3 lemons
  • 1 1/4 cups water
  • about 5 1/2 cups sugar
  • 1 vanilla bean, slit open

Directions

  1. In a large pan, combine pears, water, lemon juice and vanilla bean. Bring to a boil, cover and simmer for 10 minutes, uncover pan and continue cooking for another 15-20 minutes, or until the pears are very soft.
  2. Remove vanilla bean and gently scrape out any seeds into the pan, using the rounded tip of a knife.
  3. Using a submersion blender*, and puree. You could also use your blender or food processor. Then press the resulting puree through a fine meshed strainer into a bowl.
  4. Measure puree into a large pan, adding  1 cup warmed sugar for every 2 cups of puree.
  5. Stir mixture over low heat until the sugar dissolves then increase the heat and boil for 15 minutes or more, stirring, until mixture becomes a thick puree and holds its shape when a little is spooned onto a cold plate.
  6. Spoon boiling pear butter into small, sterilized jars, being careful not to get burned, leaving 1/2″ head space. Immediately seal. After cooled off, check for seal, label and store in a cool, dark place for a minimum of 2 days before serving for flavors to blend.
  7. Keeps for 3 months, refrigerate once opened.

image

Close up.. Mmmmh see the Vanilla seeds?

image

Copyright © 2011 Simple Healthy Homemade. All rights reserved.

Pickles

image

Swiss or German pickles, yes, German-speaking, mine are smart, they can talk. Haha, no, but they are different from what is served here in Pennsylvania (can’t speak too much for other parts of the country since pickles are not usually high on my list of local fare when I travel 🙂 ) But since I am not a big fan of dill, personally thinking it goes well with fish and fish dishes, and should remain there… needless to say, the classic ‘Dill Pickle’ is not my thing.

I will move my sandwich to higher ground to avoid cross contamination with pickle juice, if I was served a pickle after all (If I remember, I usually ask for it to be left off)

Where I am from, pickles are sour. Period. Yes, there are spices used, but none is so dominant that it overpowers all others. We like balance (or close to). Go figure we’re neutral, ha!

So after not eating pickles (besides cornichon) for years, finally the revelation came to me: ‘Make them yourself, it can’t be that hard.’ And it isn’t, in fact it is less work than making jams or preserves.

And now, since I waited the required week to allow the flavors to blend, and I tried the result… Finally, Ladies and Gentlemen, the moment you’ve all been waiting for (drum roll): I am sharing what I did and how to go about it!

image
You can see the deviant pickle jar in the back left. I used carrots to completely fill the jar. Have not tried that one yet…

Ingredients

  • 4 cups apple cider vinegar
  • 4 cups water
  • 1/4 cup pickling salt
  • 20-25 pickling cucumbers, not waxed

Per Jar: (use quart size wide mouth jars)

  • 1/2 tsp yellow mustard seed
  • 1/8 tsp brown mustard seed (for pretty)
  • 1/8 tsp whole coriander seeds
  • 3-4 black peppercorns
  • 1 bay leaf
  • 1-2 small garlic cloves, peeled
  • 1-2 pieces of shallot (a piece here is about the size of a small to medium garlic clove)

Directions

  1. Bring water in a water bath canner to a boil, sterilizing the jars by cooking for 10 minutes.
  2. In a sauce pan in simmering water, sterilize the lids.
  3. In a large sauce pan, heat the water, cider vinegar and salt, stirring until salt dissolves. Bring to a simmer
  4. Scrub cucumbers and remove jars from water. Empty the water back into the canner,  fill jars with the cucumbers, then add the spices to each jar. Fill with vinegar mix, leaving a 1/2″ head space. Center a lid on top and secure with a band. Repeat with remaining cucumbers and jars, when all are sealed, place on canning rack and lower into the boiling water of your water bath canner. Process for 10 minutes, then turn of the heat and let sit in the water another 5 minutes, then gently remove the jars and place on a heat proof surface*, careful not to shake or tilt the jars
  5. Wait till next day to check for seal, place any jars that did not seal properly in the fridge and consume those first.
  6. Wait one week before eating.

*The best way for me is to place the jars on a big wooden cutting board, since they have to sit undisturbed for a week, I can move the whole lot of them without having to tilt and jiggle the jars

Makes 4-5 quart size jars

Copyright © 2011 Simple Healthy Homemade. All rights reserved.