Super Natural Mango Ice Cream

   imageSoft serve state…image…or popsicle, fantastic either way!  

You may have notice that I am obsessed enamored with mangoes. For more on this delicious fruit, see the Mango Cheesecake and the Mango with Sticky Rice posts and a fun side salsa, geeez, I guess I am kinda crazy about them. Since it is really hard to describe a flavor so exotic and sweet that it transports you to faraway places where the sun rises red through the early morning haze and you hear a peacock’s cry in the distance. The view takes your breath away as daylight slowly uncovers the scenery, like unrolling an exquisite silk tapestry…

Well, beyond dreaming, this is not going to get much words from me, except it’ only 2 ingredients and a must-try! No added sugar since mangoes are sweet as a dream, and if you use coconut milk, the whole thing is vegan.

Remember to start this the day before you want to eat the super natural mango ice

Ingredients

  • 2 champagne mangoes, peeled, cut into 1/2″ chunks
  • about 3/4 cups coconut milk (or half & half*)

*If using half & half, the mango ice is no longer vegan

Directions

  1. Chop and freeze the mango pieces until rock hard. (best overnight, but minimum of 6 hours seems to work)
  2. Blend the chopped, frozen mango pieces, until they look crumbly, like such…image
  3. With the machine running, slowly pour in coconut milk (or half and half, if going the dairy route) until the mango crumbles start to blend into a homogenous mass.image
  4. Either serve right away (texture is soft serve) or scoop into a small dish or popsicle molds and freeze until solid. Will keep for several weeks, if you can keep your fingers off of it 🙂

image

© 2012 SimpleHealthyHomemade

Mango Sweet Pepper Salsa

image

Chives and how to get rid of use them… Okay, one more… now I think I used almost a cup of chopped chives! I can feel a little better about using things up, I think. This one’s super easy and super yummy! Serve over or with chive burgers and guilt free chive sauce

image

Ingredients

  • 1 mango, peeled and pitted
  • 1/8th of a red bell pepper
  • 2 tablespoons lime juice
  • 3-4 tablespoons chopped chives

Directions

  1. Chop the mango, finely dice the red bell pepper
  2. Toss with 2 tablespoons of fresh lime juice and the chives

image

Copyright © 2012 Simple Healthy Homemade. All rights reserved

Sticky Rice with Mango (Khao Neeow Mamuang)

image

Sticky rice, also called glutinous rice (even though there is absolutely no gluten in rice) is eaten sweet as a snack or desert a lot of places in Thailand, in the northeast of the country it is also served along your meal, unsweetened of course. That rice finds its way into meals from breakfast to desert isn’t surprising for a country where rice is a main staple in the diet, after all the verb ‘to eat’ in Thai is tantamount to ‘to eat rice’

image

For me, nothing says Thailand more than getting a serving of sticky rice with mango from a small place off a street corner somewhere. Vendor’s specialize in this dish and often you will find a line of people when mangoes are in season. That’s what I look for 😉 where the locals eat, it’s always the best. It’s served with sweetened coconut milk and is just delicious! Back home I would order it at Thai restaurants any chance I’d get, but alas it was often unavailable due to seasonal availability and because, unfortunately the restaurant often thought that ‘common’ food was not what should be served to guests in their establishment. 🙁 Imagine my joy when a few years back, I finally figured out that this exotic desert was actually pretty simple and easy enough to make at home. Cheaper and available whenever the lovely grocery store carries yummy mangoes. Win & win! Now I just have to figure out how to make the taro desert I can only get in Thailand…

image

You need to start this several hours before you want to indulge, since the rice is first soaked, then steamed.

Ingredients

  • 1 cup sticky rice*
  • 2-3 ripe mangoes, cut into bite sized pieces
  • 1 can coconut milk (not the light kind)
  • 2-3 tbsp palm sugar

Directions

  • Soak the rice in cool water overnight or at a minimum 4 hours
  • Line a bamboo steamer with cheesecloth and over the sink pour the rice into it to drain. Fold the cheesecloth over the edges so it doesn’t hang down and catch fire (tried that, and no, it doesn’t improve the flavor). Cover with the steamer lid.image
  • Set your bamboo steamer over a pot or wok of boiling water, and steam until the rice is cooked and yields softly to the bite. It will have a tacky consistency, will be slightly shiny and the rice grains will stick together. Takes about 15 minutes.

image

  • In the meantime, gently heat 3/4 of the can of coconut milk in a sauce pan, add the coconut sugar and stir to dissolve.
  • When the rice is done, transfer to a bowl and add the rest of the can of coconut milk, stir to mix. Let stand a couple of minutes until evenly moistened, then serve with mango and sweetened coconut milk.

If I get a good deal on mangoes, like I did this week, (hence the mango cheesecake, and this) I will make a good batch of this and keep the rest in the fridge, to reheat as needed for a quick exotic snack or desert anytime 🙂

*You can get this type of rice at most Asian stores, look for glutinous rice, sticky rice or sweet rice. Regular rice won’t work. It comes in white as well as purple!

If you find you end up making this a lot, you can get yourself an authentic sticky rice steaming contraption at Importfood.com as seen in the picture to the right here. I so far have used my regular (Chinese) bamboo steamer with results that make me happy 🙂

Nomnomnom nom nom…image

Copyright © 2012 Simple Healthy Homemade. All rights reserved

Mango Cheesecake

image

All Mangoes are not created equal.

What I am trying to get at here is, this is a very seasonal dish, not all mangoes will be up for the task at hand, and the kind you need for this cheesecake are not always readily available. First, the common grocery store variety, you know the big green and red ones are NOT going to work. I know. I speak from experience, I had to find out the hard way, as I happily agreed to bring a cheesecake to a good friend’s birthday party. Even blending cannot get rid of the stringy fibers inside that fruit and unless you’re a cat and you don’t mind getting hair between your teeth or you like getting hairballs…(And juuust on the off chance that you are, I bet your dinner guests might not )

The Mighty Mango, an infographic← Just to give you an idea, the Mango varieties out there are in the hundreds, if not thousands. Over 500 varieties are known in India, the largest producer of mango in the world.

Okay, so now that we know what not to do, let’s get to what you do need 😉 There’s a variety called Champagne or Ataulfo Mango, it’s smaller, flatter and oblong in shape and yellow. Indian grocers might be a good source, they also carry a shortcut item I’ll cover a bit later here. If you live in other parts of the world, you might be lucky and get your fingers on any number of varieties of tasty mangoes that would work, but in the US there seems to be not that much choice. So after you got yourself the perfect mango to make the cake, you will need to start the day before you want to eat this, since it requires to get chilled and set in the fridge overnight.

image

Ingredients

Crust:

  • 1 1/2 cups graham cracker crumbs
  • 2 tbsp sugar
  • 3/4 stick unsalted butter, melted

Filling:

  • 3 packets of cream cheese (8oz each), softened and brought to room temperature
  • 1/2 cup sugar*
  • 4 large eggs
  • 1 tsp vanilla extract
  • 2 cups pureed mango (from 4-5 Champagne Mangoes)*

*lazy version/or when the proper mango cannot be found: Get Kesar Mango pulp from an Indian Grocer, omit the sugar in the filling, since the canned Mango pulp is sweetened already. Works great and is less messy. Get 1 mango to decorate the top of the cake

Directions

  • Preheat oven to 325°F.
  • Butter a 9″ Ø Spring form pan.
  • To make the crust,  stir together crumbs and the 2 tbsp sugar. Add the melted butter and mix until evenly moistened. Then press crumb mixture into bottom of prepared pan (only bottom, not up the sides)

imageMake sure you pack the crumb crust down firmly. Push progressively more as the crust starts to hold together

  • Bake until set, 12 minutes, then cool completely
  • For filling, peel and chop mango, then blend until smooth
  • (If you turned off the oven and did this in two steps, preheat the oven to 325°F again.)
  • Mix softened cream cheese, sugar and vanilla in a large bowl until completely creamy and no little chunks remain.
  • Add eggs one at a time, beat well after each addition.
  • Add the mango puree, beat until well blended, then pour filling over crust into springform. Wrap bottom of springform pan in a layer of aluminum foil. Then bake until the edges are golden and puffed and the cake is set (it should only move very slightly when the pan is shaken gently, if the whole thing jiggles, it’s not set yet) about 1 hour and 25 minutes
  • Cool cake one hour. Refrigerate uncovered overnight.
  • Before serving, run a sharp thin knife around the edges of the pan to loosen cake. Remove ring. Transfer cake to serving dish and garnish with additional sliced magoes

Copyright © 2012 Simple Healthy Homemade. All rights reserved

5 minute Snack Cakes

image
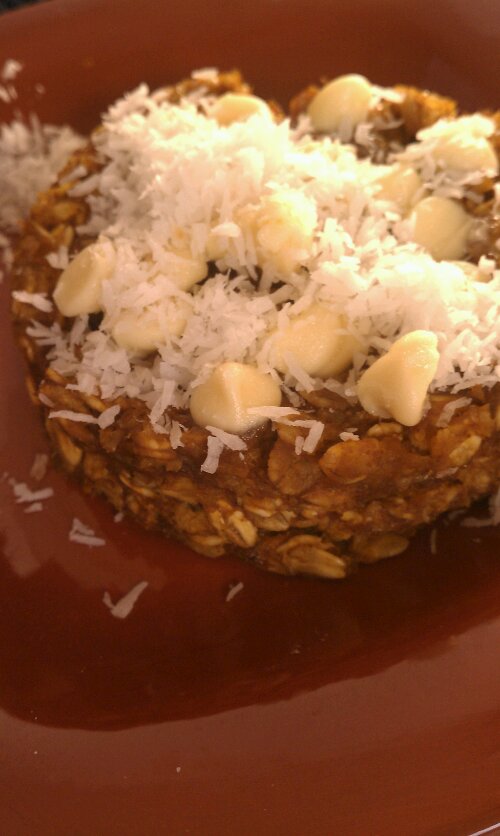
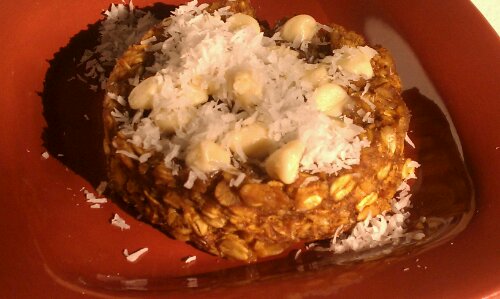
Pumpkin White Chocolate version here shown made with rolled oats…

image
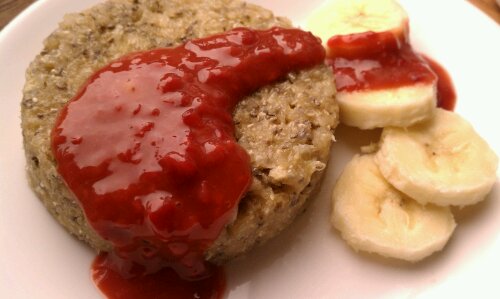
and Tropical Mango version with Raspberry Mango Sauce, shown made with Quinoa   (I know, it looks like Ketchup; Trust me it tastes TOTALLY different!)

For breakfast, as a snack and the best part, it’s utterly delicious cold as well AND when cold, they are portable (minus the garnish)

You can make these with rolled oats or any other flakes such a quinoa or barley flakes. You might have to adjust cooking time a little, but whatever is on hand works for these!

As an easy alternative to getting a mango, peeling and pureeing it, I have used mango baby food. One of my friends turned me onto the idea of using baby food as a flavoring for plain greek yogurt. Check the ingredients, but the brand I use has no added sugar, some flavor varieties use fruit juice to add extra sweetness. Don’t like mango? Make it juts with apple sauce or maybe a pear baby food?

image
Tropical Mango Banana Cake

Ingredients

1/2 cup quinoa or oat flakes,
1/2 ripe banana (1/4 cup)
1/4 cup mango purer (use 1 small glass of mango baby food, 4 oz)
1 tbsp sugar (palm sugar, etc)
(1 tbsp Chia seeds, optional)
1/4 cup rasbperries, frozen or fresh
Mix 1/4 cup of the mango, banana, oats (or quinoa), sugar, and Chiang seeds if using in a bowl
Grease two 8 oz ramekins with some oil on a piece of papertowel
Fill and smooh the top
Microwave on high for 3-5 minutes, depending on the power of your device. It’s done when the top does not look liquid anymore and the sides gently separate from the bowl.
Run a knife around the edge, inverted on a plate and serve with raspberry mango sauce (below), or your favorite topping. Such as maple syrup, almond butter, Apple sauce.
Or eat out of the bowl

For the raspberry mango sauce, heat the raspberries in a small saucepan then stir in the remainder (1/4 cup) of the mango puree

image
Pumpkin White Chocolate Oat Cake

Ingredients

1/2 cup rolled oat or quinoa flakes
1/2 cup pumpkin puree
1 tbsp sugar
1 dash cinnamon
1 dash pumpkin pie spice
1/4 tsp vanilla
White chocolate chips  and coconut for garnish (optional)

Mix all ingredients except chocolate and coconut in a bowl, then divide into two 8oz prepared ramekin forms.
Microwave on high for 2 min 30 sec to 3 minutes.

Run a knife around the edge, inverted on a plate and decorate with white chocolate chips, cover with the just removed ramekin and allow heat to steam the chocolate until soft (you can also re-microwave for 30 seconds), serve with coconut, or your favorite topping.

Copyright © 2011 Simple Healthy Homemade. All rights reserved