Savory Sweet Potato Cheddar Pie

image

Make something different this Thanksgiving!

image

Ingredients

  • 2 Pie crusts  (either home made or store bought)
  • 6 oz cheddar cheese, grated (using the coarse side of a grater)
  • 2 cups chopped onions (from 2 med cooking onions or 1 lg sweet onion)
  • 3/4 lb (about 1 md) sweet potato, grated using the coarse side of your grater
  • 1/4 cup milk or half-and-half
  • 1/4 tsp ground white pepper
  • 1/2 tsp salt
  • 3 eggs, beaten, plus 1 egg for glaze (total 4)

Directions

  1. Preheat oven to 425 F
  2. In a large skillet, heat 2 table spoons oil over medium, add the chopped onions and cook, stirring occasionally, until softened but not browned, about 8 minutes.
  3. Add the grated sweet potato, cook stirring to mix contents for an additional 5 minutes, to soften the sweet potatoes slightly. Remove from heat, let cool slightly
  4. In a bowl, combine the grated cheese, 3 eggs, milk and spices, stirring with a fork to combine.
  5. Combine the cooled sweet potato mixture with the cheese, eggs and milk mix, using a fork to stir until mixed evenly.
  6. Place crust in a deep 9″ pie pan, fill with sweet potato cheddar mix. Beat remaining egg, brush edges with egg wash, then place second pie crust on top, crimp edges to seal, cut 6-8 steam vents into the top crust and brush with remaining egg wash.
  7. Bake at 425 for 40 min or until the top is golden brown and filling is set.
  8. Serve warm or at room temperature with a large green salad or as part of your Thanksgiving dinner.

image

Copyright © 2011 Simple Healthy Homemade. All rights reserved

5 minute Snack Cakes

image
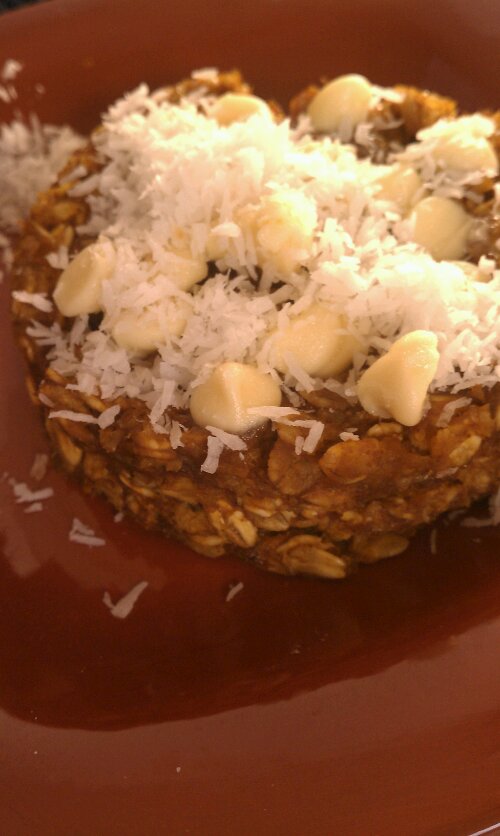
Pumpkin White Chocolate version here shown made with rolled oats…

imageand Tropical Mango version with Raspberry Mango Sauce, shown made with Quinoa   (I know, it looks like Ketchup; Trust me it tastes TOTALLY different!)

For breakfast, as a snack and the best part, it’s utterly delicious cold as well AND when cold, they are portable (minus the garnish)

You can make these with rolled oats or any other flakes such a quinoa or barley flakes. You might have to adjust cooking time a little, but whatever is on hand works for these!

As an easy alternative to getting a mango, peeling and pureeing it, I have used mango baby food. One of my friends turned me onto the idea of using baby food as a flavoring for plain greek yogurt. Check the ingredients, but the brand I use has no added sugar, some flavor varieties use fruit juice to add extra sweetness. Don’t like mango? Make it juts with apple sauce or maybe a pear baby food?

image
Tropical Mango Banana Cake

Ingredients

1/2 cup quinoa or oat flakes,
1/2 ripe banana (1/4 cup)
1/4 cup mango purer (use 1 small glass of mango baby food, 4 oz)
1 tbsp sugar (palm sugar, etc)
(1 tbsp Chia seeds, optional)
1/4 cup rasbperries, frozen or fresh
Mix 1/4 cup of the mango, banana, oats (or quinoa), sugar, and Chiang seeds if using in a bowl
Grease two 8 oz ramekins with some oil on a piece of papertowel
Fill and smooh the top
Microwave on high for 3-5 minutes, depending on the power of your device. It’s done when the top does not look liquid anymore and the sides gently separate from the bowl.
Run a knife around the edge, inverted on a plate and serve with raspberry mango sauce (below), or your favorite topping. Such as maple syrup, almond butter, Apple sauce.
Or eat out of the bowl

For the raspberry mango sauce, heat the raspberries in a small saucepan then stir in the remainder (1/4 cup) of the mango puree

image
Pumpkin White Chocolate Oat Cake

Ingredients

1/2 cup rolled oat or quinoa flakes
1/2 cup pumpkin puree
1 tbsp sugar
1 dash cinnamon
1 dash pumpkin pie spice
1/4 tsp vanilla
White chocolate chips  and coconut for garnish (optional)

Mix all ingredients except chocolate and coconut in a bowl, then divide into two 8oz prepared ramekin forms.
Microwave on high for 2 min 30 sec to 3 minutes.

Run a knife around the edge, inverted on a plate and decorate with white chocolate chips, cover with the just removed ramekin and allow heat to steam the chocolate until soft (you can also re-microwave for 30 seconds), serve with coconut, or your favorite topping.

Copyright © 2011 Simple Healthy Homemade. All rights reserved

Creamy Mushroom Soup

image

One thing that I really love about the colder months is soup! I could live on soup. If all I could eat for the rest of my days is soup, I’d be happy. Ok, maybe something crunchy to go on the side…

Soups are warming when it is cold, easy to make, easy to reheat and mostly pretty cheap to make as well. A lot of times when it is cold, I do not drink as much water as I should and as I do in the summer, I am just not as thirsty and I think soup has that added benefit of liquid 😉

To achieve the creamy consistency without added fat, I used some sweet potato, but since the mushrooms are braised and caramelized first to intensify their flavor, you can’t tell that there is anything except mushroomy goodness in the soup!

image…shown here with Garlic Thyme Sweet Potato Straws

Ingredients

  • 12 oz crimini or baby bella mushrooms, cleaned and sliced
  • 1 md shallot, minced finely
  • 1 md sweet potato, peeled and chopped
  • 2 tbsp Olive oil
  • Salt

Directions

  1. In a heavy pot, heat oil over medium. Add the diced shallot and cook until softened and browned.
  2. Add the sliced mushrooms, sprinkle with salt, stir, cover and turn heat to medium low. Cook for 15 -20 minutes, stirring every couple of minutes. The mushrooms will start to release their juices and cook.
  3. Uncover and cook, stirring occasionally until the liquid is reduced and the mushrooms start to caramelize and brown in bits, about 5 minutes.
  4. Add water and the sweet potato to the pot. Add enough water to cover the mushrooms and sweet potato by 1″ to 1 1/2″ (remember, you can always add more water, trying to boil it off, is much harder). Add 1/2 tsp salt (or to taste) and bring to a boil.
  5. Cook until the sweet potato is very soft.
  6. Remove from the heat, let cool slightly, then using a handheld blender/immersion blender (if you don’t have one, you NEED one, seriously), puree the soup. (alternately you could use your food processor/blender and blend the soup in batches, being careful not to overfill the container)

Serve with Garlic Thyme Sweet Potato Straws, croutons or a slice of hearty home made bread.

If you really want your soup to be super creamy, you could add 1/2 cup half-and-half (or coconut milk to keep it vegan).

Makes 4-6 servings

image

Copyright © 2011 Simple Healthy Homemade. All rights reserved

Sausage and White Beans ‘Slow Cooker Friday’ Stew

image

As the colder and shorter days arrive, and I know some of you are starting to get ready for the holidays, I tend to be drawn to soups and slow cooked dishes. I shop and eat with the seasons. Many of you already realize that in the summer months you are drawn to fresh crisp salads, raw vegetables and fruits and but now you naturally gravitate towards warming dishes as the temperatures start coming down. This is all part of the seasonal gear shift getting into the colder months. Nature hibernates and rests. So sit and sip some tea in front of the fireplace and read a good book, take your time, slow down and rest.

Eating fresh and local means to be in sync with nature more. Eating with the seasons takes into account that fruits and vegetables are at their peak of nutritional value when ripe, and the longer they have to travel until they get to you, the sooner (before ripeness) they have to be picked. Once the produce is picked and disconnected from the plant or root that it grew on, it is as nutritious as it is ever going to be, it can’t ‘make’ any more nutritional value. At the same time, the clock starts ticking and its nutritional value diminishes over time. For those of us on the East Coast, just think about how long it takes a truck to get here from California… Seasonal eating involves eating more locally grown and harvested produce. It has to travel less far to get to a store near you = it’s nutritional content is higher, therefore better for you. Yes, that means in the winter, strawberries and cantaloupe are not going to be as good or as good for you (high in nutritional content), as when they are in season. However apples, pears and oranges are at their peak.

image
Even though I love to cook, and admittedly spend a lot of time in the kitchen, on Fridays specially now that it gets dark so early, I like to take a break. I know many of you understand this feeling, after a long week, you just want to relax. That’s where this series of recipes comes in: Slow Cooker Friday! Simple and easy to prepare, pile it all in the slow cooker and forget about it until you come home to wonderfully flavorful dinner and a kitchen that smells like you just spent hours laboring over the stove!

To get the best dried beans, make sure they are not too old. In addition to loosing nutritional value, they will take longer and longer to cook. The best places for (fresh) dried beans I find are stores with a large Latino or Indian customer base. Remember, you will need to start this recipe the night before, as you are going to be soaking the beans overnight. I have also added barley to this recipe, since beans and grains together make up a complete protein, good to know if you are vegetarian!

image
Easy and it is also an end of the month kinda recipe, using sausage, and dried beans to maximize your $$!

Note: I use a 2 qt round slow cooker, which usually makes enough for 2 hungry people, plus a round of leftover for as many.

Ingredients

  • 1/2 to 1 lb sausage of your choice (I used a spicy garlic turkey sausage this time, but sweet or hot italian sausage works great too!)
  • 1 cup baby lima beans (about 1/2 lb)
  • 1/4 cup barley
  • 2 celery ribs, chopped
  • 2 carrots, chopped
  • 1 tsp salt
  • 1 sprig of rosemary or 1/2 tsp dried
  • 1 bay leaf

Directions

  1. Soak the beans the night before in a bowl with cold water.
  2. Chop the carrots and celery ribs and place in the slow cooker insert. Then drain the beans and layer over top the vegetables. Add the bay leaf and rosemary and sprinkle with salt.
  3. In a skillet brown the sausage by cooking it without turning for about 5 minutes per side. Place in the slow cooker on top of the veggies.
  4. Fill the slow cooker insert with water to just cover the ingredients by 1/2″, turn your cooker on low and cook for 5 hours.
  5. Come home to a wonderful dinner 🙂

Serves 4

Copyright © 2011 Simple Healthy Homemade. All rights reserved

Cranberry Oat Scones

image

Guess what I found in my freezer? Cranberries! …and I remember putting them in there too. At the very tail end of winter, they were on sale, and I can be such a sucker for sales when it involves things that can and will be eaten. As for those cranberries, well, apparently they did not. So since they endured summer somewhere in the recesses of my freezer, I decided it was time to finally turn them into something, well, more than just frozen cranberry taking up space in the freezer.

image
For those of us that enjoy an occasional baked treat, scones are the perfect marriage between sweet and substantial. These scones are just a touch sweet, and even though full of oats and other goodness, have a surprisingly light texture. Having made the discovery before that finding a good scone, isn’t as simple of  task as it seems. I remember the taste bud disappointment from biting into what I expected to be slightly crunchy on the outside and soft crumb in the center,  just to bite into a brick, a extra sweet brick 🙁 Not a fan, no can’t say. So with this recipe I made sure that would not happen. Try them still warm for breakfast or reheat in the toaster oven.

image
Ingredients

  • 2 cups all-purpose flour
  • 1/4 cup sugar (sucanat, coconut sugar or turbinado/raw)
  • 2 1/2 tsp baking powder
  • 1 tsp baking soda
  • 1/2 tsp salt
  • 7 tbsp butter, cold, cut into cubes
  • 2/3 cup + 2 tbsp rolled oats
  • 1 cup fresh or frozen cranberries
  • 1 cup + 2 tbsp milk (dairy or almond) or half & half
  • 1/2 tsp vanilla
  • 3 tbsp turbinado (raw) sugar for garnish

Directions

  1. Combine dry ingredients (flour through salt)
  2. Cut butter into flour mixture using a pastry cutter or 2 knifes, or pulse in the blender until coarse meal forms
  3. Add 2/3 cup oats and stir to mix
  4. Add cranberries, then add the milk and vanilla
  5. The resulting dough is going to be quite sticky. Using a measuring cup, drop by the 1/4 cup onto a parchment lined cookie sheet, spacing about 2″ apart. (I made them in the 1/2 cup size before, but they get really big)
  6. Sprinkle with the remaining 2 tbsp oats and 3 tbsp sugar
  7. Bake at 350F for 30 minutes or until skewer inserted from the side comes out clean

Makes about 12 scones, (or 6-7 big ones )

image

Copyright © 2011 Simple Healthy Homemade. All rights reserved

Chicken Liver Paté

image

I find it interesting how so many foods that back in the day were most likely eaten because people would not waste any part of an animal, are now either gourmet foods or at least they sell for a lot more at the store than you should reasonably be asking for them. Let’s take chicken wings for example. Definitely a ‘what are we going to do with this’ kinda food, but go check the price of wings on the meat section… As for me, I am not a fan of liver at all, in fact you could chase me with calf liver, but I love good Paté or Mousee Trufée, goose duck, chicken, it’s all good. But as with so many things, it is generally either out of budget or there are too many ingredients in it I am trying to avoid, or both, like in this case. I for one think that a chicken liver paté, does not need any pork in it, thank you very much. Or soy, or hydrolyzed plant protein or whey or even egg. Paté is, I know, not everybody’s thing, but this spread is fantastic, even if you go with the basic version and omit the truffle paste. No need to like liver, I don’t.

image
When I first looked into making this, I had looked through my old recipe books, and all I found was seriously time consuming recipes, where you bake stuff in a water bath in the oven. Who has time for that, I ask? So off I went into the kitchen and after a little tinkering, came up with a version, maybe not 100 % traditional in its preparation and technique, but tasty? check, and quick? check. So if you like some good gourmet food on occasion, you’ll be happy to know that it is easy to make and very much every day affordable (although you might want to curb that habit just a bit, liver paté is a pretty rich food)

image

Ingredients

  • 1/4 cup butter
  • 8 oz chicken liver
  • 3/4 tsp green pepper corns
  • 3/4 tsp black pepper corns
  • 1 tsp salt
  • 1 small clove garlic
  • 2 tbsp Cognac or Calvados*
  • (optional: 1 tsp truffle paste )

* Calvados is a French spirit distilled from apples, basically an apple brandy from a specific region

Directions

  1. Melt all but 1 tbsp of the butter over low heat in a heavy sauté pan.
  2. Add the peppercorns and turn heat up to medium.
  3. Chop the chicken livers into pieces and add to the pan, stirring occasionally. Cook until browned on the outside, but still slightly pink inside (unless you really like your meat well done, then go for it, cook it more)
  4. With a fork, pick out the cooked liver pieces, let cool slightly then put them into your food processor.
  5. Add 1 tbsp Cognac or Calvados to the pan and scrape up any browned bits, then remove most of the peppercorns from the pan and set aside.
  6. Crush the garlic into the same pan, roasting until golden, then tip the butter and garlic into the food processor with the chicken livers.
  7. Pulse a few times to combine, then add the remaining 1 tbsp Cognac or Calvados, and the salt, blend until smooth
  8. Add the truffle paste (if using) and the pepercorns and pulse a few times to combine
  9. Melt the remaining butter. Spread chicken liver mix from blender into several small ramekin forms and pour the molten butter over top.
  10. Refrigerate for at least a half hour before serving. Whatever you are not going to eat within 3-4 days, freeze for later.

Copyright © 2011 Simple Healthy Homemade. All rights reserved

Pumpkin Apricot White Chocolate Muffins

image

What to do if you were blinded by the fact that all pumpkins were the same price, but one person can only eat so much pumpkin and still you picked the BIGGEST one at the farmers marked? My solution was this: You make another pumpkin muffin! This one with dried apricots and some white chocolate chips. They are not super sweet, therefore the white chocolate chips make for a nice addition. Enjoy!

image

Ingredients

  • 1 1/2 cups all purpose flour
  • 1/2 cup whole wheat flour
  • 1/2 cup sugar ( sucanat, coconut sugar or regular)
  • 1 1/2  tsp baking powder
  • 1/2 tsp baking soda
  • 1/2 tsp cinnamon
  •  1/2 cup chopped dried apricots
  • 1/2 cup white chocolate chips
  • 2 tbsp oil
  • 2 tbsp to 1/4 cup water
  • 1 cup pumpkin puree
  • 1 tsp vanilla extract

Directions

  1. Preheat oven to 400
  2. Combine dry ingredients up to cinnamon, add the chopped apricots by sprinkling them over the flour mixture so they don’t clump together
  3. Add the chocolate chips
  4. Stir in pumpkin puree, vanilla, oil and water. Stir until just combined and you can see  no more floury pieces of apricot
  5. Drop by the tablespoon full into prepared muffin tin
  6. Bake 15-20 minutes or until toothpick inserted into a muffin comes out clean

image

Copyright © 2011 Simple Healthy Homemade. All rights reserved

Poor Man’s Bouillabaisse

image

Bouillabaisse… Flavor of the sun and the ocean

Scent of thyme and wild fennel on the dry summer breeze, arid, sun drenched slopes, rugged coastline and a wild blue sea…

Marseille, Roucas Blanc District

File:Calanques2.jpg Calanque (Inlet) near Marseille

Anytime I think of Bouillabaisse, Marseille the birth place of this oh so quintessential Mediterranean soup comes to mind. Port city with its mix of cultures, where some streets have more of a Middle Eastern than French feel, fresh seafood abounds and where people’s lives are outside as much as in during the summer months. But I am getting lost in reveries here…

Marseille

Unless you live close to the sea, and have ready access to reasonably priced fresh seafood of all sorts, Bouillabaisse is not usually going to be an everyday meal. At least for me, the variety of seafood generally used in a soup like that, definitely moves it into the ‘special occasion’ category. However, a couple of quick changes and substitutions, et voilà, now I can get my flavor fix even on days when my budget is slim!

image

Ingredients

  • 3 tbsp olive oil
  • 1 3/4 cups c finely diced onions (from about 2 medium)
  • 1 fennel bulb, trimmed greens reserved, thinly sliced
  • 2 cloves of garlic
  • 1 (14oz) can diced tomatoes, in juice*
  • 2 cups chicken or vegetable broth (or water, 1 tsp salt and Rapunzel bouillon cube)
  • 2 sprigs thyme
  • 1 can water packed sardines
  • 1 can solid tuna,
  • (**optional: leftover cooked fish filets such as tilapia and salmon,  mussels, can of clams, calamari, scallops)

* or equivalent in frozen tomatoes, plus 2 tbsp tomato paste

** Note that you can make this soup at any level of ‘poor’ or ‘not so poor’ by either adding or substituting various fish and seafood items. Starting with a can of Tuna, and a can of Sardines, or adding crab meat, clams, mussels, whole shrimp and/or cooked fish filet such as salmon, trout or tilapia.

Directions

  1. In a stock pot, heat oil on medium, then add the onions, cook about 5 minutes until beginning to soften
  2. Add fennel and garlic, sprinkle with salt and pepper to taste, adjusting heat if ingredients start to brown to quickly. Cook about 15 minutes until tender, stirring often.
  3. Add broth, tomatoes and thyme and bring to a boil. Reduce heat and simmer, covered, until vegetables are very tender, about 15 minutes.
  4. Add a can of water packed sardines, chopped and/or solid tuna broken into bits, (or crabmeat and clams, or leftover cooked fish filers such as salmon or any other seafood that strikes your fancy and is in your budget)

Seriously, if the sea and the sun had a love child, it would be this  🙂

Copyright © 2011 Simple Healthy Homemade. All rights reserved

Shallot Red Wine Finishing Butter

image

My Dad used to buy herb butter for grilled meats, it was intensely flavored, fresh herbs, some garlic and salt and would melt wonderfully when placed onto a chicken breast or steak, hot off the coals. In my quest to recreate that elusive aroma from the past, I have come up with quite a range of flavoring and finishing butters (some good, some nah, I will spare you those). This one works well on chicken, roasted potatoes or salmon. And I am sure once you make it, you will find some other creative uses for it as well. What is your favorite way of using finishing butters?

Ingredients

  • 1/2 cup plus 1 tbsp butter, softened
  • 2 md Shallots, finely minced (about 1/4 to 1/3 cup)
  • 1/2 cup red wine (such as a Cabernet Sauv or a Côte du Rhône, don’t use anything sweet)
  • 1 tsp chopped fresh parsley
  • 1/2 tsp salt

Directions

  1. In a small sauce pan, melt the table spoon of butter, add the shallots and cook over low until softened, not browned.
  2. Add the wine and salt, simmer until the liquid is reduced by more than half and starts to become thick and sauce like. Add the parsley, and cook for a further 2 minutes over low. Remove from heat, let cool slightly ( it can still be somewhat warm, but not hot for the next step)
  3. Add the saucepan content into the softened butter and stir to incorporate completely. Your goal is not melt the butter, but mix the flavorings into the softened, malleable butter.
  4. Press into silicon ice cube molds and freeze until firm or chill in the fridge for a little, then form into 1 1/2″ to 2″ rolls on wax paper, refrigerate until completely firm and slice into portion sized disks, store in the freezer.

Note: If you pre portion the flavoring butter, you will only need to remove what you use from the fridge and don’t have to worry about the rest warming up and re freezing each time you use it.

Note: In these pictures, I reduced the wine too much (the phone rang 🙁 ) and the shallots absorbed all of it, and the parsley became all but invisible . The flavor is great, but it looks a tad different when you do it right, will post some updated pictures next time I make this. Usually the whole butter takes on the color

image
Home made, no nothing artificial (that’s why we store it in the freezer, no preservatives that make it stay ‘good’ for a ridiculous amount of time.

Copyright © 2011 Simple Healthy Homemade. All rights reserved

Roasted pumpkin seeds

image

Had I only tried this sooner. I always thought that it would be way cumbersome to clean the seeds after you scoop them out of the pumpkin, that I would just throw it all on the compost. Well, this year, I (finally) git smart and decided to try roasting pumpkin seeds. Now in my defense, since I am not from here, pumpkins are not the main focus of our entire fall season, so I really did not grow up wit the pumpkin mania that hits the US every year 😉
To make cleaning them easier, scoop the seeds out first, using a spoon. Then remove all the stringy stuff. Place he seeds in a collander and with the water running, using your dish brush, clean and swirl the seeds.
Let them drip a little then spread on paper towels and allow to dry. Season with ingredients below and spread in a single layer on a (aluminium foil lined for easy clean up) baking sheet. Roast in a preheated oven at 325 for 20-25 minutes or until the seeds pop! (Haha, anyone remember ‘ Music & Lyrics‘ ? ), stir after 10 minutes.

But to make your life even easier, I tried it out in the toaster oven, and it works there too, yay for easy and quick! What can I say, I am a busy girl and the toaster oven has served as my version of a microwave lately.

Below recipes are for about  1 cup seeds, use less oil, if your pumpkin had less seeds or you’re using squash seeds. Unless of course, you had a zombie squash, then things are different…

Plain:

  • toss pumpkin seeds with 1-3 tsp oil (depending on amount and size of seeds)
  • 1/2 tsp salt

Spiced:

  • toss pumpkin seeds with 1-3 tsp basting oil
  • 1/2 tsp salt
  • 1/2 tsp paprika, sprinkle on 5 minutes before done roasting*
  • (if you’re really into spice, use cayenne instead)

* Note: If attempting in the toaster oven, put the paprika on AFTER the seeds are roasted

image

Sorry no more toasted seed pictures, the seeds are too tasty to wait and do you know how hard it is to make beige or brown little seeds look pretty in a picture? 🙂

Copyright © 2011 Simple Healthy Homemade. All rights reserved.