Chocolate Pear Overnight Pudding

image

I have been wanting something sweet, but not too sweet. Chocolate-y, but not actually chocolate, difficult right? Since I have drastically reduced my (refined) sugar intake, my taste buds realize just how much added sugar there is in everything. It’s just like salt, once you’re used to using less, you can taste its overabundance in everything. And as for sugar, many items I just plain don’t find enjoyable, no flavor just extremely SWEET. I remember how after every visit back home, I cannot eat commercially made salad dressing for a couple of months, they are sweet and it just tastes funny to me (I get vinegar & oil )

But back to the program: Make this the night before, enjoy as a healthy breakfast cold out of the fridge or heat in the microwave.

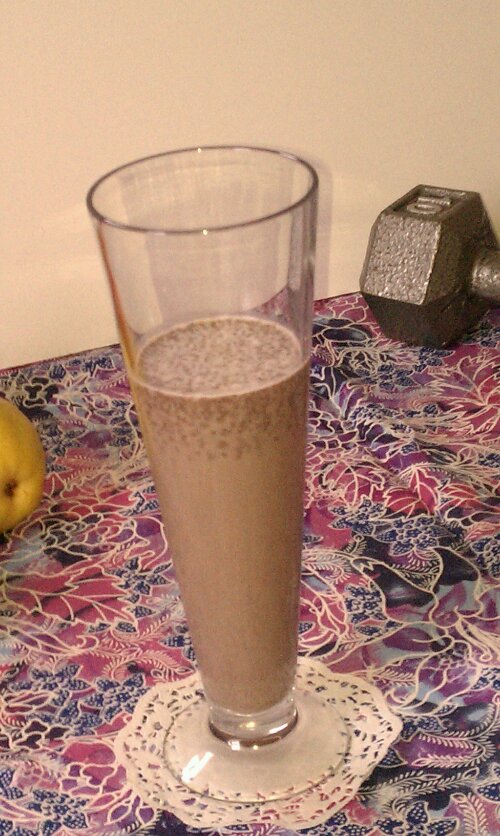
Since I started making these, I have been absolutely addicted to them, the pictures don’t do the taste justice. It’s a perfect healthy treat, desert or breakfast, YES all three ;). I’ll have some versions and variations coming up for you soon.

Yay, chocolate pudding any time!!

image

Inspired by Leanne’s Banana Cherry Pudding

Ingredients:

  • 1 ripe pear, diced
  • 1/2 cup almond milk (or regular milk)
  • 2 tbsp flax seed, roughly crushed with mortar and pestle
  • 2 tbsp chia seed
  • 2 tbsp ground almond (aka almond flour)
  • 1 1/2 to 2 tsp cocoa powder
  • 1 tbsp honey or maple syrup (optional, if you like things a bit sweeter)

Directions

  1. Combine chopped pear, cocoa, and almond milk in a glass dish or bowl, stir until cocoa is incorporated
  2. Using your handheld blender, blend until smooth
  3. Add flax seed, chia seed and ground almond, stir, cover and refrigerate overnight
  4. In the morning, eat chilled out of the fridge, or heat in the microwave for about 30 to 45 seconds

Copyright © 2011 Simple Healthy Homemade. All rights reserved

Corn Free Baking Powder


If you are allergic or sensitive to corn, it can be quite a hassle eliminating all products containing corn or corn derivatives. It juts so seem since it is a heavily subsidized crop, it’s in everything or made into something that is in everything. Baby Carrots for example, are processed using citric acid, in this country made mostly from corn (ever notice how they are softer than regular carrots? Ever wonder why?) Somehow, besides adding substances that corn sensitive people react to, it seem to alter the GI (Glycemic Index, how fast carbohydrates in a particular food elevate your blood sugar), my guess is by breaking down some of the plant tissue by ‘cooking’ it with citric acid. I have heard from several diabetics that their blood sugar goes through the roof after snacking on baby carrots, but regular carrots are fine. Stay away from them.

But I’m going off on a tangent here. When I first started paying attention to the ‘corn in everything’ issue (my boss at work with is allergic to corn) I realized that baking powder is made with cornstarch, who would have thought?

So after some research, I have found this recipe that you can make yourself if you can’t find a corn free baking powder recipe (there are a couple out there I hear, but pretty hard to find)

Here’s what you need:

  • Baking Soda
  • Cream of Tartar
  • Rice, Tapioca or Potato starch (depending on quantity you’re planning on making)

From my research, I found many similar recipes and have compiled the info here for y’all. Basically you need an alkaline ingredient and an acid salt, and an inert ingredient to keep the two from reacting until you want them too.

More technical stuff, if you care, if not skip to the recipe, I won’t be offended 😉

Cream of tartar is the common name for potassium hydrogen tartrate. Grapes are the only significant natural source of tartaric acid, and cream of tartar is obtained from sediment produced in the process of making wine. Cream of tartar is obtained when tartaric acid is half neutralized with potassium hydroxide, transforming it into a salt. Sodium bicarbonate reacts with the potassium hydrogen tartrate,  causing the release of carbon dioxide (the bubbles that make the cake rise)

I even found the chemical reaction, but let’s skip that and get on with the program.

And as per my research, if you don’t add the inert starch, it will become rock solid (haven’t tried that, if you do let me know if it really does, I am infinitely curious)

For just a small quantity:

If your recipe calls for:

  • 1 tsp baking powder:         use 1/4 tsp baking soda, 1/2 tsp cream of tartar
  • 1 1/2 tsp baking powder:  use 3/8 tsp baking soda, 3/4 tsp cream of tartar

Or to keep on hand:

  • 1/4 cup cram of tartar
  • 2 tbsp baking soda
  • 2 tbsp potato, rice or tapioca starch

Store just like you would for store bought baking powder.

Copyright © 2011 Simple Healthy Homemade. All rights reserved

Wild Rice Stuffing with Plums and Chestnuts

image

Happy Thanksgiving everyone!

you’re safe, you’re not on my menu today

I am thankful for so many things in my life 🙂 I like to take a moment or two every day to count my blessings, I feel it sets the tone for the day and sometimes even lifts a gloomy mood. Today I am thankful for my friends, my family back home in Switzerland, my adopted family in NY (Nelson’s fam), my health, being in a position to inspire others to lead a healthier life, my ability to create great food and share it with others, the roof over my head, having a job, and living in a free country (huge).

What are you thankful for?

Since it was just going to be me this year, I made a roast chicken, not a turkey for ‘Thanks Giving’. With my work schedule, (yesss! Boot Camp Friday morning at 5:30 am, while the rest of you still wait in line for those elusive deals at the department store) going somewhere other than my own kitchen, just wasn’t going to happen this year. I am glad to say that Nelson’s Dad is doing somewhat better though and there’s hope he might get released from the hospital back to the nursing home soon.

So having all sunny day to myself, I slept in (yay, don’t get to do that very often), had a leisurely breakfast and a not so traditional Thanks Giving feast!

On the menu:

  • Roast chicken with wild rice stuffing (I had gotten an organic, pastured chicken at the Fairgrounds Farmers Market) enough for 2 people, or one plus leftovers 😉
  • Roasted vegetables (carrots, asparagus, parsnips and onions, lazily used as a roasting rack for the chicken= adds flavor to the chicken, and the chicken in turn adds flavor to the veggies, added plus: no extra pan to clean)

(I ended up skipping these two, got too tired from the back splash tiling adventure, and realized, I’d have food for a week)

  • Fresh homemade cranberry sauce
  • Streuseled sweet potato casserole

The advantages of having a Thanksgiving by yourself? I ate the skin off the chicken while carving it, it was soooo good, like the best, crispiest skin ever. Ha! try explaining that to dinner guests “Well, it’s this new thing at the grocery store… you know, ‘skinless chicken’ , muuuch healthier.”

imageIt’s kinda hard to take a pretty picture of stuffing, it’s just so … brown

Wild Rice Stuffing:

makes 3 cups, enough to stuff 1 chicken, plus some extra you can cook on the side. If using for a turkey, triple or quadruple the recipe.

  • 1/4 cup wild rice, uncooked (see note)
  • 1/2 cup chopped roasted or cooked chestnuts
  • 1/4 cup chopped dried plums
  • 2 slices of toast bread,(I used Ezekiel brand) toasted, torn into rough pieces
  • 1 tsp fresh thyme (or 1/2 tsp dried)
  • 2 tsp fresh parsley
  • 1/2 tsp salt

Note: alternately use either a store bought wild rice mix, the wild rice will be pre-cooked and the process will take less time or use 1 cup of leftover cooked wild rice

Directions

  1. In a saucepan, bring 2 cups of water and the wild rice to a boil, reduce the heat and simmer  covered until cooked through about 45 minutes
  2. Don’t drain (unless the wild rice is still swimming in water, then drain off excess) add the chopped chestnuts and chopped plums, spices and salt, cover and let stand for about 20 minutes to soften.
  3. Stir in bread crumbs, mix with a fork
  4. Stuff the chicken cavity, roast the chicken, then remove the stuffing and serve alongside the bird (or add chicken stock until desired moistness is reached and reheat in the oven.

I was really debating adding cranberries to the stuffing, for a all in one kinda deal, maybe next time…

image
Copyright © 2011 Simple Healthy Homemade. All rights reserved

Egg Nog Ice Cream

image


All year I wait for Egg Nog Season 🙂 Who doesn’t love that thick, sweet, delicious beverage that comes with Christmas time and disappears from the shelves before it gets warmer again? I think the question really is, what was first Egg Nog or Winter?  *grin* And it appears I am not the only one that feels that way, it seems pretty much every culture in the western world has their own recipe for this (western dairy drinking cultures, that is). From Egg Nog in the english speaking world, to “Eierlikör” in german, and the italian “Zabaglione” isn’t that different either, even Rocky  drank it (hmm okay so he skipped the booze, skipped the sugar…he just wasn’t as refined as the rest of us) The basic recipe is always along the lines of eggs, cream, sugar, spices and some sort of liquor, from Rum to Cognac to Madeira to Brandy to Vermouth, anything goes it seems.

And while you are most certainly welcome to make your own Egg Nog (knock yourself out, just be sure to use very fresh eggs), this one is definitely for the lazy. But thanks to that I am now (finally) the proud owner of a tiled back splash in my kitchen. Yaha, all by myself. So I think it’s okay to take some tasty shortcuts every so often, specially if you are eating right most of the time, a treat here and there is not going to do any harm. And since Wawa has such great ready-made Egg Nog in their dairy department, I don’t really feel too bad about this desert. Use your favorite brand, I tried some fancier and pricier ones, but prefer the taste of Wawa’s Egg Nog.

Did you know:

  • Egg Nog in Canadian french is called: Lait de Poule (Chicken Milk)
  • The term Egg Nog is though to come from ‘egg and grog’ a colonial term for the drink made with rum and eggs

image
 

You need:

  • Egg Nog (I would get about 1 qt, drink the rest 🙂 )
  •  2 tbsp dark Rum or Cognac for every 2 cups of Egg Nog, optional
  • Special equipment needed: Ice Cream maker

Depending on the size of your ice cream maker, you can make less or more of this. My little machine holds about 2 1/2 cups. You want to be careful not to fill the freezer bowl too much, since the volume will increase as the ingredients freeze. Also make sure you have the freezer canister frozen for at least 24 hours (or whatever it says in your user manual) unless you use a manual one, in which case I believe you need ice cubes and salt.

Directions

  1. Turn on your ice cream maker, pour 2 1/2 cups of chilled Egg Nog into the freezer canister, add rum, if using.
  2. Churn until thick and creamy, (in mine, this process takes about 10 to 15 minutes) turn off and transfer ice cream to freezer proof container to harden completely.
  3. Freeze at least overnight before serving.
  4. When you’re ready to serve, place ice cream in the fridge for a little to soften a bit so it can be scooped better

Serve with Caramellinis or cookie of choice or coffee or Kahlua coffee liquor or more egg nog 🙂

Copyright © 2011 Simple Healthy Homemade. All rights reserved

Caramellini

image

They are super quick, I made them this morning, before going to work. And besides quick, they are also the easiest cookies ever, with a delightful caramel flavor! With Thanksgiving ringing in the holiday season for shoppers and this coming Sunday being the First Advent or people in Europe ( the 4 Sundays leading up to Christmas) I think I can start getting in to my traditional seasonal cookies here soon. This one is not a classic Christmas cookie in Switzerland, (there are many others I would not make any other time of year) but I have been adding this one, because it’s caramel flavor and slight crunch are too good to resist.

Can’t wait to try them tomorrow as a topper for my Egg Nog Ice Cream! It will be sooooo awesome!
image

Ingredients

  • 1 stick butter, unsalted, softened
  • 3/4 cups raw sugar
  • 1 tbsp honey or molasses
  • 1 egg
  • 1 pinch salt
  • 1 tsp vanilla extract
  • 1 tsp baking powder
  • 1 1/2 cups flour

Directions

  1. Preheat oven to 425F (220C)
  2. Mix first 6 ingredients in a bowl.
  3. Mix Flour and baking powder, then add to the bow, stir until combined.
  4. On wax paper, form into a 2″-3″ diameter roll, chill in the fridge or freezer until firm
  5. Using a sharp knife, cut into 1/8″ thick slices and place on a parchment paper lined cookie sheet. (if the cookies deform when cutting, it’s not chilled enough)
  6. Bake 6-8 minutes in the upper third of the preheated oven, until slightly brown on the bottom and edges.
  7. Cool on rack

Makes about 2 standard cookie sheets full

image

Copyright © 2011 Simple Healthy Homemade. All rights reserved

Cocoa Post Workout Recovery Drink

image

I am not a big believer in supplements, protein powders and bars, thinking that most anything you need, you can get from proper nutrition. I resort to recovery drinks and an occasional protein bar, if I really don’t have the time to have something real. And since many of  y clients always ask me what to take, and what to do, I decided to share this post workout recovery drink with you. Can you add a scoop of protein powder? If you like, sure. But the mainstay of this is the D-Ribose. Ribose is a special carbohydrate that is used in the body for energy production in the cells as it plays a critical role in the production of adenosine triphosphate (ATP). ATP is the energy unit that fuels our cells and bodies. It  provides energy needed for short burst of power movements during physical activity, is needed to help our muscles squeeze, heart pump, brains think and countless actions that we don’t consciously control.

Ribose provides a raw material to facilitate ATP production. Many doctors believe that at least part of the problem with chronic illnesses, such as fibromyalgia and chronic fatigue, is a lack of energy production to keep the organs, like the muscles and brain, happy. If the muscles have adequate energy available = less stiffness and cramping. This is similar to having enough money in the bank. If the money is gone, and the roof springs a major leak, no funds are available to fix it. In the end, the whole house is affected. Similarly, if the muscles are undernourished and energy production is down, the muscles will tighten, causing pain. Tight muscles can often pinch nerves, causing greater pain and starting a vicious cycle. One of the main goals of ribose supplementation is to improve symptoms by aiding energy production.

As I said, I generally don’t supplement, but after an extra hard workout, with a full day still ahead of me, I might help myself out a bit by having one of these!

Ingredients

  • 1 cup milk (almond milk is fine, if you are vegan)
  • 1/2 tsp D-Ribose powder
  • 1 tbsp almond butter
  • 1 tsp cocoa powder
  • (optional 2 tsp chia seed, for added protein and fiber, but will turn this in to bubble tea)

Directions

Put everything (except chia seed) into a blender or shaker and mix well. Add chia seed, if using and enjoy!

Copyright © 2011 Simple Healthy Homemade. All rights reserved

Turkey Provençal ‘Slow Cooker Friday’

image

Isn’t it time for another lazy day recipe? Well, maybe not lazy, but for when you’re tired (or you know you’re going to be tired) and just want something simple, that waits for you when you come how after a long day at work. Lately it’s already dark by the time you get out of work and I am feeling tired. I still think we were supposed to hibernate, just like bears and those other smart creatures (I tell you , they got it right), but asides from daylight saving time, there isn’t a whole lot of support of this idea 😉 (Just imagine though, wouldn’t it be great? fireplace, bowl of soup and long naps all winter… 🙂

Well since that is not happening anytime soon, I will keep making tasty slow cooker recipes for my Fridays. This one has a bit of international flair, olives, tomatoes and rosemary, evoking summer sun and abundance while the white wine rounds out the flavors.

image

Ingredients

  • 1 turkey leg, boneless
  • 4 plum tomatoes chopped (or one 14oz can)
  • 2 celery ribs, chopped (including leaves)
  • 1 cup diced winter squash (such as butternut, kabocha, buttercup)
  • 1/4 cup black or green olives, pitted
  • 1/2 cup dry white wine
  • 1 tsp mustard
  • 1/2 tsp rosemary leaves
  • 1 tbsp basting oil
  • 1/2 small onion, diced
  • 2 tbsp flour
  • 1 bay leaf
Note: If you got enough turkey in your near future, you could also make this with pork, like a piece of pork shoulder

Directions

  1. Dice tomatoes (or open can, if using canned) place in the bottom of the slow cooker insert, add diced celery and bay leaf.
  2. Place turkey atop the vegetables, adding the olives, mustard, rosemary and basting oil over top
  3. In a zip top bag, toss the diced onions with the flour until coated, then cook in a skillet over medium heat until softened and lightly browned. Add wine and scrape up any browned bits, stirring to dissolve the flour. Pour over turkey in slow cooker insert.
  4. Add the pieces of winter squash (if you are going to be home, you can also add these half way through cooking, if you prefer to have the squash hold it’s shape)
  5. Cook on low for 6-8 hours (after 6 the meat will still hold its form, after 8 it will fall apart)
  6. Serve by itself or with polenta or rice as a side

If the tomatoes are very juicy and the dish seems to watery, mix 1 tbsp flour with about 3 tablespoons cold water and slowly stir into the slow cooker dish, cooking until the sauce thickens.

image
Copyright © 2011 Simple Healthy Homemade. All rights reserved

Savory Sweet Potato Cheddar Pie

image

Make something different this Thanksgiving!

image

Ingredients

  • 2 Pie crusts  (either home made or store bought)
  • 6 oz cheddar cheese, grated (using the coarse side of a grater)
  • 2 cups chopped onions (from 2 med cooking onions or 1 lg sweet onion)
  • 3/4 lb (about 1 md) sweet potato, grated using the coarse side of your grater
  • 1/4 cup milk or half-and-half
  • 1/4 tsp ground white pepper
  • 1/2 tsp salt
  • 3 eggs, beaten, plus 1 egg for glaze (total 4)

Directions

  1. Preheat oven to 425 F
  2. In a large skillet, heat 2 table spoons oil over medium, add the chopped onions and cook, stirring occasionally, until softened but not browned, about 8 minutes.
  3. Add the grated sweet potato, cook stirring to mix contents for an additional 5 minutes, to soften the sweet potatoes slightly. Remove from heat, let cool slightly
  4. In a bowl, combine the grated cheese, 3 eggs, milk and spices, stirring with a fork to combine.
  5. Combine the cooled sweet potato mixture with the cheese, eggs and milk mix, using a fork to stir until mixed evenly.
  6. Place crust in a deep 9″ pie pan, fill with sweet potato cheddar mix. Beat remaining egg, brush edges with egg wash, then place second pie crust on top, crimp edges to seal, cut 6-8 steam vents into the top crust and brush with remaining egg wash.
  7. Bake at 425 for 40 min or until the top is golden brown and filling is set.
  8. Serve warm or at room temperature with a large green salad or as part of your Thanksgiving dinner.

image

Copyright © 2011 Simple Healthy Homemade. All rights reserved

5 minute Snack Cakes

image
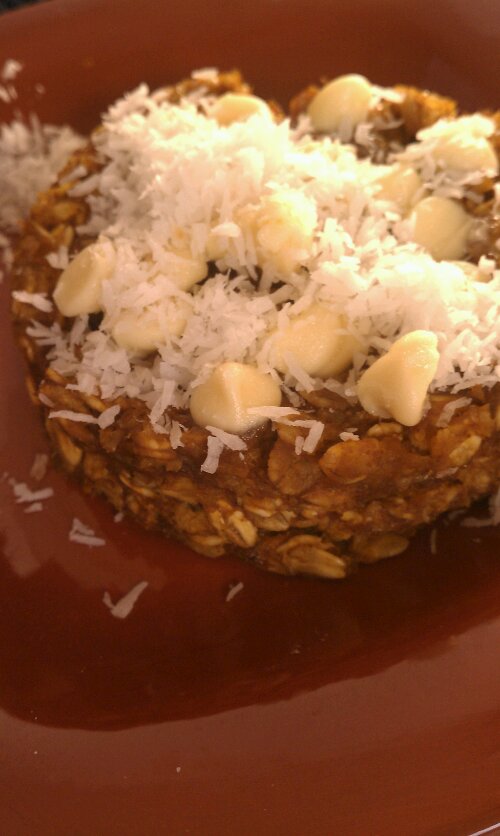
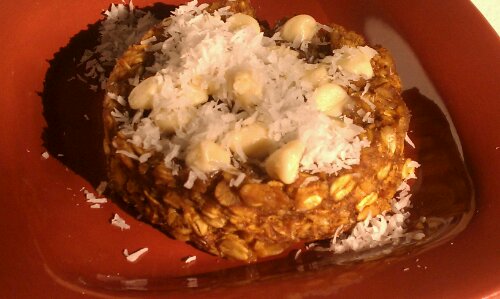
Pumpkin White Chocolate version here shown made with rolled oats…

image
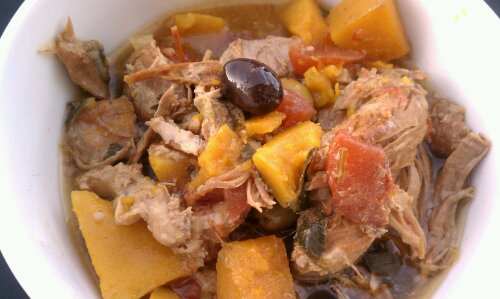
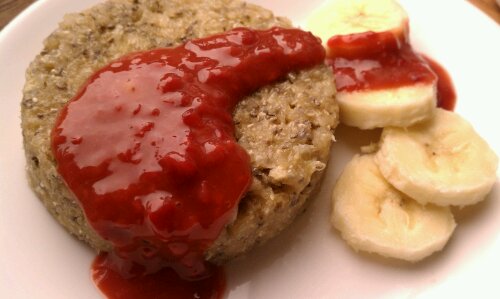
and Tropical Mango version with Raspberry Mango Sauce, shown made with Quinoa   (I know, it looks like Ketchup; Trust me it tastes TOTALLY different!)

For breakfast, as a snack and the best part, it’s utterly delicious cold as well AND when cold, they are portable (minus the garnish)

You can make these with rolled oats or any other flakes such a quinoa or barley flakes. You might have to adjust cooking time a little, but whatever is on hand works for these!

As an easy alternative to getting a mango, peeling and pureeing it, I have used mango baby food. One of my friends turned me onto the idea of using baby food as a flavoring for plain greek yogurt. Check the ingredients, but the brand I use has no added sugar, some flavor varieties use fruit juice to add extra sweetness. Don’t like mango? Make it juts with apple sauce or maybe a pear baby food?

image
Tropical Mango Banana Cake

Ingredients

1/2 cup quinoa or oat flakes,
1/2 ripe banana (1/4 cup)
1/4 cup mango purer (use 1 small glass of mango baby food, 4 oz)
1 tbsp sugar (palm sugar, etc)
(1 tbsp Chia seeds, optional)
1/4 cup rasbperries, frozen or fresh
Mix 1/4 cup of the mango, banana, oats (or quinoa), sugar, and Chiang seeds if using in a bowl
Grease two 8 oz ramekins with some oil on a piece of papertowel
Fill and smooh the top
Microwave on high for 3-5 minutes, depending on the power of your device. It’s done when the top does not look liquid anymore and the sides gently separate from the bowl.
Run a knife around the edge, inverted on a plate and serve with raspberry mango sauce (below), or your favorite topping. Such as maple syrup, almond butter, Apple sauce.
Or eat out of the bowl

For the raspberry mango sauce, heat the raspberries in a small saucepan then stir in the remainder (1/4 cup) of the mango puree

image
Pumpkin White Chocolate Oat Cake

Ingredients

1/2 cup rolled oat or quinoa flakes
1/2 cup pumpkin puree
1 tbsp sugar
1 dash cinnamon
1 dash pumpkin pie spice
1/4 tsp vanilla
White chocolate chips  and coconut for garnish (optional)

Mix all ingredients except chocolate and coconut in a bowl, then divide into two 8oz prepared ramekin forms.
Microwave on high for 2 min 30 sec to 3 minutes.

Run a knife around the edge, inverted on a plate and decorate with white chocolate chips, cover with the just removed ramekin and allow heat to steam the chocolate until soft (you can also re-microwave for 30 seconds), serve with coconut, or your favorite topping.

Copyright © 2011 Simple Healthy Homemade. All rights reserved

Creamy Mushroom Soup

image

One thing that I really love about the colder months is soup! I could live on soup. If all I could eat for the rest of my days is soup, I’d be happy. Ok, maybe something crunchy to go on the side…

Soups are warming when it is cold, easy to make, easy to reheat and mostly pretty cheap to make as well. A lot of times when it is cold, I do not drink as much water as I should and as I do in the summer, I am just not as thirsty and I think soup has that added benefit of liquid 😉

To achieve the creamy consistency without added fat, I used some sweet potato, but since the mushrooms are braised and caramelized first to intensify their flavor, you can’t tell that there is anything except mushroomy goodness in the soup!

image…shown here with Garlic Thyme Sweet Potato Straws

Ingredients

  • 12 oz crimini or baby bella mushrooms, cleaned and sliced
  • 1 md shallot, minced finely
  • 1 md sweet potato, peeled and chopped
  • 2 tbsp Olive oil
  • Salt

Directions

  1. In a heavy pot, heat oil over medium. Add the diced shallot and cook until softened and browned.
  2. Add the sliced mushrooms, sprinkle with salt, stir, cover and turn heat to medium low. Cook for 15 -20 minutes, stirring every couple of minutes. The mushrooms will start to release their juices and cook.
  3. Uncover and cook, stirring occasionally until the liquid is reduced and the mushrooms start to caramelize and brown in bits, about 5 minutes.
  4. Add water and the sweet potato to the pot. Add enough water to cover the mushrooms and sweet potato by 1″ to 1 1/2″ (remember, you can always add more water, trying to boil it off, is much harder). Add 1/2 tsp salt (or to taste) and bring to a boil.
  5. Cook until the sweet potato is very soft.
  6. Remove from the heat, let cool slightly, then using a handheld blender/immersion blender (if you don’t have one, you NEED one, seriously), puree the soup. (alternately you could use your food processor/blender and blend the soup in batches, being careful not to overfill the container)

Serve with Garlic Thyme Sweet Potato Straws, croutons or a slice of hearty home made bread.

If you really want your soup to be super creamy, you could add 1/2 cup half-and-half (or coconut milk to keep it vegan).

Makes 4-6 servings

image

Copyright © 2011 Simple Healthy Homemade. All rights reserved