Banana ‘Fritters’

imageOr what to so with those ‘ugly’ bananas…

image

Maybe I am just weird but I tend to believe that others out there do not like mushy bananas either. You know, the ones that sit in the fruit basket forgotten like the proverbial step child until, without warning suddenly they turn brown, in a matter of hours it seems. Alright, admittedly I am exaggerating, but I just really do not like them even when they start getting the little brown spots. At least not for eating as a banana. No, at that point I will resort to using them up in all manners of ways that I came up with over the years (I don’t like to waste and throw them out after all) from smoothies to sweetener in baked goods and muffins, to ice cream topping, I have tried most anything. How about you guys, do you have any favorite banana-use recipes?

image

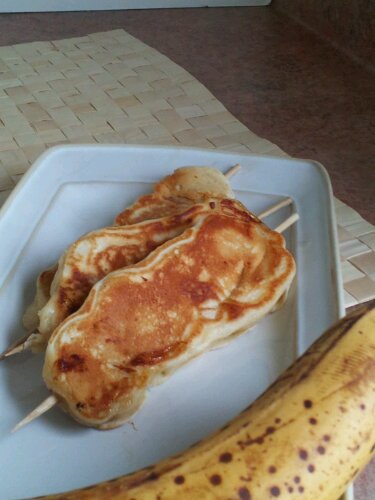
This would be great as a snack or an indulgent breakfast: Pancake batter banana ‘fritters’. Since the bananas get soft and extra sweet as they cook, no need for syrup. Haven’t tried this, but some chocolate spread, like Nutella might be good…

Ingredients

  • You need a few ugly bananas (very ripe)*
  • leftover pancake batter (or for a simple recipe go here)
  • short Bamboo skewers (to fit in the pan)

* one banana makes about three skewers on average.

Directions

  1. Slice bananas into rounds, about 1/2″ thick and thread 3 to 4 pieces onto short bamboo skewers (if you only have the long ones, cut them in half before or it won’t fit in the pan) You want to thread them on like you are making a flat snow man, if that makes sense (so they lie flat)
  2. Heat a skillet over medium high, when it’s hot, add a bit of oil and swirl to coat
  3. Put the pancake batter in a shallow dish and dip, first one side then the other, of the banana skewer until the slices are completely coated in batter.
  4. Cook in the preheated pan until set and slightly browned, then turn over and cook on the second side. Depending on the size of your pan, you can cook 3 to 4 skewers at a time. Enjoy hot!

Because of the skewer they are easy to pick up and eat!
image© 2012 SimpleHealthyHomemade

Better-for-you Gluten Free Brownies

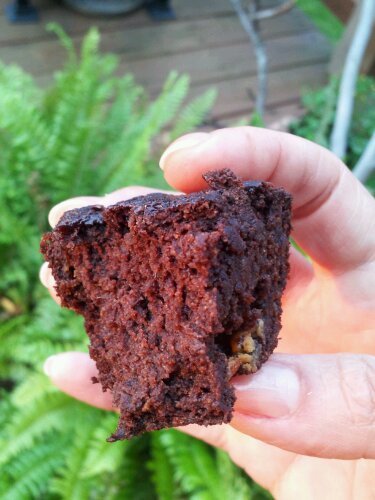
imagebrownie and sunshine 🙂

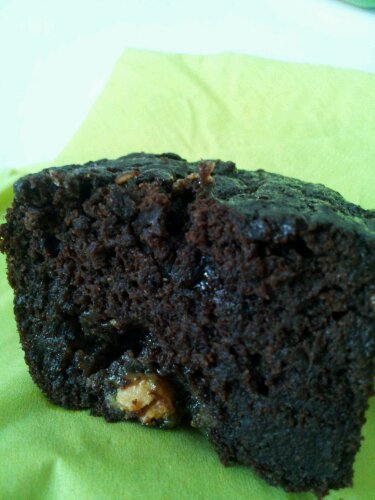
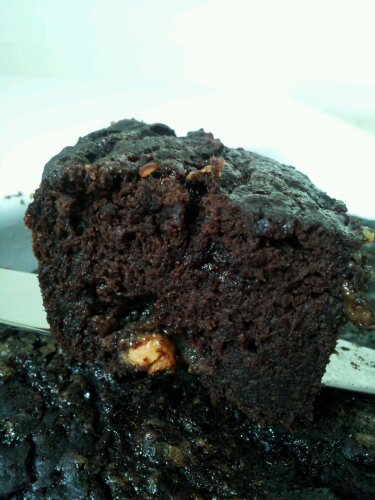
imagebrownie, no sunshine. Oh yeah, the thing in the middle there? A overly cooked white chocolate chip…

I wanted to do something a bit special, celebratory for our 1 year anniversary and how better to celebrate than with something sweet and chocolatey? Yes, it is true, today my little blog turns one!

Therefore today’s recipe had to be a little special, so ‘common’ brownies were not going to cut it and since I don’t like things that are very sweet anyway, a standard recipe would not have been my thing. I have often felt that there are too many products and recipes out there that are, for example, gluten free, but now there are 18 eggs in them, or they are low fat but have twice as much sugar. So I challenged myself, why not combine some of the restrictions people face into one recipe without adding extra “bad stuff”?  A lot of folks have issues digesting gluten + diabetics should be real careful eating sugar (and I don’t like lots of it, + it’s really not good for you) + most people watch the amount of fat they consume: I was setting out with quite a lofty goal. Can’t be done, you say? Well, I just think I might have nailed it! Best of all, if you just happen to be vegan, you can make this too 🙂

And since the weather looked a good deal like fall today I added another good for you ingredient: Pumpkin, to make it moist (also packs vitamin E, Vitamin A, Vitamin C, Vitamin K, Iron, Manganese and is a good source of fiber) and chick pea flour to keep it gluten free. I did have a whole big bag of chickpea flour, from who knows what recipe originally that I just rediscovered last week in making Socca.

By the way, get Besan from the Indian grocer, much cheaper than other healthfood store brands. As a matter of fact, anything you can buy at an ethnic store will be cheaper. If it is considered a specialty or an exotic item the grocery store will a) buy less of it, making it more expensive, and b) they can get away with charging premium dollar for ‘delicacies’ and ‘gourmet food’.For example, if you have a Asian grocer nearby, get your shallots there, also rice and rice noodles, dried or fresh will be a lot cheaper, so is Tofu, if you have that on your meal plan. Indian grocers usually carry various beans, peas and lentils, spices and almonds are usually less as well. And of course they have Besan, which is the chick pea flour we just talked about. But since it is not sold as a ‘gluten free’ flour… fraction of the cost!

But I digress, back to today’s topic: The gluten free, virtually fat free, low sugar, vegan anniversary BROWNIES! Yes, I am a tad exited about them, can you tell? 😉

image

Ingredients

  • 3 ripe bananas
  • 1 cup pumpkin puree
  • 1/2 cup + 2 tablespoons cocoa powder, unsweetened
  • 1/2 cup brown rice syrup
  • 1/2 cup millet flour
  • 1/2 cup chick pea flour/besan
  • 1/2 cup sorghum flour
  • 1/2 tsp xanthan gum
  • 1 tsp baking powder
  • 1/2 tsp baking soda
  • 1 cup mixed chocolate chips (dairy free, or it’s no longer vegan) or 1/2 nuts 1/2 chips
  • 3/4 cups water
  • 1/4 cup raw sugar (turbinado)

image

Directions

  1. Preheat oven to 350ºF
  2. Lightly grease a 9″ x 13″ baking dish (lasagna dish) with coconut oil
  3. In a large bowl mash the bananas and mix in the pumpkin puree, then stir in the cocoa powder.
  4. Add the brown rice syrup and the water and stir until well mixed
  5. Combine the three flours, the xanthan gum, baking powder and baking soda
  6. Add the flours and 2 tablespoons of the raw sugar to the cocoa mixture and stir until well blended, then add the chocolate chips or nuts.
  7. Spread into the prepared baking dish. Sprinkle top with remaining sugar
  8. Bake in the middle of the pre heated oven for 45-50 minutes or until tester inserted in the center comes out clean.
  9. Let cool completely before cutting, or you’ll have fudge brownies

image

© 2012 SimpleHealthyHomemade

Bircher Müesli

image

You may know versions of it as ‘musli ‘, but this cereal based dish has its roots firmly planted in Switzerland. Dr. Bircher decided, at a time when everything was cooked due to germs, that there were benefits to real and raw foods.

Per my research, for those who care to dive a bit deeper: Dr. Maximilian Oskar Bircher-Benner  (or in german) (August 22, 1867, Aarau – January 24, 1939) was a Swiss physician and a pioneer in nutritional research. At his sanatorium in Zürich, a balanced diet of raw vegetables and fruit was used as a means to heal patients, contrary to the beliefs commonly held at the end of the 19th century.image

Bircher-Benner changed the eating habits of the late 19th century. He believed eating raw and whole foods such as fruit, vegetables, grains and nuts was healthier than cooked, he also rejected the use of refined products such as white flour and white sugar. His ideas may not all have been correct, he believed solar energy stored in food (in a not strictly defined or explained way) was what made them better and not the quantity or quality of nutrients. His theory of life was based on harmony between people and nature. Some of his ideas originated from observing the daily life of shepherds in the Swiss Alps, who lived a simple and healthy life.

image

By now this recipe has as many variations as there are days in a week, multiplied by the number of people in Switzerland (my Dad says we Swiss people are born with the Bircher Müesli recipe attached to the umbilical cord 😉 this is my basic recipe and it’s variations.


Walking though the aisles in a grocery store, you will find commercially made musli mixes, including everything from dried fruit to chocolate chips. This is the commercially available basic Swiss version I found at the store the other day!


image


It’s quite a popular food these days, it seems to me. But here I am taking you back to the roots, the origins of where this all came from. (using my important voice)


And let’s face it, why waste money on prepackaged stuff when you can make a better and healthier-for-you version easily at home? No cooking required and easy to make, this recipe is very versatile and adapts through the seasons depending on your fridge or gardens content of fruits and berries.

A great summer meal, I love it anytime of day, but in Switzerland, it is not considered a breakfast food. It is eaten as alight lunch or dinner with a buttered slice of crusty bread. (We love our bread) …And sometimes some whipped cream on top…

image

I always put it up to my Dad being a foreigner, him never being super exited about Bircher Müesli, but now I am wondering if it is a guy thing. Let me explain. The other morning over breakfast, Nelson kept talking about ‘having some ‘Beatle Music’ and pssssshhhh totally over my ehad. Well, I figured it out Beatle Music = Bircher Müesli, hahaha. Of course I thought he meant ‘beetle music’ and was utterly confused, imagining a line of beetles tapping their little feet (or legs?) rhythmically, so sadly I was left with the impression that maybe he did not like my ‘Beatle Music’ turns out he does, it’s after all juts a better version of oatmeal, cold and with fruit!

image

Ingredients

  • 1/2 cup rolled oats
  • 1/2 cup rolled wheat, barley, millet, and/or rye flakes (you can use all oats instead)
  • 2 tablespoons sliced almonds
  • 2 tablespoons raisins
  • 2 cups milk
  • 1 yogurt (optional)
  • 1 apple
  • 1 banana
  • 1 1/2 cup mixed fruits and berries (plums, peaches, apples, pears, oranges, grapes, strawberries or even frozen blueberries, the possibilities are endless)

optional: you can also add chopped roasted hazelnuts, pieces of dried fruit or banana)

image

Directions

  1. In a large bowl, combine the cereal flakes (or just the rolled oats), raisins, almonds and hazelnuts and 1 1/2 cups of the milk.
  2. Grate an apple on the large holes of a grater, stir to combine.
  3. Cover and let stand 1 hour or until the oats are softened.
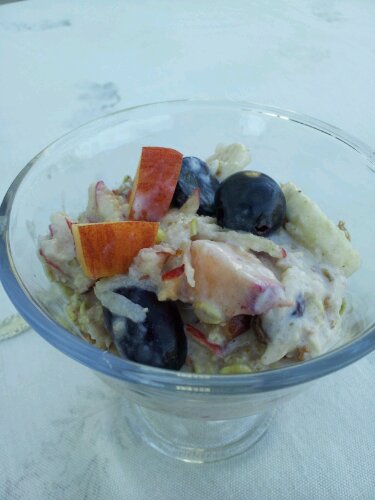
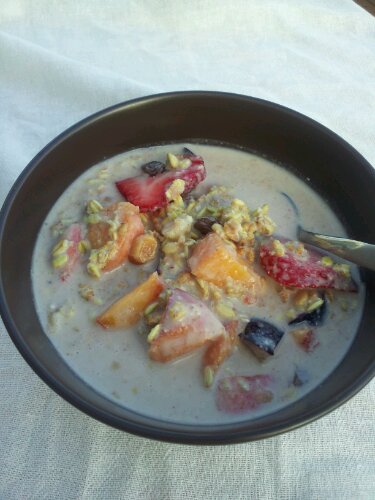
  4. Slice the banana, chop the peach and the berries (used in the picture are peach, plum, strawberry, banana and apple) or whatever other fruit you have on hand.
  5. Uncover the bowl, stir in the yogurt (if using) and the rest of the milk (You can add more if it looks dry) then add all the fruit, gently mix so one person doesn’t get all the fruit and serve.
  6. Store any leftovers in the fridge and eat within 2 or 3 days

image

Healthy Breakfast!

image

© 2012 SimpleHealthyHomemade

Healthy Camping Pt1

So many think that when you take food along or cook outside your kitchen that forcibly the quality of your food has to go down, as in unhealthy and bad for you. But there is really no reason for that, whatsoever. As proven by or most recent camping trip and many hikes before that (I made Vietnamese summer rolls on time, put the peanut sauce right into them), you can definitely ‘rough it’ without sacrificing on the food side of things.

This time we only had a few days so it was sadly much shorter than we would have liked. But hey, that was in June (yes, sometimes that’s how long it takes me to get a post completed) and now it’s only August, and even if you are cold easily, camping season extends till at least the end of September.
We set off on a blistering hot weekend where temps here in the Lehigh Valley topped out just short of the triple digit mark, drove through several fronts of thunderstorm and heavy downpour ( there was an inch of water in my kayak by the time we got there! ) up to the Catskills which proved to be cooler and therefore much more agreeable with everybody. Oh and the best part? It did not rain one drop once we got there!

We went with friends and the cooking duties were split evenly: we were responsible for one dinner and one breakfast.

But first, here are some general guidelines for meal planning, away from you regular kitchen:
Use seasonal produce for fresh and healthy meals. Most produce can be kept at room temperature for a period of time ( unless it’s berries, which we did put on ice in the cooler) Things like cucumbers, tomatoes, potatoes, bananas, apples, grapefruit, oranges, watermelon , cantaloupe , red bell pepper, onions or green beans, even kale if wrapped in a moistened paper towel before put in a plastic bag will happily keep a while. And if you end up having more space than expected, you can always store them on top of the rest in your cooler. ( don’t refrigerate your tomatoes or bananas)

Breakfast:

Mix up the dry ingredients for pancakes and store in a zip top bag, all you need to add is the liquid stuff (a liquid like milk, oil and eggs, if you are making them with eggs)

Omelettes are always a good choice, easy and versatile that can be made with pretty much anything added.
Desert: doesn’t have to be roasted marshmallow or smores either, branch out. Try fruit salad with watermelon or mixed berries with yogurt the first couple of nights. Yogurt keeps fairly well, it’s fermented. Folks used to turn milk into cheese and yogurt in order for it to keep before there was no refrigeration. Keep it cool, but you can also bring it along for a picnic on a hike, no need to panic about it. When you get down to the end of your supplies and the more delicate things are gone, make these chocolate bananas over the fire. Or make a fruit compote topped with granola for crunch!

Dinner choices beyond the hot dog and chips: Pieces of meat are healthier than mystery meat in a casing. That said this time we did have chicken sausage the one night. Carl at the farmers market is a sausage genius and I know for a fact that his chicken sausage is made from chicken breast he sells right there alongside the sausage made from it. Steak, pork chops and chicken breast can all be easily grilled but need to be kept cold on ice in your cooler until you are ready for them. In my experience, meat, like ground beef, sausage or steak. (Oh yes, I said we did it in style, didn’t I?) keeps well right on the ice or bottom of the cooler, submerged in the water. To make doubly sure and make it keep longer, freeze it solid at home, then place in a zip top bag to keep it from getting ‘watered’ or in one of those Rubbermaid ‘take alongs’ (storage containers), they seal the water out and keep the meat inside cool and dry. You can cook chicken breast pieces in an aluminium foil pack with vegetables and seasonings included. Potatoes do well cooked that way, too, although they do take a while, sweet potato seems quicker.

Oh and remember, aluminium foil is your friend, as is a good set of grill thongs and a mitt 😉

imageWild Blue berries along the hiking route

Serves 4

Breakfast:

We decided to go with an omelette with spinach and feta for sustenance and flavor. I cooked these over a camp stove, not the open fire. And it ended up being easier to make one at a time since the pan i have, makes it hard to put more than 3 eggs on at a clip and still have it cook through. Wasn’t a problem at all since other really only takes minutes to cook.

Basic Spinach Omelette:

  • 12 eggs (3 per person)
  • Spinach ( about 2 hand full per person)
  • 4 oz Feta Cheese, cut into 1/2″ cubes

Variations on a theme:

  • Use Swiss Chard or Kale, instead of Spinach
  • Add some deli ham, or prosciutto for additional flavor
  • Use cheddar, Fontina or Swiss instead of Feta

imagewith Fontina and Prosciutto

This one’s with Swiss Chard from the garden & Ham

Desert:

© 2012 SimpleHealthyHomemade

Grilled bananas with chocolate

image

 And for an easy camping desert, bananas with chocolate:

  • Cut in to the top of the banana, making sure not to cut through.
  • Use 1 row of fine quality semi dark or milk chocolate (Lindt is excellent) and push the single pieces into the top of the banana
  • Wrap in a rectangle of aluminium foil: Place banana in the center, flip the foil up on both sides and fold down twice, then fold in ends
  • Place on a hot grill until bananas are tender and yield gently to the touch, about 10 to 15 minutes (depends on the heat of the embers)
  • Carefully open packets, and eat with a spoon. Careful very hot!!

Waking up to sunlight…

image…and some lovely scenery from the kayak cockpit!

image

Looking up through the rocks at where we will end up, after the uphill hike. And of course I had brought some Trail mix Granola Bars!

imageSunset Rock, overlooking North South Lake. You can’t see it from here, (I know this from the map) out of sight, off to the left there, are the Kaaterskill Falls, the lake water drains over the rocks into a fantastic multi level waterfall
© 2012 SimpleHealthyHomemade

Banana Chocolate Raw Pudding

image

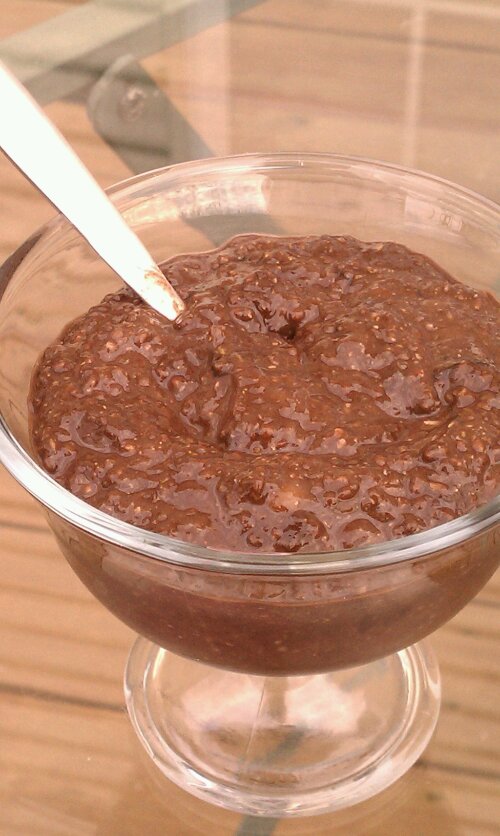
There are days when chocolate is the only thing that will do. And today I had one of those days. To make up for it, there is nothing like treating yourself with something yummy, delicious even decadent! Yay, treat time! Decision made, but good things don’t have to be bad for you. And yes, you can have this even if you don’t eat sugar. The only sweetness comes from the bananas! Let them get nice and ripe  over-ripe brown, and you’re in business! Easy to make and guilt free too 🙂

image

Ingredients

  • 2 over ripe bananas, mashed with a fork
  • about 1/2 cup milk (dairy or almond)
  • 2 tbsp cocoa powder
  • 2 tbsp ground flax seeds
  • 2 tbsp chia seeds

Directions

  1. Mash the banana with a fork
  2. Add the milk, stir until well blended
  3. Add the cocoa powder, flax seed and chia seed and stir it all together until mixed
  4. Refrigerate overnight

image
Copyright © 2012 Simple Healthy Homemade. All rights reserved

Raspberry White Chocolate Oatmeal Quick ‘Cake’

image

This chewy little treat can be eaten as much as a quick breakfast, on those gray and cold days, where the snooze button is your BFF and your feet are deadly afraid of the cold floor outside the cozy covers. You could even try to tell yourself it is all healthy by serving it topped with some greek yogurt. Or you can just face the facts that everyone needs a treat sometime, morning or night, and enjoy it as a quick desert or snack bake anytime you need a ‘cheer me up’.  Very similar to the Snack Bakes shown here, it uses a ripe banana for sweetness, but I am splurging and adding white chocolate chips and some frozen raspberries that miraculously turned up in my freezer today 🙂 Isn’t is great when you find things you didn’t know you had? Like the $20 bill in the pocket of your winter coat when you take it out of ‘summernation’ (yes, I just made that up) in October

imageBecause heart-shaped things make me happy 🙂
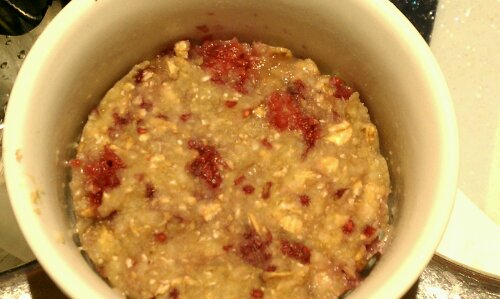
Makes 2

Ingredients

  • 1/2 really ripe banana
  • 1/2 cup rolled oats*
  • 2 tbsp white chocolate chips,
  • 2 tbsp frozen raspberries * you can also use rolled quinoa or other rolled grains
  1. Grease 2 ramekins or other heat proof little bowls/forms
  2. In a larger bowl, mash the ripe banana with a fork, until it doesn’t look dry anymore.
  3.  Mix in the rolled oats, then add the chocolate chips and the frozen raspberries.
  4.  Divide among prepared ramekins, and microwave for 3-4 minutes, depending on the power of your device, until the top looks no longer moist and the sides pull away from the ramekin.  Like in the picture below. (Mine usually take 3 minutes)
  5. Let cool down before quickly eating all enjoying, whoever you are trying to hide these from will smell them anyway 😉

image

You can flip it over on a plate to serve or just eat with a spoon right out of the bowl after you have given it enough time to cool down a bit.

My ‘sweet seduction’ speed cooking contribution is ready in under 10 minutes! That should be an incentive to enjoy life and have desert, even after a long day or week!

Blog-Event LXXV - Speed-Cooking (Einsendeschluss 15. März 2012)

This is my contribution to a blog event over in the German speaking world of food blogs. Every submission has to be prepared in under 30 minutes, or the time it takes the average pizza delivery to get to you. Here is the whole list of all the goodies that can be made super quick! This sweet treat is ultra quick, and I am hoping it will sweeten up many a tired after work meal!

Nachwort auf Deutsch: Leider hatte ich keine Zeit den ganzen Beitrag auf Deutsch zu = Übersetzen, hier nur kurz: Oatmeal/Rolled Oats= Haferflocken, eine ‘1/2 cup/ ist etwa ein Deciliter, white chocolate chips= weisse Schokolade, in kleine Stücke oder Würfelchen geschnitten. Ich hoffe das diese kleine süsse Verführung hier manchen langen Tag erträglicher macht, wenigstens im Rückblick oder aber da man schlauerweise geplant hat, von wegen transportfähig und so 🙂 Einfach einpacken und mitnehmen!

Copyright © 2012 Simple Healthy Homemade. All rights reserved

Chocolate Coconut Rounds

image

There they were, sitting timid in the middle of my fruit basket trying to pretend they were not there. Overripe bananas, like the poor step child in an old fairy tale. Since I only like to eat them when they are still a little green, these brown things in my fruit basket are definitely not my thing. But over time I have come up with various ways to use them up, using them for smoothies, pancakes or baking, after all they do provide a great source of natural sweetness without adding sugar. And yes, I have to admit before I did that, sometimes they would get thrown out. So that’s why they are scared. But fret not bananas, I have something yummy to turn you into 🙂

What do you do with your past prime bananas? Any favorites?

This recipe is grain and sugar free, the only sweetness comes from the banana, so it isn’t your traditional cookie, if you like things sweet, you might want to add 1/4 cup of sugar or some stevia. These are more like a piece of 70% cocoa chocolate, flavorful but just subtly sweet.

image
And without further ado here is how to make them:

Ingredients

  • 1/2 cup egg whites (about 4)
  • 2 ripe bananas, mashed with a fork
  • 2 cups unsweetened, shredded coconut
  • 1 cup ground almonds, natural not blanched
  • 6 tbsp cocoa powder
  • 1/4 cup almond butter (cashew butter or other nut butter would work as well)
  • 1 tbsp coconut oil
  • 1 tbsp coconut flour
  • 1 dash of salt

Directions

  1. Combine shredded coconut, ground almonds, coconut flour and cocoa powder in a bowl
  2. Add the mashed bananas
  3. Melt the coconut oil together with the almond butter and stir until smooth, add to bowl
  4. Add the egg whites
  5. Mix until everything is fully incorporated
  6. Divide dough into two portions and between wax paper, work each one into a roll of about 1 1/2” to 2″ diameter.
  7. Place in the freezer for about 1 hour or until nice and solid.
  8. Preheat the oven to 350°F
  9. Remove one roll from the freezer, and slice into rounds 1/2″ to 3/4″ thick, place ona  lined cookie sheet and bake for 15 to 20 minutes.
  10. In  the meantime, repeat the same with the other roll.
  11. Let the rounds cool down on the cookie sheet for 5 minutes before removing to a cooling rack.

image

Copyright © 2012 Simple Healthy Homemade. All rights reserved

Green Monster Power Smoothie

image

No pretty pictures, I know, but healthy and yummy none the less 🙂

There are great benefits to eating lots of greens, yes, you all heard it before, but some days it is hard to fit all that healthy stuff into your food chain between running from work to get the kids or whatever your busy life dictates. Well for days when you don’t have the time to sit down to a hearty spinach omelet you can, even if you don’t have a juicer, make yourself this amazing tasting green power smoothie. Having a juicer can be a great addition to your healthy diet, as long as you’re aware of he fact that you’ll be missing out on all the healthy fiber that you would have consumed eating the veggies. I also want to caution you on juicing fruit, you definitely want to stay HEAVY on the vegetable side. Fruit juice no matter if store-bought or homemade will affect your blood sugar level drastically, much more so than eating the whole fruit would have done. From a weight loss and even a ‘having even energy all day’ point of view, not a good thing. And if you are borderline pre diabetic, just plain BAD idea.

So in this Smoothie you’re not only going to get your greens (without feeling like a cow on the pasture) but all the healthy fiber is still there, hurray!

Added benefit when you’re maligned this with spinach: the lemon juice in the Smoothie provides vitamin c which is essential for your body to absorb the iron from the spinach!

Ingredients

  • 2 handful of Spinach leaves (or stemmed lake or collards, chopped)
  • 1 ripe banana
  • 2 cups water
  • Juice of 1 large lemon
  • 2-3 tbsp coconut/palm sugar, or honey or agave syrup (add more if you like it sweet)
  • (Optional: 2 tbsp egg white powder or protein powder)
  • You could also add a peeled Kiwi

Directions

  1. Place greens in the blender and add the two cups of water, pulse a few times to get started, pushing down the top layer of leaves if they don’t incorporate.
  2. Add the banana, lemon juice, sugar and if using protein powder. Pulse and blend until smooth
  3. Serve. Makes about 4 cups

Note: you should drink this right away, don’t make it in advance, first the Smoothie separates into solids and liquid pretty quickly (I just re-blend for the second glass) but secondly the nutrients that were happily stored inside the leaves are now exposed to the air and will start oxidizing and therefore loose potency.

image

Copyright © 2011 Simple Healthy Homemade. All rights reserved

5 minute Snack Cakes

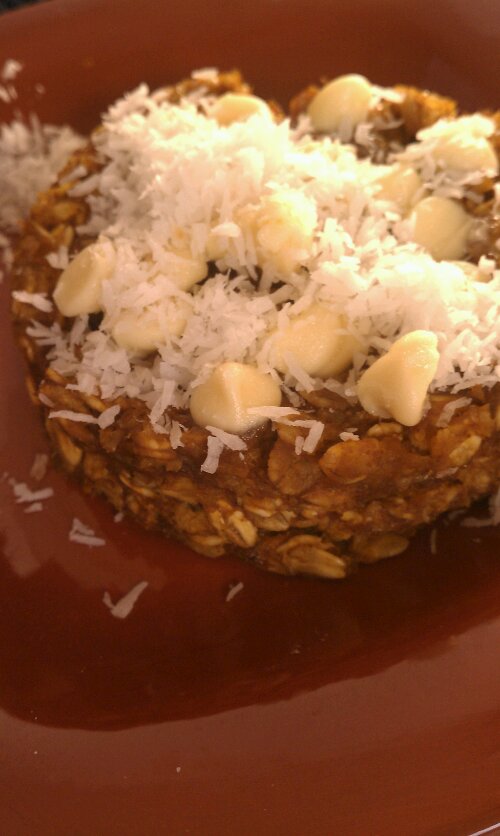
imagePumpkin White Chocolate version here shown made with rolled oats…
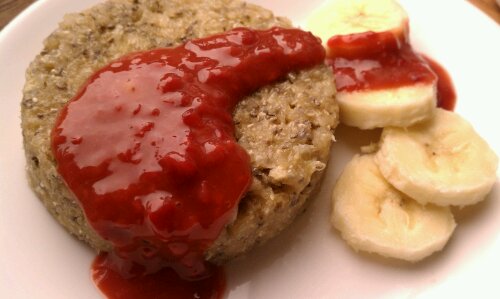
imageand Tropical Mango version with Raspberry Mango Sauce, shown made with Quinoa   (I know, it looks like Ketchup; Trust me it tastes TOTALLY different!)
For breakfast, as a snack and the best part, it’s utterly delicious cold as well AND when cold, they are portable (minus the garnish)

You can make these with rolled oats or any other flakes such a quinoa or barley flakes. You might have to adjust cooking time a little, but whatever is on hand works for these!

As an easy alternative to getting a mango, peeling and pureeing it, I have used mango baby food. One of my friends turned me onto the idea of using baby food as a flavoring for plain greek yogurt. Check the ingredients, but the brand I use has no added sugar, some flavor varieties use fruit juice to add extra sweetness. Don’t like mango? Make it juts with apple sauce or maybe a pear baby food?

image
Tropical Mango Banana Cake

Ingredients

1/2 cup quinoa or oat flakes,
1/2 ripe banana (1/4 cup)
1/4 cup mango purer (use 1 small glass of mango baby food, 4 oz)
1 tbsp sugar (palm sugar, etc)
(1 tbsp Chia seeds, optional)
1/4 cup rasbperries, frozen or fresh
Mix 1/4 cup of the mango, banana, oats (or quinoa), sugar, and Chiang seeds if using in a bowl
Grease two 8 oz ramekins with some oil on a piece of papertowel
Fill and smooh the top
Microwave on high for 3-5 minutes, depending on the power of your device. It’s done when the top does not look liquid anymore and the sides gently separate from the bowl.
Run a knife around the edge, inverted on a plate and serve with raspberry mango sauce (below), or your favorite topping. Such as maple syrup, almond butter, Apple sauce.
Or eat out of the bowl

For the raspberry mango sauce, heat the raspberries in a small saucepan then stir in the remainder (1/4 cup) of the mango puree

image
Pumpkin White Chocolate Oat Cake

Ingredients

1/2 cup rolled oat or quinoa flakes
1/2 cup pumpkin puree
1 tbsp sugar
1 dash cinnamon
1 dash pumpkin pie spice
1/4 tsp vanilla
White chocolate chips  and coconut for garnish (optional)

Mix all ingredients except chocolate and coconut in a bowl, then divide into two 8oz prepared ramekin forms.
Microwave on high for 2 min 30 sec to 3 minutes.

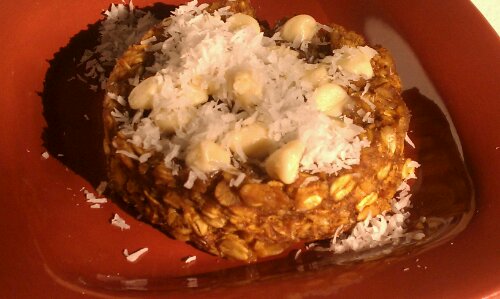
Run a knife around the edge, inverted on a plate and decorate with white chocolate chips, cover with the just removed ramekin and allow heat to steam the chocolate until soft (you can also re-microwave for 30 seconds), serve with coconut, or your favorite topping.

Copyright © 2011 Simple Healthy Homemade. All rights reserved