Spitzbuebe (little Rascals or Linzer Cookies)

image

Spitzbuebe – ‘Littel Rascals’ – Swiss Christmas Cookies

Spitzbuebe translates literally to mischievous boys, but I have seen similar cookies called Linzer cookies here in the US.

image

This is how I make the and the way my recipe adapted over time. You would do well to not work in a warm kitchen and maybe this is not the cut-out you want to make after a long and stressful day, or have your little ones help you with for that matter. My mom would almost always make them after we went off to bed. Now I know why. The dough can go from crumbly to sticky and crumbly (can you believe it) in a matter of minutes and depending on the way the dough came together that particular day, can make you walk the edge towards insanity unless you maybe make them right after a yoga class. With the changes I made to the recipe (like using a whole egg, for example) the chances of that happening have drastically decreased. Although this time a year Yoga classes might be a good idea no matter what. Nothing like the clear head after a good and sweaty class!

Oh and by the way, these are pure indulgence, not really a host of health claims attached. But they are worth every single calorie!

image

Ingredients

  • 2 sticks butter, softened
  • 1/2 cup plus 2 tbsp sugar
  • 1 egg
  • 2 and 3/4 cups flour (350g)
  • 2 tsp vanilla sugar (if you use essence, use the clear version, the dark one can give the delicate dough a strange color)
  • 2-3 tbsp currant jelly
  • confectioners sugar for dusting

Directions

  1. Stir butter until soft, then add sugar and stir until little bubbles show on the bottom of the bowl (see picture)
  2. Add the egg, mixing well.
  3. Add the vanilla sugar and the flour, stir until just combined, knead together quickly, form into a ball, cover the bowl and chill for a minimum if 4 hours
  4. When ready, take the dough out of the fridge and let warm up a bit (15-20 minutes, if you kitchen is cool) cut of half of the dough, keeping the rest chilled, and roll out to a thickness of about 1/16″ (do 1/8″ then roll just a bit more)
  5. Preheat your oven to 400ºF and line several cookie sheets with parchememnt paper or silicon mats (My cutter is a little over 2″ in diameter and I made a good 3 sheets full. Remember, you’ll end up with half as many cookies as what you bake)
  6. Cut out round shapes, making sure you have one for the bottom and one for the top. From all the top pieces, cut out a small shape such as a heart, star, flower or round. If you have special cookie cutters, the tops might be done in one step. Just make sure you have an equal number of tops and bottoms
  7. Bake for 8-10 minutes in the middle of the preheated oven, until just starting to turn a little golden. Cool on the sheet for a few minutes then transfer to wire racks.
  8. Once cooled, separate tops and bottoms. Place the wire rack with the tops over a sheet of parchment paper and using a small strainer sprinkle the tops with confectioner sugar until completely white.
  9. Heat the currant jelly in a small bowl until liquid. Fifteen seconds in the microwave works great. Using a pastry brush, brush the a bottom piece with some jelly, then gently place a finished top on it and set aside. Continue until no more cookie halves remain.
  10. Try to refrain from eating all of them before you showed them off to at least a few friends.

For more classic Swiss Christmas Cookies check here

image

Copyright © 2012 Simple Healthy Homemade. All rights reserved

Cranberry Orange Cream Scones

image

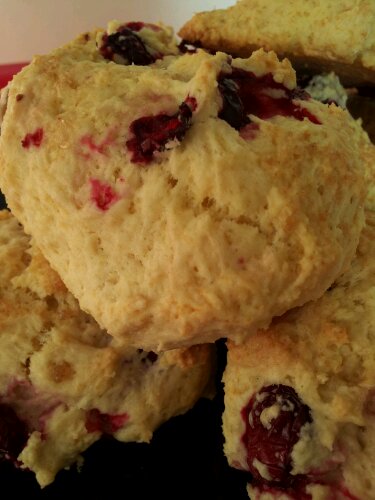
After happily taking the frozen cranberries out of the freezer, I came to the realization that there was no butter. None. Desperation set in as, how were those cranberries going to find their way into scones, if there wasn’t any butter to be had? 🙁 I even checked the corn-butterer, you know that little square contraption that fits a stick of butter for the purpose of easy application to a corn on the cob? But nope, I came up empty. And if you have ever looked up any recipes for scones, you know they all include a minimum of 6 tablespoons of butter, often more. I could have gotten out of my comfy-cosy pants and gone out into the dark December night to find me some butter…

image

However that really wasn’t my plan, especially once I discovered it was raining. So here is my solution, I used cream instead, plus a  bit of coconut oil. So instead of a traditional scone recipe with lots of butter and cream, just cream. I think it’s a fair trade-off. They are were very yummy too, but judge for yourself, don’t just take my word for it. You know you want to, you know you have some cranberries in the freezer. Come on, it’s okay, just do it. And takes no time at all! By the time you have the dough mixed, the oven is just getting hot enough!

image

Ingredients

  • 2 cups flour
  • 1/4 cup sugar + 1 tbsp raw sugar for sprinkling
  • 2 tsp baking powder
  • 2 tbsp coconut oil
  • 1 egg
  • 1 cup cream
  • 1 cup frozen or fresh cranberries
  • 1 tsp orange extract/orange essence

Directions

  1. Preheat oven to 400ºF  (200°C) and prepare a baking sheet
  2. Mix flour through baking powder
  3. Add oil, egg, cream and orange essence, stir to combine.
  4. Stir in cranberries.
  5. Drop dough by the 1/4 cup full onto the lined baking sheet, sprinkle the raw sugar over top and bake 22 to 25 minutes (cut time down if your cranberries are not frozen, try 16-18 minutes) or until slightly browned on the bottom and golden on top.
  6. Cool on a wire rack and enjoy!

Makes about 12

image

Copyright © 2012 Simple Healthy Homemade. All rights reserved

Cheesy Cornbread Muffins (gluten free)

image

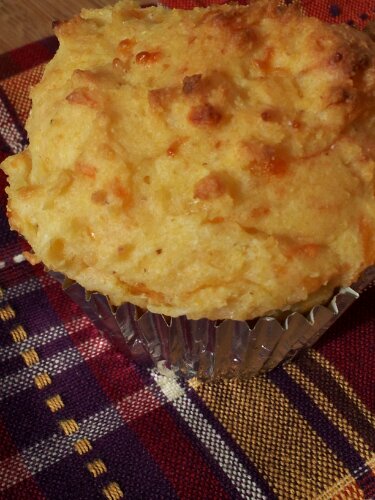
We all know those people that won’t touch anything that says healthy in any of it’s conjugations, and since these days gluten free is in the news a lot, that get’s lumped into that same ‘healthy’ category and they won’t touch it. In their minds for some reason, healthy equals not tasty. But let’s face it, just because you have to adjust your diet, or want to change the way you eat, you do not have to go without and you certainly don’t have to deprive your self. You’re not going to last in your new healthy lifestyle, if you constantly feel that you are forced to live on dungeon food of moldy bread and water. But I digress, we were talking gluten free, which for some can be a healthy choice  for others it is a must (due to various digestion and auto-immune response issues).

image

When people first transition from a SAD (Standard American Diet, funny how that works out) to a gluten free life, it can be confusing and disheartening. And let’s take kids for example, they often refuse things that taste different from what they are used to or have a different texture. And frankly some of those gluten free products out there taste just a little better than saw dust, and probably just as good for you. Not that I would know what saw dust tastes like, but I imagine it to be pretty close to that. But trust me you can live a full and healthy life without gluten, without having to go buy the saw dust bread that the grocery store carries or for that matter even set foot into that section of the store.

image

Yes, you may have to eat different things, but you certainly have a whole host of choices out there, especially if you are a bit more open minded about what you put in your mouth. For one, there are numerous other cuisines out there that do not rely as heavily on wheat and wheat products as the western diet does. In many Asian countries you could eat all day without running into gluten, many Mexican dishes are gluten free. Many dinners you make at home are already gluten free. And, as I always repeat, make it yourself and you control what goes in it. Some unexpected items have wheat derived gluten ingredients, some salad dressings for example, so read the labels or make it yourself. And if you make corn bread or corn muffins, you get to decide what flour and how much butter you will put in. Gluten free baking can be a bit tricky at first since gluten is what makes the bread have the characteristic holes, well to be exact the gluten forms a sort of ‘web’ that traps the gas and creates the holes. So gluten free flours just don’t do that. And the texture often suffers accordingly, which brings me back to the picky eaters… Well you’re in luck, you can now have corn bread to have with your chili! The texture when they come out of the oven is so light and airy I almost called them corn souffle muffins. Trust me, no one will be able to tell they are gluten free!

image

Ingredients

  • 6 oz Neufchatel Cheese (1/3 less fat cream cheese) softened
  • 1 cup sour cream
  • 3/4 cups milk
  • 1 1/2 cups cornmeal
  • 1/4 cup potato flour ( or use your gluten free flour mix of choice)
  • 1/4 cup tapioca flour ( or gluten free flour mix)
  • 1 1/2 tsp xanthan gum
  • 2 tsp baking powder
  • 1/2 tsp baking soda
  • 1 cup grated Mexican cheese mix or cheddar
  • 1 or 2 tbsp sugar
  • 1 egg
  • 1/2 tsp salt

image

Directions

  1. Pre heat oven to 375ºF and prepare muffin tins (line with paper or grease well)
  2. Stir the softened cream cheese until smooth, then add the sour cream, milk, egg and sugar and stir to combine.
  3. Mix the dry ingredients, cornmeal through baking soda, add the salt then add everything to the bowl with the cream cheese mixture. Stir until blended, adding a little more milk if dough is too thick.
  4. Last mix in the cheese.
  5. Fill your muffin cups (makes about 12 standard size) and bake in the pre heated oven for 20 to 25 minutes or until golden brown and tester comes out clean.
  6. Have them with campfire chili , snowstorm venison chili or as snacks anytime

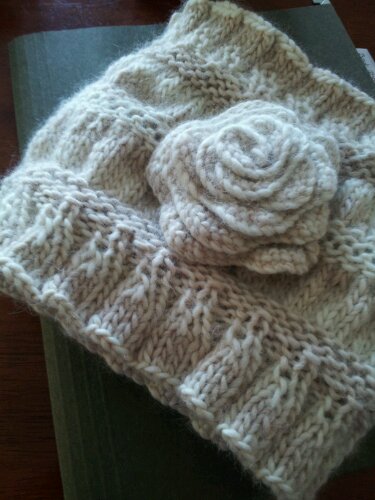
imageOh and  Remember this? I finished it! Finished and ready for gifting! On to new shores…

image

© 2012 SimpleHealthyHomemade

Mushroom Gruyère Tart

image

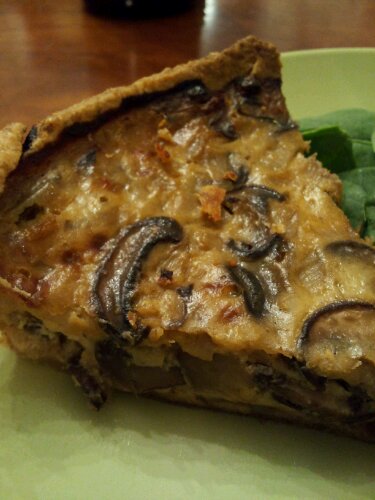
This past weekend I was on a mission to not go out and buy more, but use up all the odds and ends that can accumulate in your kitchen and fridge over the week. In my case that involved some mushrooms that were begging to be eaten and the large chunk of cheese that I bought and had not made much of a dent into looked like a contender as well. Add an open container of cottage cheese and you’re talking! And pie crust is always easy and cheap to make, you can even make a large portion ahead and freeze it for later.

And in the tradition of a true leftover dish, this can be made without the mushrooms, add some leftover steamed broccoli for example, Cheddar or other semi hard cheese can be substituted for the Gruyère. Play with it, it’s really easy to make something yummy if it is served in a pie crust. The result heats up well for lunch in a toaster oven or even as a light dinner with a side salad of spinach and pomegranate seeds. Ever since I discovered how easy it is to get to the seeds, I have been in love with the juicy little red things, when the weather gets colder, I know they will show back up in the stores soon 🙂

Also I am super sorry for still not posting the Sweet Potato Spatzle I promised a little while ago. Turns out I was so exited making them, that I never wrote the recipe down 🙁 So I will have to recreate them before I can share it with all of you. Not like I mind eating them again so soon, lol.image

Ingredients

  • 1 single pie crust I (preferably whole wheat and homemade)
  • 8 oz brown button mushrooms, sliced
  • 1 sweet onion, diced
  • 2 eggs
  • 4 oz Gruyère  cheese, grated
  • 1/2 cup cottage cheese (min 4% fat*)
  • 1 tbsp good quality balsamic vinegar
  • 1/4 to 1/2 tsp salt

*using lower fat contend can make the result dry

Directions

  1. Heat  a little oil in a skillet, cook the onions until they start to become translucent, then add the mushrooms and salt. Cook until both the mushrooms and onions are soft, then add the balsamic vinegar and cook for an additional minute. Remove from heat and set aside to cool.
  2. In the meantime, heat the oven to 380ºF. Roll out pie crust and fill a pie or tart pan with the dough.
  3.  When the mushrooms are cooled down enough, add the eggs, grated cheese and cottage cheese (make sure you let the mixture cool down so the eggs don’t ‘cook’ when added) Stir well and fill into prepared crust. Smooth out the top.
  4. Bake in  the middle of the preheated oven for 40 to 45 minutes or until slightly browned and set in the center.

image

© 2012 SimpleHealthyHomemade

Sweet & Spicy Pretzel Mix

image

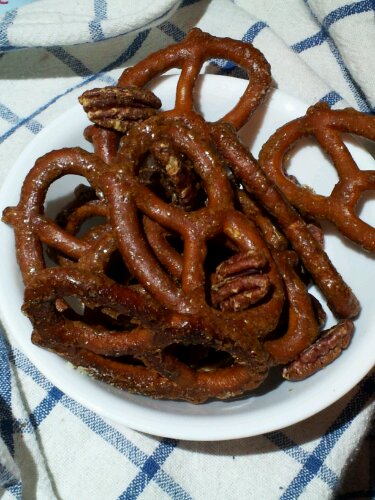
I admit, I did not make the pretzels. I only made them into something. Something better, or so I like to think.
I started out with no salt added pretzels. Why? Because there is so much sodium in and ON regular pretzels that I’d rather just add some myself. At least then I know how much and I can use my RealSalt or Himalayan salt. This is a super easy snack mix that looks and tastes a lot more expensive than it is to make. Make a double quantity and serve it up for cocktail hour at your next dinner party.

image

Ingredients

  • 2 cups salt free pretzels
  • 1/2 cup pecans or almonds
  • 2 tablespoons butter, melted
  • 2 tablespoons dark brown sugar
  • 1 teaspoon cayenne pepper
  • 1/2 teaspoon ground chipotle pepper
  • salt shaker with salt of choice

image

Directions

  1. Pre heat oven to 300ºF
  2. In a large bowl, combine the melted butter and brown sugar and stir until dissolved.
  3. Add the cayenne and chipotle, adjust the spice level down if necessary (start with just 1/2 teaspoon cayenne and omit the chipotle, if you are sensitive to heat) and mix well
  4. Add the pretzels and toss until evenly coated, then add the nuts and mix until they are coated too.
  5. Spread in a single layer on a parchment lined baking sheet, sprinkle with salt and bake 15 to 20 minutes.
  6. Let cool completely before serving.

image

© 2012 SimpleHealthyHomemade

Better-for-you Gluten Free Brownies

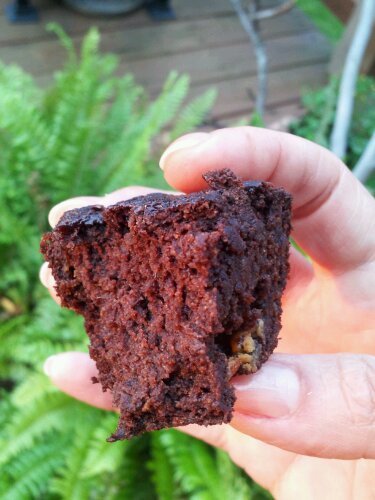
imagebrownie and sunshine 🙂

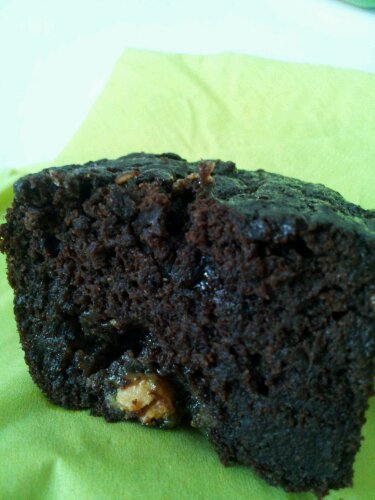
imagebrownie, no sunshine. Oh yeah, the thing in the middle there? A overly cooked white chocolate chip…
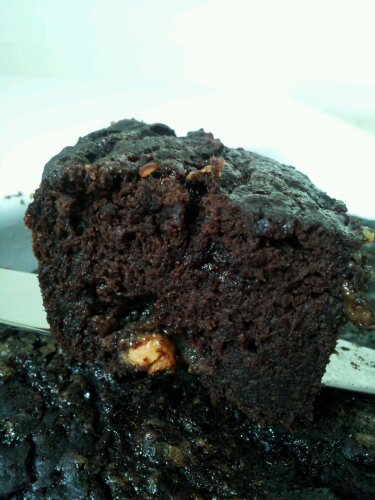
I wanted to do something a bit special, celebratory for our 1 year anniversary and how better to celebrate than with something sweet and chocolatey? Yes, it is true, today my little blog turns one!

Therefore today’s recipe had to be a little special, so ‘common’ brownies were not going to cut it and since I don’t like things that are very sweet anyway, a standard recipe would not have been my thing. I have often felt that there are too many products and recipes out there that are, for example, gluten free, but now there are 18 eggs in them, or they are low fat but have twice as much sugar. So I challenged myself, why not combine some of the restrictions people face into one recipe without adding extra “bad stuff”?  A lot of folks have issues digesting gluten + diabetics should be real careful eating sugar (and I don’t like lots of it, + it’s really not good for you) + most people watch the amount of fat they consume: I was setting out with quite a lofty goal. Can’t be done, you say? Well, I just think I might have nailed it! Best of all, if you just happen to be vegan, you can make this too 🙂

And since the weather looked a good deal like fall today I added another good for you ingredient: Pumpkin, to make it moist (also packs vitamin E, Vitamin A, Vitamin C, Vitamin K, Iron, Manganese and is a good source of fiber) and chick pea flour to keep it gluten free. I did have a whole big bag of chickpea flour, from who knows what recipe originally that I just rediscovered last week in making Socca.

By the way, get Besan from the Indian grocer, much cheaper than other healthfood store brands. As a matter of fact, anything you can buy at an ethnic store will be cheaper. If it is considered a specialty or an exotic item the grocery store will a) buy less of it, making it more expensive, and b) they can get away with charging premium dollar for ‘delicacies’ and ‘gourmet food’.For example, if you have a Asian grocer nearby, get your shallots there, also rice and rice noodles, dried or fresh will be a lot cheaper, so is Tofu, if you have that on your meal plan. Indian grocers usually carry various beans, peas and lentils, spices and almonds are usually less as well. And of course they have Besan, which is the chick pea flour we just talked about. But since it is not sold as a ‘gluten free’ flour… fraction of the cost!

But I digress, back to today’s topic: The gluten free, virtually fat free, low sugar, vegan anniversary BROWNIES! Yes, I am a tad exited about them, can you tell? 😉

image

Ingredients

  • 3 ripe bananas
  • 1 cup pumpkin puree
  • 1/2 cup + 2 tablespoons cocoa powder, unsweetened
  • 1/2 cup brown rice syrup
  • 1/2 cup millet flour
  • 1/2 cup chick pea flour/besan
  • 1/2 cup sorghum flour
  • 1/2 tsp xanthan gum
  • 1 tsp baking powder
  • 1/2 tsp baking soda
  • 1 cup mixed chocolate chips (dairy free, or it’s no longer vegan) or 1/2 nuts 1/2 chips
  • 3/4 cups water
  • 1/4 cup raw sugar (turbinado)

image

Directions

  1. Preheat oven to 350ºF
  2. Lightly grease a 9″ x 13″ baking dish (lasagna dish) with coconut oil
  3. In a large bowl mash the bananas and mix in the pumpkin puree, then stir in the cocoa powder.
  4. Add the brown rice syrup and the water and stir until well mixed
  5. Combine the three flours, the xanthan gum, baking powder and baking soda
  6. Add the flours and 2 tablespoons of the raw sugar to the cocoa mixture and stir until well blended, then add the chocolate chips or nuts.
  7. Spread into the prepared baking dish. Sprinkle top with remaining sugar
  8. Bake in the middle of the pre heated oven for 45-50 minutes or until tester inserted in the center comes out clean.
  9. Let cool completely before cutting, or you’ll have fudge brownies

image

© 2012 SimpleHealthyHomemade

Rosemary Black Pepper Socca

image

Socca, a delicious street food from the south of France, more exactly Nice (in Switzerland, Nizza as the city is known in italian) is something I just recently discovered. I know, right? not while travelling in France, mind you, but living on the good old East Coast of the US. Which just goes to show that good food knows no boundaries.

image

“La socca de Nice, ou socca caouda, est un des plats les plus populaires de Nice semblable à une grande crêpe mais à base de farine de pois chiches et cuite au feu de bois.
A l’origine, c’était le plat du pauvre, bon marché et consistante.”

Basically saying: Nice’s ‘Socca’ is one of the most popular dishes from that region, resembling a big crêpe but made from chickpea flour and cooked over wood fire. Originating as poor folk’s dish, cheap and filling

Today, it is as much casual as it can be sophisticated, and a crowd pleaser at any dinner invite or potluck. Plus since it is naturally gluten free and vegan, can be served to most anyone. Best of all it is super easy to make but tastes incredible! Use a cast iron skillet for best results but I have also come across folks making it in a  pie dish, during my internet research. Traditionally it is made on a large copper disk, over very high heat and in a very hot oven. As with most street food (I was going to say any, but the Malaysian Roti Canai might be the exception to the rule) it is easy to prepare and therefore I figured must be a good candidate for outdoor cooking.

I have even had success making this directly on the  camp fire (since traditionally it is cuite au feu de bois, I had to) while camping but there are no pictures to prove it, so in this day and age, it never happened, lol. The one I did manage to get pictures of was made on my camp stove. And maybe here would be a good spot to apologize for the quality of some of the pics in this post, it was quite dark when I took them. Though I have to say, my headlamp functioned quite well as a backup flash for my cell phone, no?

image

You can make this easily in the oven at home, but since I had a little weekend away at a campfire planned, I decided to hone my socca making skills on a real fire. Maybe not entirely traditional, since much thicker than usual, but entirely too yummy not to share 🙂  I might post a more traditional version at some later time, we’ll see, but for camp fire cooking, this is taking it out of the hot dogs and smores category that often comes to mind when hearing ‘camping’. To make things extra easy, combine the flour, salt and pepper in a zip top bag before leaving and all you have to do is add the oil, water and rosemary at cooking time!

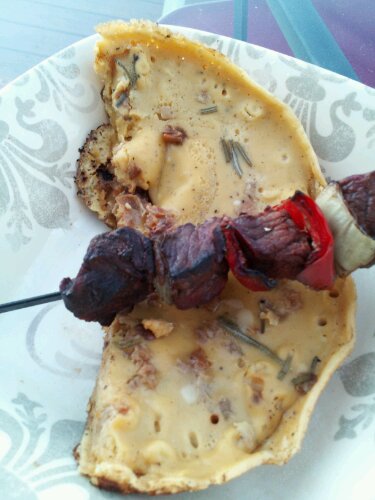
imageHere shown with beef and red pepper kebabs, a match made in heaven!

Ingredients

  • 1 cup chick pea flour*
  • 1 cup water
  • 1/2 onion diced
  • 1 1/2 tsp salt
  • 3-4 tablespoons olive oil
  • 1/2 tsp black pepper
  • 2 tablespoons fresh rosemary

*chickpea flour can be found at many health food stores or the gluten free section of your grocery store. But the cheapest way is to find an Indian grocer and get it there, it’s called ‘Besan’image

Directions

  1. Heat 3 tbsp olive oil in a 8″ cast iron skillet*, cook the onions until soft, turn down the heat and cook for another 10 to 15 minutes until starting to brown and caramelize. Set aside return the skillet to the heat, and keep heating on medium high.
  2. Mix chick pea flour, water and 1 tsp salt, stirring with a whisk or fork until all lumps are gone. Set aside (you can make this and use it right away or set it aside for several hours, it’s all good)
  3. Over high heat, in the same skillet, heat the remaining oil, then pour in the batter. After cooking for one minute, sprinkle the top evenly with the cooked onions and rosemary, and remaining 1/2 tsp salt, then cover with a lid until cooked through and the top is set about 5-7 minutes. Serve hot as a side to roasted meat or eat on its own.

* If you have a 10″ or larger skillet, the result will be thinner and take less time cooking.

The setting during the day…

image© 2012 SimpleHealthyHomemade

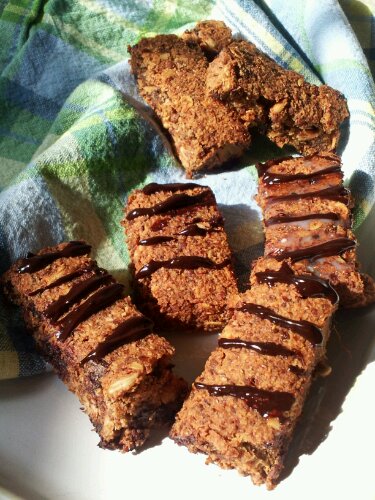
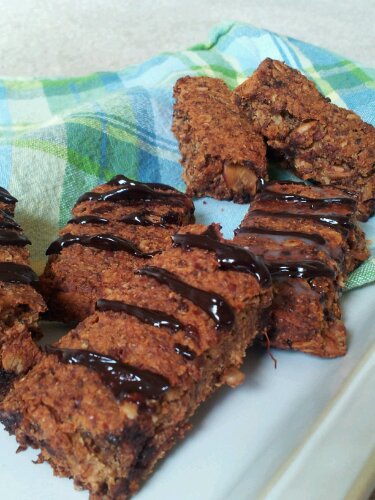
Coconut Super-Power Bars

image

Here shown with chocolate drizzles…

I was reorganizing my kitchen cabinets the other day, (can you associate with this?) and found that the recesses of the cabinet used as pantry hold much more than can be readily found by me on any given day. Some needed to be tossed 🙁 had been lost in the depths too long, there were things I didn’t know I had anymore but had been looking for and then of course there are the quadruplicates , I mean, duplicates.

Several (open) bags of extra dark chocolate chips, about 4 different ‘grinds’ of unsweetened coconut, all opened too, of course, and several jars with 3 or 4 tablespoons of honey or brown rice syrup were retrieved from the depths of my cabinet. I did promise myself to not get so ahead of myself again, let’s see if it holds next time I face a sale at the store…

So after my botched attempt at making coconut butter (I think the very fine Indian store coconut I had, was a just a bit too dry) I came up with plan B, and a fine plan it turned out to be. My boyfriend who is training to run the NY City Marathon this year, swears it’s those bars that made him finish the last couple of 15 mile training runs with ease. He swears they gave him super-powers, hence the name, they previously were ‘just’ power bars 🙂 And I’ll let you in on a secret, he doesn’t even like coconut ;P but if you bake it until the bars get brown, careful it’s right before the ‘too much’ stage, the coconut gets a taste similar to dark chocolate, add a handful of morsels and the deal is fixed. Just to calm your conscience, yes, he does know there’s coconut in there.

image

Vegan, gluten free and grain free and if you don’t count the coconut as nut (they really are considered one of the largest seeds, or technically a drupe, says Wiki) it’s nut free as well 🙂 Oh and don’t forget the power of the sprouted lentils.

image See the little sprout poking out? And I think I spot a lentil too…

And please don’t be discouraged by the seemingly long ingredient list, it is totally worth making and there really isn’t that much effort required.

Since the sprouting takes some time, you want to start this several days before you want to make the bars. In the summer it only takes 2 days in my kitchen, but in the colder months, it could be three or four. Or if your kitchen is highly air-conditioned

image

Ingredients

  • 4 cups finely shredded unsweetened coconut
  • 3/4 cups red lentils, sprouted, divided (makes about 2-2 1/2 cups sprouted)
  • 3/4 cups date pieces
  • 1/2 cup brown rice syrup
  • 1/2 cup tapioca flour*
  • 1/2 cup water
  • 1 cup rolled oats
  • 1/2 cup sunflower seeds
  • 1 cup dark chocolate chips (make sure they are vegan or the recipe is not…)
  • (optional: 1/2 cup sliced almonds: not nut free anymore, but super yummy)
  •  1/4 cup chia seed
  • 1/4 cup flax seed meal
  • 1 1/2 cups water
  • (optional: a handful of chocolate chips to melt and drizzle over top)

*I am sure other gluten free flour would work as well

Directions

  1. Sprout the lentils until the little shoot is about 1/2″ to 3/4″ long (more details on sprouting here), reserve 1 cup,image
  2. Preheat oven to 350ºF
  3. Mix the chia seed and the flax seed meal in a medium bowl with 1 1/2 cups water, set aside for 10 minutes
  4. Blend the coconut and dates until finely mixed, then add all but the reserved 1 cup of lentils, blend until you have a sticky mass (or mess)
  5. Add the chia mix and the brown rice syrup, pulse until mixed in
  6. In  a large bowl,  combine tapioca flour and 1/2 cup water, the reserved sprouted lentils, and scrape the mixture from the blender into it, stir until incorporated.
  7. Add the oats, sunflower seeds, chocolate chips (and almonds if using) and evenly spread on a silicon mat lined baking sheet (Make sure you use a baking sheet with sides)
  8. Bake in the 350ºF oven for 45 minutes to 1 hour. Or until nicely browned. Remove from oven, let cool for about 1 hour then cut into bars. Spread the bars onto two (2) baking sheets, preheat the oven to 250ºF and bake for an additional hour, I sheet on the lower rack, the other on top, switching position after half an hour. This step is more to firm up the bars and kinda make them drier and more portable.
  9. Cool on wire rack and enjoy! I store mine in the freezer so I can just grab a couple at a  time.

image

© 2012 SimpleHealthyHomemade

Peach Orange Corn Muffins

image

I love the taste and texture of corn bread, and corn muffins are very close, but there’s always like 5 sticks of butter in those cornbread recipes, and while I decidedly like butter, I think there is a limit before the result is more of a garden variety of ‘fried food’ as opposed to a bread or muffin (don’t even mention what it might do to the inside of you) So that needed to be fixed, but I did not want to sacrifice the awesome moist crumb that so often is characteristic of buttery muffins, so what’s a hungry girl to do? First of, I asked myself, is it really the butter that makes them moist? I mean, have you mashed a banana lately? Or cut up some peaches? There is quite some liquid in there, so off to the kitchen we go and since I had frozen peaches on hand…

image

I know, I known… Let’s back it up a minute here, I know what you’re thinking, ‘does she know it’s summer?’ Ehhm, yes, it’s quite hot, so… but here’s how it happened: I couldn’t resist to buy one of those whole pecks of ripe peaches at the farmers market the other week, it smelled soooooooo good! I know you would have bought it too. And since they were only a day away from spoiling, I had to chop and freeze most of them right away. (For the record, I did have some fresh peaches on the side). So there I am with my frozen, sliced and chopped peaches, and heck yes, I was going to use them.  But drop the butter, use dairy instead, yes maybe the fromage blanc I made, to keep it soft and moist without the butter.

After some near fails (the ones that collapsed totally the moment they came out of the oven) I nailed it and here is your healthy, yet moist and airy corn muffin with peaches. Yes it is both low fat AND low in sugar. I think you just need to go over to the kitchen and try a batch yourself!

image

Ingredients

  • 1 1/2 cup fromage blanc, made from whole milk*
  • 1 cup all purpose flour
  • 1 cup cornmeal
  • 1 to 1 1/2 cups chopped frozen peaches, bite size chunks
  •  1/2 cup milk
  •  1 extra large egg (or two smaller ones)
  • 1/2 cup + 2 tbsp turbinado or granulated coconut sugar
  • 1 tbsp coconut oil, liquid
  • 2 tsp baking powder
  • 1/2 tsp baking soda
  • 1 tsp orange zest, (if using dried reduce to 1/2, or you could use natural orange essence or flavor)

* I have also successfully made this using half greek yogurt, half sour cream, about  3/4 cup each, plus or minus

Directions

  1. Preheat oven to 400ºF.
  2. Remove the peaches from the freezer.
  3. In a large mixing bowl, mix the flour, cornmeal, baking powder and baking soda and 1/4 cup sugar and set aside.
  4. In a separate large bowl, mix the egg(s), fromage blanc (or yogurt and sour cream), milk, coconut oil, orange zest until well blended.
  5. Add the wet mixture to the bowl with the flour, stir just until combined, then stir in the peach pieces and divide among 12 prepared muffin cups. (Line them for easy cleanup)
  6. Bake 24 to 30 minutes or until the tops are beginning to brown and the center is set.
  7. Let cool in the muffin cups for 15 minutes before digging in (it seems to help the muffins not stick to the paper liners like mad), then you may devour them and claim the muffin tin only made 11 9 muffins or finish cooling on a rack and share. Enjoy!

image

© 2012 SimpleHealthyHomemade

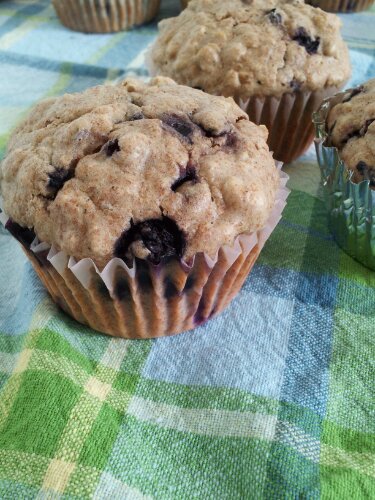
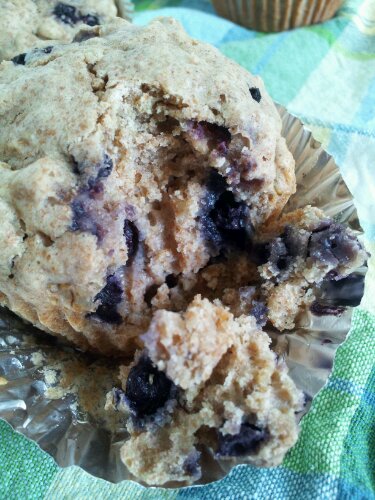
Blueberry Oatmeal Muffins

image

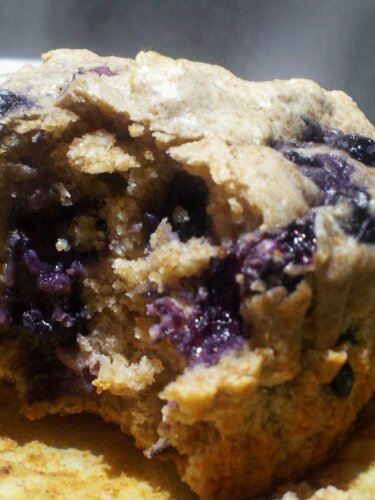
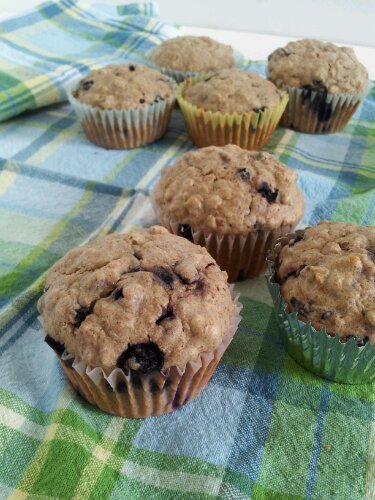
I wanted to make eat something sweet, desert, something baked, with that slight crunch when you bite it, so chocolate or ice cream was out… muffins, maybe. But i really needed to make breakfast. So in order to consolidate those two goals, it had to be at least somewhat on the healthy side, like cake was out. After some pondering and some back and forth I decided on blueberries and oatmeal. Oatmeal had to be in there due to its breakfast-y-ness and well, it’s also kinda good for you, or so I am told 😉

image

My first attempt was a fat-free (besides what was in the egg) version. Well let’s just say they, we don’t talk about those around here anymore… Happy to say that by attempt two I was cured of that idea and came up with these, a low sugar blueberry muffin.

I know many of you folks are looking for low fat versions, and fret not, I am going to figure it out a good one that works soon, I am not giving up that easy. Just be wary of anything at the store that’s labeled fat free or low fat. That claim to fame is usually pretty short lived when you look at the facts. Pretty much all store bought items that are low in fat automatically are high in something else (sugar to name the least offensive option).

image

Ingredients

  • 1 cup old fashioned rolled oats
  • 2 cups whole wheat pastry flour*
  • 1/2 cup butter, softened
  • 1/4 cup sugar or maple syrup or agave nectar
  • 1 tsp baking powder
  • 1 tsp vanilla extract
  • 3/4 to 1 cup milk
  • 2 eggs
  • 1 cup fresh or frozen blueberries

*use less liquid if you are using all purpose flour

image

Directions

  1. Preheat oven to 350º F
  2. Prepare a standard muffin tin with cupcake liners, set aside.
  3. Mix the dry ingredients in a bowl, set aside.
  4. In a medium bowl, beat butter until soft, add sugar and stir until incorporated, then add the eggs, add the milk and vanilla extract.
  5. Add the wet ingredients you just mixed up to the dry ingredients and stir just until mixed, then add the blueberries and gently fold into the dough.
  6. Divide among the prepared muffin cups and bake until golden and a toothpick tester comes out clean, 20-24 minutes.
  7. Let cool in the muffin pan on a rack for 20 minutes before removing the muffins.

Makes 12

image

© 2012 SimpleHealthyHomemade