Grilled Rosemary Focaccia

image

Craving bread is what I remember when I first moved to the United States, the kind of bread I had taken for granted back home. I seems that when you’ve only lived in a very limited part of the world, you automatically assume, everyone in the western world does things the same way, including breakfast. I had been to Asia and knew that in some eastern cultures anything goes for breakfast (Remind me to write about this awesome rice soup I had in Thailand sometime), but I guess I somehow figured that the western cultures, namely central Europe and the US, where very similar and it came as a surprise to find that in my new home, no, there was no bread to be found. 🙁

In Switzerland, a normal breakfast is bread. Slices of crusty bread, with butter, meat, cheese or homemade jams, or delicate buns or croissants. Depending on the day of week, the region, your mood or the time of year there are countless variations on the theme of bread (oh yeah, there are some awesome pastries too). And when I first moved here, I could not handle eggs for breakfast, just couldn’t stomach it in the morning and I was looking for bread. By now, luckily there are bakeries that offer ‘artisan’ breads and it’s possible to get similar items in many grocery stores across the country, but for the first few years (and I did not live in a large metropolis), it was me trying to recreate breads to glimpse a taste of home. Can you tell, I was homesick sometime? 🙂 Well that’s a long time ago and I have successfully recreated and made many breads, using available ingredients to make up for what I was told was not available quite the same way. But I digress, all I really wanted to say here was this, I love bread! Fresh baked, crusty bread; and the smell of it, it just makes me happy.

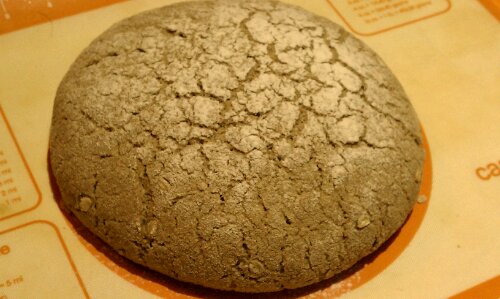
image

So summer can be a bit of a trying time, when it stays hot for months here and heating up the house by using the oven to make bread just seems silly. So what is a bread loving girl supposed to do? Take it outside, that’s right! Now, I have played with the thought of building a stone oven out back, but due to space constraints (I want to keep my little raised bed garden, after all) lack of knowledge and mainly proper mason skills, I have had to abandon that thought, along with the flock of backyard chickens… for now.

Next best thing? Use the grill! I have had this pizza stone sitting around. I had used it sometimes to bake bread on, but after some internet research felt I could give this a whirl. After all, if the darn thing breaks, I thought, I just end up with more space in my cabinets. But after three or four tries, it’s still whole. Preheating gently seems to do the trick 🙂

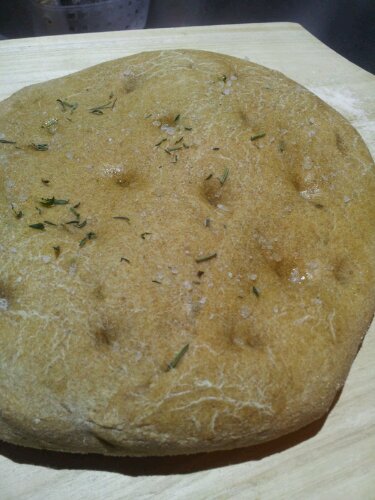
This makes one round, flat loaf of about 10″ diameter. Keeps me happy for three to four days, that’s saying you could make it as a bread to go with a dinner for four.

image

Ingredients

  • 1/4 up sourdough starter from the fridge
  • 3/4 cup warm water
  • 1 cup bread flour
  • 1 cup spelt flour
  • 1/2 tsp sea salt
  • 1 tbsp fresh rosemary, cut finely
  • coarse sea salt for sprinkling on top

imageDirections

  1. In  a large bowl, stir the sourdough with 1/2 cup warm water
  2. Add the flours, salt, rosemary and remainder of the water (If you are using all purpose flour, 1/2 cup total might be enough) mix together and knead until a smooth dough forms. Form into a ball and let rest in warm spot until doubled in size.*
  3. Shape into a flat round, about 1″ thick, place on a corn flour dusted pizza peel and let rest in a warm spot for another 20 minutes to half and hour before proceeding. (You want the dough to raise again after shaping)
  4. Place the pizza stone on the grill and preheat on low, indirect heat for 10 minutes.
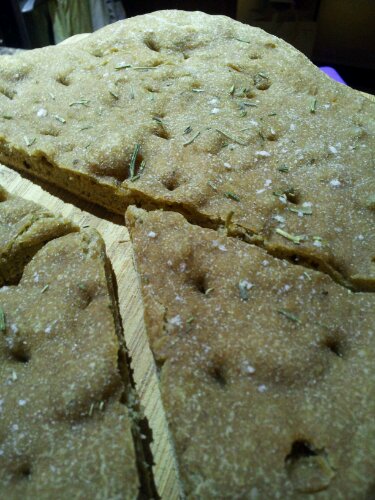
  5. Right before baking, dimple the surface of the focaccia with your finger, brush or spray the surface with some olive oil and sprinkle with coarse sea salt and more rosemary if desired.image
  6. Slide bread off of the pizza peel onto the hot stone and cover the lid. Turn the burners under the stone on, but at low flame for 10 minutes.
  7. Then turn up the heat to medium, and bake for another 10 to 15 minutes or until the bread is done and sounds hollow when you tap the bottom of it.
  8. Remove the bread and set on a rack to cool completely before serving, (leaving the stone in place as you turn off the grill) and enjoy!

* The time for this depends on the warmth as well as the level of activity level of your sourdough. In the summer this takes about an hour, and I sometimes will place the covered bowl outside.
image© 2012 SimpleHealthyHomemade

Sourdough Mini Pitas from the grill

image

So you’ve been keeping your sourdough starter more or less fed in the back of the fridge, but it’s been so hot and you are not in a mood to bake and heat up the house anymore. The sourdough starter looks a little sad, if you are really honest and you have pushed it behind other things so you don’t have to see it.

No worries, mine has been there too, take it out, refresh it, i.e. give it a good stir, feed it and let it raise, repeat one more time to make it nice and active again and put it back in the fridge. Instead of chucking the part that you remove, after the first feeding, use that to make grilled pita pocket breads instead. YAY! I know no heat in the house and you still get to have bread 🙂

image

Ingredients

  • 1/4 cup sourdough starter (fed and active and ready to go)
  • 1 cup water
  • 3 cups whole wheat flour (preferably freshly ground)
  • 1/2 tsp salt

image

Directions

  1. Mix your sourdough with water until dissolved, then add the flour and salt and mix until smooth then knead until you have a smooth elastic dough. Form into a ball and return to the bowl, cover the bowl with clear wrap or a moist kitchen towel and let rest and rise in the fridge for 6-8 hours.
  2. Remove the dough from the fridge and let sit at room temperature for about 1 hour prior to shaping.
  3. Divide dough into 12 portions. Roll each portion into a ball between your hands and flatten out into a disk about 1/4″ thick, using flour so they don;t stick. Set aside and let rest in a warm spot for another 15 minutes, covered with cling wrap.
  4. Preheat your grill to high (I have a gas grill I use for these, if you are using a charcoal grill, make sure you start the fire earlier to get to nice hot embers) The trick to making these work is a temperature around 425 to 450. It’s essential the grill be HOT, in order for the pocket part to happen, the water inside the dough needs to evaporate quickly, puffing up the bread into a little balloon.
  5. Grease the grill grates using a small amount of oil on a crumpled paper towel. Then quickly put the dough rounds on and close the lid.
  6. Grill about 4 minutes or until puffed and starting to brown on one side. Turn over and finish grilling until cooked, about another 2-3 minutes, depending on the heat of your grill.

image

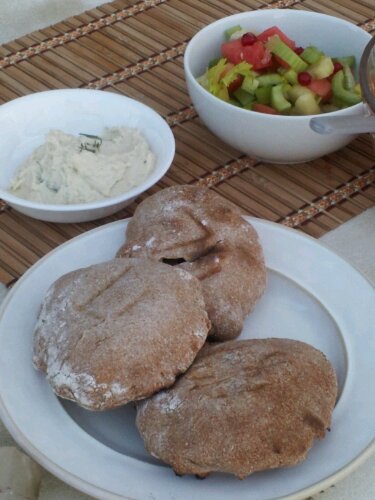
Eat with dip or dinner, anyway you like!

image© 2012 SimpleHealthyHomemade

Whole Wheat Animal Crackers

imageYes, I know you saw it coming, I mean after the Berry Ice populated with Lions and Giraffes (Ostrich looking, if you ask my boyfriend, but then again, he’s no biologist 😉 there was no question that the rest of the animal kingdom would soon show up on my blog as well. What can I say, they are just too darn cute!

image

I had searched for the perfect cutters for this recipe for  a while, square was just not an option, but plain old animal crackers from the store didn’t cut it either. Do you get that craving for crunchy as well? And I can;t shut it up with a crunchy apple, no it’s a different crunch I am after. So I set out to revamp and recreate animal crackers, surely there would be a better version one could come up with than the store  sold ones. Starting with a lot less sugar than any commercial product would contain, I added ground almond and flax meal to boost the nutrient and flavor and whole wheat to give them some substance.

image

Animal crackers on Very Merry Black Berry Ice are the best!

image

Ingredients

  • 2 cups stone ground whole wheat pastry flour
  • 1/2 cup almond meal/ground almonds
  • 1/2 cup palm sugar (dry) or rapadura
  • 1/4 cup millet or oat flower
  • 1/4 cup half & half (or cream or milk)
  • 1/4 cup flax meal
  • 2 lg eggs
  • 1/2 tsp vanilla extract
  • 1 tsp baking powder
  • 1/4 cup coconut oil
  • 1/2 tsp salt

Directions

  1. Mix dry ingredients in a bowl, set aside.
  2. Gently soften or melt coconut oil, if it is hard. Mix in the vanilla, eggs and 1/4 cup half and half.  Add the wet ingredients to the dry and mix until a  cohesive dough forms. If it is too crumbly, add a little more half & half.
  3. Form dough into ball, cover and refrigerate for at least 2 hours or until dough isn’t soft anymore.
  4. Preheat oven to 350ºF.
  5. Roll out to 1/4″ thickness, press the cookie cutters into the dough (mine have a plunger to stamp the design onto the cookies after they are cut) and place the cookies onto a lined cookie sheet.
  6. Bake for 10-13 minutes, or until slightly browned on the bottom
  7. Let cool on rack before devouring them all 🙂

image

© 2012 SimpleHealthyHomemade

Balsamic Roasted Figs with Prosciutto

image

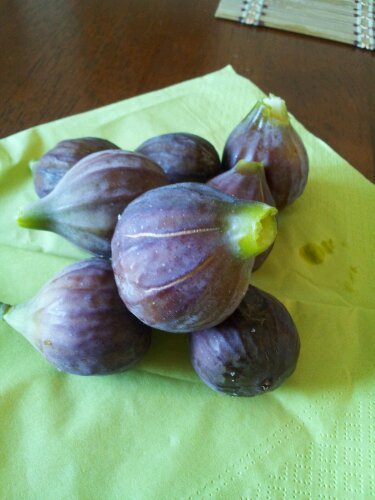
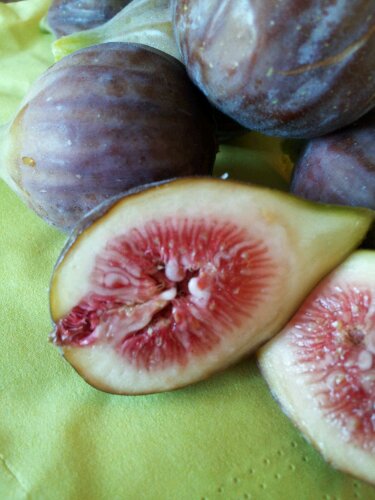
Few things spell summer like ripe figs on my tree. Undemandingly it lives in its, admittedly pretty big pot, on my deck in the summer and indoors in the winter, due to me not knowing if it would actually make it outdoors in the ground, or not. So rather than taking my chances, I lift weight so I can move the fig tree 😉 There you have it, the true reason for me to stay in shape. Well, thanks to the recent heat waves, we have been able to enjoy a handful of figs a day for the past week or so!

Summer cooking for me means lots of meals outside, fresh and simple ingredients and since I do want to make most of the beautiful weather, I don’t want to spend lots of time in the kitchen. It’s all about fresh, fast and easy for me these days! Of course without sacrificing taste!

imagefresh from the tree!

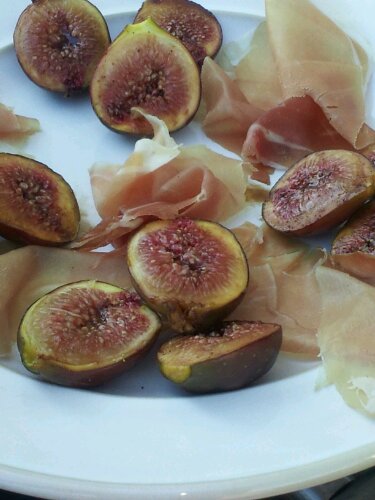
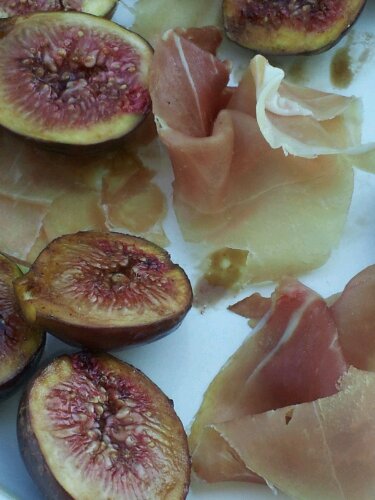
Roasting and adding balsamic vinegar intensifies the sweet taste and the bright flavors of the balsamic balance nicely with the caramelized fig juices; add something salty and you’re set!

image

So here is a quick and easy appetizers that is going to wow everyone at your next gathering but is quick enough to whip up for a surprise visit or even just a week night meal

image

Ingredients

  • Fresh Figs, cut in half as shown (I used about two hand full for two people, or about 10 medium size)
  • 2 tablespoons balsamic vinegar
  • freshly ground pepper and sea salt to taste
  • 1-2 slices Prosciutto (get the real stuff, from Italy (Parma or San Danielle is what I generally use), US domestic Prosciutto is cheaper, but super extremely salty. Since you only need a little, this is not the place to be stingy.

image

Directions

  1. Slice figs in half.
  2. Drizzle with balsamic vinegar
  3. Grind fresh pepper overtop and sprinkle with a little sea salt
  4. Place on a lined baking sheet and place in the toaster oven. Toast until hot and just starting to brown (it took a little under 5 minutes for me), serve with ripped pieces of Prosciutto.

image

© 2012 SimpleHealthyHomemade

Granola Power Bars

image

Hiking or kayaking was on my list for the past weekend, but the weather has been a little , shall we say, un-cooperative. Since last night it literally thunderstorms every hour. So I have been limited to moving out onto the deck with book, cookie and tea, then back in, then back out with juice and book, then back in…  My poor kitty ‘Einstein’ is terrified of thunderstorms. He runs into the basement and hides. He’s been there pretty much all day 🙁 saw him once, I think I will take some water and food down to his little corner… Poor fellow.

image

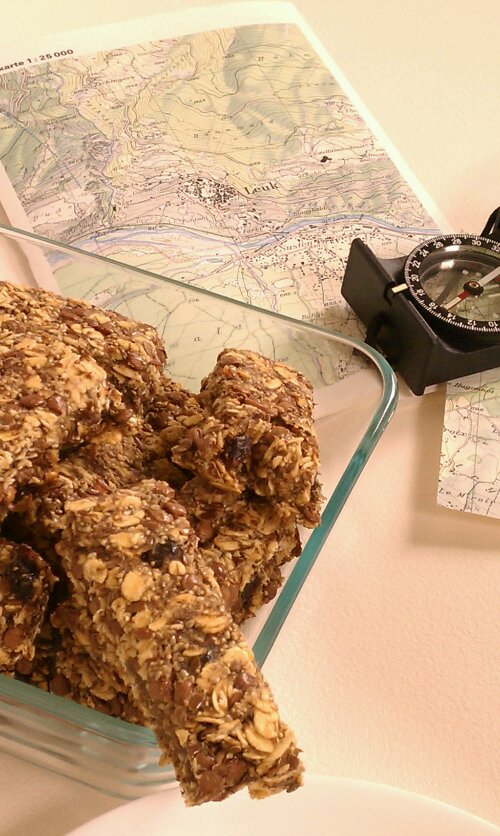
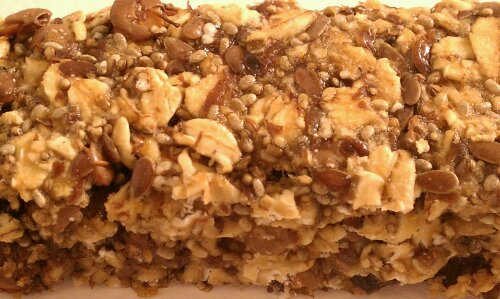
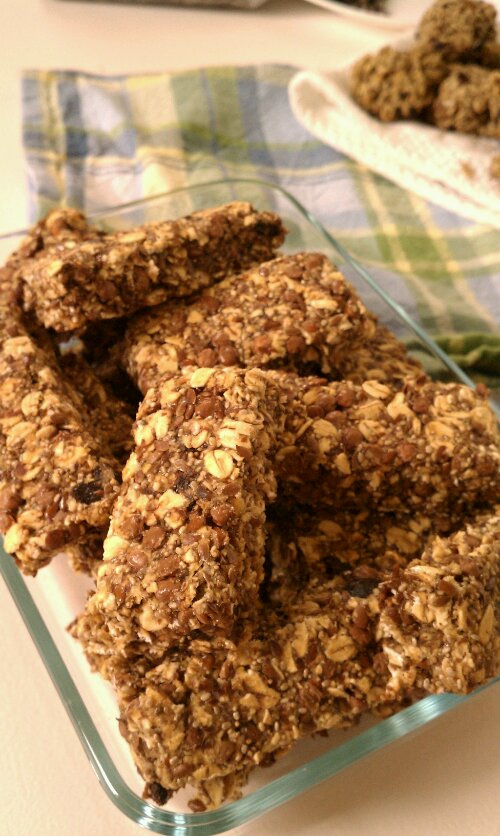
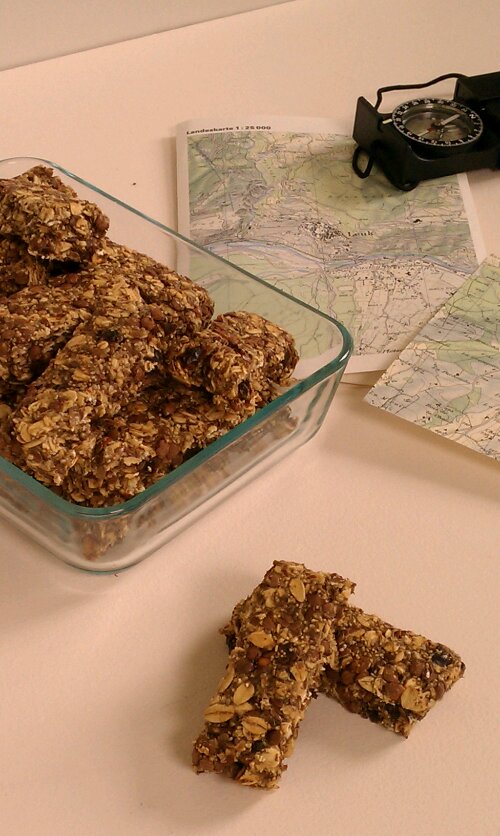
But on the upside of things, being limited to close to the house, I had plenty of time coming up with something that would be yummy (criteria number one), give me some sustained energy (i.e. complex carbs) and would be portable enough to take along, you know on hikes and such. Like a power bar. And since I really, really liked the granola I made recently (and this one), I started there with my ingredient list… And as an added bonus I supplemented with sprouted lentils for protein. To try lentils was an idea I got from Leanne’s Beach Bum Trail Mix Doesn’t that just look awesome? Heck, if they can go into trail mix, imagine how they would be sprouted and put into bars!

image

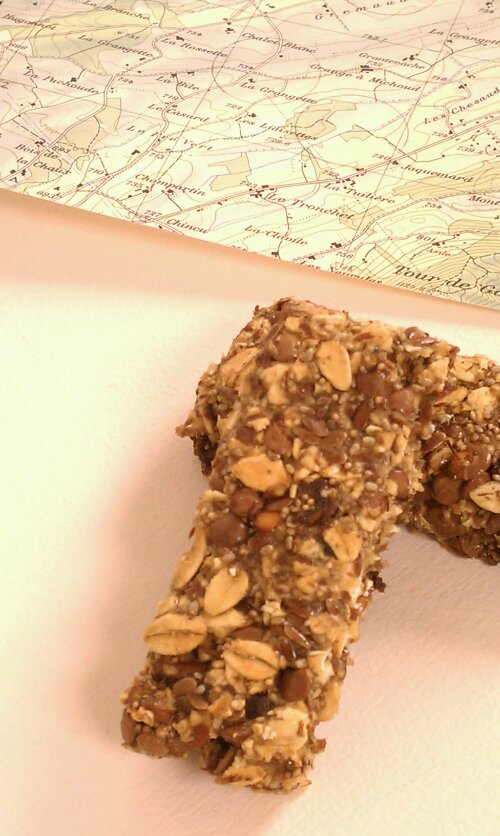
Ready for outdoor adventures! If only it stopped pouring…

imageEven my boyfriend, who’s not all that concerned with healthy eating, loves these!
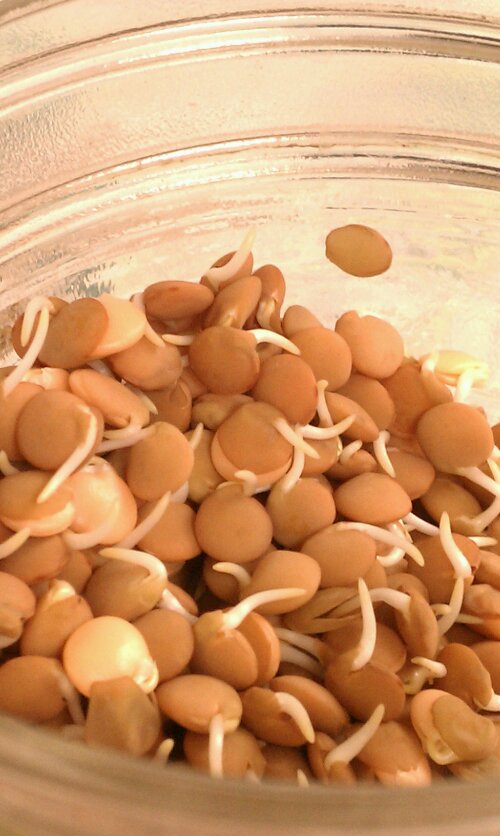
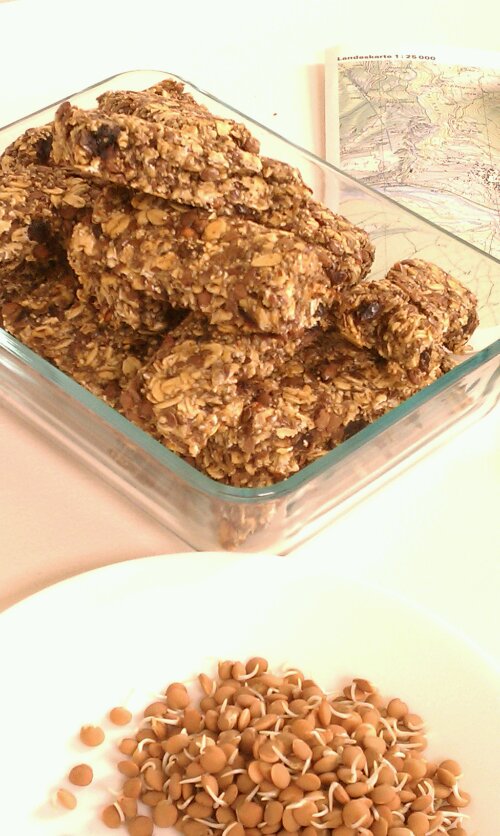
imageSprouted Lentils, before drying

Ingredients

  • 2 cups old fashioned rolled oats
  • 1/2 cup popped amaranth grain (buy or do it yourself)
  • 3/4 cup sprouted (and dried*) red lentils
  • 3/4 cup date pieces or chopped dates
  • 1/2 cup sweet brown rice flour
  • 1/4 cup flax seed
  • 1/4 cup flax meal
  • 1/4 cup chia seeds
  • 1/4 cup apple sauce
  • 1 cup water
  • 1/4 cup peanut butter
  • 1/4 cup rice syrup
  • 1/4 cup honey or agave nectar

* to dry the lentils after sprouting, preheat oven to 350F and place sprouted lentils out on a baking sheet. Cook for about 25 minutes, until crunchy. imageOk, so I got a bit picture happy. Did I mention, it was raining all day?

Directions

  1. Mix oats through brown rice flour in a large bowl, set aside
  2. Mix flax seed, flax meal, chia seed, water and apple sauce, let rest 20 minutes. Then add the sweeteners and the peanut butter and mix until well combined.
  3. Add the wet mixture to the dry ingredients in the bowl and stir until incorporated.
  4. Spread on a lined baking sheet (a US quarter sheet or half of a bigger cookie sheet works well) until about 3/4″ thick
  5. Bake at 350 for 60 to 65 minutes, checking and turning the sheet after 40. Then turn oven off and leave them in the oven overnight.
  6. In the morning, cut into rectangles roughly 1″x 4″, makes about 24

imageI used one side of a US half sheet size. Spread it out, it won’t go anywhere. And makes for some odd shaped bars at the end, you know, the ones YOU have to eat right away, to make it neat 😉
imageCopyright © 2012 Simple Healthy Homemade. All rights reserved

Gluten-free Vegan Oatmeal Cacao Nib Cookies

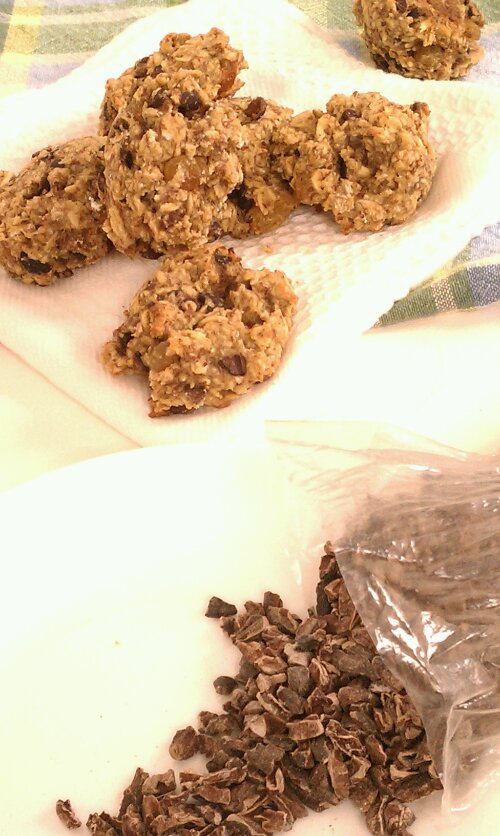
image Oh yeah, AND raisins!

These are so ridiculously awesome. The cacao nibs give them a dark chocolate flavor you can smell from the oven all while being gluten-free and low sugar! A quick word on cacao nibs/cacao bean: coming from the Theobroma cacao tree,  sometimes wrongly labeled cocoa nibs/cocoa bean, which from my understanding refers only to the extracted butter or powdered stuff. The mayan word is: kakaw, they might be on to something, I mean, they’ve only been using the stuff for ever. Just sayin’

Gosh, you have no idea, but just writing about those cookies makes my mouth water, and of course they are already gone… (I see some more baking coming up in this girl’s future) They are chewy and fragrant and yes, the texture is somewhat different than regular oatmeal cookies, after all there are mostly oats in there (and they are made without gluten flour).

imageDark cacao nibs (essentially pieces of cacao bean) 

If you are cultivating your sweet tooth, please feel free to use more ‘sweet stuff’. The cookies here are getting some of their sweetness from the raisins, but they would be a perfect treat for my Dad, who doesn’t really like sweets. I am a big believer in flavor over just plain sweet, or salty for that matter; and these cookies fit the bill perfectly.

image

Ingredients

  • 2 cups rolled oats
  • 1/2 cup millet flour*
  • 1/4 cup golden raisins
  • 1/2 cup cacao nibs
  • 1/4 cup flax meal
  • 2 tbsp chia seeds
  • 3/4 cup water
  • 1/4 cup almond or other nut butter
  • 1/4 cup agave nectar, maple syrup or honey**

* I used millet because of its sweet, nutty flavor, but you could most likely use other gluten-free flours

**if using honey, the cookies are no longer vegan

image

Directions

  1. Preheat oven to 350ºF
  2. In a large bowl, combine first four ingredients (oats through cacao nibs)
  3. In a separate bowl, mix flax meal and chia seeds with the water, set aside and let rest for 10 minutes.Then stir in the agave nectar and almond butter
  4. Stir the flax mix into the bowl with the oats, add up to another 1/4 cup of water if dough looks too dry.
  5. Drop cookies by the rounded tablespoon onto a prepared baking sheet, and bake until golden brown on the bottom and just starting to turn golden on top, about 8 to 11 minutes.

Makes about 30

imageCopyright © 2012 Simple Healthy Homemade. All rights reserved
Finnish Rhubarb Bake

image

This is adapted from an old recipe handed to me by a friend in school who was from Finland. I have made changes to it over the years and adapted the dairy products to something more readily available here in the States.

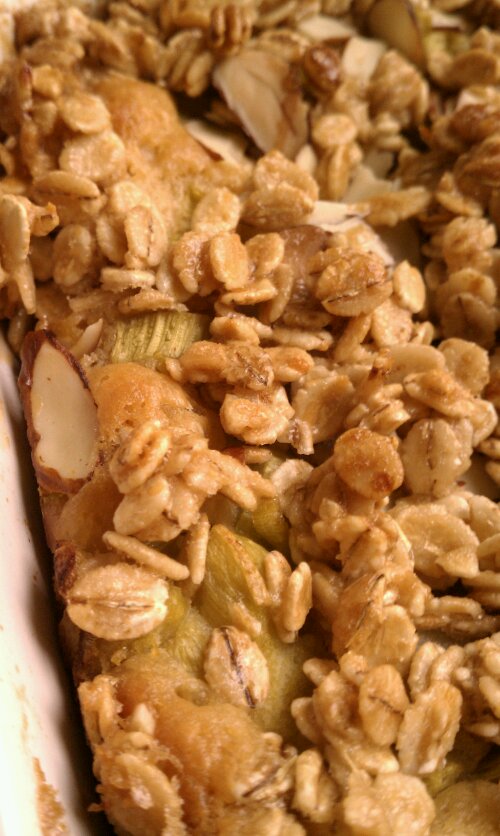
You bake it in a Lasagne type glass dish (9×13″) or using several smaller ones works as well. The resulting cake is moist, tart and sweet at the same time, and the topping makes for an awesome textural contrast. Soft rhubarb and crunchy almonds. Yum.

image‘Budget Version’ made with Oats

This year my garden has not yet produced a ton of rhubarb, it might still be too young, the stalks are nowhere near the size of what my parents have in their garden, but I had enough to make pie, for the first time this year! So I am extra exited, I love tart things and when I was a kid, when we’d cut up and clean the extra amount to prep it for the freezer, I would sneak a piece or two here and there. Yep, raw, no sugar just like that. I am weird, I know 😉 Depending on the amount of rhubarb your garden (or your neighbor’s garden or farmers market ) gives you, you can add more or less (adjust the sugar down if you use less rhubarb, or up of you like it sweet and you use extra stalks). Just make sure you don’t too drastically reduce the sugar, rhubarb is quuuuuuite tart. I have tried it, and it was not so fun. :S

I also tried greek yogurt instead of sour cream, don’t bother. Unfortunately the savings on the side of fat calories do not justify the flavor you lose by doing so. It’s a treat, so treat it as such. There just aren’t any shortcuts for some things, *sigh*

image

Ingredients

  • 4 eggs
  • 2/3 cup sugar
  • 2 sticks butter, melted, separated
  • 1 1/4 cups sour cream
  • 2 1/2 cups flour
  • 2 tsp baking powder
  • 5 stalks of rhubarb, washed peeled and chopped
  • 2 cups sliced almonds or rolled oats
  • 1/4 cup + 2 tbls light brown sugar

Directions

  1. Preheat oven to 400ºF
  2. Butter a 9″x13″ glass dish (adjust baking temp and time if using metal or ceramic)
  3. Mix eggs and sugar, then add the sour cream and stir until well blended
  4. Stir in 1 stick of melted butter, then add the flour and baking powder
  5. Pour dough into prepared form, top with the chopped rhubarb
  6. Mix remaining molten butter and brown sugar, then stir in the almonds or oats, whatever you are using (Oats will be cheaper)
  7. Spread over the rhubarb in the baking dish
  8. Bake for 30 to 35 minutes or until tester inserted in the center of pan comes out clean.

imageCopyright © 2012 Simple Healthy Homemade. All rights reserved

Totenbeinli (Hazelnut Fingers)

image

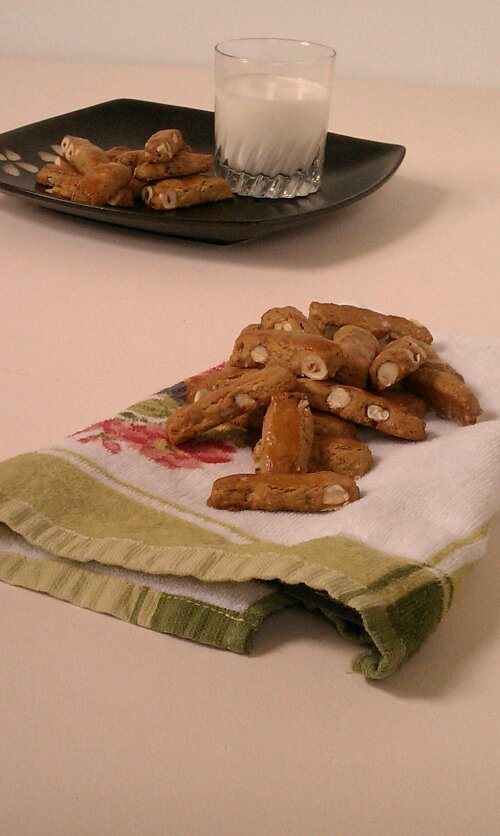
I kept wanting cookies, but at the store I’d either forget or promise myself to make some at home, so at least I would have control over the ingredients. And finally I just had to make the time! I love hazelnuts, in an y form I can get them, and these cookies rely heavily on just that. It’s not juts the flavor, I guess it has as much to do with the memories. Of outdoor adventures and hikes with my family.

Memories of my Dad making flutes out of fresh sprouted hazel twigs in early spring, when the sap just started rushing back up from the roots to make the buds sprout and give life to the plant, then in the summer the nuts would still be green, not quite ripe yet, and we’d sometimes cut small branches  (they are perfectly straight) for grilling sausage over an open camp fire for lunch out on a hike, then in early fall, the nuts would start to turn brown inside their green frilly frock and you knew they would be ready soon!

The great thing about these cookies, just like biscotti, they keep for quite some time. That is, i you can keep from eating them. Since they are crunchy all the way through they don’t go hard and stale like chewy cookies often do, (then again maybe I just don’t eat those other ones quick enough?)

image

These can range from crunchy to totally hard, but they keep, like forever (or until someone with less self control finds out where they are kept). Sort of similar to a biscotti. As per my research (thank you fragtdenkoch.ch) apparently the strange name (Toten= Dead,  Bein=Bones) comes from a custom that was mentioned first around 1500, where these would be served after a funeral. People did not have much and would save luxury items such as sugar, hazelnuts and such things for special occasions, later lemon zest, cinnamon and cloves were added and the cookie is now often made during Christmas time.  Although I remember our local grocery store carrying these in big (maybe not for American standards 😉 ) 500 gr bags all year long. I have pretty drastically reduced the sugar from my original recipe, but I think next time I will try and use even less, they are still plenty sweet!

Oh and just today, I got the local bulk store to turn some hazelnuts into hazelnut butter for me, so watch out world, I can see more Hazelnut recipes in my near future 😉

image

Ingredients

  • 1/3 cup butter, unsalted, softened
  • 1 1/2 c sugar
  • 3 eggs, separated
  • 1/2 lemon, grated peel only
  • 1 tsp cinnamon
  • 1 dash ground cloves
  • 1 pinch salt
  • 3/4 cups unblanched hazelnut flour/meal/ground hazelnuts
  • 1 1/2 cups whole hazelnuts
  • 2 cups flour

image

Directions

  1. Toast hazelnuts for a few minutes, then place on a kitchen towel and rub until some of the skins come off, set aside
  2. Stir sugar into softened butter until well mixed
  3. Add 2 eggs and lemon zest, spices, salt and ground hazelnuts, then add flour.
  4. Once everything is well blended, add the whole hazelnuts and stir.
  5. Let rest in the fridge for 30 minutes
  6. Preheat oven to 380ºF
  7. On a flour dusted surface, roll out to a little under 1/2″ thickness and cut into 1/2″ by about 3″ pieces using a bread knife to get easily through the whole hazelnuts.
  8. Place cookies on a lined baking sheet and brush with the lightly beaten remaining egg, bake for 15-18 minutes or until golden brown and crisp all the way through.

imageMakes lots of cookies, but they’re eaten so quickly

image

Copyright © 2012 Simple Healthy Homemade. All rights reserved

Walliser Brot – 100% Swiss Rye Bread

image

Finally, I think I did it!! It only took about 5 or 6 tries, and me eating countless slices of extremely dense or otherwise unsatisfying 100% rye bread. Which, if I were a cat, would most likely be good for keeping my teeth tiptop clean. But anyhow, I think, finally, I can reveal the outcome of this process, and how fitting this would be my 100th blog post!

Can you believe it? I am celebrating the 100th post on Simple Healthy Homemade! I am super exited and would like to thank all my readers and fellow bloggers for their support and interest in what I cook and scribble! Thanks to all of you who have commented and engaged in the conversation! I truly appreciate your feedback 🙂

image

But let’s start at the beginning of the story. For before I could get started making ‘Walliser Brot’ I had to tackle a couple of hurdles I did not expect. First, the flour here is different. After consulting with one of my friends from Switzerland who, as a baker, had done an exchange year in the USA, I realized that making Walliser Brot (a traditional rye bread from the canton of Valais/Wallis is Switzerland) would be a tad more involved than expected, but that has never stopped me before, and was surely not going to hold me back now that I was craving that particular bread. So the flour situation I knew was going to be some trial and error, to determine what would work as a substitute. But the second part of the puzzle, (or actually the first, since without it, I could not even start the trial process) involved the bread not being made with yeast, but a traditional rye sourdough as a starter. To read more on that and learn how to make your very own rye sourdough starter, read my previous post.

image

A little bit of background on the bread we are talking about here. Walliser Rye Bread is a 100% rye grain bread, it is fairly dark and has a dense crumb. And it tastes nothing like what most of you associate with ‘rye bread’ here in the US. The taste many here think is ‘rye’ actually comes from the caraway seeds added to many rye breads (which I am not a fan of, at all) and to a lesser extend from the molasses. Also this bread has no yeast or added wheat flour to help with the lower gluten content of rye. So I knew it was going to be a sticky situation since gluten in wheat is what makes the dough hold together and be elastic and, uuhm, dough-like. Rye bread dough is often very tacky. But I was feeling a little homesick and nothing can hold you back when you crave something that will make you feel  like home. And we all know, there’s no place like home 😉

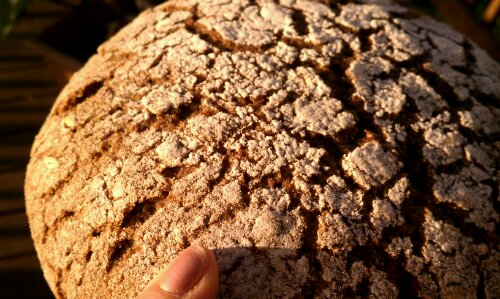
Here is a picture once I finally got it to turn out just right.

Traditionally the oven in the village would only be fired up 2-3 times a year (!!!) and each family got their turn in using it. Follows that the bread would have been hard as a rock after a while, but it also must have kept quite well. There are stories of people using an axe to get a piece of bread cut! It would then be soaked in hot milk until soft and could still be eaten. Here a link for the curious (in German) about Walliser Roggenbrot (Rye Bread) and its history.

image

Rye was the primary or only grain available since it was the only grain suitable to the high altitude and short growing season. In fact, rye was sometimes referred to as “the poverty grain” since it will grow on soils too poor for other grains. Rye grows more rapidly than wheat, can withstand submersion during floods, and continues to thrive during drought.  Rye therefore became especially popular in colder temperate countries – Russia, Poland, Scandinavia, Canada, Argentina, China, Turkey and elsewhere where it was too cold or wet for wheat to grow dependably, like in the high valleys in Switzerland. Besides being able to grow and mature in adverse conditions, it is also higher in protein, phosphorus, iron and potassium than wheat. It’s high in lysine, low in gluten and a good source of zinc, copper and selenium, and a very good source of Dietary Fiber and Manganese. In the high mountain valleys, rye was harvested with the use of only simple tools, by hand and after dreshing, would be stored in a place like this:

Stadel (Storage Barn for Rye)

Here with view of the Matterhorn

A ‘Stadel’ in this region of Switzerland would be built on stilts, which allowed the people to build on very uneven terrain, and would have a large stone plate (I have often seen them built: stilt, stone, stilt) to prevent mice and other rodents from getting into the grain stored for food. Smart move, given that back in the day, you could not just go and buy more if it went bad and you had to make it through a year before being able to harvest more.

image

But let’s get to the recipe!

Ingredients

  • 1 cup rye sourdough starter, active and fed
  • 4 cups whole rye flour* separated, plus additional for dusting
  • (1/4 cups rye flakes, soaked in water for 2 hours) optional
  • 1 tsp salt
  • 3/4 to 1 cup warm water

*Either freshly ground rye (you need about 1 3/4 cup whole rye berries/grains) or store bought, make sure it is whole grain, not white or dark rye flour

Directions

  1. In a large bowl mix the sourdough starter with 3/4 cups warm water, add 3 cups of rye flour, salt and mix until incorporated. Depending on the wetness of your sourdough (the one I maintain is 100% hydration and therefore, quite wet) At this point the dough will be fairly moist and sticky so stirring with a spoon is a good option. If it seems dry, add another 1/4 cup water.
  2. Cover and let rest and rise in a warm spot until doubled in size. This will take anywhere from 3-6 hours, depending on how active your sourdough is and the ambient temperature. If you run out of time, place in the fridge overnight, let come to room temperature before the next step.
  3. To your dough, add 1 cup of rye flour, the soaked rye flakes, if using. Knead until incorporated. If your dough is still very tacky, add some additional flour, if it feels stiff and is dry add a little more water. (This step varies depending on the moisture content of the flour you are using. If your flour has been stored for a while, it tends to be drier than freshly ground flour, and you might have to add some extra water.)imageNow it’s time to get down and dusty. Knead the additional flour into the dough before shaping it into a ball and placing on a floured baking sheet to rise…
  4. When everything is incorporated, form into a ball, flatten slightly, dust surface with flour place on a flour dusted baking sheet and let rest in a warm place until cracks show on the surface. (To create a warm place for my bread in the colder months, I turn the oven to warm (160º-170ºF) for 2-3 minutes, then turn the oven off. Cover the ‘bread to be’ with the inverted bowl so it doesn’t dry out and place in the warm oven to rise.)imageAfter its final rest and rise, ready for the oven… (notice the characteristic cracks)
  5. There are two ways of baking this bread: Preheat oven to 380ºF for 10 minutes, placing a large cast iron dutch oven in the middle of the oven. When the oven is hot, remove the dutch oven, dust the inside with some flour and gently slide the bread into the pan, cover with the lid, then set back in the oven. (You can also use a cloche, if you happen to have one) Bake 45 minutes, then turn heat down to 365ºF remove the lid and bake an additional 15 to 20 minutes or until the bread is baked through. (Do not lift the lid or peak before the 45 minutes are up, you are trying to create a moist and steamy environment for baking the bread! )
  6. If you do not have a cloche or a dutch oven, you need a metal roasting pan or jelly roll pan. Put that on the bottom shelf of your oven as you preheat. When the oven is preheated, place the bread in the oven (on the baking sheet) and add 2 cups of hot water to the roasting pan on the bottom shelf to create steam and quickly close the door, trapping the steam inside. After 20 minutes, add more water if necessary, be careful not to splatter it on the glass parts of the door or at the light bulb, they could burst or crack. Bake for 45 minutes minutes, turn the heat down to 365ºF, check on your bread an bake an additional 15 minutes, or until done. The bread will sound hollow when tapped on the bottom (careful: HOT!)
  7. Turn off the heat and leave bread in the oven for an additional 20 minutes, then remove from oven, and place on a cooling rack.
  8. Let cool completely and rest for a minimum of 24 hours before cutting into it. It will gunk up your knife and stick together or crumble if you don’t wait (Trust me, I know how hard this is to wait when the house smells like fresh bread)
I like it with cream cheese or other fresh cheese just as much as sweet toppings, my favorite currently (besides butter and prosciutto) is cashew butter and strawberry jam 🙂

image

Copyright © 2012 Simple Healthy Homemade. All rights reserved
Spaghetti Squash Leftover Bake

image

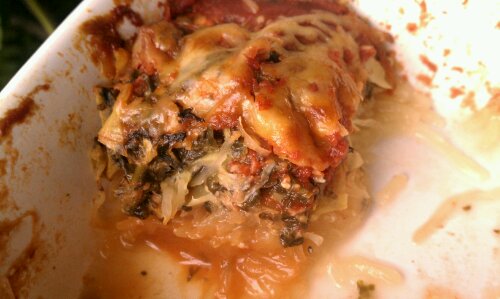
It’s a glorified leftover dish everyone will be exited about. It’s vegetarian, its cheap and it uses leftovers, option for no leftovers following as well. I mean, who has spinach artichoke dip leftovers? Pffffft!

For a long time I did not dare to eat this interesting item, it just seemed… wrong and I had no idea what to do with it once it would find its way into my kitchen. Stringy things are not usually a good thing when it comes to veggies, like stringy beans or the wire like strings in tough snowpeas that quite nearly strangle unsuspecting eaters. But finally curiosity won out and I have departed from the ‘just put spaghetti sauce over it’ approach that is generally the extend of creativity people come up with when confronted with the ‘what to do after it’s cooked’ question.

image

So while this particular squash can’t quite keep up nutrition wise with some of the other members of the winter squash family, its high water content kinda work against it there. Not to say it’s unhealthy, by no means, it’s just not as nutritionally dense as some of the other ones, but it’s a great low calorie, low carb choice!

One of the issues I have with this, like some of the other winter squashes as well, is what to do with it all? I am a one person household on most days and I really, really would like to not have to eat the same for lunch and dinner all week. Maybe I am weird that way, but hey, there’s worse 😉 Well, I have found that cooked spaghetti squash freezes quite happily for a couple of months, stored in zip top sandwich baggies. That way it’s ready to defrost in my fridge for whenever I need it.

So first, yes you do need to bake (or microwave) the thing to cook its interior.  Prick it with a fork all over so it doesn’t blow up on you, and either cut in half, scoop the seeds and discard and place cut side down on a baking sheet in the 350ºF oven until tender, or microwave without cutting in half until tender and easily cut in half (Careful, extremely freakin’ hot)

Once it’s cooled to an acceptable temperature, using a fork, scrape the stringy flesh into a bowl. Portion up as convenient and freeze until needed!

image

For two people as a side (or small meal) or 1 hungry eater

You need:

  • 1 cup cooked Spaghetti Squash (defrosted if frozen)
  • 1 cup Spinach Artichoke Dip (or 1/2 cup chopped artichoke hearts, 1 cup chopped fresh baby spinach, chopped & 1/2 cup italian cheese mix, microwave until cheese is melted and spinach wilted not quite as creamy, but works)
  • 1/2 of a 8 oz can tomato sauce
  •  1/4 cup of Italian cheese for the top (use a mix that has more than just mozzarella, so you get better flavor

Directions

  1. Preheat oven to 350ºF
  2. In an oven proof 2 cup square dish layer spaghetti squash, then top with Spinach Artichoke Dip, followed by tomato sauce by the spoonfuls. Top all of it with a handful of cheese.
  3. Bake until heated through and bubbly, cheese is melted and beginning to brown (about 15-20 minutes)

image

Copyright © 2012 Simple Healthy Homemade. All rights reserved