Gluten Free Pumpkin Crêpes

What better start could there be for a brisk fall day, than adding pumpkin to your crêpes on a Sunday any morning? And when you come back from running errands, your house still smells like pumpkin pie!

Make sure you keep these fairly thin as they tend to stay more moist than regular pancakes, too thick and the center will be more like pumpkin pie filling: namely dough-ey

These ‘crêpe-cakes’ were fine too. Any thicker though I have not had any luck with…

Serves 4

Ingredients

  • 1 cup pumpkin puree
  • 1 cup milk
  • 1 /2 cup water
  • 1 egg
  • 1/2 cup sweet sorghum flour
  • 1/4 cup tapioca flour
  • 1/4 cup chick pea flour/ besan
  • 1 tsp baking powder
  • 1 tbsp sugar
  • 1 pinch salt
  • 1/2 tsp cinnamon
  • 1/4 tsp pumpkin pie spice

Directions

  1. Mix all the dry ingredients, then add everything else
  2. Heat a non stick skillet over medium heat and quickly coat the inside with a bit of coconut oil, using a crumpled up paper towel.
  3. Pour about 1/4 cup of batter into the heated pan and tilt to coat the entire bottom of the skillet. Cook until bubbles show through and the batter stops looking shiny, then gently turn them over to cook the other side. (These are pretty delicate, so do make sure your skillet is non stick and cook them enough before attempting to flip over.)
  4. Repeat with the remaining batter, keeping the crêpes hot on a plate in the preheated oven or stick them in the toaster over (heat before, then turn off and put the plate in it)

© 2012 SimpleHealthyHomemade

Banana ‘Fritters’

imageOr what to so with those ‘ugly’ bananas…

image

Maybe I am just weird but I tend to believe that others out there do not like mushy bananas either. You know, the ones that sit in the fruit basket forgotten like the proverbial step child until, without warning suddenly they turn brown, in a matter of hours it seems. Alright, admittedly I am exaggerating, but I just really do not like them even when they start getting the little brown spots. At least not for eating as a banana. No, at that point I will resort to using them up in all manners of ways that I came up with over the years (I don’t like to waste and throw them out after all) from smoothies to sweetener in baked goods and muffins, to ice cream topping, I have tried most anything. How about you guys, do you have any favorite banana-use recipes?

image

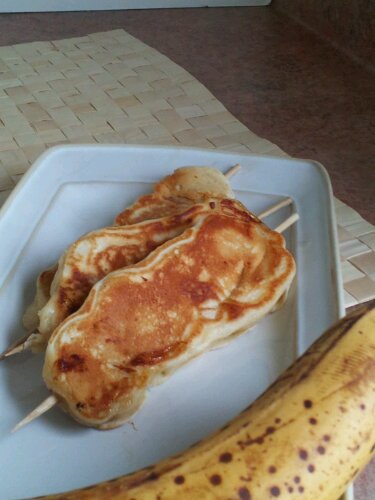
This would be great as a snack or an indulgent breakfast: Pancake batter banana ‘fritters’. Since the bananas get soft and extra sweet as they cook, no need for syrup. Haven’t tried this, but some chocolate spread, like Nutella might be good…

Ingredients

  • You need a few ugly bananas (very ripe)*
  • leftover pancake batter (or for a simple recipe go here)
  • short Bamboo skewers (to fit in the pan)

* one banana makes about three skewers on average.

Directions

  1. Slice bananas into rounds, about 1/2″ thick and thread 3 to 4 pieces onto short bamboo skewers (if you only have the long ones, cut them in half before or it won’t fit in the pan) You want to thread them on like you are making a flat snow man, if that makes sense (so they lie flat)
  2. Heat a skillet over medium high, when it’s hot, add a bit of oil and swirl to coat
  3. Put the pancake batter in a shallow dish and dip, first one side then the other, of the banana skewer until the slices are completely coated in batter.
  4. Cook in the preheated pan until set and slightly browned, then turn over and cook on the second side. Depending on the size of your pan, you can cook 3 to 4 skewers at a time. Enjoy hot!

Because of the skewer they are easy to pick up and eat!
image© 2012 SimpleHealthyHomemade

Breakfast cups

image

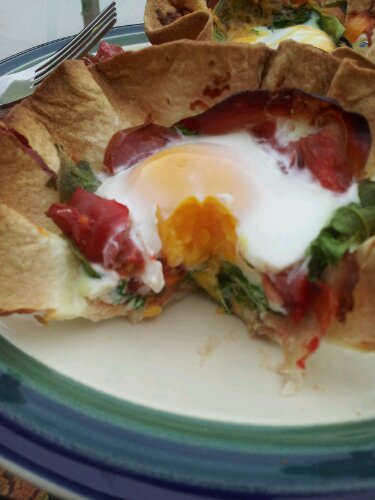
Breakfast cups or what to do with those leftover fajitas… You know how everything always seems to come in boxes and quantities for a church group? Or at least a family of 8. Well in my case, we currently are a family of 2, sometimes even a family of 1 and most of the packaged things are just too much. I guess we could just resign ourselves to eating the same thing for the next week, twice a day…  Are we just that spoiled? Anyone like to eat the same all week? If you have an answer, please do share. As for myself since I don’t like to waste things, I am always looking for different uses for the ‘rest’of the package. Fajita “wraps” are great for just that, you can turn them into desert (brush with butter and sprinkle with sugar and cinnamon), or breakfast, they don’t mind one bit 😉

imageI promise that after this, I will try and not just post breakfast recipes. Actually, I got an awesome one coming up next. Nelson offered to make dinner the other night. And not by buying it at a restaurant (the usual path of this) OMG I can hardly believe it! And he made one of the best soups ever! In fact I had it for breakfast this morning, it was THAT good. But even better than the soup? Shhhht! Don’t tell anyone, I don’t want to break the spell, but Nelson started to want to cook!!!! So now maybe I can stop worrying that I might starve when I am sick sometime or when we have kids down the road, they’ll eat only frozen pizza when I am out. Can’t say it enough, I am so thrilled! So Ladies (and fellas) 😉 there IS hope. And there can be more than one good cook in one household 🙂

image

But enough gushing, on with the show, just stay tuned for the Pepper & Mushroom Soup, coming up …

image

Ingredients

per person

  • 2 fajita size tortillas
  • 2 eggs
  • 2 slices of prosciutto or ham (leave out to keep vegetarian)
  • 1/4 cup shredded cheddar
  • 1/4 cup (packed) baby spinach leaves
  • (optional: a couple of pieces of tomato)

imagePeppered ham is wonderful too!

Directions

    1. Preheat oven to 375ºF
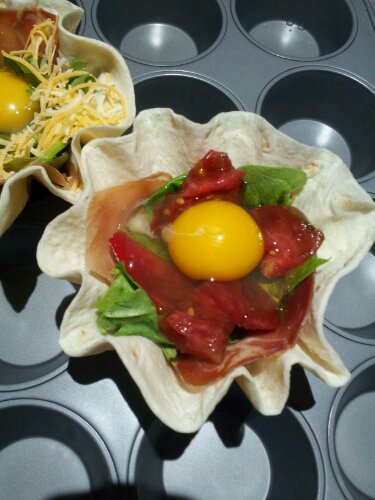
    2. Using a muffin pan or fluted Madeleine cups on a cookie sheet, form the fajita into it. It is easiest by ‘pleating’ the sides as you go around.
    3. Place the prosciutto into the created cup, followed by the spinach and the cheese. (If you are making the vegetarian option, the cheese goes on the bottom, below the spinach)image
  1. Carefully crack one egg into each cup (add a couple of pieces of tomato, if you like), and place in the middle of the pre heated ovenimage
  2. Bake 20 to 25 minutes or until eggs are set. ( The ones below I turned the broiler on for a couple of minutes at the end, but wasn’t careful enough=blackened)

image

© 2012 SimpleHealthyHomemade

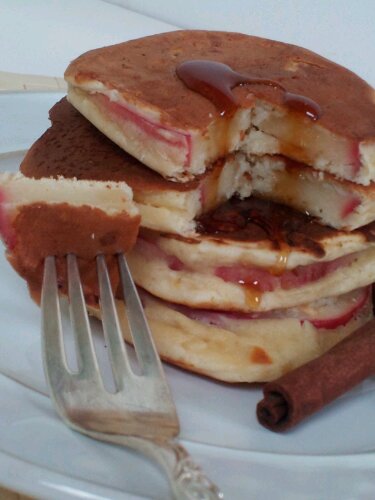
Apple Ring Pancakes

It’s fall and with that: Apple season!
And with an abundance of fresh apples the kitchen is beckoning  to turn them into… I don’t know… stuff. Yummy stuff  😉

image

The idea for this was partially inspired by my memories of Basel (my hometown) and the 2 week long autumn fair ‘Herbschtmäss’ that happens every year in, I wanna say late October. I am not certain on the exact timing all I know it is usually when you get cold toes for the first time that fall and you might want to dig out your gloves. The fair which is all over town has rides (like any good fair, I guess) but the best part are the places that have artist displaying their crafts and the food. It is traditionally the start of the colder weather, people start thinking about presents and the winter holidays coming up. But my fondest memory is of the hot apple fritters with cinnamon that one place (and one place only) was offering during those two weeks. You would get them and huff and puff for a while so you don’t completely burn yourself, but I wanna say, a little pain was often involved, it is just so hard to resist that tempting smell…   However, to bring this story full circle, the fried apple rings are maybe not the most health conscious treat out there, plus making anything deep fried is a lot of work, so abundance of apple was not going to equal fried food for this girl. And while this train of though could lead to many an end, the one my brain spat out was ‘breakfast!’ Right, what better way to use an apple than making them into breakfast?

image

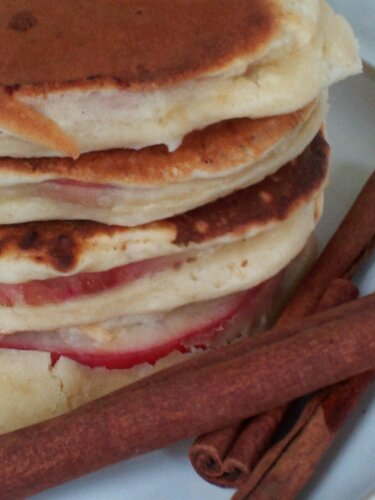
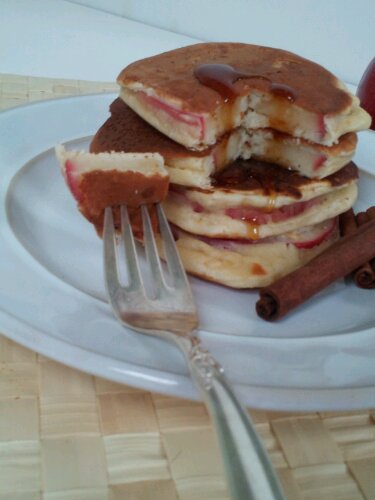
This is also a good way to add some fruit into your child’s breakfast, all while making it fun! If you’re really good, you might be able to preserve the hole in the middle that filled in with batter in my case. But I did also not try very hard to keep it, if that makes sense, since to me the shape was not as important as it might be to a 5 year old 🙂

image

Ingredients

  • 1-2 larger apples (I used a gala apple) cut cross wise into 1/4″ slices
  • 1 cup flour
  • 3/4 cup milk
  • 1 egg
  • 2 tbsp oil or melted butter
  • 2 tsp baking powder
  • 2 tsp turbinado sugar
  • 1 pinch of salt
  • cinnamon-sugar and maple syrup as toppings
  • some oil for the pan

image

Directions

  1. Cut apple into 1/4″ sliced crosswise, then using a small round cookie cutter or glass, cut out the core of the apple from each slice. (You can also use an apple corer, then slice the apple)
  2. Make the batter: Mix the flour, baking powder, salt and sugar until combined, then add the milk, oil and egg.
  3. Mix with a fork until just combined, some lumps are fine
  4. Preheat a skillet over medium heat, rub the interior with an oiled paper towel.
  5. Using a toothpick, dip the apple rings into the batter, turn to coat both sides and place in skillet to cook, about three at a time.
  6. Turn when they are golden brown and finish cooking on the second side, being careful to turn the heat down if necessary. (You want to make sure the apple gets mostly cooked before the pancake burns) Set aside, cover and keep warm on a pre-warmed plate or in the oven. Cook the remainder of the apple slices.
  7. Serve sprinkled with cinnamon-sugar or syrup and be happy you did not just have plain carbs for breakfast.

image

© 2012 SimpleHealthyHomemade

Bircher Müesli

image

You may know versions of it as ‘musli ‘, but this cereal based dish has its roots firmly planted in Switzerland. Dr. Bircher decided, at a time when everything was cooked due to germs, that there were benefits to real and raw foods.

Per my research, for those who care to dive a bit deeper: Dr. Maximilian Oskar Bircher-Benner  (or in german) (August 22, 1867, Aarau – January 24, 1939) was a Swiss physician and a pioneer in nutritional research. At his sanatorium in Zürich, a balanced diet of raw vegetables and fruit was used as a means to heal patients, contrary to the beliefs commonly held at the end of the 19th century.image

Bircher-Benner changed the eating habits of the late 19th century. He believed eating raw and whole foods such as fruit, vegetables, grains and nuts was healthier than cooked, he also rejected the use of refined products such as white flour and white sugar. His ideas may not all have been correct, he believed solar energy stored in food (in a not strictly defined or explained way) was what made them better and not the quantity or quality of nutrients. His theory of life was based on harmony between people and nature. Some of his ideas originated from observing the daily life of shepherds in the Swiss Alps, who lived a simple and healthy life.

image

By now this recipe has as many variations as there are days in a week, multiplied by the number of people in Switzerland (my Dad says we Swiss people are born with the Bircher Müesli recipe attached to the umbilical cord 😉 this is my basic recipe and it’s variations.


Walking though the aisles in a grocery store, you will find commercially made musli mixes, including everything from dried fruit to chocolate chips. This is the commercially available basic Swiss version I found at the store the other day!


image


It’s quite a popular food these days, it seems to me. But here I am taking you back to the roots, the origins of where this all came from. (using my important voice)


And let’s face it, why waste money on prepackaged stuff when you can make a better and healthier-for-you version easily at home? No cooking required and easy to make, this recipe is very versatile and adapts through the seasons depending on your fridge or gardens content of fruits and berries.

A great summer meal, I love it anytime of day, but in Switzerland, it is not considered a breakfast food. It is eaten as alight lunch or dinner with a buttered slice of crusty bread. (We love our bread) …And sometimes some whipped cream on top…

image

I always put it up to my Dad being a foreigner, him never being super exited about Bircher Müesli, but now I am wondering if it is a guy thing. Let me explain. The other morning over breakfast, Nelson kept talking about ‘having some ‘Beatle Music’ and pssssshhhh totally over my ehad. Well, I figured it out Beatle Music = Bircher Müesli, hahaha. Of course I thought he meant ‘beetle music’ and was utterly confused, imagining a line of beetles tapping their little feet (or legs?) rhythmically, so sadly I was left with the impression that maybe he did not like my ‘Beatle Music’ turns out he does, it’s after all juts a better version of oatmeal, cold and with fruit!

image

Ingredients

  • 1/2 cup rolled oats
  • 1/2 cup rolled wheat, barley, millet, and/or rye flakes (you can use all oats instead)
  • 2 tablespoons sliced almonds
  • 2 tablespoons raisins
  • 2 cups milk
  • 1 yogurt (optional)
  • 1 apple
  • 1 banana
  • 1 1/2 cup mixed fruits and berries (plums, peaches, apples, pears, oranges, grapes, strawberries or even frozen blueberries, the possibilities are endless)

optional: you can also add chopped roasted hazelnuts, pieces of dried fruit or banana)

image

Directions

  1. In a large bowl, combine the cereal flakes (or just the rolled oats), raisins, almonds and hazelnuts and 1 1/2 cups of the milk.
  2. Grate an apple on the large holes of a grater, stir to combine.
  3. Cover and let stand 1 hour or until the oats are softened.
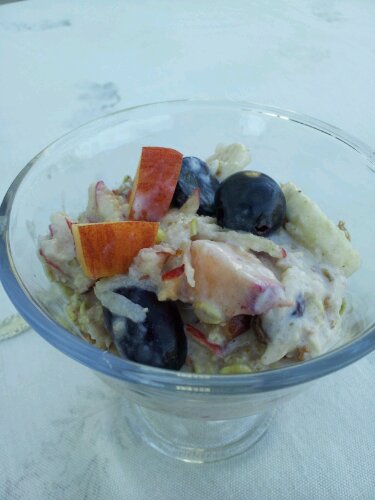
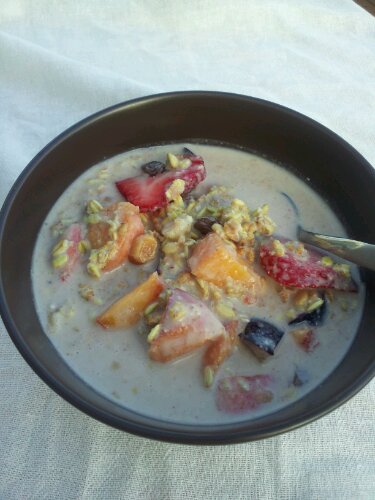
  4. Slice the banana, chop the peach and the berries (used in the picture are peach, plum, strawberry, banana and apple) or whatever other fruit you have on hand.
  5. Uncover the bowl, stir in the yogurt (if using) and the rest of the milk (You can add more if it looks dry) then add all the fruit, gently mix so one person doesn’t get all the fruit and serve.
  6. Store any leftovers in the fridge and eat within 2 or 3 days

image

Healthy Breakfast!

image

© 2012 SimpleHealthyHomemade

English Muffin Breakfast Eggs

Breakfast is a very important meal and can start your day right or set you up for hunger bangs by 10 am. And as anyone knows, when you are outdoors a lot hiking, kayaking or even just relaxing by the water, food tastes twice as good. Or maybe you get twice as hungry? Who knows. In order to fill our bellies and give us some energy for the hiking and whatever else we could come up with to fill the day ahead, we dug through the cooler and found some of our yummy supplies that had lived through my boyfriend’s searches for snacks. Okay, we planned a bit better than that, but you never know with hungry guys, they can mess up meal plans 😉 Eggs keep pretty well in a cooler, so we had ourselves some of those for breakfast on day three of our last camping trip. Prosciutto and cheese are also stuff that keeps rather well and luckily were not all gone from snacking or making our Campfire Chili.

Ingredients

(per person)

  • 1 english muffin, split
  • 2 eggs
  • 2 slices of prosciutto (or sliced ham)
  • 1 oz of cheddar*, thinly sliced

*it works with other types of cheese that melt as well, and we have even tried feta with good results

Directions

  1. Place a skillet over medium high heat, add a little oil, then carefully crack the eggs into the skillet.
  2. When the eggs are near ready, place the english muffin pieces face down next to the egg to heat up, then turn over and layer the prosciutto and cheese onto of the bread and slide the eggs on top.
  3. Enjoy by a waterfall (optional, but recommended)

and if the egg white gets out of hand, just flip it over like we did!

© 2012 SimpleHealthyHomemade

making Butter

A while back I discovered that my farmers market offers raw milk, and I started drinking raw milk again. I switch back and forth between regular (cow) milk and goat milk. I have made goat cheese and fromage blanc and mozzarella, and butter. You’d be surprised to find just how easy this is, using modern convenience tools like a blender. No shaking a barrel for hours and NO, nononono, you do not get one of these: 

         or 

To me, raw milk is the only milk worth drinking, hands down, and not just due to the taste (more here). Not only are my food decisions based on how any given food tastes, but also how it is raised. And raw milk dairies are (at least in this country) organic, my milk is from pastured, grass fed cows (you know, happy out on the pasture vs. in a dark stable tied up somewhere), so far all the raw milk diaries I have visited care a great deal about their animals and take care of them like you and I would. From a regulatory stand point, raw dairies are generally under much more scrutiny, for cleanliness, safety etc. The cows have names. Ok that part might not make the milk taste better, but wouldn’t you agree that if you name your animals, they are closer to your heart than if they just have a number? 🙂

04_23-AntVollon-MndOfButter

Mound of butter, by painter Antoine Vollon

Ever read the label of supermarket butter? One of the most surprising ingredients often is coloring. Now why would there be food coloring in your butter making it, presumably prettier, more buttery looking maybe, that is more yellow? Do we and if so why do we think it’s better if it’s yellow? If butter isn’t yellow after it’s made, then why would we think it needs to be? Complex questions you are asking, or then again not. Butter USED to be more yellow, at least in 1875 (see the painting above) when the cows where still out on the field, eating what they were meant to eat : Grass. Since most of your generic super market cows here in the US are kept indoors and fed a mixture of corn and cornstalks fortified with vitamins and minerals, the color doesn’t turn out quite the same. And it seems that people are smarter than we give ourselves credit for and somehow remember that butter is supposed to be yellow and it is more nutritious that way and this is where we get duped: color is added and our little  minds are happily appeased into thinking yummy healthy butter. A little sad, I know. BUT since it is soooo easy to make your own, from good fresh cream, you can have great butter again in less than 15 minutes of work. When you start making butter you will notice that the color of the resulting product changes throughout the season, in the spring when the cows are out on the lush, fast growing spring pasture, the butter is a sunflower yellow, almost orange! But no matter what time of  year, there still is more color in it than the regular stuff from the store. And taste!

First off, you do need cow milk to start. Goat milk is higher in fat,but naturally homogenized, so that the cream does not separate and rise to the top.

  vs 

Brown Swiss (Cow)                                           Domestic Goat

Juuuuust in case you were doubting your animal knowledge 😉

After bringing the milk home (it comes in half-gallon glass bottles) I pour it into a wide mouth glass container that I keep for just that purpose and stick it in the fridge. It needs to sit overnight since the transport home and the pouring it from on e in to another container mixes up the milk, like I do by shaking it before pouring a glass, if I am not going for butter. Wide mouth because the next morning, I can easily scoop the cream off the top using my silver gravy ladle from the thrift store.

Gently skim the top layer off the milk, it will appear a bit darker, cream colored instead of white (no pun intended) and put it right into the blender bowl.

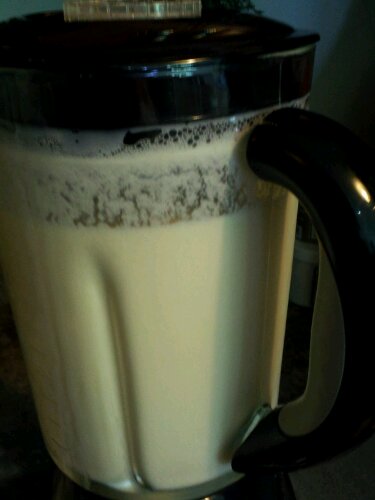
After that all that’s left to do is whirl the cream until the fat particles start clumping together.
image

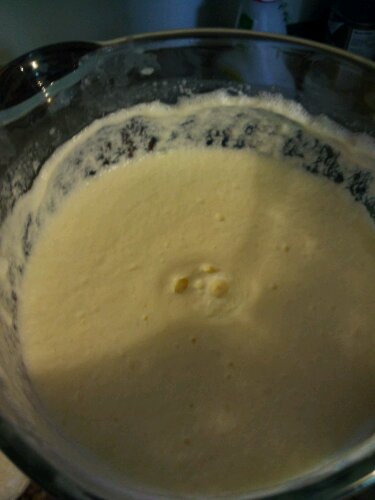
The process goes in stages, at first the cream is liquid and gets sloshed around, then it becomes thicker and has a creamy consistency (In my blender it never get’s whipped like when using egg beaters, but noticeably thicker, but if you use egg beaters, it becomes whipped cream first, the kind Grandma used to make, thick and rich, juts keep going you’re not there yet)
image

keep blending on low, if you have that setting and the cream will start to get liquid again, separating into lumps of yellow goodness and buttermilk.

image

it’s just starting…

image

here you can see from the side, how it separates

image

image

You can rinse the butter in a bowl with ice water, using your hands to ‘knead out’ the rest of the buttermilk but I find the automated way a tad easier and since the blender needs to be washed anyways…image

just make sure you rinse all the butter milk out, or it will go rancid.

 My lump of butter!
image

© 2012 SimpleHealthyHomemade


Healthy Camping Pt1

So many think that when you take food along or cook outside your kitchen that forcibly the quality of your food has to go down, as in unhealthy and bad for you. But there is really no reason for that, whatsoever. As proven by or most recent camping trip and many hikes before that (I made Vietnamese summer rolls on time, put the peanut sauce right into them), you can definitely ‘rough it’ without sacrificing on the food side of things.

This time we only had a few days so it was sadly much shorter than we would have liked. But hey, that was in June (yes, sometimes that’s how long it takes me to get a post completed) and now it’s only August, and even if you are cold easily, camping season extends till at least the end of September.
We set off on a blistering hot weekend where temps here in the Lehigh Valley topped out just short of the triple digit mark, drove through several fronts of thunderstorm and heavy downpour ( there was an inch of water in my kayak by the time we got there! ) up to the Catskills which proved to be cooler and therefore much more agreeable with everybody. Oh and the best part? It did not rain one drop once we got there!

We went with friends and the cooking duties were split evenly: we were responsible for one dinner and one breakfast.

But first, here are some general guidelines for meal planning, away from you regular kitchen:
Use seasonal produce for fresh and healthy meals. Most produce can be kept at room temperature for a period of time ( unless it’s berries, which we did put on ice in the cooler) Things like cucumbers, tomatoes, potatoes, bananas, apples, grapefruit, oranges, watermelon , cantaloupe , red bell pepper, onions or green beans, even kale if wrapped in a moistened paper towel before put in a plastic bag will happily keep a while. And if you end up having more space than expected, you can always store them on top of the rest in your cooler. ( don’t refrigerate your tomatoes or bananas)

Breakfast:

Mix up the dry ingredients for pancakes and store in a zip top bag, all you need to add is the liquid stuff (a liquid like milk, oil and eggs, if you are making them with eggs)

Omelettes are always a good choice, easy and versatile that can be made with pretty much anything added.
Desert: doesn’t have to be roasted marshmallow or smores either, branch out. Try fruit salad with watermelon or mixed berries with yogurt the first couple of nights. Yogurt keeps fairly well, it’s fermented. Folks used to turn milk into cheese and yogurt in order for it to keep before there was no refrigeration. Keep it cool, but you can also bring it along for a picnic on a hike, no need to panic about it. When you get down to the end of your supplies and the more delicate things are gone, make these chocolate bananas over the fire. Or make a fruit compote topped with granola for crunch!

Dinner choices beyond the hot dog and chips: Pieces of meat are healthier than mystery meat in a casing. That said this time we did have chicken sausage the one night. Carl at the farmers market is a sausage genius and I know for a fact that his chicken sausage is made from chicken breast he sells right there alongside the sausage made from it. Steak, pork chops and chicken breast can all be easily grilled but need to be kept cold on ice in your cooler until you are ready for them. In my experience, meat, like ground beef, sausage or steak. (Oh yes, I said we did it in style, didn’t I?) keeps well right on the ice or bottom of the cooler, submerged in the water. To make doubly sure and make it keep longer, freeze it solid at home, then place in a zip top bag to keep it from getting ‘watered’ or in one of those Rubbermaid ‘take alongs’ (storage containers), they seal the water out and keep the meat inside cool and dry. You can cook chicken breast pieces in an aluminium foil pack with vegetables and seasonings included. Potatoes do well cooked that way, too, although they do take a while, sweet potato seems quicker.

Oh and remember, aluminium foil is your friend, as is a good set of grill thongs and a mitt 😉

imageWild Blue berries along the hiking route

Serves 4

Breakfast:

We decided to go with an omelette with spinach and feta for sustenance and flavor. I cooked these over a camp stove, not the open fire. And it ended up being easier to make one at a time since the pan i have, makes it hard to put more than 3 eggs on at a clip and still have it cook through. Wasn’t a problem at all since other really only takes minutes to cook.

Basic Spinach Omelette:

  • 12 eggs (3 per person)
  • Spinach ( about 2 hand full per person)
  • 4 oz Feta Cheese, cut into 1/2″ cubes

Variations on a theme:

  • Use Swiss Chard or Kale, instead of Spinach
  • Add some deli ham, or prosciutto for additional flavor
  • Use cheddar, Fontina or Swiss instead of Feta

imagewith Fontina and Prosciutto

This one’s with Swiss Chard from the garden & Ham

Desert:

© 2012 SimpleHealthyHomemade

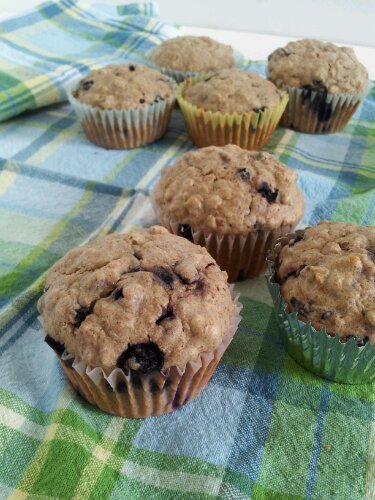
Blueberry Oatmeal Muffins

image

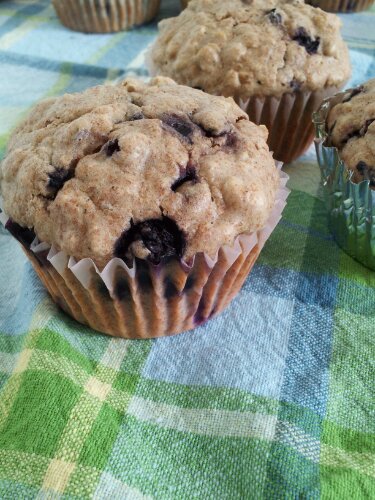
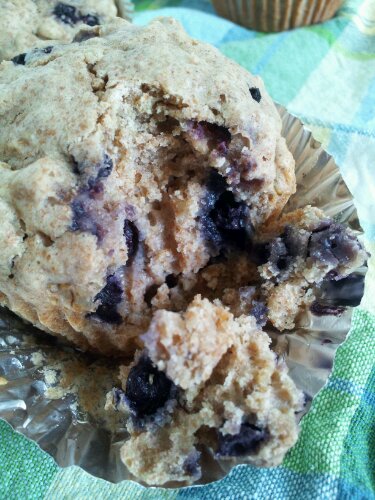
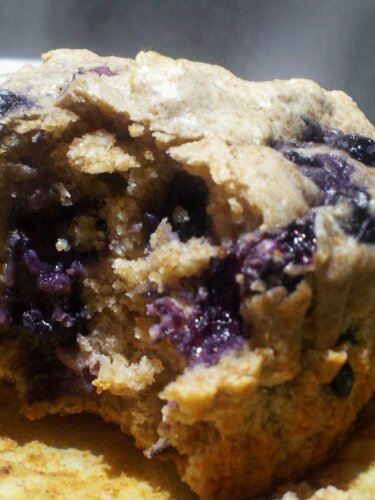
I wanted to make eat something sweet, desert, something baked, with that slight crunch when you bite it, so chocolate or ice cream was out… muffins, maybe. But i really needed to make breakfast. So in order to consolidate those two goals, it had to be at least somewhat on the healthy side, like cake was out. After some pondering and some back and forth I decided on blueberries and oatmeal. Oatmeal had to be in there due to its breakfast-y-ness and well, it’s also kinda good for you, or so I am told 😉

image

My first attempt was a fat-free (besides what was in the egg) version. Well let’s just say they, we don’t talk about those around here anymore… Happy to say that by attempt two I was cured of that idea and came up with these, a low sugar blueberry muffin.

I know many of you folks are looking for low fat versions, and fret not, I am going to figure it out a good one that works soon, I am not giving up that easy. Just be wary of anything at the store that’s labeled fat free or low fat. That claim to fame is usually pretty short lived when you look at the facts. Pretty much all store bought items that are low in fat automatically are high in something else (sugar to name the least offensive option).

image

Ingredients

  • 1 cup old fashioned rolled oats
  • 2 cups whole wheat pastry flour*
  • 1/2 cup butter, softened
  • 1/4 cup sugar or maple syrup or agave nectar
  • 1 tsp baking powder
  • 1 tsp vanilla extract
  • 3/4 to 1 cup milk
  • 2 eggs
  • 1 cup fresh or frozen blueberries

*use less liquid if you are using all purpose flour

image

Directions

  1. Preheat oven to 350º F
  2. Prepare a standard muffin tin with cupcake liners, set aside.
  3. Mix the dry ingredients in a bowl, set aside.
  4. In a medium bowl, beat butter until soft, add sugar and stir until incorporated, then add the eggs, add the milk and vanilla extract.
  5. Add the wet ingredients you just mixed up to the dry ingredients and stir just until mixed, then add the blueberries and gently fold into the dough.
  6. Divide among the prepared muffin cups and bake until golden and a toothpick tester comes out clean, 20-24 minutes.
  7. Let cool in the muffin pan on a rack for 20 minutes before removing the muffins.

Makes 12

image

© 2012 SimpleHealthyHomemade

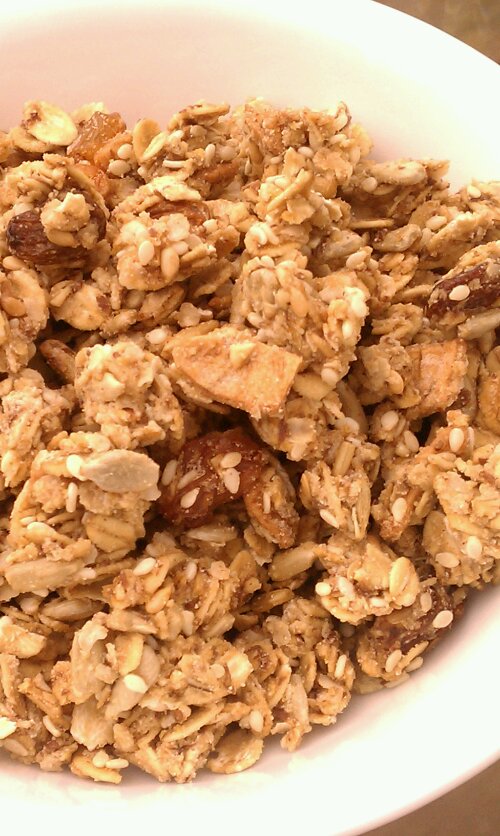
Apple Raisin Granola

image

I am back after taking a mini vacation up to a beautiful Bed & Breakfast in New Hampshire. Right on Lake Winnisquam. Sometimes you just need to get away from it all… Ahhh! It’s just the best to have someone make a lavish breakfast for you, and there were always freshly baked cookies. It’s like visiting your favorite Grandma, without having to help out in the kitchen 🙂 More on that soon! But before leaving, I had to make a few things that I could bring, for snacks and since I really did not know about the whole cookie thing they had going until we got there… And besides we were going to be on the road for six or seven hours. So I decided on another granola. Thanks to Heidi over at LightlyCrunchy who made this fantastic Apple Cranberry Granola, I was inspired to add the apple rings to my granola instead of just indiscriminately munching on them. I had never thought of using up my dried apple rings in a granola, what an ingenious idea!  

imagebefore adding milk or yogurt, can’t decide which I like best…

I go through phases, I find something, love it eat a whole bunch and then, not sure, but forget about it for a while? or get kind of tired of the taste? Anyhow I found myself with a good size bag of dried apple rings living in my cupboard, so now it can find its way into my breakfast and snacks 🙂 Delicious! The only thing I will work on for next time? Portability. Try eating granola while in the car… Not easy!

image

Ingredients

  • 2 cups rolled oats
  • 1/2 cup quinoa flakes
  • 1/2 cup dried apple rings, chopped
  • 1/4 cup sesame seeds
  • 1/4 cup golden raisins
  • 1/2 cup sunflower seeds
  • 1/2 cup brown rice flour
  • 1/4 cup brown rice syrup
  • (1/4 cup agave nectar or honey, optional*)
  • 3 tbsp coconut oil, melted
  • 4 tbsp flax meal/ground flax seeds mixed with 6 tbsp water, let rest 5 minutes

* If you are making this for the first time, use the additional sweetener (the honey or agave syrup) especially if you are trying to transition kids or the ‘I don’t have a sweet tooth’ husbands to a lower sugar diet, then over time gradually reduce the amount of sweetener added

Directions

  1. Preheat oven to 275º F
  2. Mix all the flakes, flour and seeds with the raisins and the apple pieces
  3. In a separate bowl, mix the wet ingredients: rice syrup, honey/agave, coconut oil and the flax meal mixed with the water.
  4. Add the wet ingredients to the oat mixture, stir well until evenly distributed, spread on a lined baking sheet and bake for 20 minutes. Stir, bake 10 minutes, stir again and bake for an additional 10 minutes.

image

Copyright © 2012 Simple Healthy Homemade. All rights reserved