Chicken Sausage Patties

Chicken Sausage PattiesSausage can be a mixed bag of tricks. Store bought it often contains a lot of fat with the flavor that we all want. But if you want to control fat and sodium content, blending up your own patties (unless you know of a great source that makes chicken sausage from just breasts) is often the only choice. It’s quick and cheap and oh so versatile! Trim all visible fat from the chicken breast prior to making these.

Ingredients

  • 1 boneless chicken breast half, coarsely chopped (1/2 to 3/4 pounds)
  • 1 egg white
  • 3 tablespoons scallions or onion to taste
  • 1/2 tsp salt
  • 1 tsp paprika, sweet
  • 1/4 cup fresh herbs such as parsley
  • 1/2 cup chopped bell pepper pieces, red and green (about 1/4 pepper each)
  • 1 tsp crushed red pepper, (optional, to add some spice)

Directions

  1. Pulse all the ingredients except the peppers in the blender until chopped, but not pasty
  2. Stir in the pepper pieces and using a table spoon, form into 2-3″ patties.
  3. Cook in a hot skillet until cooked through and nicely browned. (Or bake in a 375ºF oven)
  4. Can be made in advance and frozen. When needed just pop in the microwave or defrost and heat in the toaster oven.

Serve as a side with soup or White Bean Stew with Leeks and Thyme

Copyright © 2012 Simple Healthy Homemade. All rights reserved

Thai Beef Salad to go

image

Last Tuesday it snowed and today it’s 65F! Crazy weather for a 4th of December. If I were back home, I’d be making ‘Grättimännli’ tomorrow, so they are ready for December 6th, and it was a firm plan, but how could I follow through when it is SUMMER outside? So instead I am going to mix things up and post a take along salad recipe. Most folks don’t eat badly because they want to, but because they fail to plan. With this series of recipes I am hoping to help you battle the lunchtime rush and have some healthy options on hand. I was going to start with a winter salad, something that can be warmed up, since I am not a huge salad eater in the winter, but seeing that it is summer today…

image

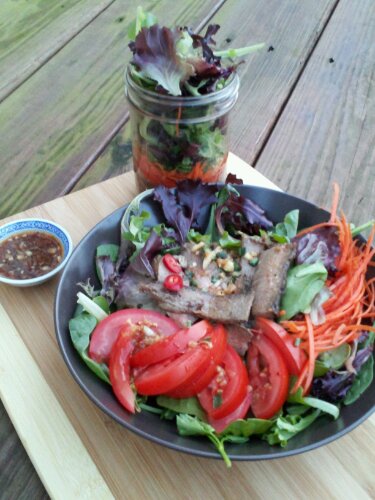
You need a two or four cup glass mason jar per serving. The jars seal well, are BPA free, re-usable forever and stack the salad items so the dressing stays away from the more delicate items until you’re ready to eat. For this one I suggest extra greens, beyond what fits the 2 cup jar. So either pack them in a little bag or go for the bigger jar (added weight). Take a fork along, shake it up and eat right out of the jar (bigger jar only), or bring a bowl and you have a fantastic lunch everyone will be eyeing.

image

Ingredients

Dressing (makes enough for 3 servings)

  • 1 tbsp garlic (about 1 clove), minced
  • 1 tbsp ginger, finely grated
  • 1 tsp dark sweet soy sauce
  • 1 tsp sesame oil (this is the oriental kind, it’s dark)
  • 1 tsp sambal oelek
  • 3 tbsp fresh lime juice (about 1 lime)
  • 2-3 tbsp Thai fish sauce ( I prefer tiparos brand)
  • This will make enough for 2-3 servings

Per Jar you will need:

  • 1/2 cup thinly sliced grilled steak
  • 1/2 medium tomato, cut into wedges
  • 2 tbsp julienned carrot
  • 2 packed cups of greens (spring mix, romaine or anything hardy works well)
  • some sliced chillies and crushed peanuts as topping (optional)

image

Directions

Make Dressing: Mix all ingredients in a small bowl and stir until well combined. Store any leftover dressing in the fridge and use within a week.

Then make the jars:

  1. Into each jar layer the ingredients in the following order: the steak, then pour 4-5 tsp of dressing over top, follow with tomato wedges, carrot, and greens.
  2. Top with some chilies if you like to spice up your life and crushed peanuts if desired. Close the lid and store in the fridge until ready to go!

Note: The dressing makes enough for 2-3 servings, so why not make dinner, and a jar for tomorrow? Or have a side salad with dinner and make 2 jars for y’all to take to work.

image


© 2012 SimpleHealthyHomemade

Raw ‘Pasta’ Alla Checca

imageServe up some summer!

‘Alla checca’ is one version of a classic Italian summer fresh uncooked tomato sauce. Dreamed up in Italy, when the summer sun ripens tomatoes by the minute and you just don’t want the extra heat nor want to spend much time indoors cooking sauce. When tomatoes are at their ripest and most flavorful, you want to give this recipe a try. Use either your own fresh picked tomatoes or something pretty from the farmers market, no watery, flavorless kind from the store will do here.

image

Summer Bounty!

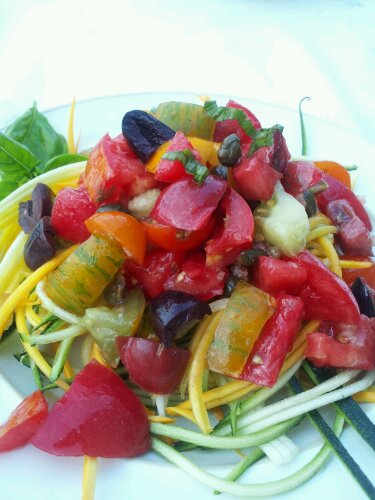
To take this a step further, I omitted the pasta and went with another summertime favorite that abounds in gardens this time a year, summer squash. Using Julienne cut zucchini and yellow squash instead of noodles, this is THE best dish of the summer. Low in calories, refreshing and oh so yummy! And the colors were so vivid and bright, I just kept looking at it, until my whole kitchen smelled like the garlic I used and hadn’t cleaned up yet;) Not as bad as the one time my whole house smelled like onions for a week, because of my over zealous helper, but more on that some other time…

Use it as a vegan main meal or serve some meat or mozzarella cheese on top or alongside. A crusty slice of bread would go well here too.

image

Ingredients

  • 2 medium summer squash (I used one zucchini and one yellow, for visual appeal and because that’s what I had)
  • 2 to 2 1/2 cups of tomatoes, chopped
  • 1 garlic clove, crushed
  •  2 tbsp capers
  • 1/4 cup extra virgin olive oil
  • 1/2 cup black olives, preferably niçoise
  • 1/4 cup basil leaves
  • fresh ground black pepper and sea salt to taste

Special tools: Julienne peeler

image

Directions

  1. Julienne the squash like such, set aside in a medium bowlimage
  2. Chop the tomatoes, add the garlic, capers and olives, cut into pieces if big, grind black pepper over top and drizzle with the olive oil. Toss to mix the sauce ingredients. Let stand for about 5 to 10 minutes to let the tomatoes release some of their juices, then salt to taste (I find that with the olives and capers, I need hardly any salt)
  3. Roll the basil leaves and slice into thin long ribbons, add about half to the dish, toss. reserve the rest for topping.
  4. Divide the cut zucchini and squash on two deep paste plates (as a main meal, four if served as a side) Top generously with the ‘alla checca’ sauce and some more basil, serve and let everyone grind some more pepper on top, if they like.

image

© 2012 SimpleHealthyHomemade

Nüssli Salat (lambs lettuce, Mâche or Corn Salad) with Eggs and Orange

image

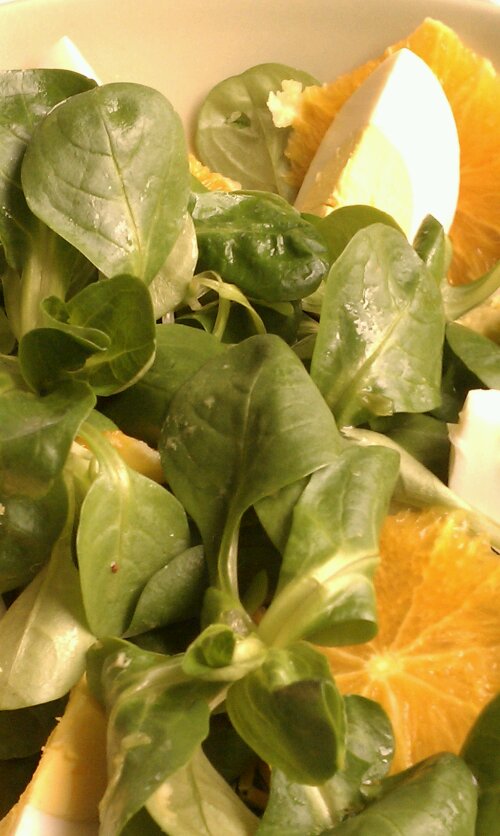
A filling lunch salad for a warm day. When I was  kid, my Mom made this a lot after Easter, it’s a good way to use up all the pretty Easter eggs. I am sure she still makes it, I am just not there to enjoy it that often 🙁  Over time, I have changed things around a bit, so for one I do not always use her creamy dressing, here I just made a simple vinaigrette  but it would sure would be awesome with Sour Cream Chive Dressing or Greek Feta Dressing! I also started adding part of an orange, to pep it up a bit, and really like it. Add a bit of the orange juice from peeling and cutting the orange to your dressing.

image

In my parents garden, we used to grow our own Nüssli Salat. In the early spring, and when we were going to get snow or a hard frost, my Dad would cover it with burlap bags. Wait, I am thinking, not totally sure on this, but I think, he grew the stuff  covered with bags all winter long… Hmm will have to check on that next time I talk to ‘Switzerland’, it might be that I was just a kid making winter looooonger than it needed to be in my Mom’s eyes. (My Mom did not really appreciate winter as much as I did)

image

Per person you will need:

Ingredients

  • a good plate full of Nüssli Salat, Mâche (Corn salad or Lambs lettuce)*
  • 2 hard boiled eggs
  • 1/2 orange, peeled pitted and sliced crosswise into rounds
  • 2-4 tablespoons of your favorite dressing (vinaigrette shown here)

* If you can’t find this delicious lettuce, it’s usually available in the winter and early in the spring, anything with some substance could be substituted

Directions

Arrange on platter and off you go!

image

Copyright © 2012 Simple Healthy Homemade. All rights reserved

Kale #1 with Golden Raisins

image

Kale is one of my favorite no-brain vegetables. Not because it isn’t good for your brain or you, no, but because I find it’s so easy to make it yummy that there isn’t a whole lot of thinking involved in figuring out how to prepare it.

In case you’re doubting me on the healthiness of kale, here are some facts:

  • One cup of kale contains 36 calories, 5 grams of fiber, and 15% of the daily requirement of calcium and vitamin B6 (pyridoxine), 40% of magnesium, 180% of vitamin A, 200% of vitamin C, and 1,020% of vitamin K. It is also a good source of minerals copper, potassium, iron, manganese, and phosphorus.
  • Kale’s health benefits are primarily linked to the high concentration and excellent source of antioxidant vitamins A, C, and K — and sulphur-containing phytonutrients.
  • Carotenoids and flavonoids are the specific types of antioxidants associated with many of the anti-cancer health benefits. Kale is also rich in the eye-health promoting lutein and zeaxanthin compounds.
  • In fact, researchers can now identify over 45 different flavonoids in kale. With kaempferol and quercetin heading the list, kale’s flavonoids combine both antioxidant and anti-inflammatory benefits in way that gives kale a leading dietary role with respect to avoidance of chronic inflammation and oxidative stress.
  • Beyond antioxidants, the fiber content of cruciferous kale binds bile acids and helps lower blood cholesterol levels and reduce the risk of heart disease, especially when kale is cooked instead of raw.

Now that’s quite a track record, don’t you think?

This time, I sweetened the deal with some golden raisins that I found hiding in my cupboard, it was just a little handful, had to be used up, as space can be at a premium around here, with all the different food things I want to try. And have you ever noticed how you can almost never find just enough for one meal, as in ‘just to try it’? Yep, so I end up with a whole box of this and a bag of that, barley couscous and mochiko (sweet rice flour) are prime examples of that. So using up and finishing up things always makes me feel good since I might get to try something else!

So simple, healthy and quick, here we go!

image

Feeds 2 as a side (around here though, I have been known to polish off a bunch of kale by myself, so use your judgement)

Ingredients

  • 1tbs oil
  • 1 bunch kale, washed and de-stemmed
  • 1-2 tbsp golden raisins
  • 1/2 cup water
  • salt to taste
  • 1 tbsp cider vinegar

Directions:

  1. Strip the leaves off of the stem (discard hard stems) and tear into smaller pieces if necessary. Wash and spin dry using a salad spinner
  2. Heat the oil in a large skillet, then add the washed and torn kale leaves. Sprinkle some salt over top.
  3. Add water and raisins and cover with a lid (even if the lid does not fit down onto the pan, juts balance it atop the kale)
  4. Cook until the kale is soft and reduced in volume. 5-10 minutes. (This depends on the age of the kale plant: If you have fresh kale from your garden in the early spring, it will take a lot less than mid winter, kinda tough plants that overwintered in your garden)
  5. Add cider vinegar, cover and cook another minute or two, then uncover and finish cooking until most of the liquid has evaporated.

image
Copyright © 2012 Simple Healthy Homemade. All rights reserved

Roasted Brussels Sprouts

image

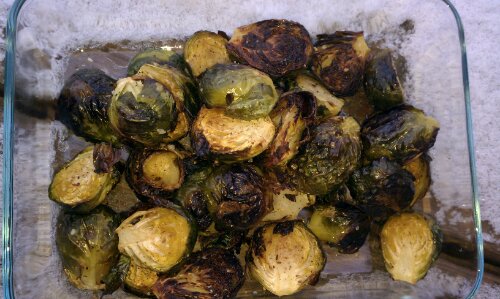
It snowed yesterday. Not much really, but steady from about 1 o’clock until 11pm. And what does one want to do when snow is falling? Eat stuff that makes us feel warm. Like yummy roasted vegetables. Granted it wasn’t all that cold, but roasting vegetables never needs much convincing in the form of good reasons, sooo…

image

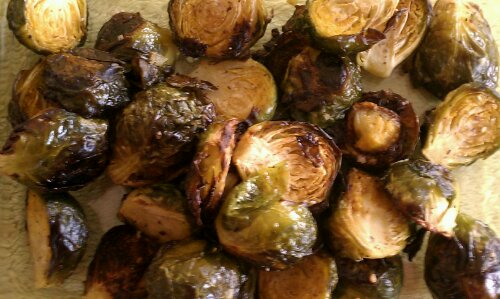
Roasted vegetables it was, and soup, and more roasted vegetables 🙂 Ahhh, the way the heat of an oven transforms simple, lowly vegetables into something so utterly delicious, it almost melts in your mouth!

imageSee the snow?

Ingredients

  •  1 lb Brussels Sprouts, cleaned and cut in half
  • 1-2 tbsp olive oil
  • 1 1/2 tsp flake salt (fleur de sel, french grey sea salt or kosher)
  • 2 tsp zahtar seasoning (Middle Eastern spice blend, or you could add a sprinkle of lemon juice, sesame seeds and some thyme)

Directions

  1. Preheat oven to 380°F
  2. In a large bowl, toss the cut Brussels sprouts with the oil until evenly coated
  3. Transfer to foil lined baking sheet (easy clean up), sprinkle with salt, and zatar seasoning.
  4. Roast for about 30 -35 minutes, or until tender and browned in spots. Stirring once halfway through.

Other great things to do with Brussels Sprouts:

And next I made some roasted carrots. I mean why stop, when we’re having so much fun??

image

Copyright © 2012 Simple Healthy Homemade. All rights reserved

Spinach and Pomegranate Salad

image
What to take for lunch? Since most of us here don’t get to go home and have a home cooked meal, and PB&J really isn’t a healthy option (I can hear you all scream right now), take out and fast food… well I don’t think I need to go into detail on that (no, salad from McDonald’s isn’t health food either). I got the idea to add pomegranate seed to a spinach salad from a local Mediterranean deli. But at a whopping $4 for a small container, what’s a girl on a tight budget supposed to do? You got it, try to make a similar concotion myself! And let me tell you, the flavor combination it amazing, it’s definitely a winner!

image
So here is a fun and yummy winter lunch box salad that would be a great side for the chicken with pepper and mushrooms, or add some fromage blanc to make it a light lunch, like I did the other day. No good picture exists to proof that, was too good, didn’t stick around long enough 🙂 And, please, don’t use just any dressing, make your own it will be infinitely better, I will of course give you one that will fit this salad perfectly!

image
Spinach  and Pomegranate Salad with Pine Nuts

Serves 4

* to get the seeds out of a pomegranate, cut in half and gently pry the seeds out of the white flesh/lining using your fingertips. I usually do this over the sink in a colander. Careful with the splatters if you pop a seed, it’s highly staining. Totally worth the effort.

image

Copyright © 2012 Simple Healthy Homemade. All rights reserved

Chicken with Yellow Pepper and Mushrooms

image

Part II of Chicken for every day of the week

See more quick and easy, yet no chance of boring chicken recipes here

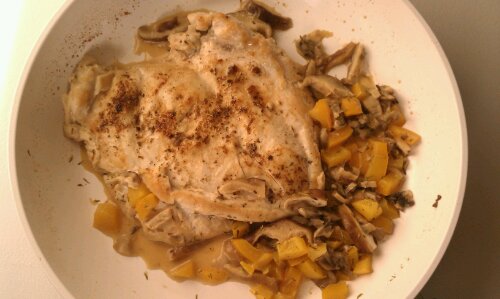
Could you use more quick week night meals? Maybe? Well, this one is just as quick as you need at the end of a long day, yet it’s tantalizing flavor will tempt even picky eaters. It takes all of 15 minutes to make, if you got all your duckies lined up 😉 So chop and mix everything before you start and you’re ready to rock the kitchen!

image

Pounding the chicken until it is an even 1/4″ thickness ensures quick and even cooking, saving time and energy. Using a spice mix to rub or sprinkle on the chicken let’s you build flavor without having to add a lot of salt or spend hours roasting and basting.  And using white wine, well, ask the French on that one, it works. The alcohol evaporates before this dish ever gets on your plate, but you could definitely use broth or water instead.

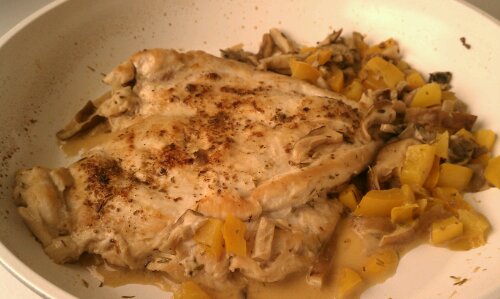
imageDid I tell you about my new magnificent skillet??? It’s got a slick white ceramic coating, I think I am in love 🙂

The spice mix makes more than what you need for this recipe you can use it on chicken, salmon and it’s awesome on pork chops too.

Serves 2

Ingredients

  • 1 skinless boneless chicken breast half
  • 1/8 tsp cumin
  • 1/8 tsp paprika
  • 1/8 tsp cayenne
  • 1 dash ground pepper (white or black)
  • 1 pinch oregano
  • 1 pinch cilantro
  • 1/2 clove garlic, minced or crushed
  • 1/4 tsp lemon peel
  • 1/4 cup white wine or water
  • 1/4 yellow bell pepper, chopped
  • 1/2 cup mushrooms, sliced ( I used Shiitake and Maitake, but any mix of mushrooms would work)
  • 1/4 cup white wine
  • 1/2 tsp thyme

Directions

  1. In a small bowl, mix cumin through cilantro, set aside
  2. Pound the chicken breast flat in between two layers of cling wrap, using a meat mallet or the bottom of a heavy pot. (Don’t do this after 10, or your neighbors might not like you anymore)
  3. Remove top layer of cling wrap, sprinkle the top of the chicken with the spice mixture
  4. In a skillet, heat a teaspoon oil over medium high, add the chicken, seasoned side down, removing the other layer of wrap from the top, then season that side as well. Cook 3 minutes or until slightly browned on the bottom.
  5. Flip chicken over, add the garlic to the pan (next to the chicken) and cook for about a minute until starting to look golden, then add the lemon peel, mushrooms, bell pepper and thyme.
  6. Cook for 2 minutes, so some of the juices release, then add the wine, cover the pan and give it another 2 minutes, uncover and cook until most of the liquid is evaporated.
  7. Et voilà! Yummy dinner!

image

Copyright © 2012 Simple Healthy Homemade. All rights reserved

Napa, Kumquat and Asian Pear Salad with Cashews

image

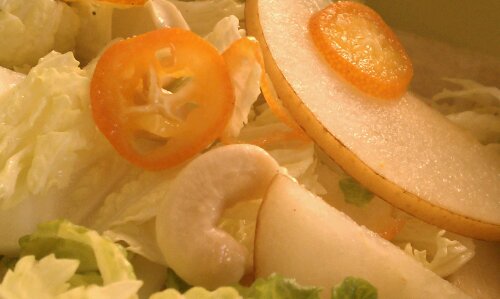
Unless I am warm I am not drawn to cold foods, so in the colder months it can be a challenge to get exited about eating raw vegetables or salads. Unless I am working out or running and my body temperature goes up, me and salad are not usually friends this time of year. So in order to make me want to eat cold things like raw vegetables, it has to be pretty special, texture, taste, all of it. This a little unusual salad combines crunchy Napa Cabbage, citrusy (is that a word, really?) Kumquats and crispy fresh Asian Pears along with cashews into an explosion of flavor without too much of the weight you too often find in rich winter salads. The dressing is simple and light and accentuates the sweetness of the Kumquats with a refreshing lime dressing.

image
If you’ve never tried Kumquats, you’re in for a treat. They are an about pecan sized member of the citrus family, but the whole fruit is edible, including the shell which is not bitter (like in an orange for example).

image

Crispy salad with creamy cashews, yummy!

Ingredients

  • 1/2 of a small Napa Cabbage
  • 1 Asian Pear
  • 6 Kumquats
  • 1/2 cup raw cashews
  • 1 lime, juice and pulp only
  • 2 tblsp olive oil

Directions

  1. Cut Napa cabbage into 1/2 wide slices.
  2. Core and slice Asian pear thinly.
  3. Slice kumquats into 1/8″ thick slivers, remove any seeds and reserve Amy juices.
  4. In a large salad bowl, combine Napa, Asian pear, kumquats and juices.
  5. Juice the lime into the same bowl.
  6. Toss to combine.
  7. Drizzle the olive oil over top and sprinkle with cashews.

image
Copyright © 2012 Simple Healthy Homemade. All rights reserved

Colorful Vegetable Soup with Celery Root

image

Celery Root or Celeriac is what we use back home as winter vegetable for soups, salads, stews, you name it. It’s cheap, readily available and has a great flavor both raw and cooked. You could most definitely use regular green celery, which has a bit more of a pungent flavor, compared to the almost a bit nutty or earthy flavor of the root crop.

Cerliac

Making vegetable soup from scratch could not be easier, and I am giving you a basic recipe that can be made in as many variations as there are cooks.

For this particular soup I chose colorful veggies, and I am foregoing the usual potato for the sake of the ‘getting lean in the new year’ and all the paleo eaters out there and I am using, as I just said, celery root instead, which has a much lower Glycemic Index (GI) than a potato. choosing vegetables (and foods in general that are low on the glycemic scale keeps you full longer, therefore helping to control your appetite. In very simple words (yes there is more to it, but I’ll spare you) the idea behind the glycemic index is to measure how quickly a particular food affects your blood sugar/insulin response, meaning how quickly the sugars in it get digested and find their way into your blood stream.
image

Alright, now that we fed the brain, let’s look at our tummy 🙂

Ingredients

  • 1/2 medium onion, peeled and chopped
  • 1/2 celery root, peeled and cut into chunks
  • 3-4 large tomatoes, diced * see note
  • 2 carrots, diced
  • 1/4 to 1/2 a head of cauliflower, separated into florets (depending ont he size of the cauliflower you get)
  • 1/4 of a head of a medium savoy cabbage, cut into chunks (or use some leaves off a large one)
  • 4-5  stalks Swiss Chard, chopped(any color you like, rainbow colors look pretty)
  • 1 tsp salt

* I used frozen ones from my Garden in the summer: when they are at the peak of ripeness, just chop and put in zip top bags for soup in the winter. Alternately you could use a can of no salt added diced tomatoes)

Makes one 3 1/2 qt pot full

Directions

  1. In a stock pot (mine is 3 1/2 qts, or so it says on the bottom) heat one tablespoon on olive or coconut oil over medium, then add the onions,a dn cook until translucent but not brown
  2. Add the celery and carrots, stir and cook until the onions are beginning to brown
  3. Add the tomatoes, with any juice that collected on the cutting board (if using frozen, partially thaw in the fridge overnight) stir and allow to cook 5 minutes to allow some of the juices to come out
  4. Add water to cover the vegetables and bring to a boil, cook 5 minutes, then add the cauliflower and chopped Swiss Chard, bring to a boil again,then reduce the heat, add the salt and simmer until celery, carrot and cauliflower are tender when pierced with a fork.
  5. Serve hot with some crackers or a slice of rustic bread, or enjoy as a first course.

To make this your own:

  • Instead of celeriac, use 2-3 stalks of celery and a medium potato
  • Use kale instead of Swiss Chard (but remove the tough stems)
  • Use spinach,  but add right before serving into individual bowls, ladle hot soup over
  • Don’t like cabbage? Leave it out
  • Instead of cabbage and kale, use thin cut or quartered Brussel sprouts
  • Add green beans or snow peas towards the end of cooking time
  • Leave out the tomatoes
  • Go through your fridge, anything vegetable can most likely be used up in your yummy soup, the potions are endless 🙂

image

Copyright © 2012 Simple Healthy Homemade. All rights reserved