Spitzbuebe (little Rascals or Linzer Cookies)

image

Spitzbuebe – ‘Littel Rascals’ – Swiss Christmas Cookies

Spitzbuebe translates literally to mischievous boys, but I have seen similar cookies called Linzer cookies here in the US.

image

This is how I make the and the way my recipe adapted over time. You would do well to not work in a warm kitchen and maybe this is not the cut-out you want to make after a long and stressful day, or have your little ones help you with for that matter. My mom would almost always make them after we went off to bed. Now I know why. The dough can go from crumbly to sticky and crumbly (can you believe it) in a matter of minutes and depending on the way the dough came together that particular day, can make you walk the edge towards insanity unless you maybe make them right after a yoga class. With the changes I made to the recipe (like using a whole egg, for example) the chances of that happening have drastically decreased. Although this time a year Yoga classes might be a good idea no matter what. Nothing like the clear head after a good and sweaty class!

Oh and by the way, these are pure indulgence, not really a host of health claims attached. But they are worth every single calorie!

image

Ingredients

  • 2 sticks butter, softened
  • 1/2 cup plus 2 tbsp sugar
  • 1 egg
  • 2 and 3/4 cups flour (350g)
  • 2 tsp vanilla sugar (if you use essence, use the clear version, the dark one can give the delicate dough a strange color)
  • 2-3 tbsp currant jelly
  • confectioners sugar for dusting

Directions

  1. Stir butter until soft, then add sugar and stir until little bubbles show on the bottom of the bowl (see picture)
  2. Add the egg, mixing well.
  3. Add the vanilla sugar and the flour, stir until just combined, knead together quickly, form into a ball, cover the bowl and chill for a minimum if 4 hours
  4. When ready, take the dough out of the fridge and let warm up a bit (15-20 minutes, if you kitchen is cool) cut of half of the dough, keeping the rest chilled, and roll out to a thickness of about 1/16″ (do 1/8″ then roll just a bit more)
  5. Preheat your oven to 400ºF and line several cookie sheets with parchememnt paper or silicon mats (My cutter is a little over 2″ in diameter and I made a good 3 sheets full. Remember, you’ll end up with half as many cookies as what you bake)
  6. Cut out round shapes, making sure you have one for the bottom and one for the top. From all the top pieces, cut out a small shape such as a heart, star, flower or round. If you have special cookie cutters, the tops might be done in one step. Just make sure you have an equal number of tops and bottoms
  7. Bake for 8-10 minutes in the middle of the preheated oven, until just starting to turn a little golden. Cool on the sheet for a few minutes then transfer to wire racks.
  8. Once cooled, separate tops and bottoms. Place the wire rack with the tops over a sheet of parchment paper and using a small strainer sprinkle the tops with confectioner sugar until completely white.
  9. Heat the currant jelly in a small bowl until liquid. Fifteen seconds in the microwave works great. Using a pastry brush, brush the a bottom piece with some jelly, then gently place a finished top on it and set aside. Continue until no more cookie halves remain.
  10. Try to refrain from eating all of them before you showed them off to at least a few friends.

For more classic Swiss Christmas Cookies check here

image

Copyright © 2012 Simple Healthy Homemade. All rights reserved

Cranberry Orange Cream Scones

image

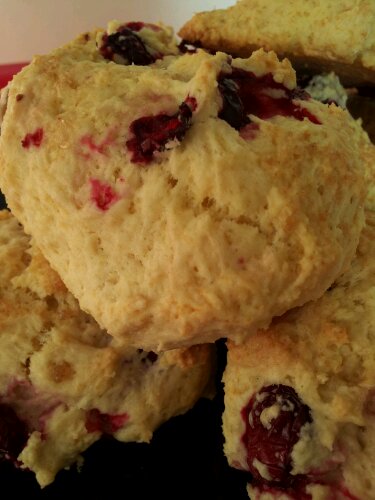
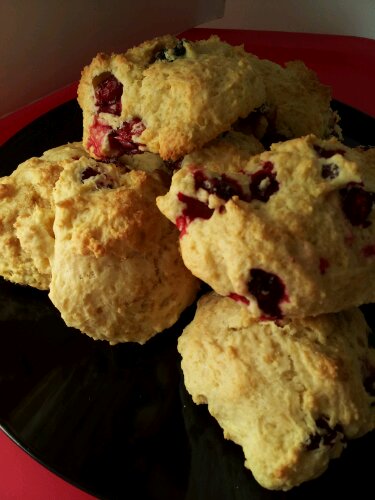
After happily taking the frozen cranberries out of the freezer, I came to the realization that there was no butter. None. Desperation set in as, how were those cranberries going to find their way into scones, if there wasn’t any butter to be had? 🙁 I even checked the corn-butterer, you know that little square contraption that fits a stick of butter for the purpose of easy application to a corn on the cob? But nope, I came up empty. And if you have ever looked up any recipes for scones, you know they all include a minimum of 6 tablespoons of butter, often more. I could have gotten out of my comfy-cosy pants and gone out into the dark December night to find me some butter…

image

However that really wasn’t my plan, especially once I discovered it was raining. So here is my solution, I used cream instead, plus a  bit of coconut oil. So instead of a traditional scone recipe with lots of butter and cream, just cream. I think it’s a fair trade-off. They are were very yummy too, but judge for yourself, don’t just take my word for it. You know you want to, you know you have some cranberries in the freezer. Come on, it’s okay, just do it. And takes no time at all! By the time you have the dough mixed, the oven is just getting hot enough!

image

Ingredients

  • 2 cups flour
  • 1/4 cup sugar + 1 tbsp raw sugar for sprinkling
  • 2 tsp baking powder
  • 2 tbsp coconut oil
  • 1 egg
  • 1 cup cream
  • 1 cup frozen or fresh cranberries
  • 1 tsp orange extract/orange essence

Directions

  1. Preheat oven to 400ºF  (200°C) and prepare a baking sheet
  2. Mix flour through baking powder
  3. Add oil, egg, cream and orange essence, stir to combine.
  4. Stir in cranberries.
  5. Drop dough by the 1/4 cup full onto the lined baking sheet, sprinkle the raw sugar over top and bake 22 to 25 minutes (cut time down if your cranberries are not frozen, try 16-18 minutes) or until slightly browned on the bottom and golden on top.
  6. Cool on a wire rack and enjoy!

Makes about 12

image

Copyright © 2012 Simple Healthy Homemade. All rights reserved

Grilled Pizza

With it being unseasonably warm again this past weekend, (as a disclaimer, I haven’t actually checked the average temperature this time a year, but somehow got used to the more frosty temperatures) I wanted to take advantage of my grill at least one more time. And, if you haven’t tried it before, pizza from the grill is the best! So following is a short tutorial on how to get the perfect Pizza off of the grill; and go ahead, have all the toppings you want!

This makes 2 pizzas, and serves four average sized appetites, however I have one time eaten a whole pizza in one sitting, not just a half, after a weekend out hiking and such. So I’d say depending on your level of activity.

    Ingredients, puffy pizza before flipping over, and toppings on ready to close the lid and let the magic happen!

Ingredients

  • 1/2 to 3/4 lb pizza dough (homemade or store bought)
  • 1 to 1 1/2 cups pizza sauce (store bought)
  • 1/4 lb to 1/2 lb Mozzarella cheese
  • Flour, to roll dough out on
  • Semolina or cornmeal, for dusting
  • Assorted toppings of choice, some suggestions:
  • Olives
  • Sliced ham
  • Red peppers
  • hot pepper flakes or sliced hot peppers
  • Salami, sliced
  • additional cheese (like Fontina, or blue cheese)
  • Capers! (I love capers 🙂 )
  • Oregano and basil
  • Anchovies
  • Pineapple

Directions

  1. Heat your grill to high/hot. 
  2. In the meantime, prepare all the ingredients so you have them ready and they can quickly  be put on the pizza. Set aside
  3. Divide the pizza dough into two balls, place one on a generously floured surface and roll out until very thin (less than a 1/8″), don’t worry if it gets odd shaped. Set aside on a sheet or pizza peel dusted with semolina or corn meal. Resist the urge to fold dough in half, it can get sticky quickly, I tried it, I know…
  4. When the grill has reached at least 400 F (You can get a thermometer for your home grill, but I have successfully made this over open fire while camping, it just needs to be hot), rub the grates using your grill thongs and a balled up paper towel with a little oil on it.
  5. Now you’re ready to start the pizza: Slide the rolled out dough, one piece at a time from the peel onto the grill grates, then close the lid and grill until slightly browned on the bottom. (They may become big and puffy as the water evaporates inside the dough due to the high heat. Don’t worry about that, just poke them with your spatula before you flip them over.)
  6. Flip the pizza, and quickly spread the sauce onto the dough, from the center out until about 1/2″ from the edge. Spread with Mozzarella, then top with any of your favorite toppings. ( You want to do this quickly to not lose too much of the built up heat inside the grill) Close the lid and finish cooking the second side until bottom is browned and crisp and the cheese is hot, bubbly and melted all the way. On a gas grill it might be necessary to turn the heat down a bit at this time.
  7. Slide off the grill onto pizza peel, and serve.

image

© 2012 SimpleHealthyHomemade

Harvest time or how to winterize your pantry

All the leaves are already past full color or already gone and I am enjoying the last couple of warm days ( presumably) until spring. It’s Fall and with Winter fastly approaching, I am going a bit into storage mode here. I guess yet another thing leftover in our system from long ago. But doesn’t the cold weather make you want to gather things too, stash them and store them up for the colder times coming? Winter IS coming. I feel like the guys from that HBO Series ‘game of thrones’ (I don’t have a TV, I got hooked on the books), if you’re watching that, you know the Starks of Winterfell, with their “winter is coming”. Crazy story, in that world they live in,  the seasons can last a lifetime, but just imagine once the tide is turning and you are facing Winter, and you don’t know for how many years? Gosh, makes you depressed and want to hibernate just thinking of it! I sure am glad we got four seasons, neatly coming around once a year, or thereabouts. Lately one wonders sometime, no?

In the last couple of weeks I made a yummy soup with the last couple of tomatoes from the garden, you know the rock hard green ones I saved from the hard frost the other week, now they finally made it to yellow and red and usable 🙂
But here’s what really convinced me its fall and getting colder, my saffron crocuses are blooming. Some days five or six others four at a time. Each little flower grows only three stigmas, and you have to hand pick and then dry them.   It takes 110,000–170,000 flowers or two football fields to gross one kilogram. No wonder this is the most expensive spice in the world! The average retail price is $1,000 per pound, or US$2,200 per kilogram. But boy is it awesome when you have that saffron risotto made with your very own hometown saffron! I don’t pluck the whole flower like in the picture below, I like having them bloom out there between all the fallen leaves.

 Kashmiri woman harvesting saffron flowersPart of my little harvest: dried on the left, fresh on the right

Please be aware that the saffron crocus is NOT your common garden crocus which bloom in the spring, that one is poisonous…

Other than that I have been busy preserving things for the colder months. I got a dehydration. Yeah, I finally broke down and bought one. So now i can dry apple slices and more…
I made mummy dries cinnamon apple and dried pineapple. Great for hiking. Weights nothing and tastes great!

imagePineapple dehydration is extremely useful when the pineapple isn’t as ripe as it looked at the store!

image

For the cinnamon apples, just slice thinly and sprinkle the apple slices with cinnamon before drying in the dehydrator in a single layer.

image

And I had to replenish my beans, as I ran out of black beans sometime before making the Santa Fe Chicken Soup and had to improvise with dark red kidney beans. Which by the way worked just fine 🙂

And of course I have been taking advantage of all the fall bounty in produce. With the shift to colder weather our bodies need different foods than in the summer. Cut back on cold salads, and reach for something warm, whether it’s a simple homemade vegetable soup,  braised brussels sprouts or a creamy soup, you need something warming and sustaining. Orange is the color of the season and sweet potato & co. are calling my name!

I have been enjoying Pumpkin Crêpes,  Pumpkin Cream Cheese stuffed French Toast, Apricot Pumpkin Muffins,  Kabocha Chowder and these Sweet Potato Spätzle, recipe will be up in the next couple of days, so check back soon!

© 2012 SimpleHealthyHomemade

Banana ‘Fritters’

imageOr what to so with those ‘ugly’ bananas…

image

Maybe I am just weird but I tend to believe that others out there do not like mushy bananas either. You know, the ones that sit in the fruit basket forgotten like the proverbial step child until, without warning suddenly they turn brown, in a matter of hours it seems. Alright, admittedly I am exaggerating, but I just really do not like them even when they start getting the little brown spots. At least not for eating as a banana. No, at that point I will resort to using them up in all manners of ways that I came up with over the years (I don’t like to waste and throw them out after all) from smoothies to sweetener in baked goods and muffins, to ice cream topping, I have tried most anything. How about you guys, do you have any favorite banana-use recipes?

image

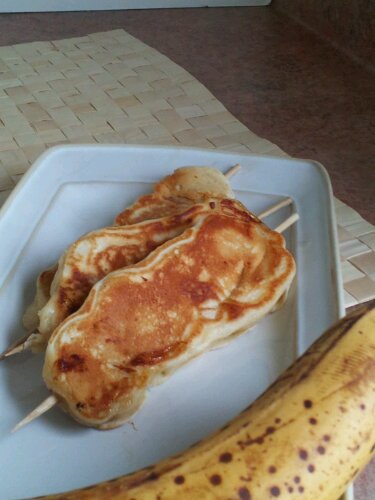
This would be great as a snack or an indulgent breakfast: Pancake batter banana ‘fritters’. Since the bananas get soft and extra sweet as they cook, no need for syrup. Haven’t tried this, but some chocolate spread, like Nutella might be good…

Ingredients

  • You need a few ugly bananas (very ripe)*
  • leftover pancake batter (or for a simple recipe go here)
  • short Bamboo skewers (to fit in the pan)

* one banana makes about three skewers on average.

Directions

  1. Slice bananas into rounds, about 1/2″ thick and thread 3 to 4 pieces onto short bamboo skewers (if you only have the long ones, cut them in half before or it won’t fit in the pan) You want to thread them on like you are making a flat snow man, if that makes sense (so they lie flat)
  2. Heat a skillet over medium high, when it’s hot, add a bit of oil and swirl to coat
  3. Put the pancake batter in a shallow dish and dip, first one side then the other, of the banana skewer until the slices are completely coated in batter.
  4. Cook in the preheated pan until set and slightly browned, then turn over and cook on the second side. Depending on the size of your pan, you can cook 3 to 4 skewers at a time. Enjoy hot!

Because of the skewer they are easy to pick up and eat!
image© 2012 SimpleHealthyHomemade

Sweet & Spicy Pretzel Mix

image

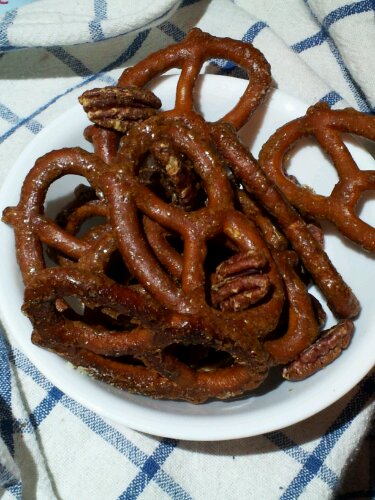
I admit, I did not make the pretzels. I only made them into something. Something better, or so I like to think.
I started out with no salt added pretzels. Why? Because there is so much sodium in and ON regular pretzels that I’d rather just add some myself. At least then I know how much and I can use my RealSalt or Himalayan salt. This is a super easy snack mix that looks and tastes a lot more expensive than it is to make. Make a double quantity and serve it up for cocktail hour at your next dinner party.

image

Ingredients

  • 2 cups salt free pretzels
  • 1/2 cup pecans or almonds
  • 2 tablespoons butter, melted
  • 2 tablespoons dark brown sugar
  • 1 teaspoon cayenne pepper
  • 1/2 teaspoon ground chipotle pepper
  • salt shaker with salt of choice

image

Directions

  1. Pre heat oven to 300ºF
  2. In a large bowl, combine the melted butter and brown sugar and stir until dissolved.
  3. Add the cayenne and chipotle, adjust the spice level down if necessary (start with just 1/2 teaspoon cayenne and omit the chipotle, if you are sensitive to heat) and mix well
  4. Add the pretzels and toss until evenly coated, then add the nuts and mix until they are coated too.
  5. Spread in a single layer on a parchment lined baking sheet, sprinkle with salt and bake 15 to 20 minutes.
  6. Let cool completely before serving.

image

© 2012 SimpleHealthyHomemade

Coconut Super-Power Bars

image

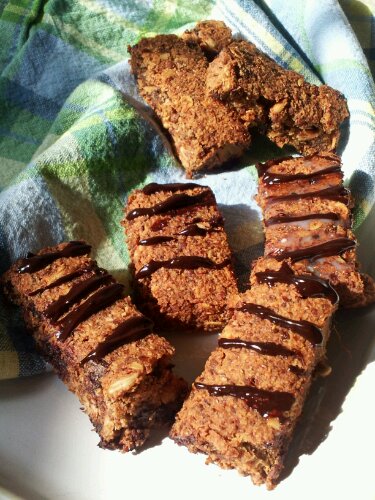
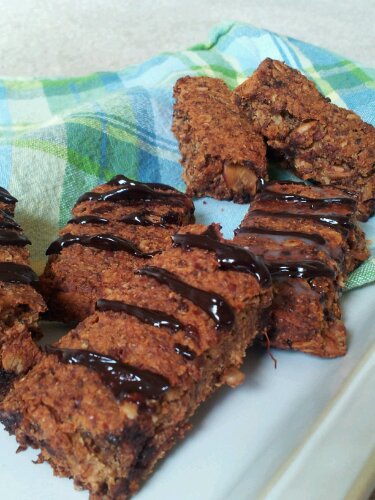
Here shown with chocolate drizzles…

I was reorganizing my kitchen cabinets the other day, (can you associate with this?) and found that the recesses of the cabinet used as pantry hold much more than can be readily found by me on any given day. Some needed to be tossed 🙁 had been lost in the depths too long, there were things I didn’t know I had anymore but had been looking for and then of course there are the quadruplicates , I mean, duplicates.

Several (open) bags of extra dark chocolate chips, about 4 different ‘grinds’ of unsweetened coconut, all opened too, of course, and several jars with 3 or 4 tablespoons of honey or brown rice syrup were retrieved from the depths of my cabinet. I did promise myself to not get so ahead of myself again, let’s see if it holds next time I face a sale at the store…

So after my botched attempt at making coconut butter (I think the very fine Indian store coconut I had, was a just a bit too dry) I came up with plan B, and a fine plan it turned out to be. My boyfriend who is training to run the NY City Marathon this year, swears it’s those bars that made him finish the last couple of 15 mile training runs with ease. He swears they gave him super-powers, hence the name, they previously were ‘just’ power bars 🙂 And I’ll let you in on a secret, he doesn’t even like coconut ;P but if you bake it until the bars get brown, careful it’s right before the ‘too much’ stage, the coconut gets a taste similar to dark chocolate, add a handful of morsels and the deal is fixed. Just to calm your conscience, yes, he does know there’s coconut in there.

image

Vegan, gluten free and grain free and if you don’t count the coconut as nut (they really are considered one of the largest seeds, or technically a drupe, says Wiki) it’s nut free as well 🙂 Oh and don’t forget the power of the sprouted lentils.

image See the little sprout poking out? And I think I spot a lentil too…

And please don’t be discouraged by the seemingly long ingredient list, it is totally worth making and there really isn’t that much effort required.

Since the sprouting takes some time, you want to start this several days before you want to make the bars. In the summer it only takes 2 days in my kitchen, but in the colder months, it could be three or four. Or if your kitchen is highly air-conditioned

image

Ingredients

  • 4 cups finely shredded unsweetened coconut
  • 3/4 cups red lentils, sprouted, divided (makes about 2-2 1/2 cups sprouted)
  • 3/4 cups date pieces
  • 1/2 cup brown rice syrup
  • 1/2 cup tapioca flour*
  • 1/2 cup water
  • 1 cup rolled oats
  • 1/2 cup sunflower seeds
  • 1 cup dark chocolate chips (make sure they are vegan or the recipe is not…)
  • (optional: 1/2 cup sliced almonds: not nut free anymore, but super yummy)
  •  1/4 cup chia seed
  • 1/4 cup flax seed meal
  • 1 1/2 cups water
  • (optional: a handful of chocolate chips to melt and drizzle over top)

*I am sure other gluten free flour would work as well

Directions

  1. Sprout the lentils until the little shoot is about 1/2″ to 3/4″ long (more details on sprouting here), reserve 1 cup,image
  2. Preheat oven to 350ºF
  3. Mix the chia seed and the flax seed meal in a medium bowl with 1 1/2 cups water, set aside for 10 minutes
  4. Blend the coconut and dates until finely mixed, then add all but the reserved 1 cup of lentils, blend until you have a sticky mass (or mess)
  5. Add the chia mix and the brown rice syrup, pulse until mixed in
  6. In  a large bowl,  combine tapioca flour and 1/2 cup water, the reserved sprouted lentils, and scrape the mixture from the blender into it, stir until incorporated.
  7. Add the oats, sunflower seeds, chocolate chips (and almonds if using) and evenly spread on a silicon mat lined baking sheet (Make sure you use a baking sheet with sides)
  8. Bake in the 350ºF oven for 45 minutes to 1 hour. Or until nicely browned. Remove from oven, let cool for about 1 hour then cut into bars. Spread the bars onto two (2) baking sheets, preheat the oven to 250ºF and bake for an additional hour, I sheet on the lower rack, the other on top, switching position after half an hour. This step is more to firm up the bars and kinda make them drier and more portable.
  9. Cool on wire rack and enjoy! I store mine in the freezer so I can just grab a couple at a  time.

image

© 2012 SimpleHealthyHomemade

Bircher Müesli

image

You may know versions of it as ‘musli ‘, but this cereal based dish has its roots firmly planted in Switzerland. Dr. Bircher decided, at a time when everything was cooked due to germs, that there were benefits to real and raw foods.

Per my research, for those who care to dive a bit deeper: Dr. Maximilian Oskar Bircher-Benner  (or in german) (August 22, 1867, Aarau – January 24, 1939) was a Swiss physician and a pioneer in nutritional research. At his sanatorium in Zürich, a balanced diet of raw vegetables and fruit was used as a means to heal patients, contrary to the beliefs commonly held at the end of the 19th century.image

Bircher-Benner changed the eating habits of the late 19th century. He believed eating raw and whole foods such as fruit, vegetables, grains and nuts was healthier than cooked, he also rejected the use of refined products such as white flour and white sugar. His ideas may not all have been correct, he believed solar energy stored in food (in a not strictly defined or explained way) was what made them better and not the quantity or quality of nutrients. His theory of life was based on harmony between people and nature. Some of his ideas originated from observing the daily life of shepherds in the Swiss Alps, who lived a simple and healthy life.

image

By now this recipe has as many variations as there are days in a week, multiplied by the number of people in Switzerland (my Dad says we Swiss people are born with the Bircher Müesli recipe attached to the umbilical cord 😉 this is my basic recipe and it’s variations.


Walking though the aisles in a grocery store, you will find commercially made musli mixes, including everything from dried fruit to chocolate chips. This is the commercially available basic Swiss version I found at the store the other day!


image


It’s quite a popular food these days, it seems to me. But here I am taking you back to the roots, the origins of where this all came from. (using my important voice)


And let’s face it, why waste money on prepackaged stuff when you can make a better and healthier-for-you version easily at home? No cooking required and easy to make, this recipe is very versatile and adapts through the seasons depending on your fridge or gardens content of fruits and berries.

A great summer meal, I love it anytime of day, but in Switzerland, it is not considered a breakfast food. It is eaten as alight lunch or dinner with a buttered slice of crusty bread. (We love our bread) …And sometimes some whipped cream on top…

image

I always put it up to my Dad being a foreigner, him never being super exited about Bircher Müesli, but now I am wondering if it is a guy thing. Let me explain. The other morning over breakfast, Nelson kept talking about ‘having some ‘Beatle Music’ and pssssshhhh totally over my ehad. Well, I figured it out Beatle Music = Bircher Müesli, hahaha. Of course I thought he meant ‘beetle music’ and was utterly confused, imagining a line of beetles tapping their little feet (or legs?) rhythmically, so sadly I was left with the impression that maybe he did not like my ‘Beatle Music’ turns out he does, it’s after all juts a better version of oatmeal, cold and with fruit!

image

Ingredients

  • 1/2 cup rolled oats
  • 1/2 cup rolled wheat, barley, millet, and/or rye flakes (you can use all oats instead)
  • 2 tablespoons sliced almonds
  • 2 tablespoons raisins
  • 2 cups milk
  • 1 yogurt (optional)
  • 1 apple
  • 1 banana
  • 1 1/2 cup mixed fruits and berries (plums, peaches, apples, pears, oranges, grapes, strawberries or even frozen blueberries, the possibilities are endless)

optional: you can also add chopped roasted hazelnuts, pieces of dried fruit or banana)

image

Directions

  1. In a large bowl, combine the cereal flakes (or just the rolled oats), raisins, almonds and hazelnuts and 1 1/2 cups of the milk.
  2. Grate an apple on the large holes of a grater, stir to combine.
  3. Cover and let stand 1 hour or until the oats are softened.
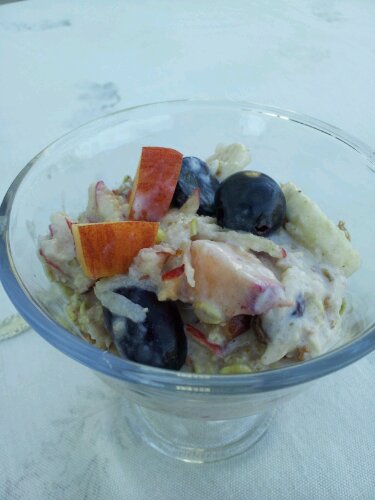
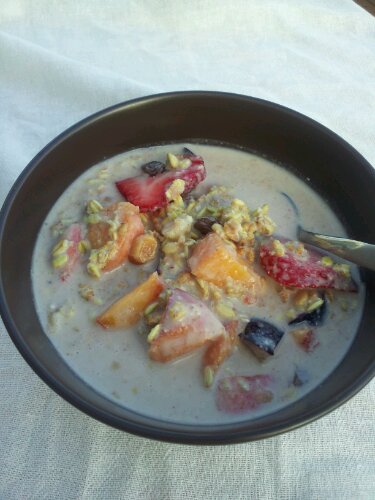
  4. Slice the banana, chop the peach and the berries (used in the picture are peach, plum, strawberry, banana and apple) or whatever other fruit you have on hand.
  5. Uncover the bowl, stir in the yogurt (if using) and the rest of the milk (You can add more if it looks dry) then add all the fruit, gently mix so one person doesn’t get all the fruit and serve.
  6. Store any leftovers in the fridge and eat within 2 or 3 days

image

Healthy Breakfast!

image

© 2012 SimpleHealthyHomemade

Healthy Camping Pt1

So many think that when you take food along or cook outside your kitchen that forcibly the quality of your food has to go down, as in unhealthy and bad for you. But there is really no reason for that, whatsoever. As proven by or most recent camping trip and many hikes before that (I made Vietnamese summer rolls on time, put the peanut sauce right into them), you can definitely ‘rough it’ without sacrificing on the food side of things.

This time we only had a few days so it was sadly much shorter than we would have liked. But hey, that was in June (yes, sometimes that’s how long it takes me to get a post completed) and now it’s only August, and even if you are cold easily, camping season extends till at least the end of September.
We set off on a blistering hot weekend where temps here in the Lehigh Valley topped out just short of the triple digit mark, drove through several fronts of thunderstorm and heavy downpour ( there was an inch of water in my kayak by the time we got there! ) up to the Catskills which proved to be cooler and therefore much more agreeable with everybody. Oh and the best part? It did not rain one drop once we got there!

We went with friends and the cooking duties were split evenly: we were responsible for one dinner and one breakfast.

But first, here are some general guidelines for meal planning, away from you regular kitchen:
Use seasonal produce for fresh and healthy meals. Most produce can be kept at room temperature for a period of time ( unless it’s berries, which we did put on ice in the cooler) Things like cucumbers, tomatoes, potatoes, bananas, apples, grapefruit, oranges, watermelon , cantaloupe , red bell pepper, onions or green beans, even kale if wrapped in a moistened paper towel before put in a plastic bag will happily keep a while. And if you end up having more space than expected, you can always store them on top of the rest in your cooler. ( don’t refrigerate your tomatoes or bananas)

Breakfast:

Mix up the dry ingredients for pancakes and store in a zip top bag, all you need to add is the liquid stuff (a liquid like milk, oil and eggs, if you are making them with eggs)

Omelettes are always a good choice, easy and versatile that can be made with pretty much anything added.
Desert: doesn’t have to be roasted marshmallow or smores either, branch out. Try fruit salad with watermelon or mixed berries with yogurt the first couple of nights. Yogurt keeps fairly well, it’s fermented. Folks used to turn milk into cheese and yogurt in order for it to keep before there was no refrigeration. Keep it cool, but you can also bring it along for a picnic on a hike, no need to panic about it. When you get down to the end of your supplies and the more delicate things are gone, make these chocolate bananas over the fire. Or make a fruit compote topped with granola for crunch!

Dinner choices beyond the hot dog and chips: Pieces of meat are healthier than mystery meat in a casing. That said this time we did have chicken sausage the one night. Carl at the farmers market is a sausage genius and I know for a fact that his chicken sausage is made from chicken breast he sells right there alongside the sausage made from it. Steak, pork chops and chicken breast can all be easily grilled but need to be kept cold on ice in your cooler until you are ready for them. In my experience, meat, like ground beef, sausage or steak. (Oh yes, I said we did it in style, didn’t I?) keeps well right on the ice or bottom of the cooler, submerged in the water. To make doubly sure and make it keep longer, freeze it solid at home, then place in a zip top bag to keep it from getting ‘watered’ or in one of those Rubbermaid ‘take alongs’ (storage containers), they seal the water out and keep the meat inside cool and dry. You can cook chicken breast pieces in an aluminium foil pack with vegetables and seasonings included. Potatoes do well cooked that way, too, although they do take a while, sweet potato seems quicker.

Oh and remember, aluminium foil is your friend, as is a good set of grill thongs and a mitt 😉

imageWild Blue berries along the hiking route

Serves 4

Breakfast:

We decided to go with an omelette with spinach and feta for sustenance and flavor. I cooked these over a camp stove, not the open fire. And it ended up being easier to make one at a time since the pan i have, makes it hard to put more than 3 eggs on at a clip and still have it cook through. Wasn’t a problem at all since other really only takes minutes to cook.

Basic Spinach Omelette:

  • 12 eggs (3 per person)
  • Spinach ( about 2 hand full per person)
  • 4 oz Feta Cheese, cut into 1/2″ cubes

Variations on a theme:

  • Use Swiss Chard or Kale, instead of Spinach
  • Add some deli ham, or prosciutto for additional flavor
  • Use cheddar, Fontina or Swiss instead of Feta

imagewith Fontina and Prosciutto

This one’s with Swiss Chard from the garden & Ham

Desert:

© 2012 SimpleHealthyHomemade

Grilled bananas with chocolate

image

 And for an easy camping desert, bananas with chocolate:

  • Cut in to the top of the banana, making sure not to cut through.
  • Use 1 row of fine quality semi dark or milk chocolate (Lindt is excellent) and push the single pieces into the top of the banana
  • Wrap in a rectangle of aluminium foil: Place banana in the center, flip the foil up on both sides and fold down twice, then fold in ends
  • Place on a hot grill until bananas are tender and yield gently to the touch, about 10 to 15 minutes (depends on the heat of the embers)
  • Carefully open packets, and eat with a spoon. Careful very hot!!

Waking up to sunlight…

image…and some lovely scenery from the kayak cockpit!

image

Looking up through the rocks at where we will end up, after the uphill hike. And of course I had brought some Trail mix Granola Bars!

imageSunset Rock, overlooking North South Lake. You can’t see it from here, (I know this from the map) out of sight, off to the left there, are the Kaaterskill Falls, the lake water drains over the rocks into a fantastic multi level waterfall

© 2012 SimpleHealthyHomemade