
As the colder and shorter days arrive, and I know some of you are starting to get ready for the holidays, I tend to be drawn to soups and slow cooked dishes. I shop and eat with the seasons. Many of you already realize that in the summer months you are drawn to fresh crisp salads, raw vegetables and fruits and but now you naturally gravitate towards warming dishes as the temperatures start coming down. This is all part of the seasonal gear shift getting into the colder months. Nature hibernates and rests. So sit and sip some tea in front of the fireplace and read a good book, take your time, slow down and rest.
Eating fresh and local means to be in sync with nature more. Eating with the seasons takes into account that fruits and vegetables are at their peak of nutritional value when ripe, and the longer they have to travel until they get to you, the sooner (before ripeness) they have to be picked. Once the produce is picked and disconnected from the plant or root that it grew on, it is as nutritious as it is ever going to be, it can’t ‘make’ any more nutritional value. At the same time, the clock starts ticking and its nutritional value diminishes over time. For those of us on the East Coast, just think about how long it takes a truck to get here from California… Seasonal eating involves eating more locally grown and harvested produce. It has to travel less far to get to a store near you = it’s nutritional content is higher, therefore better for you. Yes, that means in the winter, strawberries and cantaloupe are not going to be as good or as good for you (high in nutritional content), as when they are in season. However apples, pears and oranges are at their peak.

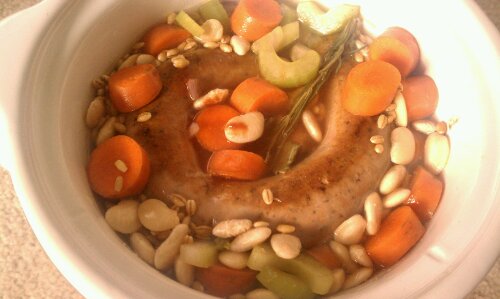
Even though I love to cook, and admittedly spend a lot of time in the kitchen, on Fridays specially now that it gets dark so early, I like to take a break. I know many of you understand this feeling, after a long week, you just want to relax. That’s where this series of recipes comes in: Slow Cooker Friday! Simple and easy to prepare, pile it all in the slow cooker and forget about it until you come home to wonderfully flavorful dinner and a kitchen that smells like you just spent hours laboring over the stove!
To get the best dried beans, make sure they are not too old. In addition to loosing nutritional value, they will take longer and longer to cook. The best places for (fresh) dried beans I find are stores with a large Latino or Indian customer base. Remember, you will need to start this recipe the night before, as you are going to be soaking the beans overnight. I have also added barley to this recipe, since beans and grains together make up a complete protein, good to know if you are vegetarian!

Easy and it is also an end of the month kinda recipe, using sausage, and dried beans to maximize your $$!
Note: I use a 2 qt round slow cooker, which usually makes enough for 2 hungry people, plus a round of leftover for as many.
Ingredients
- 1/2 to 1 lb sausage of your choice (I used a spicy garlic turkey sausage this time, but sweet or hot italian sausage works great too!)
- 1 cup baby lima beans (about 1/2 lb)
- 1/4 cup barley
- 2 celery ribs, chopped
- 2 carrots, chopped
- 1 tsp salt
- 1 sprig of rosemary or 1/2 tsp dried
- 1 bay leaf
Directions
- Soak the beans the night before in a bowl with cold water.
- Chop the carrots and celery ribs and place in the slow cooker insert. Then drain the beans and layer over top the vegetables. Add the bay leaf and rosemary and sprinkle with salt.
- In a skillet brown the sausage by cooking it without turning for about 5 minutes per side. Place in the slow cooker on top of the veggies.
- Fill the slow cooker insert with water to just cover the ingredients by 1/2″, turn your cooker on low and cook for 5 hours.
- Come home to a wonderful dinner 🙂
Serves 4
Copyright © 2011 Simple Healthy Homemade. All rights reserved


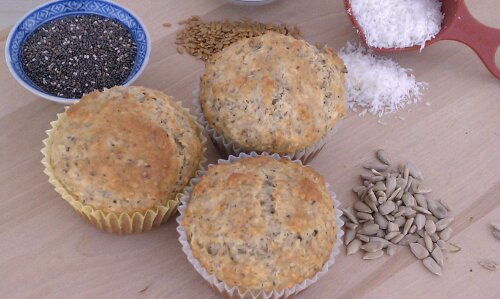
 unbaked…
 …baked!


 Calanque (Inlet) near Marseille


 Haha, see the window? 😉