Kale #1 with Golden Raisins

image

Kale is one of my favorite no-brain vegetables. Not because it isn’t good for your brain or you, no, but because I find it’s so easy to make it yummy that there isn’t a whole lot of thinking involved in figuring out how to prepare it.

In case you’re doubting me on the healthiness of kale, here are some facts:

  • One cup of kale contains 36 calories, 5 grams of fiber, and 15% of the daily requirement of calcium and vitamin B6 (pyridoxine), 40% of magnesium, 180% of vitamin A, 200% of vitamin C, and 1,020% of vitamin K. It is also a good source of minerals copper, potassium, iron, manganese, and phosphorus.
  • Kale’s health benefits are primarily linked to the high concentration and excellent source of antioxidant vitamins A, C, and K — and sulphur-containing phytonutrients.
  • Carotenoids and flavonoids are the specific types of antioxidants associated with many of the anti-cancer health benefits. Kale is also rich in the eye-health promoting lutein and zeaxanthin compounds.
  • In fact, researchers can now identify over 45 different flavonoids in kale. With kaempferol and quercetin heading the list, kale’s flavonoids combine both antioxidant and anti-inflammatory benefits in way that gives kale a leading dietary role with respect to avoidance of chronic inflammation and oxidative stress.
  • Beyond antioxidants, the fiber content of cruciferous kale binds bile acids and helps lower blood cholesterol levels and reduce the risk of heart disease, especially when kale is cooked instead of raw.

Now that’s quite a track record, don’t you think?

This time, I sweetened the deal with some golden raisins that I found hiding in my cupboard, it was just a little handful, had to be used up, as space can be at a premium around here, with all the different food things I want to try. And have you ever noticed how you can almost never find just enough for one meal, as in ‘just to try it’? Yep, so I end up with a whole box of this and a bag of that, barley couscous and mochiko (sweet rice flour) are prime examples of that. So using up and finishing up things always makes me feel good since I might get to try something else!

So simple, healthy and quick, here we go!

image

Feeds 2 as a side (around here though, I have been known to polish off a bunch of kale by myself, so use your judgement)

Ingredients

  • 1tbs oil
  • 1 bunch kale, washed and de-stemmed
  • 1-2 tbsp golden raisins
  • 1/2 cup water
  • salt to taste
  • 1 tbsp cider vinegar

Directions:

  1. Strip the leaves off of the stem (discard hard stems) and tear into smaller pieces if necessary. Wash and spin dry using a salad spinner
  2. Heat the oil in a large skillet, then add the washed and torn kale leaves. Sprinkle some salt over top.
  3. Add water and raisins and cover with a lid (even if the lid does not fit down onto the pan, juts balance it atop the kale)
  4. Cook until the kale is soft and reduced in volume. 5-10 minutes. (This depends on the age of the kale plant: If you have fresh kale from your garden in the early spring, it will take a lot less than mid winter, kinda tough plants that overwintered in your garden)
  5. Add cider vinegar, cover and cook another minute or two, then uncover and finish cooking until most of the liquid has evaporated.

image
Copyright © 2012 Simple Healthy Homemade. All rights reserved

3 Pepper Bean Soup

image

Some days it just has to be a quick and easy soup. I literally made this one in between answering emails and studying. Like many soups the active time is minimal and the result is totally worth it.

For me soups can be eaten any time of year and day, for that matter (I had this one for breakfast the other day and it was delicious, and yes, I know I am wierd). And usually the ingredient list goes by the content of my refrigerator and freezer in the colder months, my garden or the farmers market the rest of the year.

This particular recipe ends with kind of a ‘build your own’ option, a more brothy one with hearty chunks or a little thicker and more creamy option. Depending on the mood and/or the outside temperature you can vary it accordingly. Okay, you can’t go back from creamy to chunky, but it works the other way round. Either way, you can’t go wrong.

If you feel like it, you can add some cooked, shredded or diced chicken or beef.

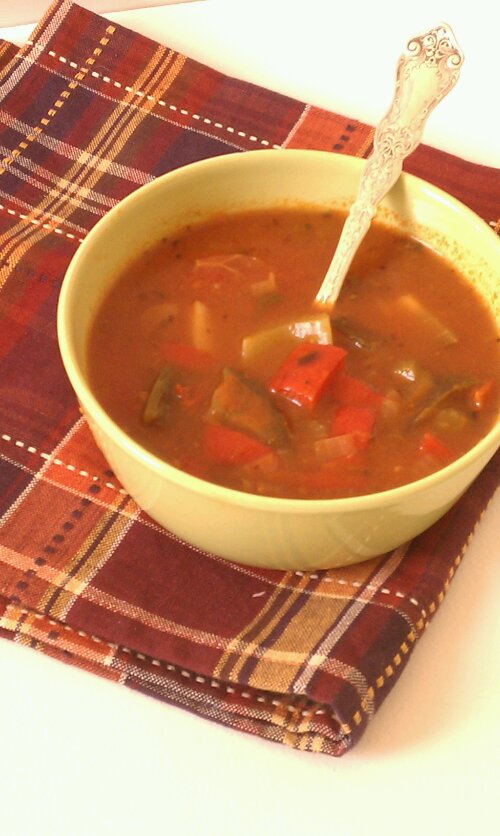
imageIt’s very hard to take pretty soup pictures 🙁 the taste will have to make up for it

Ingredients

  • 1 medium red onion, diced
  • 1 large garlic clove, thinly sliced
  • 1/2 red bell pepper
  • 1/2 yellow bell pepper
  • 1-2 small Thai chili peppers (or other hot pepper), sliced thinly
  • 4 cups beef broth (or vegetable broth for vegetarian option)
  • 2 1/2 cups red beans, cooked, such as dark red kidney beans, or small red beans (if you don’t cook them and freeze them, from 2 cans)
  • 1/2 tsp dried oregano
  • salt & freshly ground pepper to taste (I used 1 tsp, but the broth I used, has no salt in it)
  • 1 tbsp apple cider vinegar
  • water, to thin the soup if it get’s too thick

image

Directions

  1. In a large stock pot, heat up some oil over medium heat. Add onions and cook until translucent. Add garlic and cook juts until it changes color to light golden
  2. Add bell pepper and hot pepper, cook 8 minutes or until onions are tender.
  3. Add broth and beans. (If using canned beans, rinse them before adding)
  4. Cook about 10 minutes or until slightly thickened, then remove about 1 cups of the soup including beans, and puree, or mash the beans with a fork for a very chunky soup. If you want a thick and creamy soup, puree 2 cups.
  5. Add the cider vinegar and cook for another 2 minutes. (trust me on that one, it is essential)

image

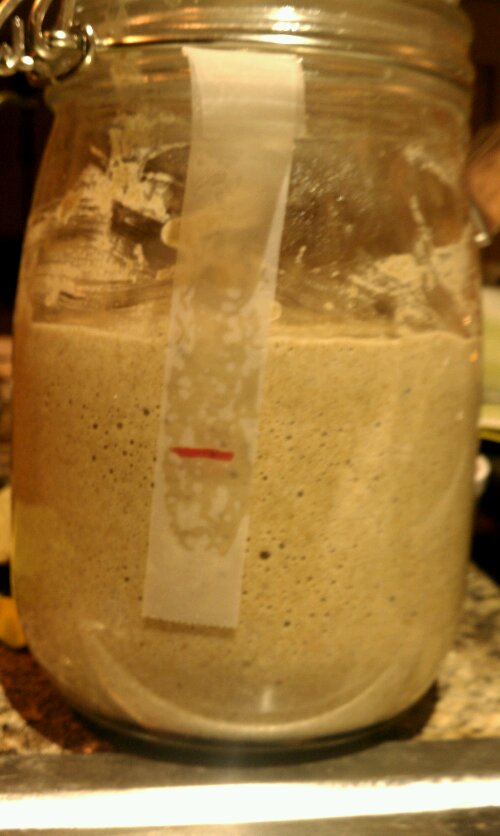
Happy to say that my Rye Sourdough seems to finally take off 🙂 More on that later though

imageCopyright © 2012 Simple Healthy Homemade. All rights reserved

Chicken with Capers and Feta

image

Part IV of the series: Chicken for every day of the week!

Look here for Part I and II & III

This time we travel to the islands of the Mediterranean. Sounds nice, what? Haha, no, it’s just a simple week day recipe that can be whipped up in no time. But it borrows greek flavors hence my mind wandered off to sunny shores and white washed houses against blue skies. To make your taste buds experience the same image, we’re using feta and capers, and slices of lemon, if you like. It just looks so pretty with it 🙂

imageServes two

Ingredients

  • 1 skinless boneless chicken breast half, pounded flat using a meat mallet
  • 1/2 tsp salt
  • 1/2 tsp pepper (or to taste)
  • 1/4 cup feta, crumbled
  • 2 tbsp capers
  • 1 lemon,  thinly sliced (optional)

image

Directions

  1. Season the flattened chicken breast with salt and pepper on both sides
  2. Heat some olive oil in a skillet
  3. Cook the chicken over medium high until browned on one side and starting to look opaque, then flip it over, crumble the feta cheese on top and ‘sprinkle’ with the capers. Cover the skillet with a lid and cook until the chicken is cooked through and browned on the second side.
  4. (If you are using the lemon slices, place on the chicken for about 2 minutes to heat up, best way is to add it just a little before the chicken is all the way done, and cover the pan back up)

image
Copyright © 2012 Simple Healthy Homemade. All rights reserved

Chocolate Coconut Rounds

image

There they were, sitting timid in the middle of my fruit basket trying to pretend they were not there. Overripe bananas, like the poor step child in an old fairy tale. Since I only like to eat them when they are still a little green, these brown things in my fruit basket are definitely not my thing. But over time I have come up with various ways to use them up, using them for smoothies, pancakes or baking, after all they do provide a great source of natural sweetness without adding sugar. And yes, I have to admit before I did that, sometimes they would get thrown out. So that’s why they are scared. But fret not bananas, I have something yummy to turn you into 🙂

What do you do with your past prime bananas? Any favorites?

This recipe is grain and sugar free, the only sweetness comes from the banana, so it isn’t your traditional cookie, if you like things sweet, you might want to add 1/4 cup of sugar or some stevia. These are more like a piece of 70% cocoa chocolate, flavorful but just subtly sweet.

image
And without further ado here is how to make them:

Ingredients

  • 1/2 cup egg whites (about 4)
  • 2 ripe bananas, mashed with a fork
  • 2 cups unsweetened, shredded coconut
  • 1 cup ground almonds, natural not blanched
  • 6 tbsp cocoa powder
  • 1/4 cup almond butter (cashew butter or other nut butter would work as well)
  • 1 tbsp coconut oil
  • 1 tbsp coconut flour
  • 1 dash of salt

Directions

  1. Combine shredded coconut, ground almonds, coconut flour and cocoa powder in a bowl
  2. Add the mashed bananas
  3. Melt the coconut oil together with the almond butter and stir until smooth, add to bowl
  4. Add the egg whites
  5. Mix until everything is fully incorporated
  6. Divide dough into two portions and between wax paper, work each one into a roll of about 1 1/2” to 2″ diameter.
  7. Place in the freezer for about 1 hour or until nice and solid.
  8. Preheat the oven to 350°F
  9. Remove one roll from the freezer, and slice into rounds 1/2″ to 3/4″ thick, place ona  lined cookie sheet and bake for 15 to 20 minutes.
  10. In  the meantime, repeat the same with the other roll.
  11. Let the rounds cool down on the cookie sheet for 5 minutes before removing to a cooling rack.

image

Copyright © 2012 Simple Healthy Homemade. All rights reserved
Kale Mushroom and Meatball Skillet

image

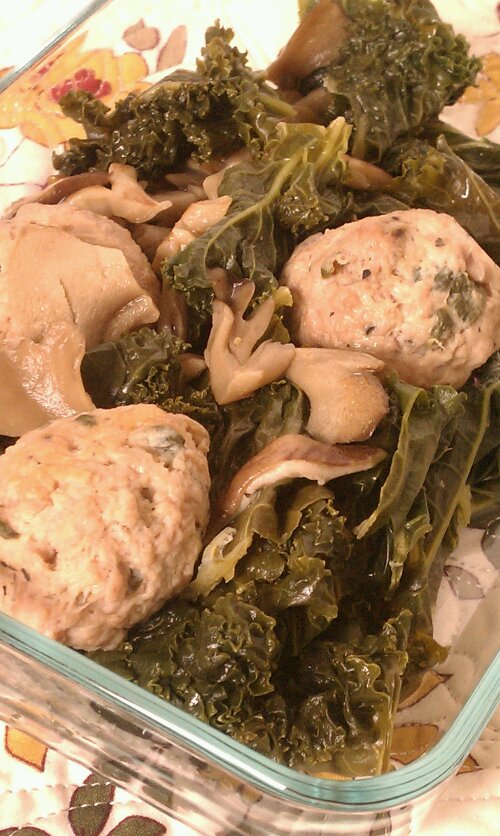
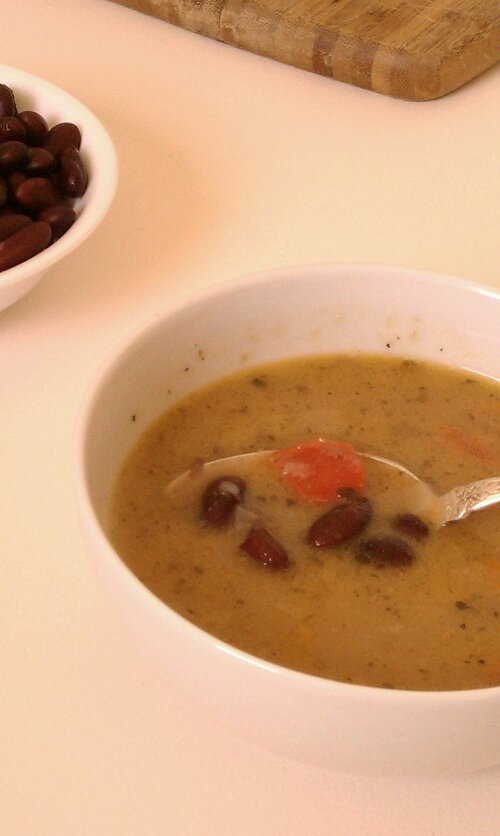
The darker the green the more nutritious a plant is, we have all heard that. And as far as color goes, you can’t get much darker than kale. Now for many this is sort of a strange new vegetable. Your Mom never made it unless you happen to be from Northern Europe or maybe Italy. If you grow it in your own garden and it’s young, it can be eaten raw on a salad. But this time of year and coming from the store, the leaves are more made for cooking. Here I made mushrooms and chicken meatballs to round out the meal. All done and only one pot to clean. I am including a simple meatball recipe, but I have also made this using ready made chicken sausage from Carl, my favorite poultry guy at the farmers market.
image

The true advantage of using sausage is it comes on its own ‘keep your hands mostly clean’ dispenser 😉 just squeeze off a portion and ‘dispense’ into the pan, one meatball at a time, kinda like squeezing toothpaste. (If you go with sausage, make sure you know what is in them, as sausage can be an excuse to use up whatever is on hand… The ones I get are awesome, made from skinless chicken breast meat, spinach, feta and some salt, that’s it! )

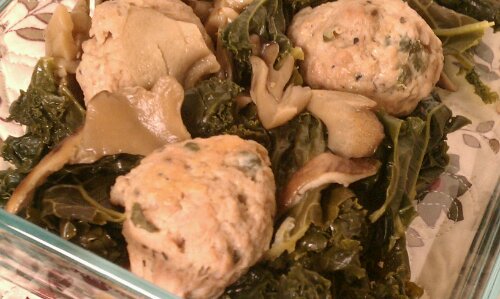
imageleftovers, ready to take to work

Serves 2 hungry mouths

Ingredients

  • 1 bunch of kale
  • 1 lb of chicken breast, ground (or sausage)
  • 1/4 cup feta cheese, crumbled
  • 1 cup baby spinach, lightly packed,
  • 1 1/2 cups mixed mushrooms, chopped ( I had shiitake and maitake that needed to be used)
  • 2 tbsp Apple cider vinegar

Directions

  1. To make the meat balls:
  2. Mix ground chicken, chopped spinach and crumbled feta in a bowl, and form into ping-pong ball sized meat balls. If you wet your hand a little, the whole thing sticks less. (If you are using sausage, skip this step)
  3. Clean and wash the kale, then separate the leaves from the tough stems. I usually rip the leaf off, or even strip it off the stem by pulling the stem through between thumb and index finger. Or you can use a knife. Cut or tear into pieces
  4. Heat a little oil in a skillet, add the chopped mushrooms and saute until lightly brown.
  5. Add the meatballs, cook until browned on one side.
  6. Pile the kale on top, all of it (if it looks like it is going to come out of the pan, just add half, wait for it to cook down a bit, then add the rest), add 1/2 cup if water, place (or balance, if there’s a mountain in your pan) a lid on top and allow to cook covered.
  7. After 5 minutes, check to see if there is still any water left, if not, add a little more. Cook until the kale is tender and the meatballs are cooked through.
  8. Add apple cider vinegar, toss and cook another 2 minutes to allow the flavors to blend.

image

Copyright © 2012 Simple Healthy Homemade. All rights reserved

Lazy ‘South of the Border’ Soup

image

You’re wondering on the lazy part here? Well it all started out with me not feeling like doing much but having to eat like everybody else. So from what I had on hand, I concocted a soup, and here is the real lazy part about it: using up half a jar of tomato sauce that was leftover from a ‘quick-take-to-a-friends-house-Lasagna’. Even I, who make most everything from scratch, (often including tomato sauce) do have some jars of good store bought sauce on hand. A word of caution here: Read the labels, I never buy any jarred sauces with sugar or cornstarch or vegetable protein or really anything other than what you would put in it at home. Lets face it, when is the last time you reached for that soy isolate or sprinkled some monosodium glutamate on your food? Alright then, you might not want to eat that I am guessing. I am even weary of ‘spices’ as they can legally stick all kinds of stuff in there under that label, but I am getting off the subject here.

image

Where were we? Lazy, oh yes, so I made a soup for a cold winter day when the soul is longing for some sunshine but you really don’t want to put a lot of thought or energy into the food making process…

image
I added spices and peppers, eggplant and cumin, and I had a name picked out and everything! Life was great. Until I bit myself eating the soup three (yes, 3) times!!?  Montezuma apparently misunderstood the title, I mean it was in English and all…          ‘Lazy Mexican-soup‘ there, happy?

Well I do have to say, I ate all the rest of the soup and no more biting myself…

image

Ingredients

  • 1 medium red onion, diced
  • 4 ribs celery
  • 1/2 medium eggplant, cut into cubes
  • 1 lb campari tomatoes (they are about ping-pong ball sized), quartered
  • 1 red bell pepper, diced (optional: roasted)
  • 1/2  a jar Marinara (Spaghetti) Sauce (about 12oz)
  • 1 tbsp cumin seeds, whole
  • 1 tsp marjoram, dried
  • 1 tsp oregano, dried
  • 1 tsp chili powder, medium or hot, depending on taste
  • 2 tsp chipotle powder
  • 1/2 tsp ground white pepper
  • 2 tsp salt
  • 2 qts plain beef stock (for vegetarian option, use vegetable broth)

Directions

  1. If you are roasting the red pepper: Spread the peppers on a line baking sheet and roast in a 400°F oven until blackened in spots. (You can do this alongside other vegetables, like while making the cumin roasted carrots) or alternately, place under the broiler with the door ajar until some brown spots appear.
  2. Add some oil to a large stockpot, add the diced onion, stir and then cook until softened and browned in parts.
  3. Add the celery, eggplant and cumin to the pot. Cook for about 2 minutes, then add the tomatoes, pepper and all the spices. Stir and wait about 1 minute until adding the broth so the spices have toast a bit and time to release their flavor.
  4. Add the Marinara Sauce and bring to a boil.
  5. Cook until the vegetables are tender, about 8 to 10 minutes. Enjoy!
See? It doesn’t get much easier, lazier or cheaper than that!

image

Copyright © 2012 Simple Healthy Homemade. All rights reserved

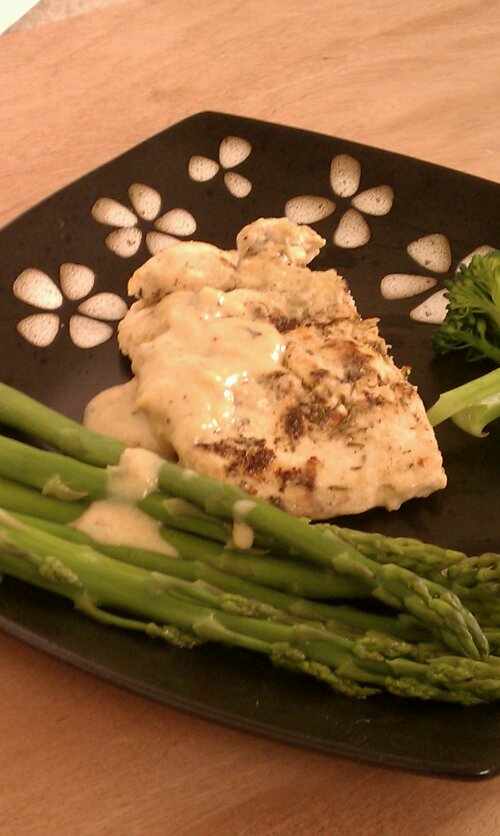
Chicken à la moutarde

image

Part III of the series: Chicken for every day of the week!

Chicken à la moutarde (chicken with creamy mustard sauce)

A staple in French kitchens and served all over Europe is mustard sauce, or Dijon sauce. A creamy flavorful sauce usually served with chicken or rabbit. And as fancy as it sounds, my version here be made very simply and even better, quickly. I used home made white wine mustard, (yes I’ll do a post on that soon) but any Dijon style mustard would work. I generally like to have both a creamy and a whole grain version on hand, but this sauce works well with just the smooth style as well.

image

Ingredients

  • 1 boneless chicken breast half, pounded flat between two sheets of cling wrap
  • 1/2 cup flour
  • 2 tbsp mustard, divided
  • 1/2 tsp thyme
  • salt and pepper to taste
  • 1/2 cup white wine (or water)
  • 1/2 cup milk

Directions

  1. Rub the chicken breast all over with 1 tbsp of mustard (I like to use the old fashioned kind for this)
  2. In a shallow dish combine the flour with 1 tsp salt and dredge the chicken breast until covered in a thin layer of flour. Season with pepper and thyme.
  3. Heat 1 tbsp of oil in a large skillet, then add the chicken and cook undisturbed until the edges start to look cooked and the bottom is browned. Turn the chicken breast and cook until cooked through.
  4. Add the wine to the pan, gently stir to loosen up any browned bits. Remove the chicken from the pan and set aside, keeping it warm.
  5. Mix the additional tablespoon of mustard with a tablespoon flour until a paste forms, add to the pan, and add the milk.
  6. Stir to dissolve any pieces of flour and mustard and bring sauce to a boil, simmer until sauce thickens, and serve over chicken

image

Copyright © 2012 Simple Healthy Homemade. All rights reserved

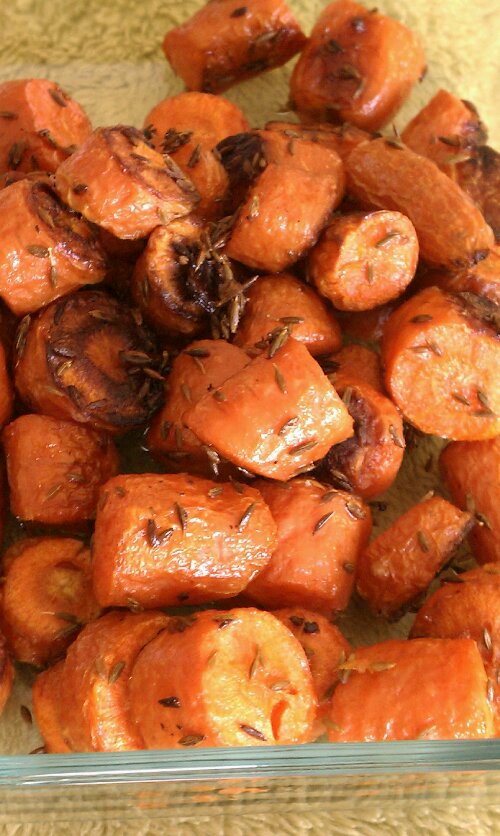
Cumin Roasted Carrots

image

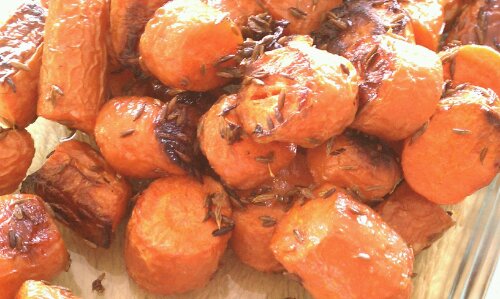
I have to admit I was addicted to this recipe for a while last year. Yep, ‘Addictive veggies’, who would have thought? Somehow the way the coarse salt flakes make the cumin taste on those carrots is just beyond description. You have to try it to believe it, but around here, I always make extra so I have leftovers.

And it’s so easy, in fact it only takes 4 ingredients, including the carrots!

I love to bake and roasting is, uhm, almost like baking. Riiight, you’re saying. Well maybe it’s a bit wishful thinking. I have been going sugar and grain free for a while, that sorta limits the baking. One thing you start noticing is your taste buds rejuvenate and become more sensitive. You will be able to taste the natural sweetness in carrots or beets for example, or even milk. It’s quite astonishing how dulled our senses have become to sugar, (read a 1996 study on sugar preference and consumption  between rural and urban population groups in Iraq) apparently the more sugar you eat, the duller your senses become to it and the more you need over time. Works kinda like drugs that way, a  bit scary, ain’t it? But I digress. The roasted carrots are a must try, even if you’re not a big carrot fan, roasting them caramelizes the sugars and renders them sweeter. Part of why roasted carrots have a higher glycemic index than raw or even steamed carrots.

image

Ingredients

  • 1 lb Carrots (about), cut into pieces
  • 2 tbsp olive oil
  • 1 1/2 tsp coarse flake salt (such as french grey sea salt, or fleur du sel)
  • 2 tsp cumin seeds

Directions

  1. Preheat oven to 380°F
  2. In a bowl, drizzle the carrot pieces with the 2 tbsp olive oil, and toss to coat. (Trust me, you don’t want to skip this step and just drizzle them on the baking sheet, won’t work, I tried, take it from a cumin roasted carrot addict), then add the cumin seeds.
  3. Line a baking sheet with aluminum foil (easy clean up makes me happy)
  4. Transfer the carrots to the baking sheet, making sure you scrape out all the cumin seeds. Sprinkle with the salt and place in the preheated oven
  5. Bake for 35-45 minutes, depending on the size of your carrots and the desired softness. (Mine usually are perfect after 40)
What’s your favorite vegetable to roast?

Copyright © 2012 Simple Healthy Homemade. All rights reserved

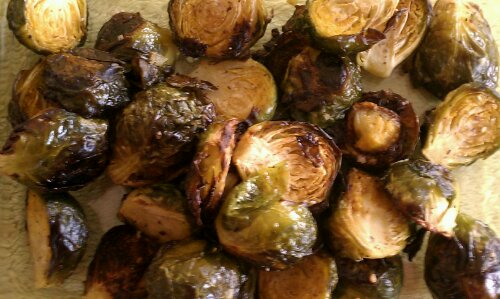
Roasted Brussels Sprouts

image

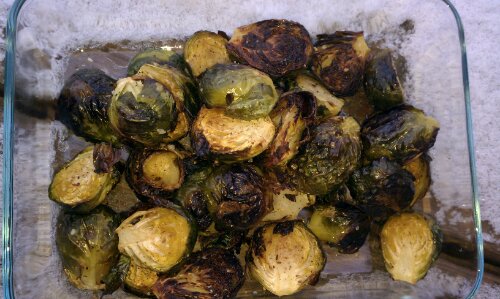
It snowed yesterday. Not much really, but steady from about 1 o’clock until 11pm. And what does one want to do when snow is falling? Eat stuff that makes us feel warm. Like yummy roasted vegetables. Granted it wasn’t all that cold, but roasting vegetables never needs much convincing in the form of good reasons, sooo…

image

Roasted vegetables it was, and soup, and more roasted vegetables 🙂 Ahhh, the way the heat of an oven transforms simple, lowly vegetables into something so utterly delicious, it almost melts in your mouth!

imageSee the snow?

Ingredients

  •  1 lb Brussels Sprouts, cleaned and cut in half
  • 1-2 tbsp olive oil
  • 1 1/2 tsp flake salt (fleur de sel, french grey sea salt or kosher)
  • 2 tsp zahtar seasoning (Middle Eastern spice blend, or you could add a sprinkle of lemon juice, sesame seeds and some thyme)

Directions

  1. Preheat oven to 380°F
  2. In a large bowl, toss the cut Brussels sprouts with the oil until evenly coated
  3. Transfer to foil lined baking sheet (easy clean up), sprinkle with salt, and zatar seasoning.
  4. Roast for about 30 -35 minutes, or until tender and browned in spots. Stirring once halfway through.

Other great things to do with Brussels Sprouts:

And next I made some roasted carrots. I mean why stop, when we’re having so much fun??

image

Copyright © 2012 Simple Healthy Homemade. All rights reserved

Spinach and Pomegranate Salad

image
What to take for lunch? Since most of us here don’t get to go home and have a home cooked meal, and PB&J really isn’t a healthy option (I can hear you all scream right now), take out and fast food… well I don’t think I need to go into detail on that (no, salad from McDonald’s isn’t health food either). I got the idea to add pomegranate seed to a spinach salad from a local Mediterranean deli. But at a whopping $4 for a small container, what’s a girl on a tight budget supposed to do? You got it, try to make a similar concotion myself! And let me tell you, the flavor combination it amazing, it’s definitely a winner!

image
So here is a fun and yummy winter lunch box salad that would be a great side for the chicken with pepper and mushrooms, or add some fromage blanc to make it a light lunch, like I did the other day. No good picture exists to proof that, was too good, didn’t stick around long enough 🙂 And, please, don’t use just any dressing, make your own it will be infinitely better, I will of course give you one that will fit this salad perfectly!

image
Spinach  and Pomegranate Salad with Pine Nuts

Serves 4

* to get the seeds out of a pomegranate, cut in half and gently pry the seeds out of the white flesh/lining using your fingertips. I usually do this over the sink in a colander. Careful with the splatters if you pop a seed, it’s highly staining. Totally worth the effort.

image

Copyright © 2012 Simple Healthy Homemade. All rights reserved