Green Power Watercress Omelet

image

I know many resolutions for the new year are to get fitter and be healthier. What kind of New Years resolution did you come up with? Well instead of resolutions and radical changes, how about something more playful? Here’s a New Years challenge for you: Instead of cutting out things in your daily diet and feeling deprived, start with adding nutritiously dense foods!  I am challenging you to incorporate more greens into your diet, and here is a great way to start, if you are not quite ready yet to steam or saute kale, collard greens or water cress.
image

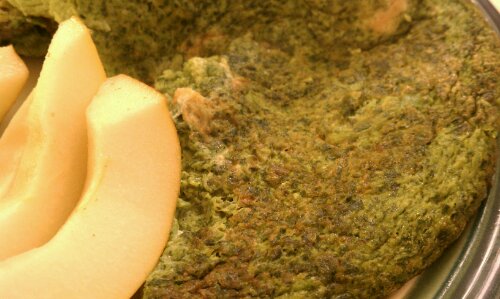
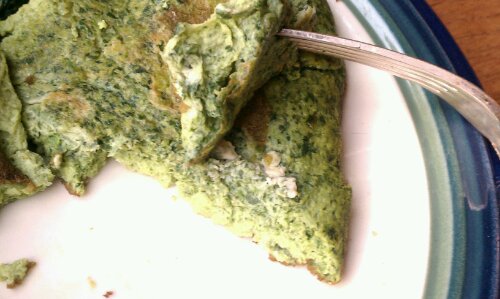
Watercress, a leafy green native to Europe, has edible leaves and stems, but I find that I do not enjoy the stems as much as I could. I tried it as salad, addition to soups, but those crunchy stems I just can’t get used to. So…. besides puréed soups, what to do? In comes my blender and the Green Power Omelet !

image

Oh yeah, it’s wicked green, (trust me, you can’t really tell from the picture) and the odd thing in there, you ask?  I added some ‘free form’ meatballs from a jalapeño chicken sausage for extra flavor

image

Some of the ‘goodness in watercress:

    • Fresh cress has more concentration of ascorbic acid (vitamin C) than some fruits and vegetables. 100 g of leaves provide 47 mg or 72% of RDA of vitamin C.  As an anti-oxidant, vitamin C helps to quench free radicals and reactive oxygen species (ROS) through its reduction potential properties. Lab studies suggests that regular consumption of foods rich in vitamin C helps maintain normal connective tissue, prevent iron deficiency, and also helps body develop resistance against infectious agents by boosting immunity.
    • It is one of the excellent vegetable sources for vitamin-K
      ; 100 g provides over 200% of daily recommended intake. Vitamin K has potential role bone health by promoting osteotrophic (bone formation and strengthening) activity. Adequate vitamin-K levels in the diet helps limiting neuronal damage in the brain; thus, has established role in the treatment of patients suffering from Alzheimer’s disease.
    • Cress is also excellent source of vitamin-A
      and flavonoids anti-oxidants like ß carotene
      , lutein and zeaxanthin.
    • It is also rich in B-complex group of vitamins such as riboflavin, niacin, vitamin B-6 (pyridoxine), thiamin and pantothenic acid that are essential for optimum cellular metabolic functions.
    • It is also rich source of minerals like copper, calcium, potassium, magnesium, manganese and phosphorus. Potassium in an important component of cell and body fluids that helps controlling heart rate and blood pressure by countering effects of sodium. Manganese is used by the body as a co-factor for the antioxidant enzyme superoxide dismutase. Calcium is required as bone/teeth mineral and in the regulation of heart and skeletal muscle activity.

Watercress (Nasturtium officianale), fresh,
raw leaves, Nutrition value per 100 g.
(Source: USDA National Nutrient data base)

See the table below for in depth analysis of nutrients:
Principle Nutrient Value Percentage of RDA
Energy 11 kcal <1%
Carbohydrates 1.29 g 1%
Protein 2.30 g 4%
Total Fat 0.10 g 0.5%
Cholesterol 0 mg 0%
Dietary Fiber 0.5 g 1%
Vitamins
Folates 9 mcg 2%
Niacin 0.200 mg 1%
Pantothenic acid 0.310 mg 6%
Pyridoxine 0.129 mg 10%
Riboflavin 0.120 mg 9%
Thiamin 0.090 mg 7.5%
Vitamin A 3191 IU 106%
Vitamin C 43 mg 72%
Vitamin E 1.0 mg 7%
Vitamin K 250 mcg 208%
Electrolytes
Sodium 41 mg 3%
Potassium 330 mg 7%
Minerals
Calcium 120 mg 12%
Copper 0.077 mg 8.5%
Iron 0.20 mg 2.5%
Magnesium 21 mg 5%
Manganese 0.244 mg 11%
Phosphorus 60 mg 8%
Selenium 0.9 mcg 1.5%
Zinc 0.11 mg 1%
Phyto-nutrients
Carotene-ß 1914 mcg
Carotene-α 0 mcg
Lutein-zeaxanthin 5767 mcg

Now that I bored you all with just how good it is for you, on to the recipe! (Be warned the color is unreal, it looks like you put food coloring in there when you’re done!)

Ingredients

  • 3 egg whites + 1 egg (or 5 egg whites)
  • 1 good handful fresh watercress

Directions

  1. Add the watercress to blender, add eggs, pulse until combined and the greens have been emulsified (You may have to push the watercress down as necessary with a spatula so it can get chopped up before it will all blend)
  2. Heat a skillet over medium, add a tsp coconut oil (or oil of choice), swirl to coat the pan then add the green goodness from your blender
  3. Cover and cook until firm.
  4. Enjoy and feel good about your self for all the greens you already ate 🙂

image
Copyright © 2012 Simple Healthy Homemade. All rights reserved

Green Monster Power Smoothie

image

No pretty pictures, I know, but healthy and yummy none the less 🙂

There are great benefits to eating lots of greens, yes, you all heard it before, but some days it is hard to fit all that healthy stuff into your food chain between running from work to get the kids or whatever your busy life dictates. Well for days when you don’t have the time to sit down to a hearty spinach omelet you can, even if you don’t have a juicer, make yourself this amazing tasting green power smoothie. Having a juicer can be a great addition to your healthy diet, as long as you’re aware of he fact that you’ll be missing out on all the healthy fiber that you would have consumed eating the veggies. I also want to caution you on juicing fruit, you definitely want to stay HEAVY on the vegetable side. Fruit juice no matter if store-bought or homemade will affect your blood sugar level drastically, much more so than eating the whole fruit would have done. From a weight loss and even a ‘having even energy all day’ point of view, not a good thing. And if you are borderline pre diabetic, just plain BAD idea.

So in this Smoothie you’re not only going to get your greens (without feeling like a cow on the pasture) but all the healthy fiber is still there, hurray!

Added benefit when you’re maligned this with spinach: the lemon juice in the Smoothie provides vitamin c which is essential for your body to absorb the iron from the spinach!

Ingredients

  • 2 handful of Spinach leaves (or stemmed lake or collards, chopped)
  • 1 ripe banana
  • 2 cups water
  • Juice of 1 large lemon
  • 2-3 tbsp coconut/palm sugar, or honey or agave syrup (add more if you like it sweet)
  • (Optional: 2 tbsp egg white powder or protein powder)
  • You could also add a peeled Kiwi

Directions

  1. Place greens in the blender and add the two cups of water, pulse a few times to get started, pushing down the top layer of leaves if they don’t incorporate.
  2. Add the banana, lemon juice, sugar and if using protein powder. Pulse and blend until smooth
  3. Serve. Makes about 4 cups

Note: you should drink this right away, don’t make it in advance, first the Smoothie separates into solids and liquid pretty quickly (I just re-blend for the second glass) but secondly the nutrients that were happily stored inside the leaves are now exposed to the air and will start oxidizing and therefore loose potency.

image

Copyright © 2011 Simple Healthy Homemade. All rights reserved

Chocolate Pear Overnight Pudding

image

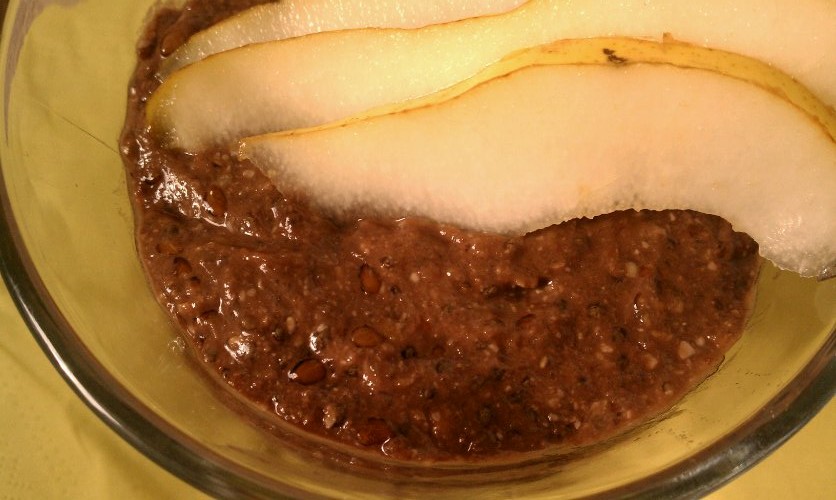
I have been wanting something sweet, but not too sweet. Chocolate-y, but not actually chocolate, difficult right? Since I have drastically reduced my (refined) sugar intake, my taste buds realize just how much added sugar there is in everything. It’s just like salt, once you’re used to using less, you can taste its overabundance in everything. And as for sugar, many items I just plain don’t find enjoyable, no flavor just extremely SWEET. I remember how after every visit back home, I cannot eat commercially made salad dressing for a couple of months, they are sweet and it just tastes funny to me (I get vinegar & oil )

But back to the program: Make this the night before, enjoy as a healthy breakfast cold out of the fridge or heat in the microwave.

Since I started making these, I have been absolutely addicted to them, the pictures don’t do the taste justice. It’s a perfect healthy treat, desert or breakfast, YES all three ;). I’ll have some versions and variations coming up for you soon.

Yay, chocolate pudding any time!!

image

Inspired by Leanne’s Banana Cherry Pudding

Ingredients:

  • 1 ripe pear, diced
  • 1/2 cup almond milk (or regular milk)
  • 2 tbsp flax seed, roughly crushed with mortar and pestle
  • 2 tbsp chia seed
  • 2 tbsp ground almond (aka almond flour)
  • 1 1/2 to 2 tsp cocoa powder
  • 1 tbsp honey or maple syrup (optional, if you like things a bit sweeter)

Directions

  1. Combine chopped pear, cocoa, and almond milk in a glass dish or bowl, stir until cocoa is incorporated
  2. Using your handheld blender, blend until smooth
  3. Add flax seed, chia seed and ground almond, stir, cover and refrigerate overnight
  4. In the morning, eat chilled out of the fridge, or heat in the microwave for about 30 to 45 seconds

Copyright © 2011 Simple Healthy Homemade. All rights reserved

5 minute Snack Cakes

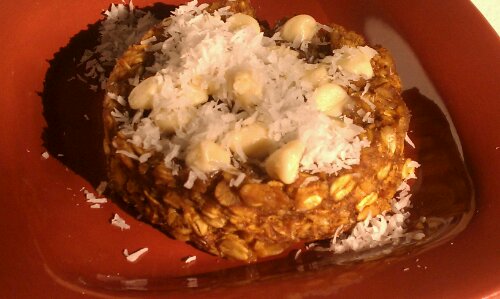
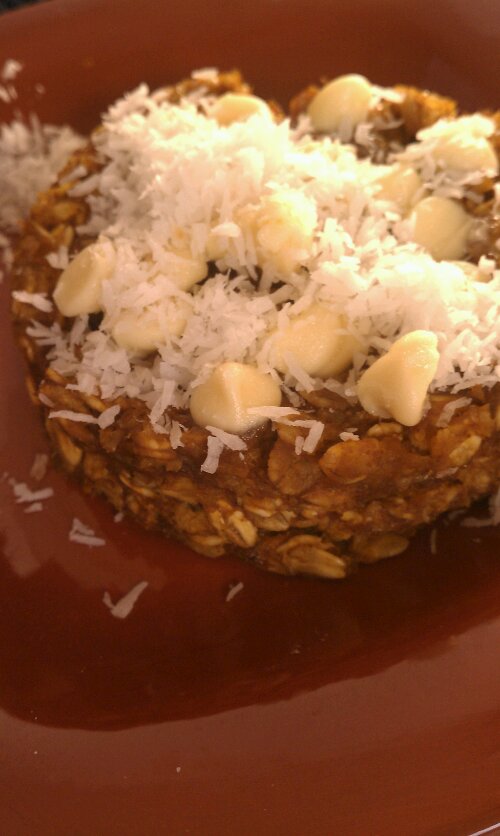
imagePumpkin White Chocolate version here shown made with rolled oats…

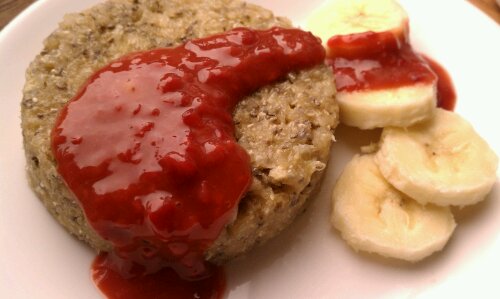
imageand Tropical Mango version with Raspberry Mango Sauce, shown made with Quinoa   (I know, it looks like Ketchup; Trust me it tastes TOTALLY different!)

For breakfast, as a snack and the best part, it’s utterly delicious cold as well AND when cold, they are portable (minus the garnish)

You can make these with rolled oats or any other flakes such a quinoa or barley flakes. You might have to adjust cooking time a little, but whatever is on hand works for these!

As an easy alternative to getting a mango, peeling and pureeing it, I have used mango baby food. One of my friends turned me onto the idea of using baby food as a flavoring for plain greek yogurt. Check the ingredients, but the brand I use has no added sugar, some flavor varieties use fruit juice to add extra sweetness. Don’t like mango? Make it juts with apple sauce or maybe a pear baby food?

image
Tropical Mango Banana Cake

Ingredients

1/2 cup quinoa or oat flakes,
1/2 ripe banana (1/4 cup)
1/4 cup mango purer (use 1 small glass of mango baby food, 4 oz)
1 tbsp sugar (palm sugar, etc)
(1 tbsp Chia seeds, optional)
1/4 cup rasbperries, frozen or fresh
Mix 1/4 cup of the mango, banana, oats (or quinoa), sugar, and Chiang seeds if using in a bowl
Grease two 8 oz ramekins with some oil on a piece of papertowel
Fill and smooh the top
Microwave on high for 3-5 minutes, depending on the power of your device. It’s done when the top does not look liquid anymore and the sides gently separate from the bowl.
Run a knife around the edge, inverted on a plate and serve with raspberry mango sauce (below), or your favorite topping. Such as maple syrup, almond butter, Apple sauce.
Or eat out of the bowl

For the raspberry mango sauce, heat the raspberries in a small saucepan then stir in the remainder (1/4 cup) of the mango puree

image
Pumpkin White Chocolate Oat Cake

Ingredients

1/2 cup rolled oat or quinoa flakes
1/2 cup pumpkin puree
1 tbsp sugar
1 dash cinnamon
1 dash pumpkin pie spice
1/4 tsp vanilla
White chocolate chips  and coconut for garnish (optional)

Mix all ingredients except chocolate and coconut in a bowl, then divide into two 8oz prepared ramekin forms.
Microwave on high for 2 min 30 sec to 3 minutes.

Run a knife around the edge, inverted on a plate and decorate with white chocolate chips, cover with the just removed ramekin and allow heat to steam the chocolate until soft (you can also re-microwave for 30 seconds), serve with coconut, or your favorite topping.

Copyright © 2011 Simple Healthy Homemade. All rights reserved

Cranberry Oat Scones

image

Guess what I found in my freezer? Cranberries! …and I remember putting them in there too. At the very tail end of winter, they were on sale, and I can be such a sucker for sales when it involves things that can and will be eaten. As for those cranberries, well, apparently they did not. So since they endured summer somewhere in the recesses of my freezer, I decided it was time to finally turn them into something, well, more than just frozen cranberry taking up space in the freezer.

image
For those of us that enjoy an occasional baked treat, scones are the perfect marriage between sweet and substantial. These scones are just a touch sweet, and even though full of oats and other goodness, have a surprisingly light texture. Having made the discovery before that finding a good scone, isn’t as simple of  task as it seems. I remember the taste bud disappointment from biting into what I expected to be slightly crunchy on the outside and soft crumb in the center,  just to bite into a brick, a extra sweet brick 🙁 Not a fan, no can’t say. So with this recipe I made sure that would not happen. Try them still warm for breakfast or reheat in the toaster oven.

image
Ingredients

  • 2 cups all-purpose flour
  • 1/4 cup sugar (sucanat, coconut sugar or turbinado/raw)
  • 2 1/2 tsp baking powder
  • 1 tsp baking soda
  • 1/2 tsp salt
  • 7 tbsp butter, cold, cut into cubes
  • 2/3 cup + 2 tbsp rolled oats
  • 1 cup fresh or frozen cranberries
  • 1 cup + 2 tbsp milk (dairy or almond) or half & half
  • 1/2 tsp vanilla
  • 3 tbsp turbinado (raw) sugar for garnish

Directions

  1. Combine dry ingredients (flour through salt)
  2. Cut butter into flour mixture using a pastry cutter or 2 knifes, or pulse in the blender until coarse meal forms
  3. Add 2/3 cup oats and stir to mix
  4. Add cranberries, then add the milk and vanilla
  5. The resulting dough is going to be quite sticky. Using a measuring cup, drop by the 1/4 cup onto a parchment lined cookie sheet, spacing about 2″ apart. (I made them in the 1/2 cup size before, but they get really big)
  6. Sprinkle with the remaining 2 tbsp oats and 3 tbsp sugar
  7. Bake at 350F for 30 minutes or until skewer inserted from the side comes out clean

Makes about 12 scones, (or 6-7 big ones )

image

Copyright © 2011 Simple Healthy Homemade. All rights reserved

Super Muffins

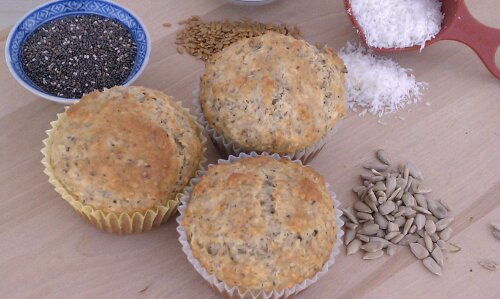
image

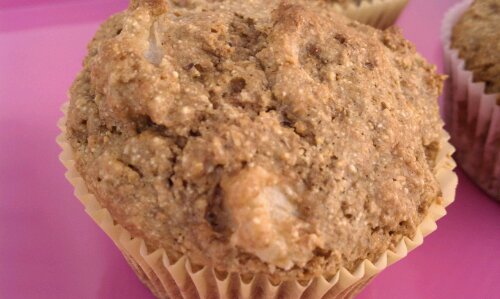
I wanted to make muffins that taste good and you don’t have to feel super guilty about eating six, four, one.  Not like I did that or anything…

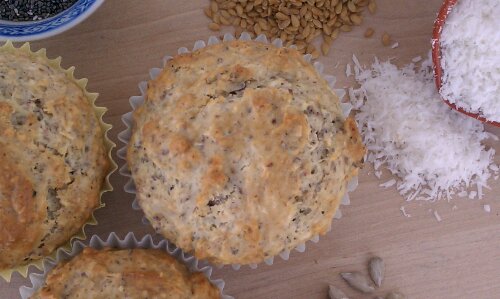
Here’s the result, mightily loaded with chia (protein, omega-3 & fiber, essential minerals like phosphorus, manganese, calcium, potassium and sodium) and flax seeds (omega-3), coconut (medium chain triglycerides are more likely to be used as energy than stored as fat), sunflower seeds (essential fatty acids, B1, B5, magnesium, manganese and various other minerals) and ground almond (monounsaturated fats, vitamin E, fiber, B complex vitamins and essential minerals)

While I am in no way suggesting you should live on these, they have nutritional value versus just empty calories, which makes me happy.

image

Super as in mighty good and good for you too, yummo!

Ingredients

  • 1 3/4 cups all purpose flour
  • 1/3 cup sugar (sucanat, coconut sugar or regular)
  • 1/2 cup ground whole almonds
  • 2 tsp baking powder
  • 1/2 tsp baking soda
  • 1/4 cup coconut, unsweetened
  • 2 tbsp chia seed
  • 3 tbsp raw sunflower seeds
  • 2 tbsp flax seeds (brown or golden)
  • 2 tbsp ground flax seed
  • 1 cup milk
  • 2 lg eggs

Directions

  1. Preheat oven to 400F
  2. In a bowl, combine all the dry ingredients (up to ground flax seed)
  3. Add the milk and eggs, mix just until all the dry ingredients are incorporated, (do not over mix or the dough becomes tough)
  4. Drop into paper lined muffin cups and bake at 400F for 15-20 minutes or until golden brown and a tooth pick inserted comes out clean.
  5. Let cool in the muffin pan for 5 minutes before removing individual muffins to a cooling rack.

image unbaked…

image…baked!

Okay, maybe I did have like 5… had to make sure they were really, really good before I posted it. You know, I am looking out for you guys 🙂

Copyright © 2011 Simple Healthy Homemade. All rights reserved

Pumpkin Apricot White Chocolate Muffins

image

What to do if you were blinded by the fact that all pumpkins were the same price, but one person can only eat so much pumpkin and still you picked the BIGGEST one at the farmers marked? My solution was this: You make another pumpkin muffin! This one with dried apricots and some white chocolate chips. They are not super sweet, therefore the white chocolate chips make for a nice addition. Enjoy!

image

Ingredients

  • 1 1/2 cups all purpose flour
  • 1/2 cup whole wheat flour
  • 1/2 cup sugar ( sucanat, coconut sugar or regular)
  • 1 1/2  tsp baking powder
  • 1/2 tsp baking soda
  • 1/2 tsp cinnamon
  •  1/2 cup chopped dried apricots
  • 1/2 cup white chocolate chips
  • 2 tbsp oil
  • 2 tbsp to 1/4 cup water
  • 1 cup pumpkin puree
  • 1 tsp vanilla extract

Directions

  1. Preheat oven to 400
  2. Combine dry ingredients up to cinnamon, add the chopped apricots by sprinkling them over the flour mixture so they don’t clump together
  3. Add the chocolate chips
  4. Stir in pumpkin puree, vanilla, oil and water. Stir until just combined and you can see  no more floury pieces of apricot
  5. Drop by the tablespoon full into prepared muffin tin
  6. Bake 15-20 minutes or until toothpick inserted into a muffin comes out clean

image

Copyright © 2011 Simple Healthy Homemade. All rights reserved

Pear Vanilla Butter

image

Lately I have just been feeling like changing things. From putting summer clothes away, ‘Tiffany-ing’ my bathroom windows,

image

and just generally fixing up and changing things around the house. Home Depot has been my friend (if not my wallet’s…) and I will soon be the proud owner of a real garage door opener! Hey, it only took four and a half years of living here, but now in the winter, in the snow or rain, I can actually use my garage for what it was meant for. Right now I have to leap out of the car, unlock the garage door, (had to get a separate key chain for that), open it, run back to the car and drive in = Completely useless when it pours as it literally takes less time to run to the front door. Yay! Can’t wait 🙂

I also have been thinking about adding a tile back-splash in my kitchen, currently debating on colors.

image
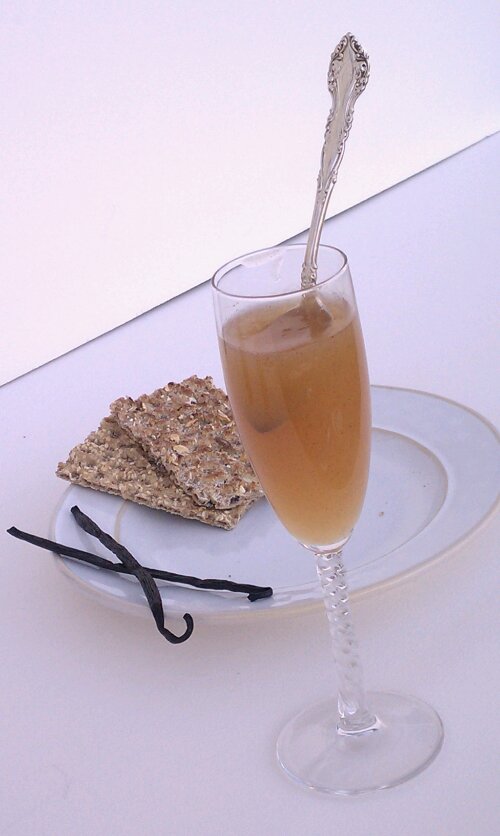
But here’s what I’ve come across looking for some paperwork filed away in a box in the basement… I though I ate it all, but there it was: Pear Vanilla Butter, 2008.

I have been waiting forever, ok maybe not, almost two weeks, to share this with you. It was inspired by a recipe in a cook book on preserving, but for the love of me I can’t find where it was. Luckily I had jotted down some notes and can therefore (hopefully * I was saying a prayer here*) recreate it. Trust me, it is totally worth the time spent. It is the smoothest, most delicately flavored preserve you will ever make! If the best and most beautiful parts of fall turned into a single food, it would be this elegant and sophisticated jam! Move over pumpkin and apple! ( At least for a little while)

image
I vaguely remember the original recipe saying something about ‘keeps for 3 months’, but this little gem I found smells and tastes just like I remember and while I won’t recommend you try this at home, it seems perfectly fine to me (if this is the last post on this blog, you’ll know why 😉 )

Ingredients

  • 4 lb pears, peeled, cored and diced
  • juice of 3 lemons
  • 1 1/4 cups water
  • about 5 1/2 cups sugar
  • 1 vanilla bean, slit open

Directions

  1. In a large pan, combine pears, water, lemon juice and vanilla bean. Bring to a boil, cover and simmer for 10 minutes, uncover pan and continue cooking for another 15-20 minutes, or until the pears are very soft.
  2. Remove vanilla bean and gently scrape out any seeds into the pan, using the rounded tip of a knife.
  3. Using a submersion blender*, and puree. You could also use your blender or food processor. Then press the resulting puree through a fine meshed strainer into a bowl.
  4. Measure puree into a large pan, adding  1 cup warmed sugar for every 2 cups of puree.
  5. Stir mixture over low heat until the sugar dissolves then increase the heat and boil for 15 minutes or more, stirring, until mixture becomes a thick puree and holds its shape when a little is spooned onto a cold plate.
  6. Spoon boiling pear butter into small, sterilized jars, being careful not to get burned, leaving 1/2″ head space. Immediately seal. After cooled off, check for seal, label and store in a cool, dark place for a minimum of 2 days before serving for flavors to blend.
  7. Keeps for 3 months, refrigerate once opened.

image

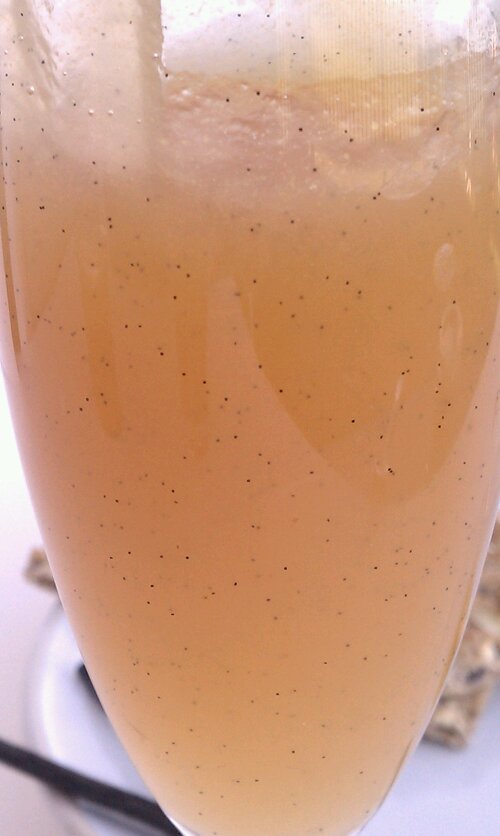
Close up.. Mmmmh see the Vanilla seeds?

image

Copyright © 2011 Simple Healthy Homemade. All rights reserved.

Pear Almond Muffins

image

Guess what was on sale at the farmers market this week-end? 🙂 Pears! Yumm! I love pears, when  you get them when they are juuust right, juicy, ripe but not too soft. Which is a fine balance and therefore, having bought a bunch I now gotta ‘consume’ them rather quickly.  I like apples but, let’s face it, pears are almost regal compared to a ‘commoner’ apple (No offense, Apple, love you too), maybe I just have this opinion because we can now get pretty good apples year round and they ceased to feel special, not being really seasonal anymore whereas pears are just never quite like they are in the fall… or maybe it’s because of this memory of my Mom saying ‘Pears are the queen of fruits’, who knows 🙂      Ahh the things we remember…

Besides eating pears fresh, melt chocolate chips as a sauce ( a personal favorite, use dark chocolate), roasting as a side, or baking a pear upside down cake or Tarte Tatin, oh and don’t forget, making pear vanilla butter (getting to that one later on, but it’s the very best thing you can do with your time if you have pears…and time, promise) what is one to do with  a bushel of pears?

image
Muffins! Quick, easy and portable, now we are talking!

image
Makes 12 regular size

Ingredients

  • 1/2 cup whole wheat pastry flour
  • 1 1/2 cups all purpose flour (I have used all whole wheat, it just gets a bit denser)
  • 2 tsp baking powder
  • 1/2 tsp baking soda
  • 1 1/4 cup ripe but firm pear, diced finely (from 1 to 2 pears, depending on size)
  • 1/2 cup coconut palm sugar, sugar or sucanat
  • 1/2 tsp vanilla extract
  • 1/2 tsp almond extract
  • 2 tbsp almond butter
  • 2 tbsp oil (you can leave the oil out, the consistency will change a little, but it’s still yum)
  • 1 lg egg
  • 1/4 cup milk (dairy or almond milk)

 Directions

  1. In a large bowl, mix together the first four ingredients
  2. add sucanat or coconut sugar, and diced pear and stir to coat
  3. add the remainder of the ingredients and stir until just combined then drop by the table spoons into lines muffin pan
  4. bake in a preheated oven at 400F for 15-20 minutes or until tester inserted into muffin comes out clear
  5. Let cool slightly before serving.

image

And just like that, they are all gone:)

Gotta get back to the oven, I am seeing some Pear Gingerbread Muffins in my near future…

Copyright © 2011 Simple Healthy Homemade. All rights reserved.

Pumpkin Cream Cheese Stuffed French Toast

image

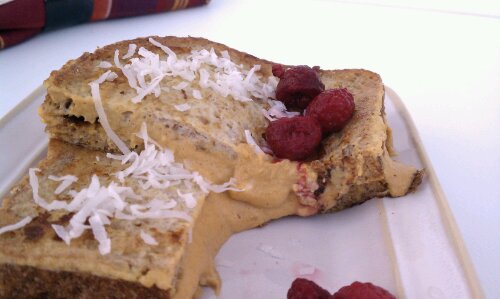
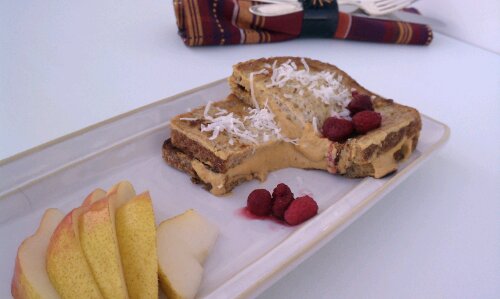
One of my favorite breakfast spots in the area makes this amazing stuffed french toast that’s to die for.  They are, however, closed on Sundays, which would only be like the perfect brunch day. So obviously it was only a matter of time until I had to try and recreate so I could have it anytime. Ahh the convenience of it 😉 And of course I will still go and have breakfast there, some days there is nothing better than to just sit down and have someone do all the work for you, including the dishes 🙂

Here’s my version using, you guessed it, some of that pumpkin that’s still left over from making pumpkin lattes, mini tartletts and goat cheese pumpkin ravioli. If you cook for one or two people only, you gotta be inventive and use what you have several different ways, so it doesn’t go bad, and I am not one to waste anything if I can help it, so bare with me if you feel pumpkin OD coming on. I’ll be onto something else soon, I promise.

image

Any bread will work for this, crusty bread just has to be soaked a bit longer. We used to make a dish like this back home, using any leftover day old bread, although we didn’t call it ‘french toast’, and we did not stuff it with anything.

Ingredients

  • 4 slices of toast bread (or any day old bread, roughly equivalent in size, I used Ezekiel)
  • 2 eggs, beaten
  • 1/2 cup milk, warm
  • coconut oil for cooking
  • 4 oz cream cheese
  • 1/4 cup pumpkin puree
  • 2 tbsp granulated palm sugar, or sweetener of choice
  • 1/4 tsp cinnamon
  • 1/4 tsp pumpkin pie spice
  • optional grated coconut for garnish, toasted if desired

Directions:

  1. Soften cream cheese, and stir until smooth
  2. Add the spices, sugar and the pumpkin puree, mix until incorporated.
  3. Place milk and eggs in two separate deep flat dishes
  4. Turn the bread in the milk, then turn in the beaten egg and place in heated skillet. Cook until golden brown, then flip over to cook the second side. Remove from pan and set aside and keep warm.
  5. After making the second slice, while still in the skillet, top with 3 tblsp pumpkin cream cheese mix and top with another slice of french toast, and sprinkle with toasted coconut. (If your skillet is big enough, you might be able to cook all four slices at once, but mine only fits 2)

THE best!

image
Copyright © 2011 Simple Healthy Homemade. All rights reserved.