Lighter Asparagus Quiche

image

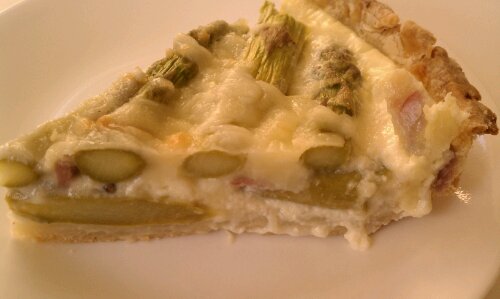
Asparagus Bacon and Cheddar, what better combination could there be? Oh I know, a crispy pie crust to encase it all. A Quiche in this country a lot of times feels like an ‘egg pie’ to me, which can make it pretty heavy and rich. So for this recipe I only used 1 egg, and by adding greek yogurt, we up the protein content without adding a ton of fat or weighing down the filling. Serve with a big salad for a light lunch or dinner or with a side salad as a first course for a leisurely, sit down dinner.
image

Okay so after all that pretty talk, here’s the truth: I made so many different traditional Swiss cookie dough recipes (you know, for Christmas I get homesick if I don’t have ‘my’ cookies), that I ran out of eggs, well, besides the one used here. So I had to make due with what I had on hand: 1 egg, flour/pie crust (there’s always pie crust), asparagus and some odds and ends.

Well, as so many times, when you find yourself in a tight situation, it leads to the discovery of something much better than expected…

image

Ingredients:

  • Single pie crust
  • 1 lb asparagus
  • 1 oz Speck *, diced
  • 2 oz Gruyere (or cheddar), grated
  • 1 cup milk
  • 1 egg
  • salt to taste
  • 2 heaped tbsp Greek yogurt

Directions

  1. Preheat oven to 380°F
  2. Roll out pie crust 1″ bigger than pie pan, fold to place into pan, and roll edges under to make a thicker edge.
  3. Mix milk through Greek yogurt
  4. Cut any hard ends off of asparagus, then place them into the crust in two layers, the second layer at a right angle to the first. Break any asparagus that are too big into smaller pieces
  5. Distribute the Speck over the asparagus, then pour the milk egg mixture over everything, and sprinkle with the grated cheese.
  6. Bake in the middle of the oven for 35-40 min
  7. Serve hot or warm

*often translated as bacon, it however has much more meat than fat on it, but plain old bacon would do as well, just have the butcher cut you a thick piece you can then dice into cubes)

Serves 4 as a lunch/light dinner, or 8 as an appetizer.

image
Copyright © 2011 Simple Healthy Homemade. All rights reserved

Pumpkin Apricot White Chocolate Muffins

image

What to do if you were blinded by the fact that all pumpkins were the same price, but one person can only eat so much pumpkin and still you picked the BIGGEST one at the farmers marked? My solution was this: You make another pumpkin muffin! This one with dried apricots and some white chocolate chips. They are not super sweet, therefore the white chocolate chips make for a nice addition. Enjoy!

image

Ingredients

  • 1 1/2 cups all purpose flour
  • 1/2 cup whole wheat flour
  • 1/2 cup sugar ( sucanat, coconut sugar or regular)
  • 1 1/2  tsp baking powder
  • 1/2 tsp baking soda
  • 1/2 tsp cinnamon
  •  1/2 cup chopped dried apricots
  • 1/2 cup white chocolate chips
  • 2 tbsp oil
  • 2 tbsp to 1/4 cup water
  • 1 cup pumpkin puree
  • 1 tsp vanilla extract

Directions

  1. Preheat oven to 400
  2. Combine dry ingredients up to cinnamon, add the chopped apricots by sprinkling them over the flour mixture so they don’t clump together
  3. Add the chocolate chips
  4. Stir in pumpkin puree, vanilla, oil and water. Stir until just combined and you can see  no more floury pieces of apricot
  5. Drop by the tablespoon full into prepared muffin tin
  6. Bake 15-20 minutes or until toothpick inserted into a muffin comes out clean

image

Copyright © 2011 Simple Healthy Homemade. All rights reserved

Pumpkin Goat Cheese Ravioli

image

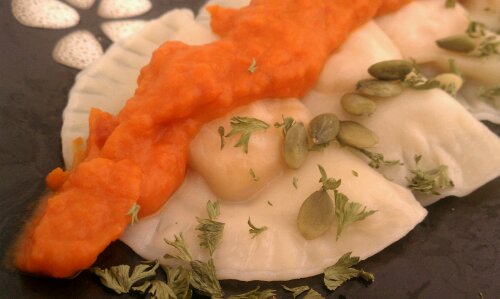
As always, I am looking for creative ways to use seasonal produce and after getting some real life pumpkin (the convenience of canned could not keep me from trying this in the end) I had to use the resulting puree up, and trust me, it makes quite a bit. I had extra to put in the freezer! And it’s really easy to do (Tasty Yummies has a more detailed set of instructions, if you like), cut the pumpkin in half, scoop the seeds and stringy ‘innards’ out (keep the seeds, clean them and keep for roasting later) place halves cut side down in a baking dish, adding 1/2″ water, and bake in a preheated oven at 350F for 40-50 minutes, (depending on the size of your pumpkin), or until the flesh is soft when pierced with a fork. Scoop the flesh out, purée and voila!
Alternately, if you got a smaller pumpkin, you can also cut, scoop the seeds and cook it in the microwave until the skin is soft when pierced and peel the skin off the slightly cooled halves using a vegetable peeler!

Keep any seeds to make roasted pumpkin seeds later!

image
You can use the ravioli right away or freeze them for later use

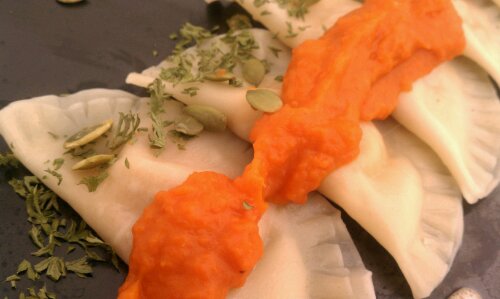
imageServe with Roasted Red Pepper ‘Cream’ Sauce
Ingredients

  • 1/2 cup fresh pumpkin puree (you can use canned)
  • 2 1/2 to 3 oz fresh goat cheese
  • 1/2 tsp salt
  • 1/4 tsp white pepper
  • 1 pack Pot sticker wrappers or Wonton wrappers

Directions

  1. Mix the first four ingredients in a bowl
  2. Using 4 wrappers at a time, place them on work surface, place one teaspoon of filling in the center, brush edges with water and fold over and seal, crimping edges using the tines of a fork
  3. place all the ravioli on a wax paper lined baking sheet and cover with plastic wrap to prevent drying while you complete step 2 with the rest of the wrappers
  4. Either cook right away: Bring a pot of water to a boil and drop ravioli in, cooking until they float to the surface, about 3 minutes.
    You can also freeze them for later use: Freeze on the sheet and once frozen store in zip top bags until ready to use. Do not defrost, but cook from frozen
  5. Serve with Roasted Red Pepper & Pumpkin Cream Sauce.

image

or try a Tarragon Cream Sauce…

image

Copyright © 2011 Simple Healthy Homemade. All rights reserved.

Roasted Red Pepper and Pumpkin ‘Cream’ Sauce

image

Glorious colors of fall! Here the leaves have finally turned color and as I am typing this I can see the red and yellow leaves glow in the sunlight, and the bronze and ‘still green’ leaves add depth to the shadows. The birds have returned to the bird feeder in droves, the nights finally have that crisp quality you only experience on an early morning in fall and I am enjoying the view to say the least.

image
To celebrate fall, with its vibrant orange of pumpkins, golden corn field and that last rest of summer’s warmth int he afternoon, I roasted up a brightly colored, mighty tasty and versatile sauce/dip/spread. Enjoy!

Ingredients

  • 1 red bell pepper
  • 1 cup chopped cooked pumpkin (or canned)
  • 1 tbsp olive oil
  • 1 pinch salt

Directions

  1. Roast whole red pepper until blackened in spots all over by holding it over a gas flame or placing under the broiler, then place in paper bag to cool a bit (the steam will loosen the skin making it easier to peel, added bonus, you won’t burn your fingers as much).
  2. Peel red pepper (don’t have a guy do this, for some reason their hands are not made the same as ours and they cannot handle heat, as per my experience 😉 ) , this works best using a paper towel and literally rubbing the skin off. Cut in half and discard the seeds, then chop flesh.
  3. Place pepper in your food processor or blender. I use a really cute mini processor for sauces and dips. And blend until you have a chunky mess, add the olive oil, blend until fairly smooth.
  4. Add the pumpkin and salt and process some more. The result should not have any chunks left in it but be smooooooth.
  5. Gently reheat to use over pasta, like the Pumpkin Goat Cheese Ravioli for example or chill and use as a spread for sandwiches or serve cold as a dip for veggies.                              Yields about 1 1/2 cups.

image

Copyright © 2011 Simple Healthy Homemade. All rights reserved.

Pumpkin Cheesecake Minis

image

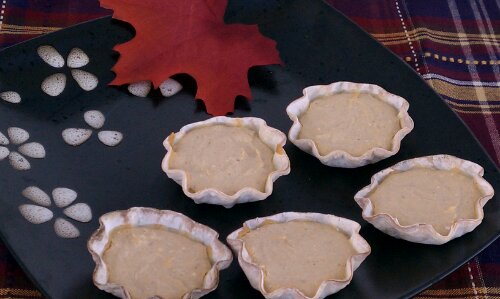
Ahhh it’s Fall, and I love me some pumpkin cheese cake. But ever notice how heavy that stuff is? I have a hard time finishing those huge pieces one is supposed to eat. How about bite sized, nah, too small maybe 3-4 bites? Now we’re talking! And while we’re at it, make it easy and quick as well.

That’s right, my friends, I want my (cheese) cake and eat it too (could not resist that one) And as you might know, I am not one for letting anything go to waste and so I was going through my fridge to see what’s on hand that might be useful.

image

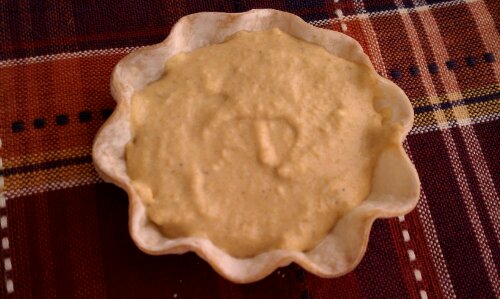
The result? SUPER EASY, and besides the crust, NO BAKING! And to top that, you can make these in the toaster oven, in fact they turn out better in the toaster oven 🙂 Win!
Here is my secret weapon of choice: left over pot sticker wrappers! That’s right, and we are going to blind bake (or toasterize)  them into crunchy littlte tartlet shells.

You need:

  • 4 oz cream cheese (1/2 bar, pack, block? what do you call that?), softened
  • 3-4 tbsp pumpkin puree (from can)
  • 2 tbsp suconat or coconut sugar
  • 1/8 tsp cinnamon
  • 1/8 tsp pumpkin pie spice mix
  • 1/8 tsp vanilla
  • 8-10 pot sticker wrappers (or wonton wrappers, trimmed to a round shape)

image

Directions

  1. Place pot sticker wrappers in individual Madeleine forms or muffin tins, place in toaster oven for about 5-6 minutes, being careful not to let them get too brown, trust me, it goes quickly. On mine I set it right between the light and the dark setting. If your toaster oven has a temp setting, turn it down to 400, but leave it on toast (depending on your muffin cups/ Madeleine forms it might take more or less time, shiny metal reflects the heat…)   Alternately, using your oven, bake at 350 for 10 to 12 minutes, or until just slightly golden. They will crisp up more as they cool.
  2. In the meantime place softened cream cheese in a bowl, add the coconut sugar/sweetener of choice, and stir until completely incorporated.
  3. Add spices and pumpkin and mix until uniform.
  4. When the shells are cooled a bit, fill each using a tablespoon.
  5. Refrigerated for min. 1 hour to allow to get firm, prior to serving.

Note: these are best made and eaten within a day or so, since the crust will soak up the moisture from the filling and get progressively less crunchy.

image
Copyright © 2011 Simple Healthy Homemade. All rights reserved.

‘Summer in a Jar’ (Canned European Plum Compote)

image

On Saturday we spend part of the day rummaging and discovering our way through a local antique place. I got some great deals on glass custard dishes, and a couple of old glass bottles we’ll be using to store my home made salad dressing (like the Greek Feta Buttermilk Dressing). It was rainy and the the temperature was steadily dropping, so being inside for several hours looking through old kitchen and household items, books and furniture was fun!

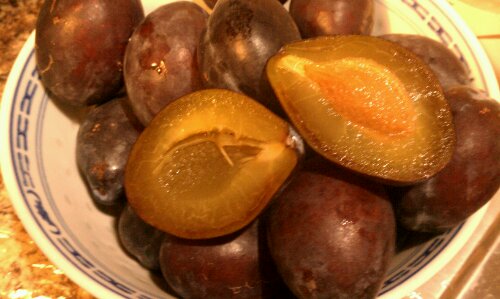
The trees behind my house are changing color, the first touches of fall, the first signs of frost (it only went down to 37 at my house, yipee!), and I have to come to terms with the fact that summer is definitely, absolutely over. No more denial. It’s FALL! Don’t get me wrong I LOVE fall, it’s just I really, really, REALLY liked summer this year and it’s hard to let go of something dear. In order to be able to take advantage of end of summer, super ripe, bursting with flavor European plums (aka prune plums, they are the smaller, oval purple/blue ones, that look a bit hazed over vs shiny) for a little while longer, I decided to cook them up into a compote, that can be used on Crêpes, pancakes or eaten as s desert (cold or warmed up) with some whipped cream or stir into greek yogurt as a treat!

or over cottage cheese…

If you live near an Italian or even Russian Market, you might have an easier time finding this old world favorite as not all stores are carrying them in our area and the seasonal availability is limited to a short window of opportunity. At my parents garden in Switzerland they would usually ripen sometime in late August or early September.

image

Today, after having found a nice (hopefully not quite yet) last batch at the farmers market, Now let’s see if we can make that preserving magic happen, for when fall or winter really hits and we are all longing for something that tastes of SUMMER!

Ingredients

  • 5 cups prune plums, halved, pitted (or 4 cups plums and 1 cup apple)
  • 1 -3 tbsp sucanat/rapadura*, raw sugar or other real sweetener of choice
  • 1 1/2 cups water
  • 1 tbsp lemon juice
  • 1/2 tsp cinnamon
  • 1/2 tsp vanilla
  • 1 tbsp tapioca
  • 3 pint canning jars and lids, bands, washed in the dishwasher
  • 21 qt water bath canner with canning rack
  • small sauce pan with boiling water ( to sterilize lids)

Directions

  • Prep the canner: fill with required amount of hot water and bring to a simmer. Heat water in small sauce pan, add the lids to it and bring to a simmer.
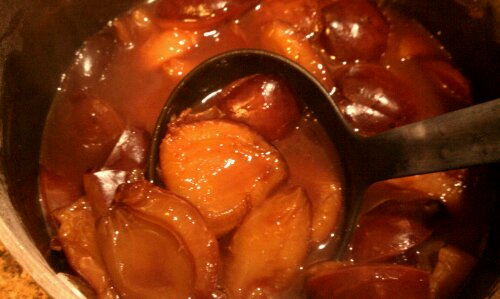
  • In a medium sauce pan, combine the plums with the rest of the ingredients above and bring to a gentle simmer, stirring occasionally . Keep at a simmer of 5 minutes, then remove from heat, cover and set aside.

image

    • If your jars are still hot (they juts came out of the dishwasher) sit them on a kitchen towel and fill one at a time with the compote, using a ladle and a canning funnel, leaving a 1/2″ head space (If they are cold, heat them submerged in the canner, in order to prevent them from breaking from the quick temperature change)
    • Wipe rim with clean paper towel, so not compote or juice clings to the top, then center one of the prepares lids on top, then tighten band (not too much, juts fingertip tight) with your fingertips only! When all the jars are filled and lidded (is that a word?), place them on the canning rack an lower into your canner, making sure all jars are covered by 1″ of water.

image

  • Bring the water in the canner to a boil and process for 30 minutes, adjusting for altitude
  • When time is up, turn off heat and leave them in the water bath for another 5 minutes, then lifting the rack up an hooking it to the sides of the pot, remove the jars gently (don’t shake or tighten or anything) place on a kitchen towel to cool off completely.
  • check in 24 h if the seal is secure (Lid does not flex up and down when pressed in the middle) place any not properly sealed jars in the fridge and eat quickly (just the content, please)
  • Label and store, or gift 🙂
Copyright © 2011 Simple Healthy Homemade. All rights reserved.