Phở Bò – Vietnamese Beef Noodle Soup

image

Happy New Year everybody!

Wishing you all a super wonderful  2012 filled with happiness, prosperity, health, friendship and love!

image

Since this is my first post this year, I wanted to make something a bit different. But when it’s cold like it is now (at my house the thermometer reads 18°F right now brrrr), the only thing to do is make some yummy soup, right? But since it’s early January and everybody is trying to eat lighter and healthier, a stew or thick soup did not seem like the way to go and anyway, I like to be reminded of warmer days or at least warmer parts of the world and since I have some time between chores (cleaning the house has to be done this year too, really?) I am making myself  Pho, Vietnamese Beef Noodle Soup from scratch.

image

You could, to save time, use beef stock and simmer the spices in that for a while, but truly the flavor of homemade stock, made with beef marrow bones, slow simmered for hours is beyond compare. Although I do wonder if this could be transferred to the slow cooker to make itself while you’re at work… I might try that next time 🙂

imageI forgot to add lime until I sat down to eat…

Traditionally , or I should say normally in restaurants, this soup is clear and very lean since the fat gets skimmed off while the flavorful broth is cooking, but you could leave some of the fat in the soup like I did, for the cold winter weather’s sake.

If you’ve ever had this in a restaurant, you might be familiar with the washtub sized bowls one gets served. I am not kidding, seriously big enough to wash your head in, and no one I have ever been to a Vietnamese restaurant with has EVER been able to finish one of those, and there were a few hungry guys amongst  those counted not just dainty ladies. So that said, the recipe makes enough for 6 to 8 meals, the lower number for bigger bowls, the bigger number for more normal appetites.

Ingredients

Stock:

    • 2 lb beef marrow bones
    • 1 lb beef brisket or other cheaper cut of meat
    • 3 medium shallots, unpeeled
    • 4 cloves
    • 1 1/2 tsp black pepper corns, whole
    • 3 green cardamom pods
    • 4-5 star anise pods
    • 2 pieces of cinnamon, 3″
    • 1 ginger, 2″ piece
    • cheesecloth or ‘bouquet garni’/spice bag
    •  1/4 to 1/2 cup nuoc mam (fish sauce) or 3 tsp to 1 tbsp salt

Garnish:

    • 1 pd sirloin or flank steak or filet (whatever your budget allows, this should be a nicer cut than what you use for the broth), placed in the freezer for 30 minutes
    • 1 pd Rice Noodles or Rice sticks, flat, size medium (about 1/4″ wide)
    •  4 handful bean sprouts (about 1 lb?)
    • 4-6  sprigs Thai or Vietnamese Basil
    • 4-6 sprigs Mint leaves
    • 4-6 sprigs Cilantro
    • red Thai chile peppers, (they are HOT), sliced
    • 1-2 Limes, cut into wedges
    • 3-4 Scallions, sliced

Directions

    • Rinse the bones with cold water, then place in a large stock pot and cover with water. Bring to a boil and blanch for 10 minutes
    • Drain, rinse the bones and clean the pot then return the blanched bones to the same pot, add 6 quarts of water and bring to a boil, skim off any fat and foam that forms on the surface.
    • Add another 2-4 quarts of water and return to a boil, again skimming off any impurities that rise to the surface.
    • In the meantime, stud the shallots with the cloves, and roast both the ginger and the shallots either by holding them over the gas burner until blackened in spots or by placing under a broiler. Place the spices, ginger and shallots inside the muslin spice bag (alternately using two layers of dampened cheesecloth, wrap all the spices and tie shut with kitchen twine).
    • Place the spice bag in the stock pot with the bones and simmer for 1 hour. Then remove the bag and discard.
    • Remove the brisket and set aside.
    • Return to a simmer and cook, uncovered 4-5 hours, adding water as necessary to maintain the water level and making sure to keep the bones covered at the minimum.
    • In the meantime, after placing in the freezer for 30 minutes slice the flank steak paper thin against the grain, also slice the reserved meat paper thin, set aside.
    • When the broth is ready, remove and discard all of the bones. Strain broth through a colander or strainer, lined with a double layer of dampened cheese cloth into a clean pot.
    • Return to heat and add the fish sauce or salt, bring to a boil then reduce the heat and keep the soup at barely a simmer while you are getting everything else ready.
    • Soak the rice noodles in very hot water until softened (takes about 15-20 minutes)
    • Divide the softened rice noodles among 6 to 8 large soup bowls, top with the sliced meats.
    • Bring the soup to a rolling boil then ladle the soup directly over the meat in each bowl, cooking it instantly.
    • Garnish with a handful of bean sprouts, some scallions and a lime wedge.
    • Let everyone garnish their own soup to their liking with additional mint, basil and cilantro leaves, sliced red chile peppers.

You can also make a large batch of broth and freeze some for later. I use quart size zip top bags that I sit inside a square container, fill with soup, freeze and remove the bag from the container. Stacks easy since it is square in its frozen shape. When you’re in the mood for some Pho, you just have to get the steak sliced, get all the garnish ready: sprouts, herbs, chile, lime and rice noodles.

image

Copyright © 2012 Simple Healthy Homemade. All rights reserved

Thai Red Curry Chicken ‘Slow-Cooker Friday’

image

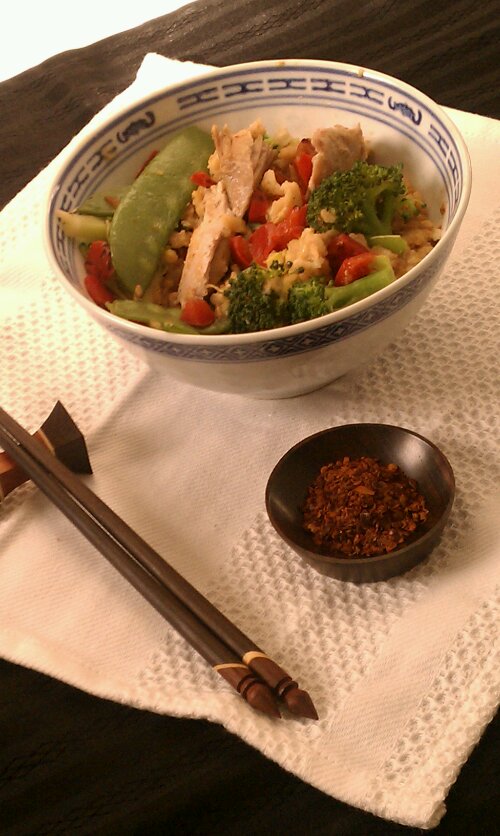
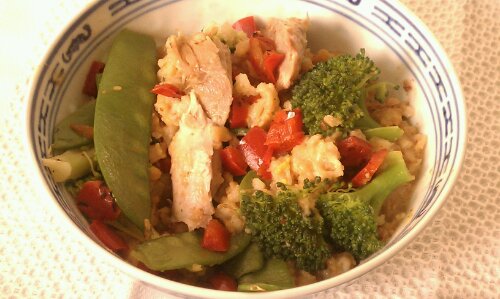
I love Thai food and I am a little bit of a Thai food snob, I have to admit. But I guess it might come as no big surprise, after travelling in South East Asia extensively, and my brother living on an island in Thailand (I know, don’t get me started, he gets to enjoy the sun while we have cold toes here ;P ) While travelling and meandering through Thailand and other South East Asian countries, I ate with local families, and therefore ate some ‘Thai Food’ you’d never see in a restaurant, in short I acquired some first hand knowledge of real Thai cooking. So this recipe really should be called Thai Inspired Red Curry Chicken, since the slow cooker is not traditional, but the flavors are still reminiscent of warmer places, so this is my Americanized Friday evening version 😉

image
Serves 4

Ingredients:

  • 2 chicken legs/thigh quarters, bone in (about 1 1/2lb)
  • 2-4 tbsp red curry paste (if you are very sensitive to spice, use less, for extra spice use more)
  • 1/2 of a 14 oz can of coconut milk
  • 1 cup brown Jasmine rice
  • 1 cup broth
  • 2 cup mixed vegetables, cut into bite size pieces (preferably fresh, I used snow peas, red bell pepper, and broccoli)
  • 1 lime, cut into wedges for garnish

Directions

  1. Heat a heavy frying pan over medium.
  2. Season the chicken with salt and pepper and cook the chicken skin side down until browned, about 4-6 minutes, turn and cook repeat on the other side (Chicken will cook more in the slow cooker, this is just to give it some extra flavor) Transfer to slow cooker
  3. To same skillet, add the coconut milk, half the broth and the curry paste. Stir and loosen any browned bits. Pour over the chicken in the slow cooker insert.
  4. Pour the rice around the chicken , add the remainder of the broth and cover.*
  5. Turn slow cooker on low and cook for 5-6 hours, or until chicken is sift and starts to fall off the bone.
  6. Half hour before you’re ready to eat, place the vegetables on top and turn up to high. Alternately you could also steam the vegetables separate and serve over the chicken and rice from the crock-pot.
  7. Garnish with lime wedges and serve.

* The rice will be soft and flavorful from cooking in the sauce, if you prefer your rice to be less ‘risotto’ , add it about half way through the cooking time.

image

Copyright © 2011 Simple Healthy Homemade. All rights reserved

Lighter Asparagus Quiche

image

Asparagus Bacon and Cheddar, what better combination could there be? Oh I know, a crispy pie crust to encase it all. A Quiche in this country a lot of times feels like an ‘egg pie’ to me, which can make it pretty heavy and rich. So for this recipe I only used 1 egg, and by adding greek yogurt, we up the protein content without adding a ton of fat or weighing down the filling. Serve with a big salad for a light lunch or dinner or with a side salad as a first course for a leisurely, sit down dinner.

image

Okay so after all that pretty talk, here’s the truth: I made so many different traditional Swiss cookie dough recipes (you know, for Christmas I get homesick if I don’t have ‘my’ cookies), that I ran out of eggs, well, besides the one used here. So I had to make due with what I had on hand: 1 egg, flour/pie crust (there’s always pie crust), asparagus and some odds and ends.

Well, as so many times, when you find yourself in a tight situation, it leads to the discovery of something much better than expected…

image

Ingredients:

  • Single pie crust
  • 1 lb asparagus
  • 1 oz Speck *, diced
  • 2 oz Gruyere (or cheddar), grated
  • 1 cup milk
  • 1 egg
  • salt to taste
  • 2 heaped tbsp Greek yogurt

Directions

  1. Preheat oven to 380°F
  2. Roll out pie crust 1″ bigger than pie pan, fold to place into pan, and roll edges under to make a thicker edge.
  3. Mix milk through Greek yogurt
  4. Cut any hard ends off of asparagus, then place them into the crust in two layers, the second layer at a right angle to the first. Break any asparagus that are too big into smaller pieces
  5. Distribute the Speck over the asparagus, then pour the milk egg mixture over everything, and sprinkle with the grated cheese.
  6. Bake in the middle of the oven for 35-40 min
  7. Serve hot or warm

*often translated as bacon, it however has much more meat than fat on it, but plain old bacon would do as well, just have the butcher cut you a thick piece you can then dice into cubes)

Serves 4 as a lunch/light dinner, or 8 as an appetizer.

image
Copyright © 2011 Simple Healthy Homemade. All rights reserved
Turkey Provençal ‘Slow Cooker Friday’

image

Isn’t it time for another lazy day recipe? Well, maybe not lazy, but for when you’re tired (or you know you’re going to be tired) and just want something simple, that waits for you when you come how after a long day at work. Lately it’s already dark by the time you get out of work and I am feeling tired. I still think we were supposed to hibernate, just like bears and those other smart creatures (I tell you , they got it right), but asides from daylight saving time, there isn’t a whole lot of support of this idea 😉 (Just imagine though, wouldn’t it be great? fireplace, bowl of soup and long naps all winter… 🙂

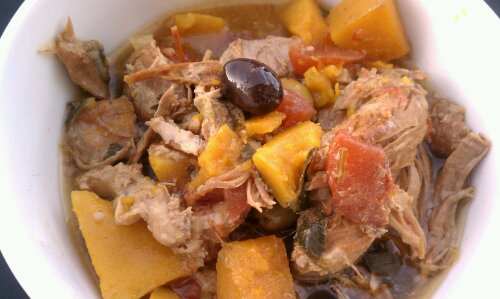
Well since that is not happening anytime soon, I will keep making tasty slow cooker recipes for my Fridays. This one has a bit of international flair, olives, tomatoes and rosemary, evoking summer sun and abundance while the white wine rounds out the flavors.

image

Ingredients

  • 1 turkey leg, boneless
  • 4 plum tomatoes chopped (or one 14oz can)
  • 2 celery ribs, chopped (including leaves)
  • 1 cup diced winter squash (such as butternut, kabocha, buttercup)
  • 1/4 cup black or green olives, pitted
  • 1/2 cup dry white wine
  • 1 tsp mustard
  • 1/2 tsp rosemary leaves
  • 1 tbsp basting oil
  • 1/2 small onion, diced
  • 2 tbsp flour
  • 1 bay leaf
Note: If you got enough turkey in your near future, you could also make this with pork, like a piece of pork shoulder

Directions

  1. Dice tomatoes (or open can, if using canned) place in the bottom of the slow cooker insert, add diced celery and bay leaf.
  2. Place turkey atop the vegetables, adding the olives, mustard, rosemary and basting oil over top
  3. In a zip top bag, toss the diced onions with the flour until coated, then cook in a skillet over medium heat until softened and lightly browned. Add wine and scrape up any browned bits, stirring to dissolve the flour. Pour over turkey in slow cooker insert.
  4. Add the pieces of winter squash (if you are going to be home, you can also add these half way through cooking, if you prefer to have the squash hold it’s shape)
  5. Cook on low for 6-8 hours (after 6 the meat will still hold its form, after 8 it will fall apart)
  6. Serve by itself or with polenta or rice as a side

If the tomatoes are very juicy and the dish seems to watery, mix 1 tbsp flour with about 3 tablespoons cold water and slowly stir into the slow cooker dish, cooking until the sauce thickens.

image
Copyright © 2011 Simple Healthy Homemade. All rights reserved

Savory Sweet Potato Cheddar Pie

image

Make something different this Thanksgiving!

image

Ingredients

  • 2 Pie crusts  (either home made or store bought)
  • 6 oz cheddar cheese, grated (using the coarse side of a grater)
  • 2 cups chopped onions (from 2 med cooking onions or 1 lg sweet onion)
  • 3/4 lb (about 1 md) sweet potato, grated using the coarse side of your grater
  • 1/4 cup milk or half-and-half
  • 1/4 tsp ground white pepper
  • 1/2 tsp salt
  • 3 eggs, beaten, plus 1 egg for glaze (total 4)

Directions

  1. Preheat oven to 425 F
  2. In a large skillet, heat 2 table spoons oil over medium, add the chopped onions and cook, stirring occasionally, until softened but not browned, about 8 minutes.
  3. Add the grated sweet potato, cook stirring to mix contents for an additional 5 minutes, to soften the sweet potatoes slightly. Remove from heat, let cool slightly
  4. In a bowl, combine the grated cheese, 3 eggs, milk and spices, stirring with a fork to combine.
  5. Combine the cooled sweet potato mixture with the cheese, eggs and milk mix, using a fork to stir until mixed evenly.
  6. Place crust in a deep 9″ pie pan, fill with sweet potato cheddar mix. Beat remaining egg, brush edges with egg wash, then place second pie crust on top, crimp edges to seal, cut 6-8 steam vents into the top crust and brush with remaining egg wash.
  7. Bake at 425 for 40 min or until the top is golden brown and filling is set.
  8. Serve warm or at room temperature with a large green salad or as part of your Thanksgiving dinner.

image

Copyright © 2011 Simple Healthy Homemade. All rights reserved
Creamy Mushroom Soup

image

One thing that I really love about the colder months is soup! I could live on soup. If all I could eat for the rest of my days is soup, I’d be happy. Ok, maybe something crunchy to go on the side…

Soups are warming when it is cold, easy to make, easy to reheat and mostly pretty cheap to make as well. A lot of times when it is cold, I do not drink as much water as I should and as I do in the summer, I am just not as thirsty and I think soup has that added benefit of liquid 😉

To achieve the creamy consistency without added fat, I used some sweet potato, but since the mushrooms are braised and caramelized first to intensify their flavor, you can’t tell that there is anything except mushroomy goodness in the soup!

image…shown here with Garlic Thyme Sweet Potato Straws

Ingredients

  • 12 oz crimini or baby bella mushrooms, cleaned and sliced
  • 1 md shallot, minced finely
  • 1 md sweet potato, peeled and chopped
  • 2 tbsp Olive oil
  • Salt

Directions

  1. In a heavy pot, heat oil over medium. Add the diced shallot and cook until softened and browned.
  2. Add the sliced mushrooms, sprinkle with salt, stir, cover and turn heat to medium low. Cook for 15 -20 minutes, stirring every couple of minutes. The mushrooms will start to release their juices and cook.
  3. Uncover and cook, stirring occasionally until the liquid is reduced and the mushrooms start to caramelize and brown in bits, about 5 minutes.
  4. Add water and the sweet potato to the pot. Add enough water to cover the mushrooms and sweet potato by 1″ to 1 1/2″ (remember, you can always add more water, trying to boil it off, is much harder). Add 1/2 tsp salt (or to taste) and bring to a boil.
  5. Cook until the sweet potato is very soft.
  6. Remove from the heat, let cool slightly, then using a handheld blender/immersion blender (if you don’t have one, you NEED one, seriously), puree the soup. (alternately you could use your food processor/blender and blend the soup in batches, being careful not to overfill the container)

Serve with Garlic Thyme Sweet Potato Straws, croutons or a slice of hearty home made bread.

If you really want your soup to be super creamy, you could add 1/2 cup half-and-half (or coconut milk to keep it vegan).

Makes 4-6 servings

image

Copyright © 2011 Simple Healthy Homemade. All rights reserved

Sausage and White Beans ‘Slow Cooker Friday’ Stew

image

As the colder and shorter days arrive, and I know some of you are starting to get ready for the holidays, I tend to be drawn to soups and slow cooked dishes. I shop and eat with the seasons. Many of you already realize that in the summer months you are drawn to fresh crisp salads, raw vegetables and fruits and but now you naturally gravitate towards warming dishes as the temperatures start coming down. This is all part of the seasonal gear shift getting into the colder months. Nature hibernates and rests. So sit and sip some tea in front of the fireplace and read a good book, take your time, slow down and rest.

Eating fresh and local means to be in sync with nature more. Eating with the seasons takes into account that fruits and vegetables are at their peak of nutritional value when ripe, and the longer they have to travel until they get to you, the sooner (before ripeness) they have to be picked. Once the produce is picked and disconnected from the plant or root that it grew on, it is as nutritious as it is ever going to be, it can’t ‘make’ any more nutritional value. At the same time, the clock starts ticking and its nutritional value diminishes over time. For those of us on the East Coast, just think about how long it takes a truck to get here from California… Seasonal eating involves eating more locally grown and harvested produce. It has to travel less far to get to a store near you = it’s nutritional content is higher, therefore better for you. Yes, that means in the winter, strawberries and cantaloupe are not going to be as good or as good for you (high in nutritional content), as when they are in season. However apples, pears and oranges are at their peak.

image
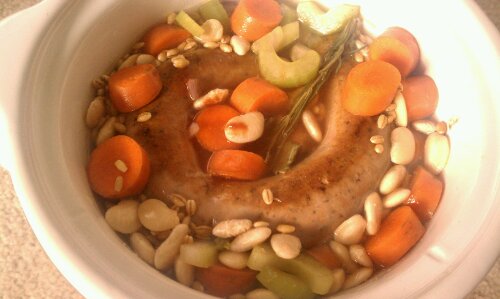
Even though I love to cook, and admittedly spend a lot of time in the kitchen, on Fridays specially now that it gets dark so early, I like to take a break. I know many of you understand this feeling, after a long week, you just want to relax. That’s where this series of recipes comes in: Slow Cooker Friday! Simple and easy to prepare, pile it all in the slow cooker and forget about it until you come home to wonderfully flavorful dinner and a kitchen that smells like you just spent hours laboring over the stove!

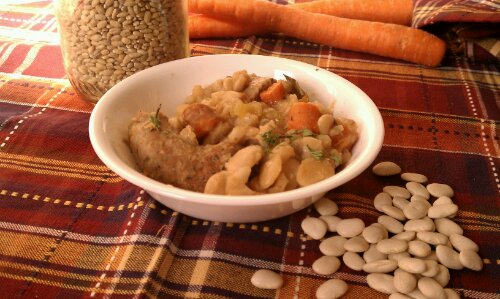
To get the best dried beans, make sure they are not too old. In addition to loosing nutritional value, they will take longer and longer to cook. The best places for (fresh) dried beans I find are stores with a large Latino or Indian customer base. Remember, you will need to start this recipe the night before, as you are going to be soaking the beans overnight. I have also added barley to this recipe, since beans and grains together make up a complete protein, good to know if you are vegetarian!

image
Easy and it is also an end of the month kinda recipe, using sausage, and dried beans to maximize your $$!

Note: I use a 2 qt round slow cooker, which usually makes enough for 2 hungry people, plus a round of leftover for as many.

Ingredients

  • 1/2 to 1 lb sausage of your choice (I used a spicy garlic turkey sausage this time, but sweet or hot italian sausage works great too!)
  • 1 cup baby lima beans (about 1/2 lb)
  • 1/4 cup barley
  • 2 celery ribs, chopped
  • 2 carrots, chopped
  • 1 tsp salt
  • 1 sprig of rosemary or 1/2 tsp dried
  • 1 bay leaf

Directions

  1. Soak the beans the night before in a bowl with cold water.
  2. Chop the carrots and celery ribs and place in the slow cooker insert. Then drain the beans and layer over top the vegetables. Add the bay leaf and rosemary and sprinkle with salt.
  3. In a skillet brown the sausage by cooking it without turning for about 5 minutes per side. Place in the slow cooker on top of the veggies.
  4. Fill the slow cooker insert with water to just cover the ingredients by 1/2″, turn your cooker on low and cook for 5 hours.
  5. Come home to a wonderful dinner 🙂

Serves 4

Copyright © 2011 Simple Healthy Homemade. All rights reserved

Poor Man’s Bouillabaisse

image

Bouillabaisse… Flavor of the sun and the ocean

Scent of thyme and wild fennel on the dry summer breeze, arid, sun drenched slopes, rugged coastline and a wild blue sea…

Marseille, Roucas Blanc District

File:Calanques2.jpg Calanque (Inlet) near Marseille

Anytime I think of Bouillabaisse, Marseille the birth place of this oh so quintessential Mediterranean soup comes to mind. Port city with its mix of cultures, where some streets have more of a Middle Eastern than French feel, fresh seafood abounds and where people’s lives are outside as much as in during the summer months. But I am getting lost in reveries here…

Marseille

Unless you live close to the sea, and have ready access to reasonably priced fresh seafood of all sorts, Bouillabaisse is not usually going to be an everyday meal. At least for me, the variety of seafood generally used in a soup like that, definitely moves it into the ‘special occasion’ category. However, a couple of quick changes and substitutions, et voilà, now I can get my flavor fix even on days when my budget is slim!

image

Ingredients

  • 3 tbsp olive oil
  • 1 3/4 cups c finely diced onions (from about 2 medium)
  • 1 fennel bulb, trimmed greens reserved, thinly sliced
  • 2 cloves of garlic
  • 1 (14oz) can diced tomatoes, in juice*
  • 2 cups chicken or vegetable broth (or water, 1 tsp salt and Rapunzel bouillon cube)
  • 2 sprigs thyme
  • 1 can water packed sardines
  • 1 can solid tuna,
  • (**optional: leftover cooked fish filets such as tilapia and salmon,  mussels, can of clams, calamari, scallops)

* or equivalent in frozen tomatoes, plus 2 tbsp tomato paste

** Note that you can make this soup at any level of ‘poor’ or ‘not so poor’ by either adding or substituting various fish and seafood items. Starting with a can of Tuna, and a can of Sardines, or adding crab meat, clams, mussels, whole shrimp and/or cooked fish filet such as salmon, trout or tilapia.

Directions

  1. In a stock pot, heat oil on medium, then add the onions, cook about 5 minutes until beginning to soften
  2. Add fennel and garlic, sprinkle with salt and pepper to taste, adjusting heat if ingredients start to brown to quickly. Cook about 15 minutes until tender, stirring often.
  3. Add broth, tomatoes and thyme and bring to a boil. Reduce heat and simmer, covered, until vegetables are very tender, about 15 minutes.
  4. Add a can of water packed sardines, chopped and/or solid tuna broken into bits, (or crabmeat and clams, or leftover cooked fish filers such as salmon or any other seafood that strikes your fancy and is in your budget)

Seriously, if the sea and the sun had a love child, it would be this  🙂

Copyright © 2011 Simple Healthy Homemade. All rights reserved

Snowstorm Venison Chili

image

On Saturday, we were hit by a super untimely snowstorm. Up to this point from what my research has revealed, the Lehigh Valley (PA) has only had a major snow occurrence (not sure where it goes from minor to major, but that’s what the weather website said) and it was 2.2″ in 1925!!! Well unofficial measurements on my deck for this one: 6.25″
My trees are still mostly green, and with all those leaves, the branches bent almost to the ground. I went out and with the help of a rake, shook the snow off the bending branches before they could snap, like three times yesterday. We lost power around noon, so there goes my ‘corn maze, then lazy weekend on the sofa watching movies…’

The last roses from my yard, dug out of the snow and brought in

No power brings back memories of being out during hurricane Isabel, a few years back, when I lived in a house with a well =fail… (For those of you that don’t know how this works: no well pump=no water, shower, toilet, I practically lived at the gym for 7 days, don’t ask…) and I had an electric stove at the time, double fail. So right now I am feeling blessed to have a gas stove so we can cook and we have lots of candles and today we hooked up my generator, to keep the fridge and freezer alive. They keep promising the power will be back by this evening, keeping my fingers crossed.
🙂
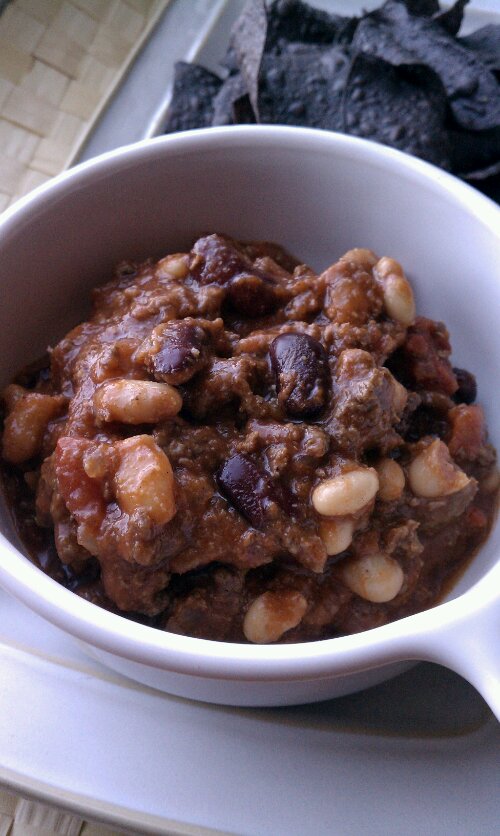
Here’s what we ate, as no power is no excuse for not having a great meal. Even though I had lots of plans for oven roasted squash with shallot finishing butter or basting oil, and a nice braised stew maybe…

image

Candle light dinner, Chili and salad with Spring ‘Fall mix’ salad from the garden (dug out from under 3″ of snow. Surprisingly, I got it before it was too late!)

Ingredients:

  • 1 1/2 pd ground meat (we used venison, but you could use whatever you like, including turkey)
  • 1 can or equivalent serving frozen dark red kidney beans (if using canned, rinse in a colander to remove excess sodium)
  • 1 can or frozen portion great northern beans or other white beans of choice
  • 1 1/2 cups diced tomatoes or a 14.5 oz can diced tomatoes
  • 1 15 oz can of crushed tomatoes (or plain homemade sauce)
  • 1 8 oz can of tomato sauce
  • 1 medium red onion, diced
  • 3-4 tbsp chili powder
  • 3 tbsp corn meal
  • 1 tsp cumin powder
  • 1 tsp chipotle powder or 1 tbsp sauce from a can of ‘chipotle in adobo sauce’ (you can add more for extra heat!)
  • 1/2 tsp oregano
  • salt to taste

Directions

  1. Heat 2 tbsp oil in a big heavy pan, add the onions and cook until softened, not browned.
  2. Add the ground venison and separate into chunks using a fork. Cook, stirring occasionally until you can’t see any more pink.
  3. Add the spices and cook, stirring until fragrant.
  4. Add tomatoes,  1 cup water, crushed tomatoes and tomato sauce. Stir and let simmer for 10-15 minutes, for flavor to blend a little.
  5. Stir in corn meal and cook for an additional 5 minutes or until the Chili becomes nice and thick.
  6. Serve with corn chips or a nice hearty slice of bread

serves 4 hungry folks (5 if you serve more moderate portions)

image
Copyright © 2011 Simple Healthy Homemade. All rights reserved.

Kabocha (or Butternut Squash) Chowder

image

There is simply nothing better than dipping your spoon into a steamy bowl of soup after being outside on a cold and windy day! I had sampled some fabulous roasted butternut squash at one of the grocery stores in the area, and it’s been working its way through my mind for re-creation and sharing soon 😉 However, when I came in after riding my bike today, there was no patience left for roasting anything. And since it was cold, I was hungry and I had a Kabocha squash sitting on the counter waiting for the perfect opportunity to turn into an awesome meal, soup it had to be!

If you’re not familiar with Kabocha Squash, it’s very similar looking to a Buttercup squash in that it has a dark green shell, but you could really use Butternut, Buttercup or Kabocha for this. Kabocha will be sweeter than  the other types and most likely it’s the brightest colored.

image

Ingredients

  • 1 md Kabocha or butternut squash, seeded, peeled and cut into pieces
  • 1 tbsp coconut or olive oil
  • 1/2 cup coconut milk (or regular cream*)
  • 1/2 red onion, chopped
  • 1 tbsp Madras curry powder
  • 1 tsp salt
  • water
* If using cream, recipe is no longer vegan or dairy free

Directions

  1. In a large pot, heat oil on medium and add onions and squash pieces. Cook stirring occasionally until onions are softened but not brown
  2. Add curry powder and cook until flavorful, then add enough water to cover squash by about 1/2″ (you can always add more to thin the soup, but cooking excess liquid off takes a long time.) Bring to a boil, cover half and simmer until squash is very soft.
  3. Remove pot from heat and using an immersion blender, blend until smooth and there are no more pieces (alternately you can blend in batches in your food processor or blender, but make sure you wait for the soup to cool down some first and don’t fill too much)
  4. Return to stove, add salt and 1/2 cup coconut milk (or regular cream) stir until dissolved.
  5. Serve each bowl garnished with a spoonful of coconut milk or cream, using a tooth pick, stir just a little to form a swirl pattern.

Makes 4 to 6 servings.

Pretty eats!

image

Go ahead, connect to your inner Picasso!

Copyright © 2011 Simple Healthy Homemade. All rights reserved.