Portable Chicken Meatball ‘Muffins’

imageChicken Turkey Meatball Muffins

I came to thinking about this the other day. Can you name a snack that would deliver protein versus carbs, just one thought, on top of your head, …nothing? Right, thought so. Short of  protein bars (mostly containing sugar=CARBS and soy), there really isn’t much we ‘snack’ on that would fall into this category. So when I came across a recipe for a turkey meatloaf a light went on,  and I tinkered around in the kitchen until I came up with this variation.

I’ve made two versions so far, one with chicken breast meat and venison, (all ground) the other with turkey thigh meat and chicken thigh meat with the addition of vegetable.

imageChicken Venison Meatball Muffins, (I think I added some jalapeno, see the green?)

I notice using breast meat and venison makes the muffins denser, the second version is a bit softer and juicier due to either using only thigh meat, or the additional vegetables. For vegetables I used the pulp from my juicer. I like having fresh squeezed vegetable juice in my diet, since the micro nutrient content of fresh homemade vegetable juice is out of this world, but having no compost, feel bad throwing out the dry pulp that is left over. Well, I stuck it in these and let me tell ya, it tastes awesome! If you don’t have a juicer, I am sure you could just shred and/or blend some vegetables, if juicy, squeeze in some paper towels and reduce the egg whites a bit or add some additional oats. Have not tried that, but don’t see why it wouldn’t work.
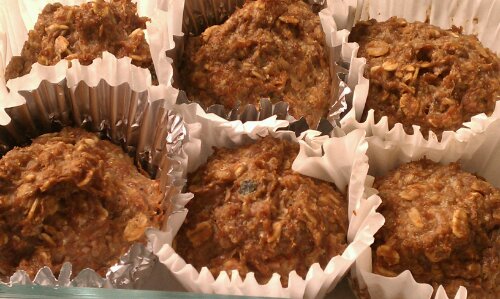
image

Meatballs to go, now who wouldn’t love that??

Eat them cold or microwave for 20-30 seconds to warm up. You could also put them on a salad as a protein addition, if you like.

Chicken Venison Meatball Snackie

Ingredients

  • 1 lb lean ground chicken thigh meat
  • 1 lb ground turkey thigh meat
  • 1 cup rolled oats
  • 1/2 cup quinoa flakes (optional)
  • 1 cup liquid egg whites (about 5-6)
  • 2 tsp paprika, sweet
  • 1 tsp salt
  • 1 tsp white pepper
  • 1 tsp chipotle* pepper, ground (optional, makes it spicy, yum!)
  • 1/2 tsp ground cumin
  • 1/2 tsp dried thyme

* if you don’t have chipotle pepper, use cayenne

Chicken Turkey Vegetable Meatball Muffins

Ingredients

  • 1 lb lean ground chicken meat (I used breast meat)
  • 1 lb ground venison (which is always lean, you know, no junk food or CAFO’s in nature)
  • 1 cup mixed vegetable pulp (I used a mix of celery,kale, kohlrabi, carrot and golden beet)
  • 1 cup rolled oats
  • 1 cup liquid egg whites (about 5-6)
  • 2 tsp paprika, sweet
  • 1 tsp salt
  • 1 tsp white pepper
  • 1 tsp chipotle pepper, ground (optional, makes it spicy, yum!)
  • 1/2 tsp ground cumin
  • 1/2 tsp dried thyme

Directions

  1. Preheat oven to 375°F
  2. Place meat, egg whites (if using, vegetable pulp and quinoa as well) and oats together in a large bowl.
  3. Mix the spices and salt in a small dish, add to the large bowl and mix into the meat using a fork until well incorporated.
  4. Line a muffin pan with (jumbo) muffin cups or grease well
  5. Form into 12 balls, about baseball sized and place in muffin pan
  6. Bake 30-35 minutes or until cooked through.
  7. Cook in muffin pan for 5 minutes, then place on cooling rack
  8. Keep in the fridge or freeze for later use

Each chicken venison muffin has 20 g protein,  3 g fat, and 5 g carbs, 123 calories

Each chicken turkey muffin has 18.3 g protein,  5.3 g fat, and 8.3 g carbs (includes fiber from the vegetable pulp) 156 cal  (with Quinoa 18.8 g protein)


image

Copyright © 2012 Simple Healthy Homemade. All rights reserved

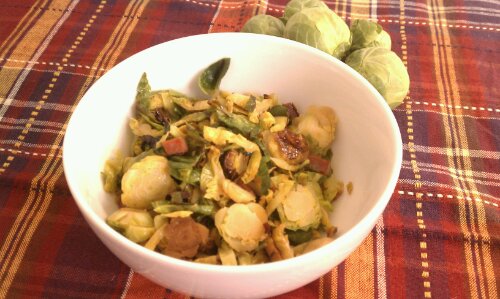
Braised Brussel Sprouts

image

Winter and all I seem to be eating lately is cabbage, in its various forms. Like Sauerkraut, or this Napa, Kumquat Salad, or Turkey Cabbage Rolls, or Lemony Brussels Sprouts, the list goes on… For versatility of use, the Brassica family of veggies is almost unsurpassed. I am just saying, ‘almost’ because there might be something else out there that I have not come across yet 🙂

image

For the Braised Brussels Sprouts, I added just a bit of Speck and some Thyme Garlic Basting oil for flavor, the rest of the dish is accomplished by the main player, the Brussels sprouts. If you’re worried, the flavor here is not strong, the braising really mellows the flavor and brings out an almost creamy quality in this lovely vegetable.

image

This is soooo good, I think I could live on it for the rest of my life!

Ingredients

  • 1 lb Brussels Sprouts, cleaned
  • 2″ piece of thick cut Speck (or Bacon, 1/4″ thick by 2″ long)
  • 2-3 tblsp garlic thyme basting oil
  • 1/2 tsp salt

Directions

  1. Cut the cleaned Brussels Sprouts into 3-4 slices, (usually I cut from top to stem, length wise, so they don’t totally fall apart, but as you can see in the pictures it works the other way, too)
  2. Dice the Speck piece into stick and then into 1/4″ cubes
  3. Heat a skillet over medium, add the Speck or bacon bits and cook for a minute or until the fatty parts begin to look transparent and start releasing some of the fat. (If you use bacon, there most likely is more fat on the bits and you could reduce the amount of basting oil you add)
  4. Add the Garlic Thyme Basting Oil
  5. Add the Brussels Sprouts and stir. Cook 2-3 minutes, then  add 1/4 cup water and cover the pan. Cook for 6-7 minutes, stirring occasionally or until the Brussels sprouts are tender (Depending on your taste, you can cook them until they still have a bit of a bite to them or cook further until creamy soft)
  6. Uncover, season with salt, stir to combine and serve!

Serves 3-4 as a side dish (depending on love of Brussels Sprouts, here it’s more like 3)

image

Copyright © 2012 Simple Healthy Homemade. All rights reserved

Napa, Kumquat and Asian Pear Salad with Cashews

image

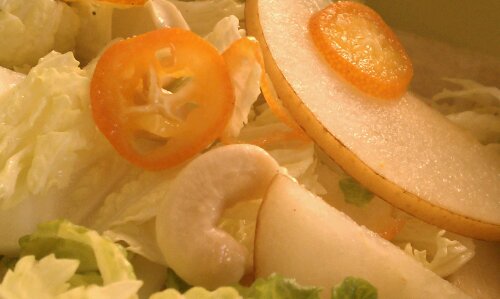
Unless I am warm I am not drawn to cold foods, so in the colder months it can be a challenge to get exited about eating raw vegetables or salads. Unless I am working out or running and my body temperature goes up, me and salad are not usually friends this time of year. So in order to make me want to eat cold things like raw vegetables, it has to be pretty special, texture, taste, all of it. This a little unusual salad combines crunchy Napa Cabbage, citrusy (is that a word, really?) Kumquats and crispy fresh Asian Pears along with cashews into an explosion of flavor without too much of the weight you too often find in rich winter salads. The dressing is simple and light and accentuates the sweetness of the Kumquats with a refreshing lime dressing.

image
If you’ve never tried Kumquats, you’re in for a treat. They are an about pecan sized member of the citrus family, but the whole fruit is edible, including the shell which is not bitter (like in an orange for example).

image

Crispy salad with creamy cashews, yummy!

Ingredients

  • 1/2 of a small Napa Cabbage
  • 1 Asian Pear
  • 6 Kumquats
  • 1/2 cup raw cashews
  • 1 lime, juice and pulp only
  • 2 tblsp olive oil

Directions

  1. Cut Napa cabbage into 1/2 wide slices.
  2. Core and slice Asian pear thinly.
  3. Slice kumquats into 1/8″ thick slivers, remove any seeds and reserve Amy juices.
  4. In a large salad bowl, combine Napa, Asian pear, kumquats and juices.
  5. Juice the lime into the same bowl.
  6. Toss to combine.
  7. Drizzle the olive oil over top and sprinkle with cashews.

image
Copyright © 2012 Simple Healthy Homemade. All rights reserved

Colorful Vegetable Soup with Celery Root

image

Celery Root or Celeriac is what we use back home as winter vegetable for soups, salads, stews, you name it. It’s cheap, readily available and has a great flavor both raw and cooked. You could most definitely use regular green celery, which has a bit more of a pungent flavor, compared to the almost a bit nutty or earthy flavor of the root crop.

Cerliac

Making vegetable soup from scratch could not be easier, and I am giving you a basic recipe that can be made in as many variations as there are cooks.

For this particular soup I chose colorful veggies, and I am foregoing the usual potato for the sake of the ‘getting lean in the new year’ and all the paleo eaters out there and I am using, as I just said, celery root instead, which has a much lower Glycemic Index (GI) than a potato. choosing vegetables (and foods in general that are low on the glycemic scale keeps you full longer, therefore helping to control your appetite. In very simple words (yes there is more to it, but I’ll spare you) the idea behind the glycemic index is to measure how quickly a particular food affects your blood sugar/insulin response, meaning how quickly the sugars in it get digested and find their way into your blood stream.
image

Alright, now that we fed the brain, let’s look at our tummy 🙂

Ingredients

  • 1/2 medium onion, peeled and chopped
  • 1/2 celery root, peeled and cut into chunks
  • 3-4 large tomatoes, diced * see note
  • 2 carrots, diced
  • 1/4 to 1/2 a head of cauliflower, separated into florets (depending ont he size of the cauliflower you get)
  • 1/4 of a head of a medium savoy cabbage, cut into chunks (or use some leaves off a large one)
  • 4-5  stalks Swiss Chard, chopped(any color you like, rainbow colors look pretty)
  • 1 tsp salt

* I used frozen ones from my Garden in the summer: when they are at the peak of ripeness, just chop and put in zip top bags for soup in the winter. Alternately you could use a can of no salt added diced tomatoes)

Makes one 3 1/2 qt pot full

Directions

  1. In a stock pot (mine is 3 1/2 qts, or so it says on the bottom) heat one tablespoon on olive or coconut oil over medium, then add the onions,a dn cook until translucent but not brown
  2. Add the celery and carrots, stir and cook until the onions are beginning to brown
  3. Add the tomatoes, with any juice that collected on the cutting board (if using frozen, partially thaw in the fridge overnight) stir and allow to cook 5 minutes to allow some of the juices to come out
  4. Add water to cover the vegetables and bring to a boil, cook 5 minutes, then add the cauliflower and chopped Swiss Chard, bring to a boil again,then reduce the heat, add the salt and simmer until celery, carrot and cauliflower are tender when pierced with a fork.
  5. Serve hot with some crackers or a slice of rustic bread, or enjoy as a first course.

To make this your own:

  • Instead of celeriac, use 2-3 stalks of celery and a medium potato
  • Use kale instead of Swiss Chard (but remove the tough stems)
  • Use spinach,  but add right before serving into individual bowls, ladle hot soup over
  • Don’t like cabbage? Leave it out
  • Instead of cabbage and kale, use thin cut or quartered Brussel sprouts
  • Add green beans or snow peas towards the end of cooking time
  • Leave out the tomatoes
  • Go through your fridge, anything vegetable can most likely be used up in your yummy soup, the potions are endless 🙂

image

Copyright © 2012 Simple Healthy Homemade. All rights reserved

Green Power Watercress Omelet

image

I know many resolutions for the new year are to get fitter and be healthier. What kind of New Years resolution did you come up with? Well instead of resolutions and radical changes, how about something more playful? Here’s a New Years challenge for you: Instead of cutting out things in your daily diet and feeling deprived, start with adding nutritiously dense foods!  I am challenging you to incorporate more greens into your diet, and here is a great way to start, if you are not quite ready yet to steam or saute kale, collard greens or water cress.

image

Watercress, a leafy green native to Europe, has edible leaves and stems, but I find that I do not enjoy the stems as much as I could. I tried it as salad, addition to soups, but those crunchy stems I just can’t get used to. So…. besides puréed soups, what to do? In comes my blender and the Green Power Omelet !

image

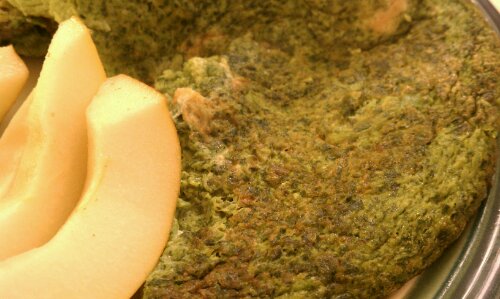
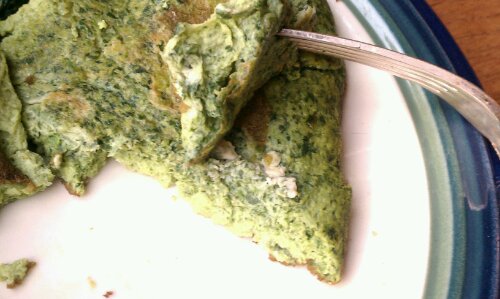
Oh yeah, it’s wicked green, (trust me, you can’t really tell from the picture) and the odd thing in there, you ask?  I added some ‘free form’ meatballs from a jalapeño chicken sausage for extra flavor

image

Some of the ‘goodness in watercress:

    • Fresh cress has more concentration of ascorbic acid (vitamin C) than some fruits and vegetables. 100 g of leaves provide 47 mg or 72% of RDA of vitamin C.  As an anti-oxidant, vitamin C helps to quench free radicals and reactive oxygen species (ROS) through its reduction potential properties. Lab studies suggests that regular consumption of foods rich in vitamin C helps maintain normal connective tissue, prevent iron deficiency, and also helps body develop resistance against infectious agents by boosting immunity.
    • It is one of the excellent vegetable sources for vitamin-K
      ; 100 g provides over 200% of daily recommended intake. Vitamin K has potential role bone health by promoting osteotrophic (bone formation and strengthening) activity. Adequate vitamin-K levels in the diet helps limiting neuronal damage in the brain; thus, has established role in the treatment of patients suffering from Alzheimer’s disease.
    • Cress is also excellent source of vitamin-A
      and flavonoids anti-oxidants like ß carotene
      , lutein and zeaxanthin.
    • It is also rich in B-complex group of vitamins such as riboflavin, niacin, vitamin B-6 (pyridoxine), thiamin and pantothenic acid that are essential for optimum cellular metabolic functions.
    • It is also rich source of minerals like copper, calcium, potassium, magnesium, manganese and phosphorus. Potassium in an important component of cell and body fluids that helps controlling heart rate and blood pressure by countering effects of sodium. Manganese is used by the body as a co-factor for the antioxidant enzyme superoxide dismutase. Calcium is required as bone/teeth mineral and in the regulation of heart and skeletal muscle activity.

Watercress (Nasturtium officianale), fresh,
raw leaves, Nutrition value per 100 g.
(Source: USDA National Nutrient data base)

See the table below for in depth analysis of nutrients:
Principle Nutrient Value Percentage of RDA
Energy 11 kcal <1%
Carbohydrates 1.29 g 1%
Protein 2.30 g 4%
Total Fat 0.10 g 0.5%
Cholesterol 0 mg 0%
Dietary Fiber 0.5 g 1%
Vitamins
Folates 9 mcg 2%
Niacin 0.200 mg 1%
Pantothenic acid 0.310 mg 6%
Pyridoxine 0.129 mg 10%
Riboflavin 0.120 mg 9%
Thiamin 0.090 mg 7.5%
Vitamin A 3191 IU 106%
Vitamin C 43 mg 72%
Vitamin E 1.0 mg 7%
Vitamin K 250 mcg 208%
Electrolytes
Sodium 41 mg 3%
Potassium 330 mg 7%
Minerals
Calcium 120 mg 12%
Copper 0.077 mg 8.5%
Iron 0.20 mg 2.5%
Magnesium 21 mg 5%
Manganese 0.244 mg 11%
Phosphorus 60 mg 8%
Selenium 0.9 mcg 1.5%
Zinc 0.11 mg 1%
Phyto-nutrients
Carotene-ß 1914 mcg
Carotene-α 0 mcg
Lutein-zeaxanthin 5767 mcg

Now that I bored you all with just how good it is for you, on to the recipe! (Be warned the color is unreal, it looks like you put food coloring in there when you’re done!)

Ingredients

  • 3 egg whites + 1 egg (or 5 egg whites)
  • 1 good handful fresh watercress

Directions

  1. Add the watercress to blender, add eggs, pulse until combined and the greens have been emulsified (You may have to push the watercress down as necessary with a spatula so it can get chopped up before it will all blend)
  2. Heat a skillet over medium, add a tsp coconut oil (or oil of choice), swirl to coat the pan then add the green goodness from your blender
  3. Cover and cook until firm.
  4. Enjoy and feel good about your self for all the greens you already ate 🙂

image
Copyright © 2012 Simple Healthy Homemade. All rights reserved
Thai Green Papaya Salad (Som Tum)

image

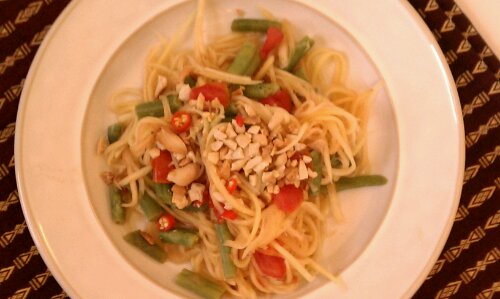
One of my favorite Thai Salads has to be Som Tum. Ever since my brother had me over for dinner one night and made this super delicious and fiery hot salad I have been hooked. (and he was nice enough to share the perfect recipe he brought back from Thailand the summer after the big Tsunami)

I like it equally with green papaya or green mango, the latter giving it a bit more of a tart flavor. You can find green (unripe) papaya at Asian food specialty stores, the regular grocery store will only carry ripe ones, yes they also look green outside, but have turned ‘fruit’ on the inside, and we need them to be ‘vegetable’ for this. ( They look white or slightly green after they are peeled, if the papaya is pinkish or the mango yellow, it’s too ripe and soft for this and the flavor is different)

image

I have adapted the original recipe a bit to adjust for our non Teflon coated tongues and intestinal tracts. The original recipe is so hot, it should have a name like Ten Thousand Chile salad or Eternal Purgatory salad. When my brother first made this we made steamed sticky rice to go along with it, to douse the fire. My version is still hot and you are most welcome to add more chillies if you like. But don’t say I didn’t warn you. I have also adjusted the preparation method (normally the salad is made in a big earthenware mortar ) and left out the dried shrimp, which are pretty hard to find and are a pretty foreign item for most folks here, although they are deliciously crispy and a bit salty, kinda like chips 😉

image

Ingredients

  • 1 green papaya (or mango, see note)
  • 2-3 cloves of garlic
  • 1 cups diced string beans or snake beans (if your papaya is big, you can use 1 1/2 cups)
  • 2 plum tomatoes, on the unripe side, diced
  • 3/4 cup raw, shelled peanuts
  • 2-3 Thai chilies ( the original asks for 9!!!)

Dressing

  • 2 tbsp Palm sugar
  • 8-10 tbsp fresh lime juice (from experience that’s about 5 small or 3 large limes)
  • 4 tbsp Fish Sauce
  • optional: Cilantro, sliced Kaffir Lime leaves and dried shrimp for garnish

Directions

  1. Dry roast peanuts in a skillet or alternately in the oven or toaster oven until slightly brown, set aside to cool
  2. Halve the papaya, seed and peel, then slice into a big bowl using a julienne cutter. (If you don’t have a julienne cutter, you can grate the papaya)
  3. Using mortar and pestle, crush half of the roasted peanuts, then add the chilies and garlic and mash together.
  4. Combine the lime juice, fish sauce and sugar, stir until the sugar dissolves.
  5. Add sauce to mashed spices, mash all of it a bit more to mix flavors, then add to the julienned papaya and mix well
  6. Serve garnished with cilantro leaves and crush the remaining peanut and server alongside to top the salad as desired.

Note: If using a green mango, you can reduce the lime juice by 3 tablespoons since the mango has a tartness of its own.

image

Copyright © 2012 Simple Healthy Homemade. All rights reserved

Phở Bò – Vietnamese Beef Noodle Soup

image

Happy New Year everybody!

Wishing you all a super wonderful  2012 filled with happiness, prosperity, health, friendship and love!

image

Since this is my first post this year, I wanted to make something a bit different. But when it’s cold like it is now (at my house the thermometer reads 18°F right now brrrr), the only thing to do is make some yummy soup, right? But since it’s early January and everybody is trying to eat lighter and healthier, a stew or thick soup did not seem like the way to go and anyway, I like to be reminded of warmer days or at least warmer parts of the world and since I have some time between chores (cleaning the house has to be done this year too, really?) I am making myself  Pho, Vietnamese Beef Noodle Soup from scratch.

image

You could, to save time, use beef stock and simmer the spices in that for a while, but truly the flavor of homemade stock, made with beef marrow bones, slow simmered for hours is beyond compare. Although I do wonder if this could be transferred to the slow cooker to make itself while you’re at work… I might try that next time 🙂

imageI forgot to add lime until I sat down to eat…

Traditionally , or I should say normally in restaurants, this soup is clear and very lean since the fat gets skimmed off while the flavorful broth is cooking, but you could leave some of the fat in the soup like I did, for the cold winter weather’s sake.

If you’ve ever had this in a restaurant, you might be familiar with the washtub sized bowls one gets served. I am not kidding, seriously big enough to wash your head in, and no one I have ever been to a Vietnamese restaurant with has EVER been able to finish one of those, and there were a few hungry guys amongst  those counted not just dainty ladies. So that said, the recipe makes enough for 6 to 8 meals, the lower number for bigger bowls, the bigger number for more normal appetites.

Ingredients

Stock:

    • 2 lb beef marrow bones
    • 1 lb beef brisket or other cheaper cut of meat
    • 3 medium shallots, unpeeled
    • 4 cloves
    • 1 1/2 tsp black pepper corns, whole
    • 3 green cardamom pods
    • 4-5 star anise pods
    • 2 pieces of cinnamon, 3″
    • 1 ginger, 2″ piece
    • cheesecloth or ‘bouquet garni’/spice bag
    •  1/4 to 1/2 cup nuoc mam (fish sauce) or 3 tsp to 1 tbsp salt

Garnish:

    • 1 pd sirloin or flank steak or filet (whatever your budget allows, this should be a nicer cut than what you use for the broth), placed in the freezer for 30 minutes
    • 1 pd Rice Noodles or Rice sticks, flat, size medium (about 1/4″ wide)
    •  4 handful bean sprouts (about 1 lb?)
    • 4-6  sprigs Thai or Vietnamese Basil
    • 4-6 sprigs Mint leaves
    • 4-6 sprigs Cilantro
    • red Thai chile peppers, (they are HOT), sliced
    • 1-2 Limes, cut into wedges
    • 3-4 Scallions, sliced

Directions

    • Rinse the bones with cold water, then place in a large stock pot and cover with water. Bring to a boil and blanch for 10 minutes
    • Drain, rinse the bones and clean the pot then return the blanched bones to the same pot, add 6 quarts of water and bring to a boil, skim off any fat and foam that forms on the surface.
    • Add another 2-4 quarts of water and return to a boil, again skimming off any impurities that rise to the surface.
    • In the meantime, stud the shallots with the cloves, and roast both the ginger and the shallots either by holding them over the gas burner until blackened in spots or by placing under a broiler. Place the spices, ginger and shallots inside the muslin spice bag (alternately using two layers of dampened cheesecloth, wrap all the spices and tie shut with kitchen twine).
    • Place the spice bag in the stock pot with the bones and simmer for 1 hour. Then remove the bag and discard.
    • Remove the brisket and set aside.
    • Return to a simmer and cook, uncovered 4-5 hours, adding water as necessary to maintain the water level and making sure to keep the bones covered at the minimum.
    • In the meantime, after placing in the freezer for 30 minutes slice the flank steak paper thin against the grain, also slice the reserved meat paper thin, set aside.
    • When the broth is ready, remove and discard all of the bones. Strain broth through a colander or strainer, lined with a double layer of dampened cheese cloth into a clean pot.
    • Return to heat and add the fish sauce or salt, bring to a boil then reduce the heat and keep the soup at barely a simmer while you are getting everything else ready.
    • Soak the rice noodles in very hot water until softened (takes about 15-20 minutes)
    • Divide the softened rice noodles among 6 to 8 large soup bowls, top with the sliced meats.
    • Bring the soup to a rolling boil then ladle the soup directly over the meat in each bowl, cooking it instantly.
    • Garnish with a handful of bean sprouts, some scallions and a lime wedge.
    • Let everyone garnish their own soup to their liking with additional mint, basil and cilantro leaves, sliced red chile peppers.

You can also make a large batch of broth and freeze some for later. I use quart size zip top bags that I sit inside a square container, fill with soup, freeze and remove the bag from the container. Stacks easy since it is square in its frozen shape. When you’re in the mood for some Pho, you just have to get the steak sliced, get all the garnish ready: sprouts, herbs, chile, lime and rice noodles.

image

Copyright © 2012 Simple Healthy Homemade. All rights reserved

Green Monster Power Smoothie

image

No pretty pictures, I know, but healthy and yummy none the less 🙂

There are great benefits to eating lots of greens, yes, you all heard it before, but some days it is hard to fit all that healthy stuff into your food chain between running from work to get the kids or whatever your busy life dictates. Well for days when you don’t have the time to sit down to a hearty spinach omelet you can, even if you don’t have a juicer, make yourself this amazing tasting green power smoothie. Having a juicer can be a great addition to your healthy diet, as long as you’re aware of he fact that you’ll be missing out on all the healthy fiber that you would have consumed eating the veggies. I also want to caution you on juicing fruit, you definitely want to stay HEAVY on the vegetable side. Fruit juice no matter if store-bought or homemade will affect your blood sugar level drastically, much more so than eating the whole fruit would have done. From a weight loss and even a ‘having even energy all day’ point of view, not a good thing. And if you are borderline pre diabetic, just plain BAD idea.

So in this Smoothie you’re not only going to get your greens (without feeling like a cow on the pasture) but all the healthy fiber is still there, hurray!

Added benefit when you’re maligned this with spinach: the lemon juice in the Smoothie provides vitamin c which is essential for your body to absorb the iron from the spinach!

Ingredients

  • 2 handful of Spinach leaves (or stemmed lake or collards, chopped)
  • 1 ripe banana
  • 2 cups water
  • Juice of 1 large lemon
  • 2-3 tbsp coconut/palm sugar, or honey or agave syrup (add more if you like it sweet)
  • (Optional: 2 tbsp egg white powder or protein powder)
  • You could also add a peeled Kiwi

Directions

  1. Place greens in the blender and add the two cups of water, pulse a few times to get started, pushing down the top layer of leaves if they don’t incorporate.
  2. Add the banana, lemon juice, sugar and if using protein powder. Pulse and blend until smooth
  3. Serve. Makes about 4 cups

Note: you should drink this right away, don’t make it in advance, first the Smoothie separates into solids and liquid pretty quickly (I just re-blend for the second glass) but secondly the nutrients that were happily stored inside the leaves are now exposed to the air and will start oxidizing and therefore loose potency.

image

Copyright © 2011 Simple Healthy Homemade. All rights reserved

Chocolate Balls

image

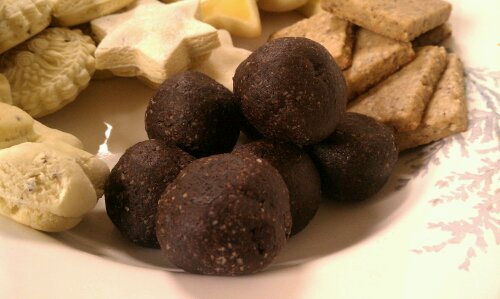
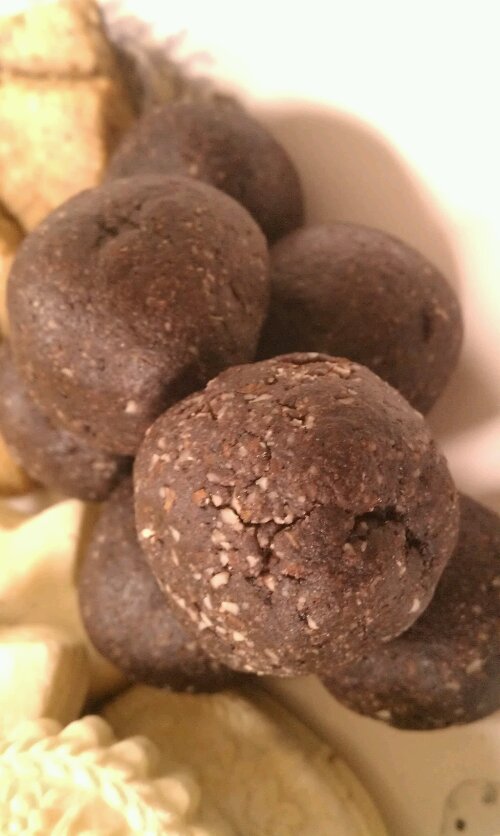
Schockolade Kugeln – Chocolate Balls – Swiss Christmas Cookies

You’re not surprised that a lot of Swiss cookies involve chocolate, are you?

This is another no butter recipe. It has an intense chocolate flavor and no added fat (only fat in here is from the almonds, eggs and cocoa powder). And as an added bonus, it just so happens that it is gluten-free, tadaa!

At first I was going to translate the name of these into bullets, as in ‘death by chocolate (bullet)’ but was musing on the whole Christmas and Peace on Earth concept and thought that would seem kinda wrong, but nevertheless they are intensely chocolatey!

image

Ingredients

    • 3 eggs
    • 1 1/2 cups sugar
    • 1 3/4 cups cocoa powder (I used a mix of extra dark and dutch processed)
    • 3 3/4 cups ground almonds (sometimes called almond flour)
    • 2-3 tbsp tapioca or potato starch

Directions

    1. In a big bowl, mix eggs sugar and cocoa until liquid and frothy looking
    2. Add the almonds and the starch and mix until, uniformly incorporated
    3. Chill dough for a few hours (if it’s cold enough where you are, put it on the balcony like we did in Switzerland, if not the fridge works well too)
    4. Form into walnut sized balls between your hands, (being careful to keep your hands cool), and place on a lined baking sheet.
    5. Let the formed balls dry overnight, or to speed up the process, you could also place the whole cookie sheet in the freezer for at least 1 hour.
    6. Bake in a preheated oven at 480°F for 3 to 5 minutes. The balls should only crack slightly
    7. Let cool on the baking sheet for 5 minutes before transferring to cooling rack.

image

Check out the post on more Swiss Christmas Cookies to try other varieties!

Copyright © 2011 Simple Healthy Homemade. All rights reserved

Thai Red Curry Chicken ‘Slow-Cooker Friday’

image

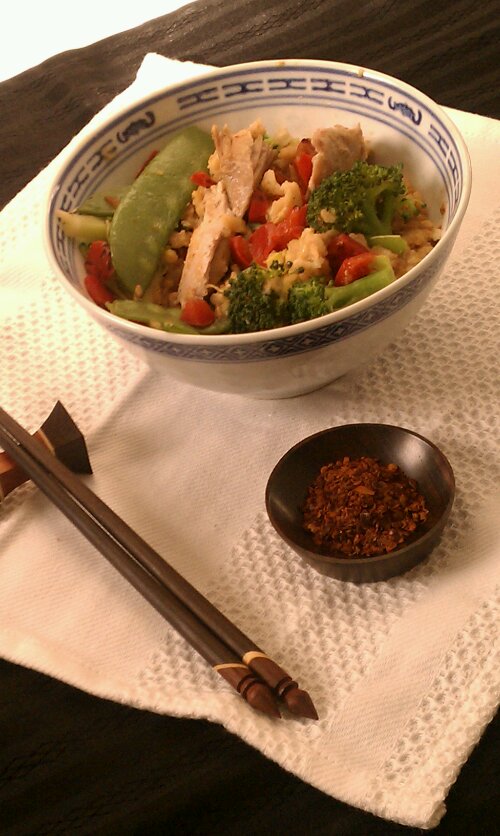
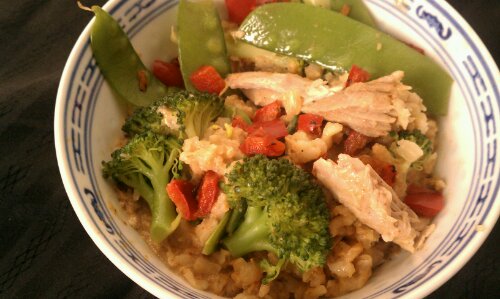
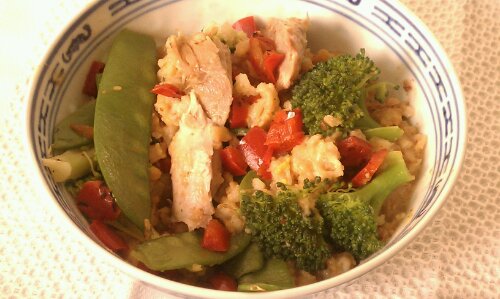
I love Thai food and I am a little bit of a Thai food snob, I have to admit. But I guess it might come as no big surprise, after travelling in South East Asia extensively, and my brother living on an island in Thailand (I know, don’t get me started, he gets to enjoy the sun while we have cold toes here ;P ) While travelling and meandering through Thailand and other South East Asian countries, I ate with local families, and therefore ate some ‘Thai Food’ you’d never see in a restaurant, in short I acquired some first hand knowledge of real Thai cooking. So this recipe really should be called Thai Inspired Red Curry Chicken, since the slow cooker is not traditional, but the flavors are still reminiscent of warmer places, so this is my Americanized Friday evening version 😉

image
Serves 4

Ingredients:

  • 2 chicken legs/thigh quarters, bone in (about 1 1/2lb)
  • 2-4 tbsp red curry paste (if you are very sensitive to spice, use less, for extra spice use more)
  • 1/2 of a 14 oz can of coconut milk
  • 1 cup brown Jasmine rice
  • 1 cup broth
  • 2 cup mixed vegetables, cut into bite size pieces (preferably fresh, I used snow peas, red bell pepper, and broccoli)
  • 1 lime, cut into wedges for garnish

Directions

  1. Heat a heavy frying pan over medium.
  2. Season the chicken with salt and pepper and cook the chicken skin side down until browned, about 4-6 minutes, turn and cook repeat on the other side (Chicken will cook more in the slow cooker, this is just to give it some extra flavor) Transfer to slow cooker
  3. To same skillet, add the coconut milk, half the broth and the curry paste. Stir and loosen any browned bits. Pour over the chicken in the slow cooker insert.
  4. Pour the rice around the chicken , add the remainder of the broth and cover.*
  5. Turn slow cooker on low and cook for 5-6 hours, or until chicken is sift and starts to fall off the bone.
  6. Half hour before you’re ready to eat, place the vegetables on top and turn up to high. Alternately you could also steam the vegetables separate and serve over the chicken and rice from the crock-pot.
  7. Garnish with lime wedges and serve.

* The rice will be soft and flavorful from cooking in the sauce, if you prefer your rice to be less ‘risotto’ , add it about half way through the cooking time.

image

Copyright © 2011 Simple Healthy Homemade. All rights reserved