Santa Fe Chicken Soup

Nothing like a spicy south western soup to warm you up on a chilly day. Specially if you have no electric and you don’t know when it’s coming back. Was hoping to post my pumpkin crêpes-cakes (they are like in between a pancake and a crêpe) but it’s a little easier making soup in the dark (or candle light that is) than making pancakes. Plus it’s kinda okay to have leftovers and eat it a few times without much additional effort. Reheating pancakes without electricity? Not so much.

Since this crazy storm that called itself Sandy came through, the lucky ones have just been out of power, some fared much worse… Since I am usually lucky, I just lost power but am able to keep the freezer stuff alive thanks to my small but potent generator. Kinda silly, but I also have the laptop hooked up right now so I can type this, and to take some of the classes for a certification I am working on, can’t tell you more right now. Soon, I promise. So where was I? Oh, I am saving the pancakes for tomorrow, and I am making some soup!

When everything shuts off, and it’s starting to get cold outside after this storm, having hot soup in your belly makes you happy. No, frankly it’s just because I like soup, a lot, in fact I might be a soup addict, if there is such a thing. But a warm belly should never be underrated, just sayin’. So being trapped inside, I made another soup 🙂 The recipe makes a lot, like for 6 to 8 people, but in this case for one. But it’s so super delicious, I wouldn’t mind eating it for breakfast, lunch and dinner for a few days!

Ingredients

  • about half a grilled or roasted chicken *
  • 4-6 cups of water
  • 2 big cloves of garlic, minced
  • 2-4 chilies and 1 tbsp sauce from 1 can of ‘chilies in adobo sauce’
  • 2 whole ears of corn (or use about 1 1/2 to 2 cups frozen, canned or fresh kernels)
  • 1 small bag of dark red kidney beans**, frozen (or 1 can, drained and rinsed)
  • 1 tsp salt
  • 2 heaping tbsp pan or masarepa (pre cooked corn meal)
  • 1 can (28 oz) San Marzano tomatoes
  • lime slices and tortilla chips for serving

*or use 4 cups of good quality chicken stock and some leftover grilled or roasted chicken meat

**I cook my own beans and freeze them in serving size bags for later use. Much cheaper and less sodium than canned and much more flavorful. Also feel free to use black beans to make it more southwestern like I intended, I only had kidney beans left.

Directions

  1. In a large stock pot cover the roasted chicken with water and 1 teaspoon salt, and bring to a boil, then reduce and simmer until the meat starts to fall off the bones. Remove the chicken and set aside to cool.
  2. Add the ears of corn to the hot stock until defrosted, then remove and slice the kernels of, return to the soup. (If using kernels, just add)
  3. Add the beans
  4. In the meantime, heat 1 tablespoon oil in a skillet and cook the garlic until golden, then chop and add the 2 chilies in adobo and the tablespoon of sauce (use more if you’re friends with the devil and like it HOT) and the can of tomatoes and cook until reduced and starting to thicken. Add to the soup pot.
  5. When the chicken is cool enough to handle remove the meat from the bones, chop and return back to the soup
  6. Remove about 1 cup of liquid from soup, set aside to cool slightly then stir the ‘pan’ into it until dissolved and no lumps are left (it will thicken) then stir back into the soup and bring to a simmer. Cook until the soup has slightly thickened, about 3-4 minutes.
  7. Serve garnished with a slice of lime and some tortilla chips on the side.

© 2012 SimpleHealthyHomemade

Herbed Yellow Tomato and Lentil Soup

imageFinishing my last bowl of soup, I thought it might be time to share this one with you instead of keeping it all to myself. Using the last tomatoes from the garden. Oh no, they have not been out on the vine for a while now. I had to pick them a while back when we were expecting a hard frost, even though they were hard and green as a granny smith apple. But oh wonder, after a couple of weeks, (yes folks, it took that long) they started to turn yellow and even a little red/orange in some spots, I guess because they remembered they were Pineapple tomatoes after all. But knowing that the flavor would not be a sun-ripened version of tomato, I decide soup might be a good bet. And since they are probably less sweet than their sun-ripened cousins, I pondered, maybe creamy would be the way to go? But I also did not want to make it too heavy or rich and full of fat, well I think I struck the balance just right, but judge for yourself. I have eaten the entire pot of soup (serves 4) over the past week, all by myself, there was no sharing here, I admit 😉

imageBy the way, I bet this would be even better with real ripe tomatoes

As I write this, it is very calm outside and very hard to imagine that there is a storm brewing that might outdo last years Halloween Snowstorm. (For those of you not familiar with my area, we don’t usually have snowstorms this early in the year and last year all the leaves where still on the trees, which made the foot of snow into a disaster leaving some of my friends out of power for 2 weeks. I got lucky mine came back on in 2 or 3 days, not too bad, considering. Well this time they are not calling for snow, but a WHOLE LOTTA rain and wind, and for a much longer time) Thank goodness for weather service, or I would have happily packed my bags for a week end hike and ended up blown away 🙁

Instead I might make some more soup tomorrow, and work on one of my little winter projects…

image
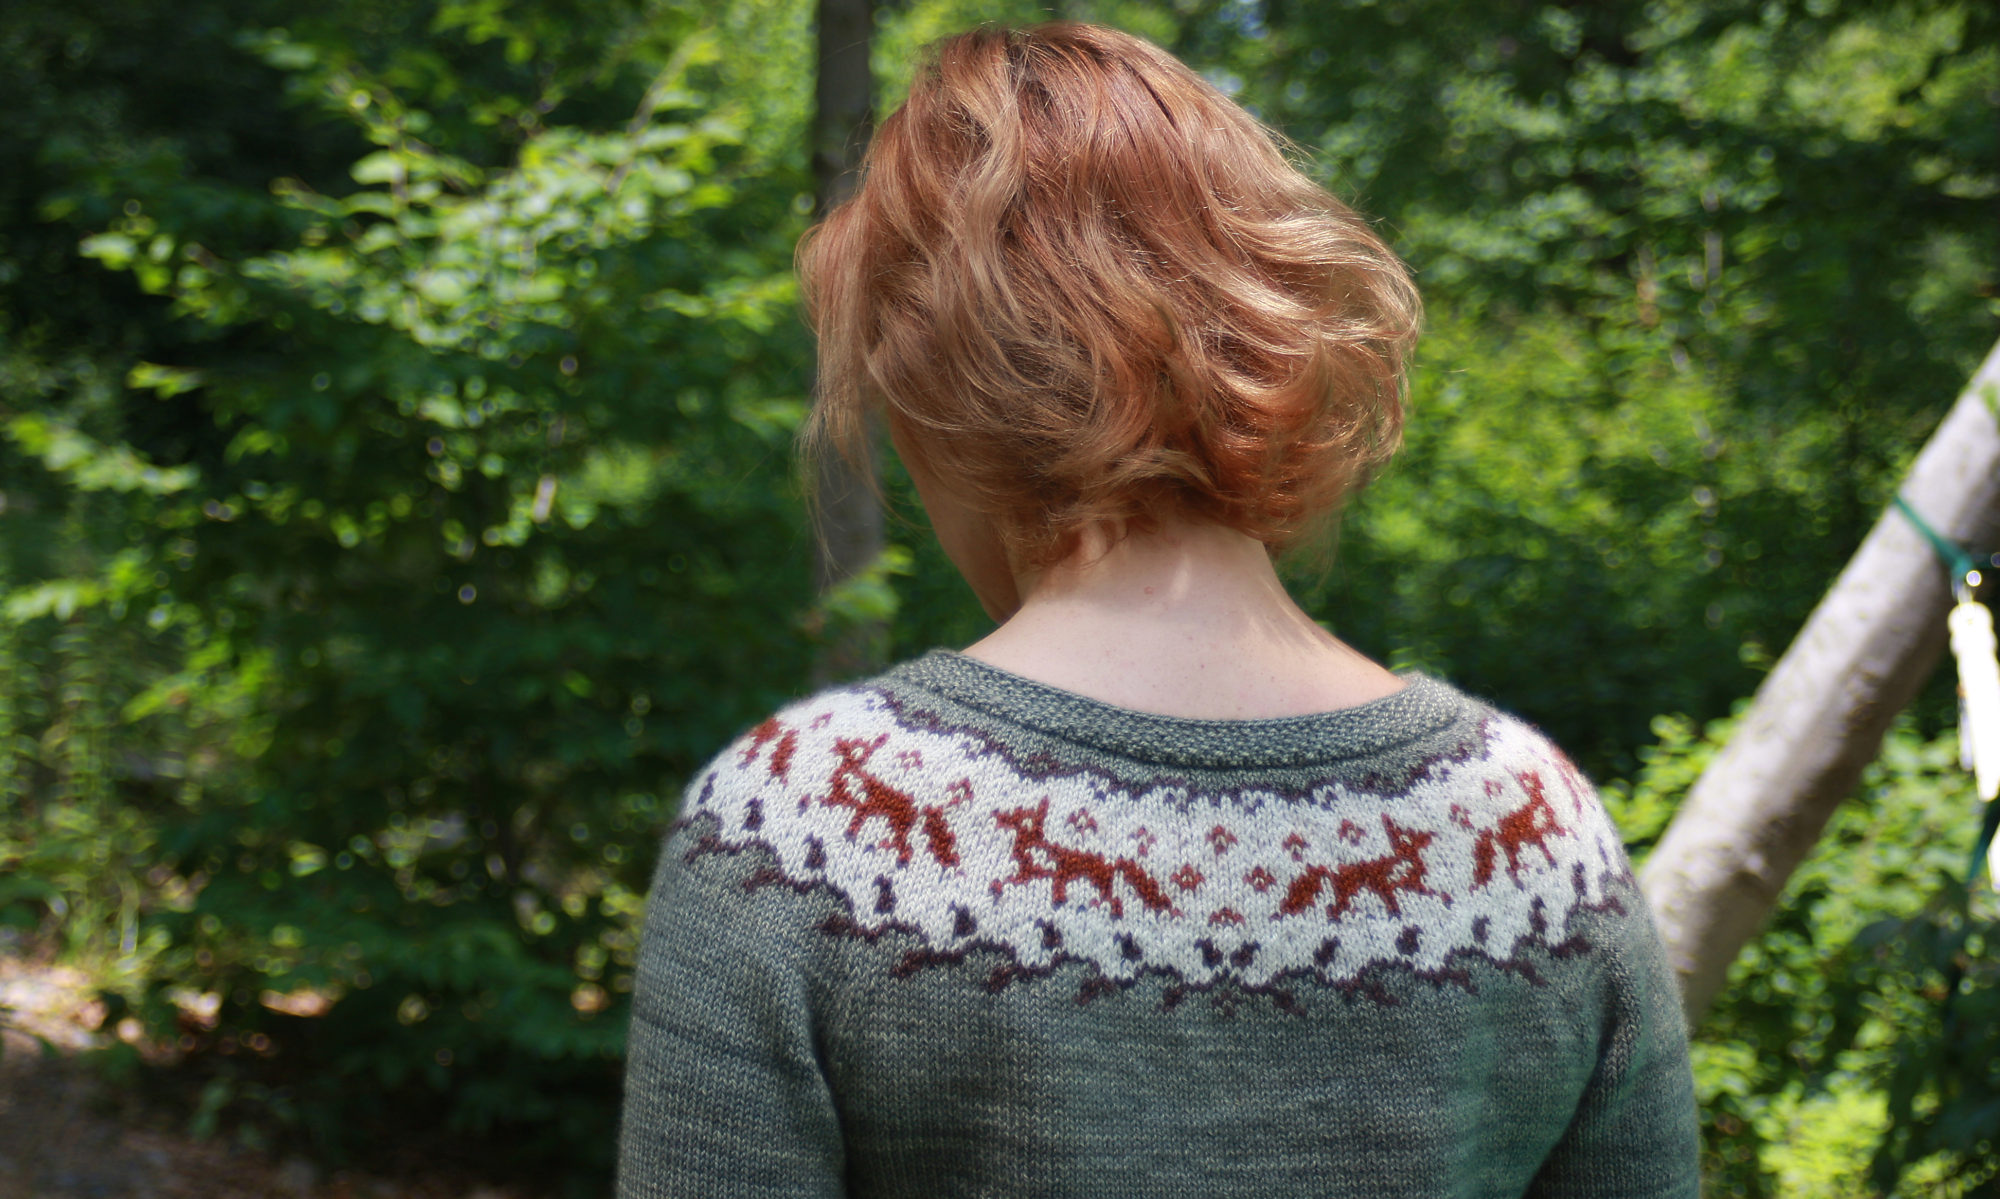
Pretty, right? You can get the pattern from Pam Powers’ website

image

Ingredients

  • 5 medium counter ripened tomatoes, yellow or red (sun ripened would work too), chopped
  • 1/2 onion, diced
  • 1 rapunzel vegan bouillon cube or 2 cups of vegetable broth
  • 1 cup cottage cheese
  • 1 medium carrot, grated on the coarse side of the grater
  • 1/2 cup Le Puy (french green) lentils
  • 1 red pepper, seeded, peeled and chopped
  • 3 sundried tomatoes, cut into small pieces
  • 2 tbsp pesto
  • 1 tsp salt
  • 1 tsp oregano
  • 1/2 tsp thyme
  • water, 2-4 cups

Directions

  1. Heat some oil over medium high in your soup pot, then add the onions and cook until slightly browned in spots, then add the tomatoes. Add salt, pesto and herbs and cook until the tomatoes render their juices (and it all becomes soup-y)
  2. Add the bouillon cube and about 4 cups of water (or 2 cups broth and 2 cups water) and bring to a boil.
  3. Add the rinsed and sorted lentils. Add the sun dried tomatoes. Bring to a boil and reduce heat to a simmer and cook until lentils are tender, about 15 to 20 minutes.
  4. In the meantime cook the bell pepper over the grill until blackened, set aside covered or enclose inside a paper bag, and when cooled enough to handle peel the blackened skin off (rubbing it with a paper towel works pretty well), then chop the roasted pepper and add to the soup
  5. Add the cottage cheese and stir until mostly melted.
  6. When the lentils are cooked, season the soup to taste with black pepper and more salt if desired

image© 2012 SimpleHealthyHomemade

Ricotta and Spinach Malfatti

image

I have a secret fascination with gnocchi, or dumplings or whatever you want to call them. I think the part that really gets me is the fact that you make a sort of dough and then dump it in boiling water, AND if you do it right, it doesn’t fall apart but cooks and comes out of the water the same shape it went in. Seems crazy that should work at all, right?


In the center shown with slow cooker sauce and sweet potato

Well, since we are on the topic, here’s another one I tried recently. With the fall weather setting in, I am veering over towards more substantial foods, but this one is surprisingly light and delicate, for a dumpling. It’s mostly ricotta after all! Still fascinated that they hold together in the water, although it just occurred to me, duh, that pasta is essentially dough as well, cooked in water. I guess the fact that pasta is much drier and flat never allowed me to make the connection? 🙂 Now granted these are a bit more delicate than Spaghetti, and need special precautions, but as long as you keep the water just below a serious boil, you’re good to go. And they are worth every minute spent on making them. Don’t let the long list of steps scare you off, they are much easier to make than it is to describe how to make them, seriously!

image

Malfatti which translates literally as ‘ badly made’ are a regional specialty from Italy. I had first seen them on menus and tables back in Europe, then heard about them again when I started reading Robert’s blog, and his recent post on flour-less Malfatti reminded me to finally give them a try. Not flour-less, I’ll leave that for later, since that seems to require a bit more dumpling experience, I hear.

image

Another thing to keep in mind before running to your kitchen: all the recipes I saw recommended draining the ricotta in a cheesecloth lined colander, in the fridge overnight, some with a weight on it. However my ricotta did not cooperate and drained nothing, so here’s my solution: When ready to make the dough, blot with several changes of paper towels, squeeze and blot several times before placing in a large bowl.

image

So here’s what you need for the ‘screwed ups’ or Malfatti

Ingredients

  • 2 cups ricotta, drained in cheesecloth in the fridge overnight
  • 1/2 to 3/4 cups flour
  • 1 egg yolk
  • 1/2 tsp salt
  • semolina (or corn meal) for dusting so they don’t stick
  • 1/3 cup grated Pecorino Romano or other hard italian cheese

image

Directions

  1. Drain the ricotta overnight in the fridge in a cheesecloth lined colander over a bowl or blot with several changes of paper towels, squeeze and blot several times before placing in a large bowl.
  2. Separate the egg yolk from the egg white, reserve egg white for another use, and add the yolk to the ricotta bowl.
  3. Cut the spinach leaves into a chiffonade (roll up a few at a time and slice thinly) then add with the salt to the ricotta. Stir with a fork until mixed.
  4. Sprinkle 1/2 cup of the flour over the ricotta mixture and using a spatula or your fingers, gently incorporate until just coming together.
  5. Prepare a baking sheet with a non stick mat ans sprinkle with semolina.
  6. Generously flour a work surface, turn out the dough onto the surface an knead 4 to 5 times. (Do NOT overmix or the dough will get tough = not good)
  7. In the meantime, bring a large pot of salted water to a boil, then reduce heat until just at a simmer and no big bubbly movement can be seen in the water.
  8. Using 2 teaspoons, cut a piece from the dough, shape and place on the prepared baking sheet. Repeat with remaining dough. Sprinkle all the Malfatti with semolina while they are ‘waiting’
  9. Gently slide dumplings into simmering water, 5 to 6 at a time and cook until they float to the surface. Scoop out using a wire skimmer and place back on the baking sheet.
  10. Preheat broiler on low and when they are all cooked, sprinkle with the Pecorino and quickly finish the Malfatti in the oven until the cheese melts, they should stay white.
  11. Serve with any sauce that makes you happy.

image

© 2012 SimpleHealthyHomemade

Banana ‘Fritters’

imageOr what to so with those ‘ugly’ bananas…

image

Maybe I am just weird but I tend to believe that others out there do not like mushy bananas either. You know, the ones that sit in the fruit basket forgotten like the proverbial step child until, without warning suddenly they turn brown, in a matter of hours it seems. Alright, admittedly I am exaggerating, but I just really do not like them even when they start getting the little brown spots. At least not for eating as a banana. No, at that point I will resort to using them up in all manners of ways that I came up with over the years (I don’t like to waste and throw them out after all) from smoothies to sweetener in baked goods and muffins, to ice cream topping, I have tried most anything. How about you guys, do you have any favorite banana-use recipes?

image

This would be great as a snack or an indulgent breakfast: Pancake batter banana ‘fritters’. Since the bananas get soft and extra sweet as they cook, no need for syrup. Haven’t tried this, but some chocolate spread, like Nutella might be good…

Ingredients

  • You need a few ugly bananas (very ripe)*
  • leftover pancake batter (or for a simple recipe go here)
  • short Bamboo skewers (to fit in the pan)

* one banana makes about three skewers on average.

Directions

  1. Slice bananas into rounds, about 1/2″ thick and thread 3 to 4 pieces onto short bamboo skewers (if you only have the long ones, cut them in half before or it won’t fit in the pan) You want to thread them on like you are making a flat snow man, if that makes sense (so they lie flat)
  2. Heat a skillet over medium high, when it’s hot, add a bit of oil and swirl to coat
  3. Put the pancake batter in a shallow dish and dip, first one side then the other, of the banana skewer until the slices are completely coated in batter.
  4. Cook in the preheated pan until set and slightly browned, then turn over and cook on the second side. Depending on the size of your pan, you can cook 3 to 4 skewers at a time. Enjoy hot!

Because of the skewer they are easy to pick up and eat!
image© 2012 SimpleHealthyHomemade

Leek and Sausage Ragù

imageLate summer and the last tomatoes are picked from the garden. They are currently occupying the best part of my counter in order to go from green to a more desirable color… In the meantime the leeks are getting to the size where it’s worthwhile cooking them and even though I did not use our own tomatoes for this one, I just had to have some of the gnocchi we made the other day. And you know what? Sometimes I find the pretty red tomatoes from the garden a little too special for sauce, especially now, that there aren’t any more coming, so I am okay with using a can once in a while 🙂

image

Ingredients

  • 28-oz. can whole peeled tomatoes (preferably San Marzano)
  • 1/2 lb. sweet Italian sausage (about 2 links)
  • 3 tblsp extra-virgin olive oil
  • 1-2 leeks (white and light-green parts only), cut into rounds and rinsed well(about 1-1/2 cups)
  • 1 tsp chopped fresh thyme
  • 1 tsp chopped fresh oregano
  • 1 small clove garlic, crushed
  • 1/2 tsp salt, or more to taste
  • Freshly ground black pepper
  • grated Parmigiano, lots (about 1 cup)

image

Directions

  1. Heat 2 tablespoons olive oil in a heavy bottomed sauce pan or dutch oven over medium heat, add the onion and cook until translucent but not browned. Add the garlic, turn the heat up slightly and cook both until golden (not brown). Add the salt and spices, stir
  2. Add the can of tomatoes and crush with a wooden spoon so the pieces break apart. Bring to a slow boil.
  3. Squeeze the sausage from its casing, ‘dispensing’ meatball sized chunks into the boiling sauce, cook until sausage is cooked through, about 5 minutes. 
  4. Turn down to a simmer and let cook for an additional 15 to 20 minutes for flavors to blend, season with black pepper to taste and serve over potato gnocchi with lots of Parmigiano cheese.

image© 2012 SimpleHealthyHomemade

Potato Gnocchi

image

With the cooler weather, the desire for more substantial foods comes back as well. Thicker sauces and thicker sweaters are a hand in hand occurence in this house. I crave different foods when the weather changes, and a good plate of airy and light yet filling gnocchi has never been passed off by this girl here. But when you research or ask around, it seem that short of moving to a monastery in the Italian Alps and apprenticing for a solid three years, or at least adopting an Italian ‘Nonna’ (and they are hard to come by), there is no chance that you might even come close to something edible. Light and delicate and not rubbery, dense or chewy is what I am dreaming off and honestly due to all the info and feedback, it took me a good year of just looking at my potato ricer (that was purchased with just this very task in mind) before I attempted my first batch. When I finally went for it, I could hardly believe how simple it seemed. Had I only realized that it would be so easy to make these from scratch I would have eaten them weekly.  So sadly I have lived without gnocchi for quite some time, having been served lumps of what must have been an illegitimate love child of paste and rubber, I had been too scared to even try the frozen variety at the store. Anyone know if they are any good?

But taking an afternoon and making a batch of nice, homemade gnocchi, is going to give you the best result. You just have to be mindful of a couple of important points and you should have no trouble creating a lofty, delicate gnocchi!

imageMy little gnocchi factory 🙂

Go ahead, give it a try! The important factors (from my research supplemented by my limited experience) are using a potato ricer, and just barely putting the dough together, if you knead it as many recipe’s are calling for, it will get dense due to the gluten developing inside the dough, and last but not least of course, the type of potato is important too: Russet, or another starchy variety is recommended.

imagemakes enough for about 3 meals for 2 people

Ingredients

  • about 2 lb of Russet potatoes (I used 3 big ones, might have been more than 2 lb, but that’s what most recipe’s call for)
  • 1 egg
  • 1 to 1 1/2 cups of flour
  • 1 tsp salt

image

Directions

  1. If necessary, cut the potatoes into manageable pieces (so it fits in a pot) and cover with cold water, bring to a boil over medium high heat. Reduce heat and cook, covered, until cooked and tender when tested with a knife.
  2. Drain and set aside until juts cold enough to handle, peel the potatoes, cut in half and pass them through a potato ricer into a large bowl. Set aside, uncovered to cool to almost room temperature, about 20 minutes. (They need to cool down to the point where they won’t cook the egg that will get mixed in)
  3. Slightly scramble the egg, then add to the potatoes with the salt and stir with a fork until mixed in.
  4. Add about 1 1/4 cup of flour and gently incorporate into a crumbly dough, using your hands. Make sure the flour is all moistened then press all of it together against the bottom of the bowl.
  5. Generously flour a work surface and wash your hands. Turn dough out onto floured surface and quickly knead until the flour is fully incorporated and the dough is soft and a little tacky but feels delicate and mostly smooth. About 30 seconds to 1 minute max. (do NOT overwork or the gnocchi will be tough)image
  6. Place dough back into bowl and cover with a kitchen towel to prevent it from drying out.
  7. Line two baking sheets with parchment and flour lightly, set aside.
  8. Lightly re-flour work surface and using a piece of dough about the size of a small orange, roll into a 3/4″ diameter roll on the floured surface, below the palms of both your hands.image
  9. With a sharp knife, cut the rope about every 3/4″so you get a little dough piece roughly 3/4″ square. Traditionally Italian Gnocchi have little ridges that are made by pushing/rolling the gnocchi over the tines of a fork, but you could just as well leave them in the ‘pillow’ shape after cutting.image
  10. Place the gnocchi in a single layer on the prepared baking sheet, and repeat until you used up all the dough.
  11. If you are going to cook them within the next 2 to 3 hours, you can leave them out on the counter,otherwise place in the freezer(on the sheets) and when frozen store them in zip top bags for use anytime!
  12. To cook, bring a pot of salted water to a rolling boil and slide the fresh gnocchi off the parchment into the water, about 15 to 20 at a time, stir and cook for 1 minute after they float to the surface. If they are frozen, cook right from the freezer but cook less at a time as the water temperature comes down when you add frozen things and the gnocchi will end up falling apart before they cook or (not sure what’s worse) become soggy.

image
© 2012 SimpleHealthyHomemade

Nelson’s Pepper and Mushroom Soup

image

After watching me make soup a couple of times, Nelson surprised me the other night by making a soup of his own, using what we have, just like I would, he whipped up the most delicious little soup one can imagine! And all from the things that needed to be used up: 2 sad looking zucchini squash, celery, 4 mushrooms leftover from making pizza on Friday, the rest of the pizza sauce, a can of pinto beans, some speck and a lovely misshapen red peppers that were on ‘quick sale’ at the store. Oh, but I wouldn’t do it justice by forgetting the not-all-that-hot looking little hot pepper we got from Dawn’s garden that spiced up the whole pot. It was super awesome! I might be odd, but I had to have some for breakfast today, yes, it was that yummy 🙂

image

Ingredients

  • 2 tablespoons coconut or olive oil
  • 1 onion chopped
  • 4 big button mushrooms, cut into chunks
  • 3-4 stalk of celery, chopped
  • 1 can Pinto beans, rinsed (or frozen equivalent)
  • 1 small green zucchini
  • 1 small yellow squash
  • 1 8 oz can of tomato sauce (or about 1 cup leftover pizza sauce)
  • 1 red bell pepper or ‘sweet ancient’ (long and funky looking)
  • 1 hot red pepper (cherry or the one we had which looked innocent like a mini bell pepper)
  • 1/4 cup diced Speck (pronounced “Shpek”, German slab bacon, cut into cubes)*
  • water (which should not be underestimated when making soup)
  • 1 tsp salt
  • 1 no salt added vegan broth cube from Rapunzel

*For vegetarian option, leave the Speck out, but make sure you blacken the red bell pepper, to give the soup some smoky depth.imageThe odd little bag, you ask? Yes, that’s my frozen beans, I soak and cook beans for several meals and freeze them in snack size bags = just about a can of beans

Directions

  1. Heat oil in a soup or stock pot, add the diced onions, celery and sweet red pepper, cook until softened and just starting to brown slightly.
  2. Add the mushrooms and speck and cook just another minute before adding about 4 cups of water, the vegetable bouillon cube and the pizza or tomato sauce. If the beans are frozen, add them at this point.
  3. Bring to a boil and cook until vegetables are tender and the soup gets cloudy looking and thickens a little, then add the finely diced hot pepper
  4. In the meantime, cut the squash lengthwise into spears and chop into pieces, add to the soup and cook for another 5-10 minutes.

image

Good with Rosemary Soca or corn chips!

image

© 2012 SimpleHealthyHomemade

Sweet & Spicy Pretzel Mix

image

I admit, I did not make the pretzels. I only made them into something. Something better, or so I like to think.
I started out with no salt added pretzels. Why? Because there is so much sodium in and ON regular pretzels that I’d rather just add some myself. At least then I know how much and I can use my RealSalt or Himalayan salt. This is a super easy snack mix that looks and tastes a lot more expensive than it is to make. Make a double quantity and serve it up for cocktail hour at your next dinner party.

image

Ingredients

  • 2 cups salt free pretzels
  • 1/2 cup pecans or almonds
  • 2 tablespoons butter, melted
  • 2 tablespoons dark brown sugar
  • 1 teaspoon cayenne pepper
  • 1/2 teaspoon ground chipotle pepper
  • salt shaker with salt of choice

image

Directions

  1. Pre heat oven to 300ºF
  2. In a large bowl, combine the melted butter and brown sugar and stir until dissolved.
  3. Add the cayenne and chipotle, adjust the spice level down if necessary (start with just 1/2 teaspoon cayenne and omit the chipotle, if you are sensitive to heat) and mix well
  4. Add the pretzels and toss until evenly coated, then add the nuts and mix until they are coated too.
  5. Spread in a single layer on a parchment lined baking sheet, sprinkle with salt and bake 15 to 20 minutes.
  6. Let cool completely before serving.

image

© 2012 SimpleHealthyHomemade

Rosemary Black Pepper Socca

image

Socca, a delicious street food from the south of France, more exactly Nice (in Switzerland, Nizza as the city is known in italian) is something I just recently discovered. I know, right? not while travelling in France, mind you, but living on the good old East Coast of the US. Which just goes to show that good food knows no boundaries.

image

“La socca de Nice, ou socca caouda, est un des plats les plus populaires de Nice semblable à une grande crêpe mais à base de farine de pois chiches et cuite au feu de bois.
A l’origine, c’était le plat du pauvre, bon marché et consistante.”

Basically saying: Nice’s ‘Socca’ is one of the most popular dishes from that region, resembling a big crêpe but made from chickpea flour and cooked over wood fire. Originating as poor folk’s dish, cheap and filling

Today, it is as much casual as it can be sophisticated, and a crowd pleaser at any dinner invite or potluck. Plus since it is naturally gluten free and vegan, can be served to most anyone. Best of all it is super easy to make but tastes incredible! Use a cast iron skillet for best results but I have also come across folks making it in a  pie dish, during my internet research. Traditionally it is made on a large copper disk, over very high heat and in a very hot oven. As with most street food (I was going to say any, but the Malaysian Roti Canai might be the exception to the rule) it is easy to prepare and therefore I figured must be a good candidate for outdoor cooking.

I have even had success making this directly on the  camp fire (since traditionally it is cuite au feu de bois, I had to) while camping but there are no pictures to prove it, so in this day and age, it never happened, lol. The one I did manage to get pictures of was made on my camp stove. And maybe here would be a good spot to apologize for the quality of some of the pics in this post, it was quite dark when I took them. Though I have to say, my headlamp functioned quite well as a backup flash for my cell phone, no?

image

You can make this easily in the oven at home, but since I had a little weekend away at a campfire planned, I decided to hone my socca making skills on a real fire. Maybe not entirely traditional, since much thicker than usual, but entirely too yummy not to share 🙂  I might post a more traditional version at some later time, we’ll see, but for camp fire cooking, this is taking it out of the hot dogs and smores category that often comes to mind when hearing ‘camping’. To make things extra easy, combine the flour, salt and pepper in a zip top bag before leaving and all you have to do is add the oil, water and rosemary at cooking time!

imageHere shown with beef and red pepper kebabs, a match made in heaven!

Ingredients

  • 1 cup chick pea flour*
  • 1 cup water
  • 1/2 onion diced
  • 1 1/2 tsp salt
  • 3-4 tablespoons olive oil
  • 1/2 tsp black pepper
  • 2 tablespoons fresh rosemary

*chickpea flour can be found at many health food stores or the gluten free section of your grocery store. But the cheapest way is to find an Indian grocer and get it there, it’s called ‘Besan’image

Directions

  1. Heat 3 tbsp olive oil in a 8″ cast iron skillet*, cook the onions until soft, turn down the heat and cook for another 10 to 15 minutes until starting to brown and caramelize. Set aside return the skillet to the heat, and keep heating on medium high.
  2. Mix chick pea flour, water and 1 tsp salt, stirring with a whisk or fork until all lumps are gone. Set aside (you can make this and use it right away or set it aside for several hours, it’s all good)
  3. Over high heat, in the same skillet, heat the remaining oil, then pour in the batter. After cooking for one minute, sprinkle the top evenly with the cooked onions and rosemary, and remaining 1/2 tsp salt, then cover with a lid until cooked through and the top is set about 5-7 minutes. Serve hot as a side to roasted meat or eat on its own.

* If you have a 10″ or larger skillet, the result will be thinner and take less time cooking.

The setting during the day…

image© 2012 SimpleHealthyHomemade

Bircher Müesli

image

You may know versions of it as ‘musli ‘, but this cereal based dish has its roots firmly planted in Switzerland. Dr. Bircher decided, at a time when everything was cooked due to germs, that there were benefits to real and raw foods.

Per my research, for those who care to dive a bit deeper: Dr. Maximilian Oskar Bircher-Benner  (or in german) (August 22, 1867, Aarau – January 24, 1939) was a Swiss physician and a pioneer in nutritional research. At his sanatorium in Zürich, a balanced diet of raw vegetables and fruit was used as a means to heal patients, contrary to the beliefs commonly held at the end of the 19th century.image

Bircher-Benner changed the eating habits of the late 19th century. He believed eating raw and whole foods such as fruit, vegetables, grains and nuts was healthier than cooked, he also rejected the use of refined products such as white flour and white sugar. His ideas may not all have been correct, he believed solar energy stored in food (in a not strictly defined or explained way) was what made them better and not the quantity or quality of nutrients. His theory of life was based on harmony between people and nature. Some of his ideas originated from observing the daily life of shepherds in the Swiss Alps, who lived a simple and healthy life.

image

By now this recipe has as many variations as there are days in a week, multiplied by the number of people in Switzerland (my Dad says we Swiss people are born with the Bircher Müesli recipe attached to the umbilical cord 😉 this is my basic recipe and it’s variations.


Walking though the aisles in a grocery store, you will find commercially made musli mixes, including everything from dried fruit to chocolate chips. This is the commercially available basic Swiss version I found at the store the other day!


image


It’s quite a popular food these days, it seems to me. But here I am taking you back to the roots, the origins of where this all came from. (using my important voice)


And let’s face it, why waste money on prepackaged stuff when you can make a better and healthier-for-you version easily at home? No cooking required and easy to make, this recipe is very versatile and adapts through the seasons depending on your fridge or gardens content of fruits and berries.

A great summer meal, I love it anytime of day, but in Switzerland, it is not considered a breakfast food. It is eaten as alight lunch or dinner with a buttered slice of crusty bread. (We love our bread) …And sometimes some whipped cream on top…

image

I always put it up to my Dad being a foreigner, him never being super exited about Bircher Müesli, but now I am wondering if it is a guy thing. Let me explain. The other morning over breakfast, Nelson kept talking about ‘having some ‘Beatle Music’ and pssssshhhh totally over my ehad. Well, I figured it out Beatle Music = Bircher Müesli, hahaha. Of course I thought he meant ‘beetle music’ and was utterly confused, imagining a line of beetles tapping their little feet (or legs?) rhythmically, so sadly I was left with the impression that maybe he did not like my ‘Beatle Music’ turns out he does, it’s after all juts a better version of oatmeal, cold and with fruit!

image

Ingredients

  • 1/2 cup rolled oats
  • 1/2 cup rolled wheat, barley, millet, and/or rye flakes (you can use all oats instead)
  • 2 tablespoons sliced almonds
  • 2 tablespoons raisins
  • 2 cups milk
  • 1 yogurt (optional)
  • 1 apple
  • 1 banana
  • 1 1/2 cup mixed fruits and berries (plums, peaches, apples, pears, oranges, grapes, strawberries or even frozen blueberries, the possibilities are endless)

optional: you can also add chopped roasted hazelnuts, pieces of dried fruit or banana)

image

Directions

  1. In a large bowl, combine the cereal flakes (or just the rolled oats), raisins, almonds and hazelnuts and 1 1/2 cups of the milk.
  2. Grate an apple on the large holes of a grater, stir to combine.
  3. Cover and let stand 1 hour or until the oats are softened.
  4. Slice the banana, chop the peach and the berries (used in the picture are peach, plum, strawberry, banana and apple) or whatever other fruit you have on hand.
  5. Uncover the bowl, stir in the yogurt (if using) and the rest of the milk (You can add more if it looks dry) then add all the fruit, gently mix so one person doesn’t get all the fruit and serve.
  6. Store any leftovers in the fridge and eat within 2 or 3 days

image

Healthy Breakfast!

image

© 2012 SimpleHealthyHomemade