Grilled Pizza

With it being unseasonably warm again this past weekend, (as a disclaimer, I haven’t actually checked the average temperature this time a year, but somehow got used to the more frosty temperatures) I wanted to take advantage of my grill at least one more time. And, if you haven’t tried it before, pizza from the grill is the best! So following is a short tutorial on how to get the perfect Pizza off of the grill; and go ahead, have all the toppings you want!

This makes 2 pizzas, and serves four average sized appetites, however I have one time eaten a whole pizza in one sitting, not just a half, after a weekend out hiking and such. So I’d say depending on your level of activity.

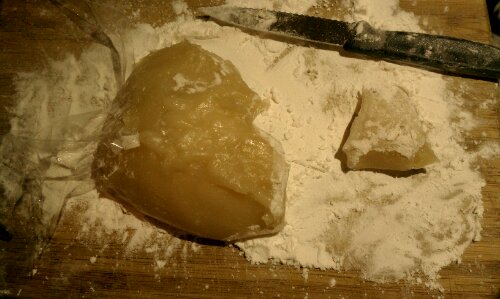
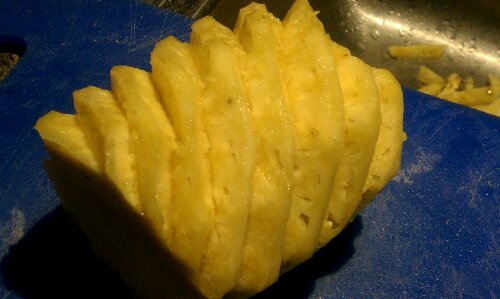
    Ingredients, puffy pizza before flipping over, and toppings on ready to close the lid and let the magic happen!

Ingredients

  • 1/2 to 3/4 lb pizza dough (homemade or store bought)
  • 1 to 1 1/2 cups pizza sauce (store bought)
  • 1/4 lb to 1/2 lb Mozzarella cheese
  • Flour, to roll dough out on
  • Semolina or cornmeal, for dusting
  • Assorted toppings of choice, some suggestions:
  • Olives
  • Sliced ham
  • Red peppers
  • hot pepper flakes or sliced hot peppers
  • Salami, sliced
  • additional cheese (like Fontina, or blue cheese)
  • Capers! (I love capers 🙂 )
  • Oregano and basil
  • Anchovies
  • Pineapple

Directions

  1. Heat your grill to high/hot. 
  2. In the meantime, prepare all the ingredients so you have them ready and they can quickly  be put on the pizza. Set aside
  3. Divide the pizza dough into two balls, place one on a generously floured surface and roll out until very thin (less than a 1/8″), don’t worry if it gets odd shaped. Set aside on a sheet or pizza peel dusted with semolina or corn meal. Resist the urge to fold dough in half, it can get sticky quickly, I tried it, I know…
  4. When the grill has reached at least 400 F (You can get a thermometer for your home grill, but I have successfully made this over open fire while camping, it just needs to be hot), rub the grates using your grill thongs and a balled up paper towel with a little oil on it.
  5. Now you’re ready to start the pizza: Slide the rolled out dough, one piece at a time from the peel onto the grill grates, then close the lid and grill until slightly browned on the bottom. (They may become big and puffy as the water evaporates inside the dough due to the high heat. Don’t worry about that, just poke them with your spatula before you flip them over.)
  6. Flip the pizza, and quickly spread the sauce onto the dough, from the center out until about 1/2″ from the edge. Spread with Mozzarella, then top with any of your favorite toppings. ( You want to do this quickly to not lose too much of the built up heat inside the grill) Close the lid and finish cooking the second side until bottom is browned and crisp and the cheese is hot, bubbly and melted all the way. On a gas grill it might be necessary to turn the heat down a bit at this time.
  7. Slide off the grill onto pizza peel, and serve.

image

© 2012 SimpleHealthyHomemade

Harvest time or how to winterize your pantry

All the leaves are already past full color or already gone and I am enjoying the last couple of warm days ( presumably) until spring. It’s Fall and with Winter fastly approaching, I am going a bit into storage mode here. I guess yet another thing leftover in our system from long ago. But doesn’t the cold weather make you want to gather things too, stash them and store them up for the colder times coming? Winter IS coming. I feel like the guys from that HBO Series ‘game of thrones’ (I don’t have a TV, I got hooked on the books), if you’re watching that, you know the Starks of Winterfell, with their “winter is coming”. Crazy story, in that world they live in,  the seasons can last a lifetime, but just imagine once the tide is turning and you are facing Winter, and you don’t know for how many years? Gosh, makes you depressed and want to hibernate just thinking of it! I sure am glad we got four seasons, neatly coming around once a year, or thereabouts. Lately one wonders sometime, no?

In the last couple of weeks I made a yummy soup with the last couple of tomatoes from the garden, you know the rock hard green ones I saved from the hard frost the other week, now they finally made it to yellow and red and usable 🙂
But here’s what really convinced me its fall and getting colder, my saffron crocuses are blooming. Some days five or six others four at a time. Each little flower grows only three stigmas, and you have to hand pick and then dry them.   It takes 110,000–170,000 flowers or two football fields to gross one kilogram. No wonder this is the most expensive spice in the world! The average retail price is $1,000 per pound, or US$2,200 per kilogram. But boy is it awesome when you have that saffron risotto made with your very own hometown saffron! I don’t pluck the whole flower like in the picture below, I like having them bloom out there between all the fallen leaves.

 Kashmiri woman harvesting saffron flowersPart of my little harvest: dried on the left, fresh on the right

Please be aware that the saffron crocus is NOT your common garden crocus which bloom in the spring, that one is poisonous…

Other than that I have been busy preserving things for the colder months. I got a dehydration. Yeah, I finally broke down and bought one. So now i can dry apple slices and more…
I made mummy dries cinnamon apple and dried pineapple. Great for hiking. Weights nothing and tastes great!

imagePineapple dehydration is extremely useful when the pineapple isn’t as ripe as it looked at the store!

image

For the cinnamon apples, just slice thinly and sprinkle the apple slices with cinnamon before drying in the dehydrator in a single layer.

image

And I had to replenish my beans, as I ran out of black beans sometime before making the Santa Fe Chicken Soup and had to improvise with dark red kidney beans. Which by the way worked just fine 🙂

And of course I have been taking advantage of all the fall bounty in produce. With the shift to colder weather our bodies need different foods than in the summer. Cut back on cold salads, and reach for something warm, whether it’s a simple homemade vegetable soup,  braised brussels sprouts or a creamy soup, you need something warming and sustaining. Orange is the color of the season and sweet potato & co. are calling my name!

I have been enjoying Pumpkin Crêpes,  Pumpkin Cream Cheese stuffed French Toast, Apricot Pumpkin Muffins,  Kabocha Chowder and these Sweet Potato Spätzle, recipe will be up in the next couple of days, so check back soon!

© 2012 SimpleHealthyHomemade

Beans and how I cook them

imageSoaking the beans in plenty of water overnight is essential
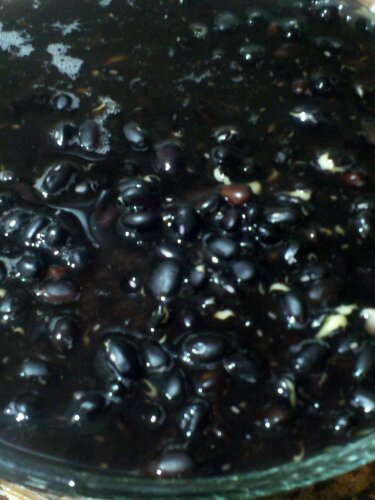
With making most things from scratch, the question sooner or later arises: What about beans? As I have mentioned before, I do cook my own beans and then package them rather than buying cans. It’s first of all cheaper, then it’s also better for the planet and most likely much healthier for you, not only due to the sodium content in most canned varieties but due to the materials used in the can lining that have come under more and more scrutiny lately. And if that does not have you convinced to cook dried beans, maybe the fact that they just taste so much better will! And it is really not all that time consuming if you are organized about it. Yes, it is easier if you have a pressure cooker, like the one I brought back with me from Switzerland. Mine is a Kuhn-Rikon Duromatic, kinda like this one, but any good quality pressure cooker would make your life easier, not just for beans (Do NOT get the cheapo ones with the wiggly-rocking-weight-thingy balanced on top, not worth it)

imagethe next morning: after soaking

I usually cook a couple of pounds of beans in one day, depending on the size of your cooker (refer to the manufacturers guidelines) about a pound at a time. So yes, I will cook several batches, one after another and then store them in the freezer for an easy addition to soups and other meals. I know some resources say that you can cook the beans without soaking, or ‘quick soak’ them by letting them sit in boiling water, here’s my experience: You know all the things beans are supposed to do to you, the bad things why folks don’t want to eat beans? In my experience, the gentler you prepare the beans the less they cause you to have to forego your upcoming social appointments. 😉 That includes soaking them overnight, draining and rinsing them before putting them in the cooking pot and cooking over gentle heat. Yes, it takes a bit longer but the results are way worth it.

Trust me.

Have I ever led you astray? No? See!

image Finished Product: Black eyed peas

Here’s the way I like to do it. You need:

  • 1 lb dry beans, soaked overnight
  • water
  • snack sized zip top baggies (about 6-8 per pound)
  • 1 or 2 gallon sized freezer bag
  • pen for labeling

For most beans: 1 pound dried beans = 2  cups dried = 4 – 5 cups cooked beans= 3-4 cans of beans!

  • Rinse the dried beans in cold water, then to soak overnight place in a good-sized bowl (the beans will swell and get bigger as they soak up the water) and cover with cold water. You want them covered by at least two inches of water.
  • In the morning drain and rinse the beans, then put them in the cooking pot of your choice
  • Option A: Regular pot is fine, just cover with plenty of water and bring to a boil then reduce and simmer until tender, can take 1-2 hours depending on the variety.  
  • Options B (my preferred method): Pressure Cooker, (following manufacturers guidelines) For mine that means cover with about a finger’s width of fresh water, close the lid and place on the stove over medium heat. Slowly heat until the pressure valve gets up to the first red ring, turn heat to low and set your timer (*see below). 
  • After releasing the pressure from the cooker by running cold water over it, open and drain the cooked beans in a colander in your sink until cool, then package in snack sized zip top bags, and store 6 to 8 baggies in a gallon sized bag labelled with the type of bean and the date before putting in the freezer.

*Some of my favorites are listed below; with the times that I have found produce perfectly cooked beans (I will update as I add more species and specifics)

All ready to freeze, packaged in portions ( I could probably have let them cool a little longer,a s you can see there is condensation in the bags)

And please understand that every pressure cooker is different, the beans could be fresher or older, so you do need to experiment a little. A lot of times I can tell by the smell of the steam escaping the pot if they still smell ‘green’ and need more cooking. I pre-soak all of these beans, unless otherwise stated. I also find that letting the pot stand off the heat for a while before releasing the pressure by running cold water over the outsides and the top keeps the beans nicer. NEVER EVER try to open a cooker that is still under pressure, this could be highly dangerous as the water still boils inside the cooker long after it’s been removed from the fire! Also too drastic of a pressure change and they tend to burst, same when you cook them at too high a pressure, so stick with the first red ring. This is not an activity to watch TV next to. 

Type of bean: time at first red ring: standing time before releasing pressure:

  • Small Red: 4-5 minutes: 5 minutes: then run cold water over sides and top
  • Adzuki Beans: no soaking 5 minutes: 6 minutes: then run cold water over sides and top
  • Baby Lima: 5-7 minutes: 3 minutes: then run cold water over sides and top
  • Black Eyed Peas: 6-8 minutes: 4 minutes: then run cold water over sides and top
  • Cannellini Beans: 8 minutes: 4 minutes: then run cold water over sides and top
  • Black Beans: 9 minutes: 6 minutes: then run cold water over sides and top
  • Red Kidney Beans: 10-12 minutes: 6 minutes: then run cold water over sides and top
  • Pinto Beans: 10-12 minutes: 6 minutes: then run cold water over sides and top
  • Chick Peas: 10 minutes: 4 minutes: then run cold water over sides and top

Some tips:

*Buy beans at a place where they have a quick turnover. WHile they are dry and will keep a long time, quality will diminish over time, just like with anything else you eat. Buy your beans at a latin or indian grocer, folks that eat a lot of beans tend to not have them on the shelf as long.

* Don’t salt beans until they are cooked, or you are adding to the cooking time! (I usually forget in the end and just salt when using the beans)

*Do not mix beans from two packages bought at different times. Cooking time varies with how old and dry the beans are as well as by variety and a new bag plus one that just showed up in the back of your pantry could cook at different times leaving some beans hard and some mushy.

image

© 2012 SimpleHealthyHomemade

Potato Gnocchi

image

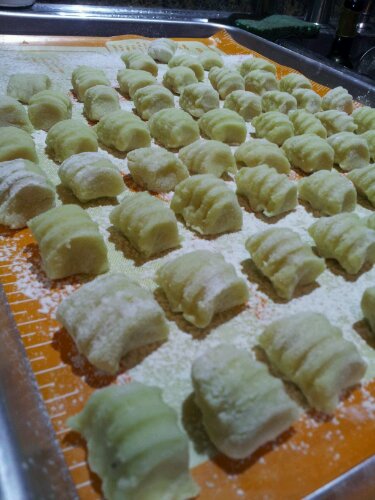
With the cooler weather, the desire for more substantial foods comes back as well. Thicker sauces and thicker sweaters are a hand in hand occurence in this house. I crave different foods when the weather changes, and a good plate of airy and light yet filling gnocchi has never been passed off by this girl here. But when you research or ask around, it seem that short of moving to a monastery in the Italian Alps and apprenticing for a solid three years, or at least adopting an Italian ‘Nonna’ (and they are hard to come by), there is no chance that you might even come close to something edible. Light and delicate and not rubbery, dense or chewy is what I am dreaming off and honestly due to all the info and feedback, it took me a good year of just looking at my potato ricer (that was purchased with just this very task in mind) before I attempted my first batch. When I finally went for it, I could hardly believe how simple it seemed. Had I only realized that it would be so easy to make these from scratch I would have eaten them weekly.  So sadly I have lived without gnocchi for quite some time, having been served lumps of what must have been an illegitimate love child of paste and rubber, I had been too scared to even try the frozen variety at the store. Anyone know if they are any good?

But taking an afternoon and making a batch of nice, homemade gnocchi, is going to give you the best result. You just have to be mindful of a couple of important points and you should have no trouble creating a lofty, delicate gnocchi!

imageMy little gnocchi factory 🙂

Go ahead, give it a try! The important factors (from my research supplemented by my limited experience) are using a potato ricer, and just barely putting the dough together, if you knead it as many recipe’s are calling for, it will get dense due to the gluten developing inside the dough, and last but not least of course, the type of potato is important too: Russet, or another starchy variety is recommended.

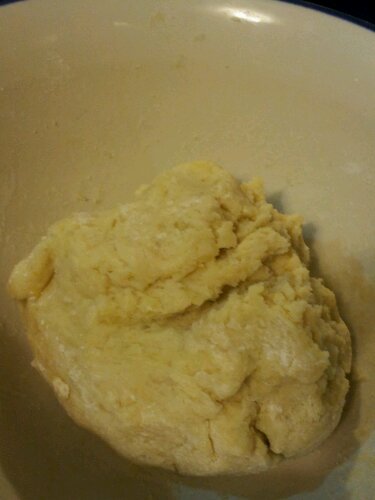
imagemakes enough for about 3 meals for 2 people
Ingredients

  • about 2 lb of Russet potatoes (I used 3 big ones, might have been more than 2 lb, but that’s what most recipe’s call for)
  • 1 egg
  • 1 to 1 1/2 cups of flour
  • 1 tsp salt

image

Directions

  1. If necessary, cut the potatoes into manageable pieces (so it fits in a pot) and cover with cold water, bring to a boil over medium high heat. Reduce heat and cook, covered, until cooked and tender when tested with a knife.
  2. Drain and set aside until juts cold enough to handle, peel the potatoes, cut in half and pass them through a potato ricer into a large bowl. Set aside, uncovered to cool to almost room temperature, about 20 minutes. (They need to cool down to the point where they won’t cook the egg that will get mixed in)
  3. Slightly scramble the egg, then add to the potatoes with the salt and stir with a fork until mixed in.
  4. Add about 1 1/4 cup of flour and gently incorporate into a crumbly dough, using your hands. Make sure the flour is all moistened then press all of it together against the bottom of the bowl.
  5. Generously flour a work surface and wash your hands. Turn dough out onto floured surface and quickly knead until the flour is fully incorporated and the dough is soft and a little tacky but feels delicate and mostly smooth. About 30 seconds to 1 minute max. (do NOT overwork or the gnocchi will be tough)image
  6. Place dough back into bowl and cover with a kitchen towel to prevent it from drying out.
  7. Line two baking sheets with parchment and flour lightly, set aside.
  8. Lightly re-flour work surface and using a piece of dough about the size of a small orange, roll into a 3/4″ diameter roll on the floured surface, below the palms of both your hands.image
  9. With a sharp knife, cut the rope about every 3/4″so you get a little dough piece roughly 3/4″ square. Traditionally Italian Gnocchi have little ridges that are made by pushing/rolling the gnocchi over the tines of a fork, but you could just as well leave them in the ‘pillow’ shape after cutting.image
  10. Place the gnocchi in a single layer on the prepared baking sheet, and repeat until you used up all the dough.
  11. If you are going to cook them within the next 2 to 3 hours, you can leave them out on the counter,otherwise place in the freezer(on the sheets) and when frozen store them in zip top bags for use anytime!
  12. To cook, bring a pot of salted water to a rolling boil and slide the fresh gnocchi off the parchment into the water, about 15 to 20 at a time, stir and cook for 1 minute after they float to the surface. If they are frozen, cook right from the freezer but cook less at a time as the water temperature comes down when you add frozen things and the gnocchi will end up falling apart before they cook or (not sure what’s worse) become soggy.

image
© 2012 SimpleHealthyHomemade

making Butter

A while back I discovered that my farmers market offers raw milk, and I started drinking raw milk again. I switch back and forth between regular (cow) milk and goat milk. I have made goat cheese and fromage blanc and mozzarella, and butter. You’d be surprised to find just how easy this is, using modern convenience tools like a blender. No shaking a barrel for hours and NO, nononono, you do not get one of these: 

         or 

To me, raw milk is the only milk worth drinking, hands down, and not just due to the taste (more here). Not only are my food decisions based on how any given food tastes, but also how it is raised. And raw milk dairies are (at least in this country) organic, my milk is from pastured, grass fed cows (you know, happy out on the pasture vs. in a dark stable tied up somewhere), so far all the raw milk diaries I have visited care a great deal about their animals and take care of them like you and I would. From a regulatory stand point, raw dairies are generally under much more scrutiny, for cleanliness, safety etc. The cows have names. Ok that part might not make the milk taste better, but wouldn’t you agree that if you name your animals, they are closer to your heart than if they just have a number? 🙂

04_23-AntVollon-MndOfButter

Mound of butter, by painter Antoine Vollon

Ever read the label of supermarket butter? One of the most surprising ingredients often is coloring. Now why would there be food coloring in your butter making it, presumably prettier, more buttery looking maybe, that is more yellow? Do we and if so why do we think it’s better if it’s yellow? If butter isn’t yellow after it’s made, then why would we think it needs to be? Complex questions you are asking, or then again not. Butter USED to be more yellow, at least in 1875 (see the painting above) when the cows where still out on the field, eating what they were meant to eat : Grass. Since most of your generic super market cows here in the US are kept indoors and fed a mixture of corn and cornstalks fortified with vitamins and minerals, the color doesn’t turn out quite the same. And it seems that people are smarter than we give ourselves credit for and somehow remember that butter is supposed to be yellow and it is more nutritious that way and this is where we get duped: color is added and our little  minds are happily appeased into thinking yummy healthy butter. A little sad, I know. BUT since it is soooo easy to make your own, from good fresh cream, you can have great butter again in less than 15 minutes of work. When you start making butter you will notice that the color of the resulting product changes throughout the season, in the spring when the cows are out on the lush, fast growing spring pasture, the butter is a sunflower yellow, almost orange! But no matter what time of  year, there still is more color in it than the regular stuff from the store. And taste!

First off, you do need cow milk to start. Goat milk is higher in fat,but naturally homogenized, so that the cream does not separate and rise to the top.

  vs 

Brown Swiss (Cow)                                           Domestic Goat

Juuuuust in case you were doubting your animal knowledge 😉

After bringing the milk home (it comes in half-gallon glass bottles) I pour it into a wide mouth glass container that I keep for just that purpose and stick it in the fridge. It needs to sit overnight since the transport home and the pouring it from on e in to another container mixes up the milk, like I do by shaking it before pouring a glass, if I am not going for butter. Wide mouth because the next morning, I can easily scoop the cream off the top using my silver gravy ladle from the thrift store.

Gently skim the top layer off the milk, it will appear a bit darker, cream colored instead of white (no pun intended) and put it right into the blender bowl.

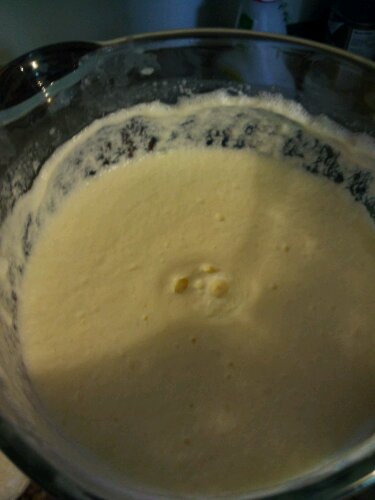
After that all that’s left to do is whirl the cream until the fat particles start clumping together.

image

The process goes in stages, at first the cream is liquid and gets sloshed around, then it becomes thicker and has a creamy consistency (In my blender it never get’s whipped like when using egg beaters, but noticeably thicker, but if you use egg beaters, it becomes whipped cream first, the kind Grandma used to make, thick and rich, juts keep going you’re not there yet)

image

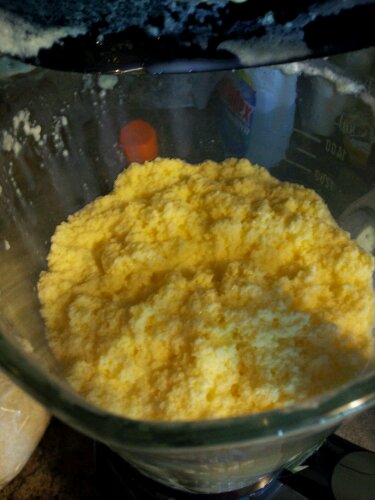
keep blending on low, if you have that setting and the cream will start to get liquid again, separating into lumps of yellow goodness and buttermilk.

image

it’s just starting…

image

here you can see from the side, how it separates

image

image

You can rinse the butter in a bowl with ice water, using your hands to ‘knead out’ the rest of the buttermilk but I find the automated way a tad easier and since the blender needs to be washed anyways…image

just make sure you rinse all the butter milk out, or it will go rancid.

 My lump of butter!
image

© 2012 SimpleHealthyHomemade


Healthy Camping Pt1

So many think that when you take food along or cook outside your kitchen that forcibly the quality of your food has to go down, as in unhealthy and bad for you. But there is really no reason for that, whatsoever. As proven by or most recent camping trip and many hikes before that (I made Vietnamese summer rolls on time, put the peanut sauce right into them), you can definitely ‘rough it’ without sacrificing on the food side of things.

This time we only had a few days so it was sadly much shorter than we would have liked. But hey, that was in June (yes, sometimes that’s how long it takes me to get a post completed) and now it’s only August, and even if you are cold easily, camping season extends till at least the end of September.
We set off on a blistering hot weekend where temps here in the Lehigh Valley topped out just short of the triple digit mark, drove through several fronts of thunderstorm and heavy downpour ( there was an inch of water in my kayak by the time we got there! ) up to the Catskills which proved to be cooler and therefore much more agreeable with everybody. Oh and the best part? It did not rain one drop once we got there!

We went with friends and the cooking duties were split evenly: we were responsible for one dinner and one breakfast.

But first, here are some general guidelines for meal planning, away from you regular kitchen:
Use seasonal produce for fresh and healthy meals. Most produce can be kept at room temperature for a period of time ( unless it’s berries, which we did put on ice in the cooler) Things like cucumbers, tomatoes, potatoes, bananas, apples, grapefruit, oranges, watermelon , cantaloupe , red bell pepper, onions or green beans, even kale if wrapped in a moistened paper towel before put in a plastic bag will happily keep a while. And if you end up having more space than expected, you can always store them on top of the rest in your cooler. ( don’t refrigerate your tomatoes or bananas)

Breakfast:

Mix up the dry ingredients for pancakes and store in a zip top bag, all you need to add is the liquid stuff (a liquid like milk, oil and eggs, if you are making them with eggs)

Omelettes are always a good choice, easy and versatile that can be made with pretty much anything added.
Desert: doesn’t have to be roasted marshmallow or smores either, branch out. Try fruit salad with watermelon or mixed berries with yogurt the first couple of nights. Yogurt keeps fairly well, it’s fermented. Folks used to turn milk into cheese and yogurt in order for it to keep before there was no refrigeration. Keep it cool, but you can also bring it along for a picnic on a hike, no need to panic about it. When you get down to the end of your supplies and the more delicate things are gone, make these chocolate bananas over the fire. Or make a fruit compote topped with granola for crunch!

Dinner choices beyond the hot dog and chips: Pieces of meat are healthier than mystery meat in a casing. That said this time we did have chicken sausage the one night. Carl at the farmers market is a sausage genius and I know for a fact that his chicken sausage is made from chicken breast he sells right there alongside the sausage made from it. Steak, pork chops and chicken breast can all be easily grilled but need to be kept cold on ice in your cooler until you are ready for them. In my experience, meat, like ground beef, sausage or steak. (Oh yes, I said we did it in style, didn’t I?) keeps well right on the ice or bottom of the cooler, submerged in the water. To make doubly sure and make it keep longer, freeze it solid at home, then place in a zip top bag to keep it from getting ‘watered’ or in one of those Rubbermaid ‘take alongs’ (storage containers), they seal the water out and keep the meat inside cool and dry. You can cook chicken breast pieces in an aluminium foil pack with vegetables and seasonings included. Potatoes do well cooked that way, too, although they do take a while, sweet potato seems quicker.

Oh and remember, aluminium foil is your friend, as is a good set of grill thongs and a mitt 😉

imageWild Blue berries along the hiking route

Serves 4

Breakfast:

We decided to go with an omelette with spinach and feta for sustenance and flavor. I cooked these over a camp stove, not the open fire. And it ended up being easier to make one at a time since the pan i have, makes it hard to put more than 3 eggs on at a clip and still have it cook through. Wasn’t a problem at all since other really only takes minutes to cook.

Basic Spinach Omelette:

  • 12 eggs (3 per person)
  • Spinach ( about 2 hand full per person)
  • 4 oz Feta Cheese, cut into 1/2″ cubes

Variations on a theme:

  • Use Swiss Chard or Kale, instead of Spinach
  • Add some deli ham, or prosciutto for additional flavor
  • Use cheddar, Fontina or Swiss instead of Feta

imagewith Fontina and Prosciutto

This one’s with Swiss Chard from the garden & Ham

Desert:

© 2012 SimpleHealthyHomemade

Daifuku

image

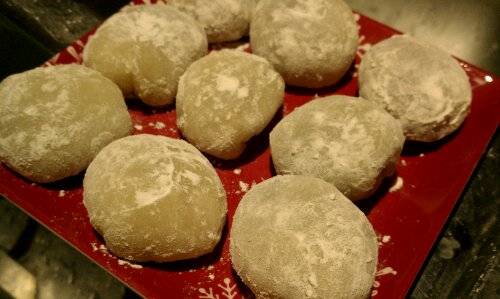
Glutinous rice cakes or Daifuku are something you can find at Asian markets all over the world, and that’s where I found them first. But if you know me a little, at some point I can’t leave it at that. I gotta know how it’s made.To ease your fears, no, I wasn’t the kid that opened up the belly of my dolls to find out what was inside. But I suspect that one of the reasons as to why not, might have had to do with me understanding that it would destroy them and my mom most certainly would not find willful destruction (no matter how lofty and glorious the reason behind it might have been) a good enough reason to buy another one. Oh yeah, from the days before the entire living room turned into a toy store when folks have children.

So, back to the subject at hand, I am just intrigued by how things are made, and why. You know that show on tv ‘how things are made’? If I had a tv, totally down my ally :). So of course that does not stop at food either and since part of my philosophy is if you can’t make it yourself, don’t eat it, I had to give this one a shot.

I searched the internet and found tons of recipes, some traditional, using a stove top method, some very elaborate on how to decorate, color or shape into flowers. So this recipe is adapted from various internet sources and in the end, I opted for an easy microwave option to make the dough…

image

Not quite as pretty and uniform as from the store…

You need to get Mochiko, or glutinous rice flour, which is the main ingredient in these, and something to fill the little cakes with. Traditionally Koshi-an, a sweetened Adzuki (red) bean paste is used, or a, also sweetened, smooth white bean paste, but I have in the past made them using sweetened chestnut puree. Besides sugar, the only other thing you need is potato starch, so the dough doesn’t stick to everything

imageI have a nagging feeling that the translator flunked English class…

imageMake sure the entire work surface is covered in corn, I mean potato starch. Cut off a chunk of dough…
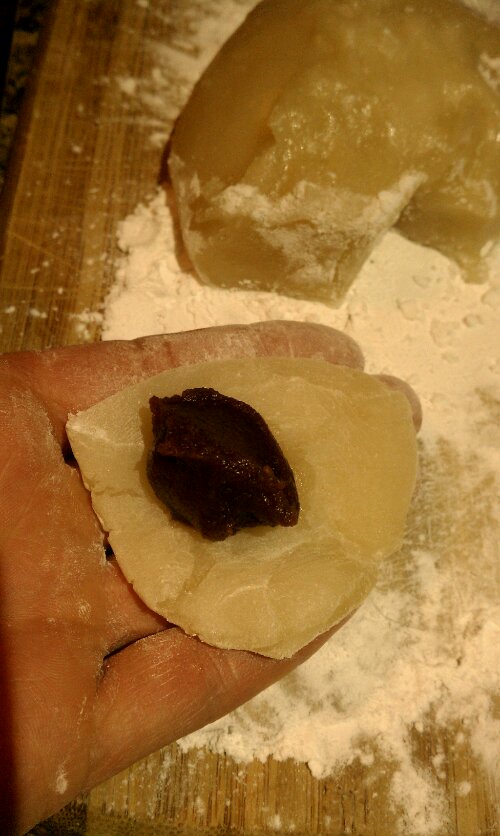
image…place the filling in the center…

imagethen  wrap the dough around it, making a little pillow… And finished!

Ingredients:

  • 3/4 cup Mochiko (sweet rice flour, also called glutinous rice flour)*
  • 1/4 cup sugar
  • 3/4 cups minus one tablespoon Water
  • 1 tsp pandanus leaf or vanilla extract (optional)
  • about 1 cup Red Bean paste (or other sweet filling)
  • Potato starch or other ‘..starch’ to keep the cakes from sticking to everything

* even though the name suggests it, there is not gluten in rice.

Directions:

  1. Mix the M0chiko, sugar, water and extract (if using) in a bowl, and mix well with a fork
  2. Microwave on high for 2 minutes, carefully remove the bowl (HOT) and stir, then return to microwave and cook another 1 1/2 to 2 minutes (depending on the power of your device). The dough should now be smooth and super hot.
  3. Cover a cutting board (or other work surface) with potato starch (or whatever else they sold you at the Asian market 😉 and leave the dough on it to cool slightly.
  4. When it can be touched, cut a piece of dough off (about egg yolk sized, out of lack for a better comparison), flatten into a disc and place a tablespoon fo filling in the center. Make sure the dough piece and your hands are covered in starch before you start. Note: To start, until you get the hang of it, use a teaspoon of filling, it’s a bit easier.
  5. Cover the filling with the edges of the disc so as to encase the filling completely. Set aside, seam side down, on a potato starch dusted tray or plate, and repeat until all the dough is used up.

imageCopyright © 2012 Simple Healthy Homemade. All rights reserved

Best way to cut up a pineapple

Stop buying those crazy gadgets, people!  There is, in no kitchen in the world, the need for a pineapple corer. Not only do you waste money on the tool, but you waste a whole bunch of yummy pineapple every time you cut one up. No No, nononono!
Here is a much better the best way to go about it, and all you need is a big cutting board, a bread knife (trust me, works the best) and, of course a ripe pineapple.
First you cut the ends off, like such…

image

Then proceed to slicing off just the outer layer, or most of the outer prickly layer…

image

Make sure you leave the prickly  ‘dimples’ in place, they provide a visual clue for the next step…

image

Notice how there is a patter to those ‘eyes’? Yes, they run in a spiral around your fruit. So cut out a few at a time, by holding the knife and cutting diagonally from one, then the other side of the dimples, so as to cut out a wedge containing the prickly bits.

image

And there is your pineapple! Imagine the waste if you had to cut down to the inner level and chuck all the rest?

image

The only thing left to do now is half, then quarter the pineapple, and cut the hard part off of the center as shown in the picture. Feel free to gnaw and chew on it, its yummy! You just can’t eat all of it, too hard.

And there you go. No more unnecessary waste!

Another thing I like to do, after the outer hard shell is cut off and discarded(since I don’t know where this little fruit’s been hanging around) get a pitcher and put all the diagonal/wedge cut pieces plus the center in it, fill with water and let rest a room temperature for at least 4 hours, then refrigerate. Makes yummy pineapple flavored water. Keeps in the fridge for 4 to 5 days.

Would be really yummy on some fresh cheese or yogurt…but we’ll have to make do with plain Kefir, since that’s all my fridge will give me at the moment…

Copyright © 2012 Simple Healthy Homemade. All rights reserved