Green Power Watercress Omelet

image

I know many resolutions for the new year are to get fitter and be healthier. What kind of New Years resolution did you come up with? Well instead of resolutions and radical changes, how about something more playful? Here’s a New Years challenge for you: Instead of cutting out things in your daily diet and feeling deprived, start with adding nutritiously dense foods!  I am challenging you to incorporate more greens into your diet, and here is a great way to start, if you are not quite ready yet to steam or saute kale, collard greens or water cress.
image

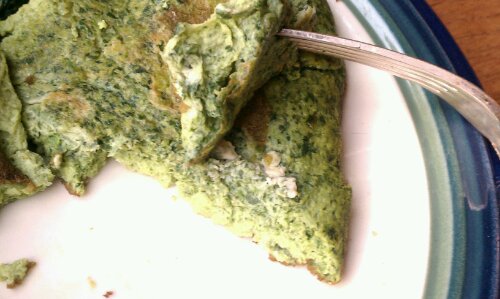
Watercress, a leafy green native to Europe, has edible leaves and stems, but I find that I do not enjoy the stems as much as I could. I tried it as salad, addition to soups, but those crunchy stems I just can’t get used to. So…. besides puréed soups, what to do? In comes my blender and the Green Power Omelet !

image

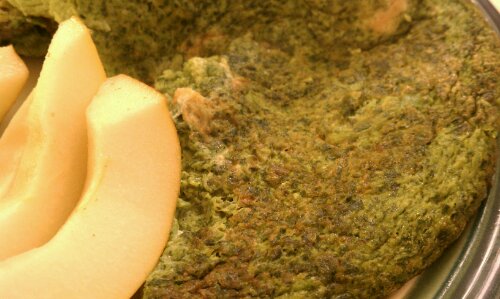
Oh yeah, it’s wicked green, (trust me, you can’t really tell from the picture) and the odd thing in there, you ask?  I added some ‘free form’ meatballs from a jalapeño chicken sausage for extra flavor

image

Some of the ‘goodness in watercress:

    • Fresh cress has more concentration of ascorbic acid (vitamin C) than some fruits and vegetables. 100 g of leaves provide 47 mg or 72% of RDA of vitamin C.  As an anti-oxidant, vitamin C helps to quench free radicals and reactive oxygen species (ROS) through its reduction potential properties. Lab studies suggests that regular consumption of foods rich in vitamin C helps maintain normal connective tissue, prevent iron deficiency, and also helps body develop resistance against infectious agents by boosting immunity.
    • It is one of the excellent vegetable sources for vitamin-K
      ; 100 g provides over 200% of daily recommended intake. Vitamin K has potential role bone health by promoting osteotrophic (bone formation and strengthening) activity. Adequate vitamin-K levels in the diet helps limiting neuronal damage in the brain; thus, has established role in the treatment of patients suffering from Alzheimer’s disease.
    • Cress is also excellent source of vitamin-A
      and flavonoids anti-oxidants like ß carotene
      , lutein and zeaxanthin.
    • It is also rich in B-complex group of vitamins such as riboflavin, niacin, vitamin B-6 (pyridoxine), thiamin and pantothenic acid that are essential for optimum cellular metabolic functions.
    • It is also rich source of minerals like copper, calcium, potassium, magnesium, manganese and phosphorus. Potassium in an important component of cell and body fluids that helps controlling heart rate and blood pressure by countering effects of sodium. Manganese is used by the body as a co-factor for the antioxidant enzyme superoxide dismutase. Calcium is required as bone/teeth mineral and in the regulation of heart and skeletal muscle activity.

Watercress (Nasturtium officianale), fresh,
raw leaves, Nutrition value per 100 g.
(Source: USDA National Nutrient data base)

See the table below for in depth analysis of nutrients:
Principle Nutrient Value Percentage of RDA
Energy 11 kcal <1%
Carbohydrates 1.29 g 1%
Protein 2.30 g 4%
Total Fat 0.10 g 0.5%
Cholesterol 0 mg 0%
Dietary Fiber 0.5 g 1%
Vitamins
Folates 9 mcg 2%
Niacin 0.200 mg 1%
Pantothenic acid 0.310 mg 6%
Pyridoxine 0.129 mg 10%
Riboflavin 0.120 mg 9%
Thiamin 0.090 mg 7.5%
Vitamin A 3191 IU 106%
Vitamin C 43 mg 72%
Vitamin E 1.0 mg 7%
Vitamin K 250 mcg 208%
Electrolytes
Sodium 41 mg 3%
Potassium 330 mg 7%
Minerals
Calcium 120 mg 12%
Copper 0.077 mg 8.5%
Iron 0.20 mg 2.5%
Magnesium 21 mg 5%
Manganese 0.244 mg 11%
Phosphorus 60 mg 8%
Selenium 0.9 mcg 1.5%
Zinc 0.11 mg 1%
Phyto-nutrients
Carotene-ß 1914 mcg
Carotene-α 0 mcg
Lutein-zeaxanthin 5767 mcg

Now that I bored you all with just how good it is for you, on to the recipe! (Be warned the color is unreal, it looks like you put food coloring in there when you’re done!)

Ingredients

  • 3 egg whites + 1 egg (or 5 egg whites)
  • 1 good handful fresh watercress

Directions

  1. Add the watercress to blender, add eggs, pulse until combined and the greens have been emulsified (You may have to push the watercress down as necessary with a spatula so it can get chopped up before it will all blend)
  2. Heat a skillet over medium, add a tsp coconut oil (or oil of choice), swirl to coat the pan then add the green goodness from your blender
  3. Cover and cook until firm.
  4. Enjoy and feel good about your self for all the greens you already ate 🙂

image
Copyright © 2012 Simple Healthy Homemade. All rights reserved

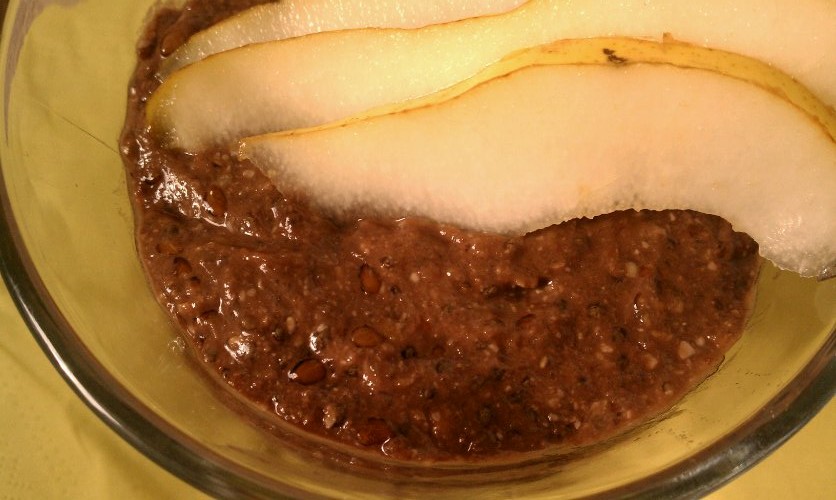
Chocolate Pear Overnight Pudding

image

I have been wanting something sweet, but not too sweet. Chocolate-y, but not actually chocolate, difficult right? Since I have drastically reduced my (refined) sugar intake, my taste buds realize just how much added sugar there is in everything. It’s just like salt, once you’re used to using less, you can taste its overabundance in everything. And as for sugar, many items I just plain don’t find enjoyable, no flavor just extremely SWEET. I remember how after every visit back home, I cannot eat commercially made salad dressing for a couple of months, they are sweet and it just tastes funny to me (I get vinegar & oil )

But back to the program: Make this the night before, enjoy as a healthy breakfast cold out of the fridge or heat in the microwave.

Since I started making these, I have been absolutely addicted to them, the pictures don’t do the taste justice. It’s a perfect healthy treat, desert or breakfast, YES all three ;). I’ll have some versions and variations coming up for you soon.

Yay, chocolate pudding any time!!

image

Inspired by Leanne’s Banana Cherry Pudding

Ingredients:

  • 1 ripe pear, diced
  • 1/2 cup almond milk (or regular milk)
  • 2 tbsp flax seed, roughly crushed with mortar and pestle
  • 2 tbsp chia seed
  • 2 tbsp ground almond (aka almond flour)
  • 1 1/2 to 2 tsp cocoa powder
  • 1 tbsp honey or maple syrup (optional, if you like things a bit sweeter)

Directions

  1. Combine chopped pear, cocoa, and almond milk in a glass dish or bowl, stir until cocoa is incorporated
  2. Using your handheld blender, blend until smooth
  3. Add flax seed, chia seed and ground almond, stir, cover and refrigerate overnight
  4. In the morning, eat chilled out of the fridge, or heat in the microwave for about 30 to 45 seconds

Copyright © 2011 Simple Healthy Homemade. All rights reserved

Roasted Pumpkin with Thyme Basting Oil

image

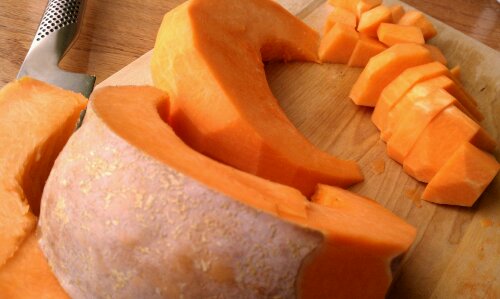
The Farmers market had a glorious amount of pumpkins! So much to choose from so many varieties. From your standard orange sugar or pie pumpkin to gray and hazy green looking varieties, they had it all. After roasting a quarter of the one I settled on and since it was an exceptionally beautiful (and BIG) representative of the pumpkin family, I made gnocchi with another quarter and pumpkin puree with the rest.

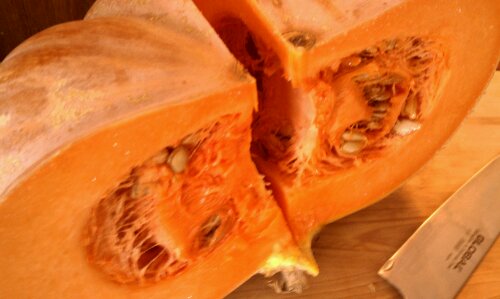
If your pumpkin seems very juicy, you might want to save that one for a soup or puree and use for pie. This dish works best with a firm pumpkin or squash. I tried it with one that was ‘liquid’, …results not convincing. Not sure why but that one time, I got one of those fairy tale pumpkins, kinda like the one in the picture and it was the juiciest pumpkin ever. Cleaning it out, it was running orange down my hands. I should have known better and turned that into, I don’t know, Pumpkin juice?

image

Ingredients

Directions

  1. Chop squash or pumpkin into 1″ cubes,
  2. Preheat oven to 450 F
  3. Toss, squash in a large bowl with 2 tbsp basting oil, then spread on a rimmed cookie sheet or roasting pan, season with salt and pepper to taste and place on the middle rack.
  4. Bake for 15 to 20 minutes, or until fork tender

Note: Any leftover pumpkin can easily be turned into a yummy soup: Just blend and add broth or milk, bring to a boil and serve hot with a slice of crusty bread on the side and some fresh toasted pumpkin seeds for garnish!

image

Copyright © 2011 Simple Healthy Homemade. All rights reserved

Poor Man’s Bouillabaisse

image

Bouillabaisse… Flavor of the sun and the ocean

Scent of thyme and wild fennel on the dry summer breeze, arid, sun drenched slopes, rugged coastline and a wild blue sea…

Marseille, Roucas Blanc District

File:Calanques2.jpg Calanque (Inlet) near Marseille

Anytime I think of Bouillabaisse, Marseille the birth place of this oh so quintessential Mediterranean soup comes to mind. Port city with its mix of cultures, where some streets have more of a Middle Eastern than French feel, fresh seafood abounds and where people’s lives are outside as much as in during the summer months. But I am getting lost in reveries here…

Marseille

Unless you live close to the sea, and have ready access to reasonably priced fresh seafood of all sorts, Bouillabaisse is not usually going to be an everyday meal. At least for me, the variety of seafood generally used in a soup like that, definitely moves it into the ‘special occasion’ category. However, a couple of quick changes and substitutions, et voilà, now I can get my flavor fix even on days when my budget is slim!

image

Ingredients

  • 3 tbsp olive oil
  • 1 3/4 cups c finely diced onions (from about 2 medium)
  • 1 fennel bulb, trimmed greens reserved, thinly sliced
  • 2 cloves of garlic
  • 1 (14oz) can diced tomatoes, in juice*
  • 2 cups chicken or vegetable broth (or water, 1 tsp salt and Rapunzel bouillon cube)
  • 2 sprigs thyme
  • 1 can water packed sardines
  • 1 can solid tuna,
  • (**optional: leftover cooked fish filets such as tilapia and salmon,  mussels, can of clams, calamari, scallops)

* or equivalent in frozen tomatoes, plus 2 tbsp tomato paste

** Note that you can make this soup at any level of ‘poor’ or ‘not so poor’ by either adding or substituting various fish and seafood items. Starting with a can of Tuna, and a can of Sardines, or adding crab meat, clams, mussels, whole shrimp and/or cooked fish filet such as salmon, trout or tilapia.

Directions

  1. In a stock pot, heat oil on medium, then add the onions, cook about 5 minutes until beginning to soften
  2. Add fennel and garlic, sprinkle with salt and pepper to taste, adjusting heat if ingredients start to brown to quickly. Cook about 15 minutes until tender, stirring often.
  3. Add broth, tomatoes and thyme and bring to a boil. Reduce heat and simmer, covered, until vegetables are very tender, about 15 minutes.
  4. Add a can of water packed sardines, chopped and/or solid tuna broken into bits, (or crabmeat and clams, or leftover cooked fish filers such as salmon or any other seafood that strikes your fancy and is in your budget)

Seriously, if the sea and the sun had a love child, it would be this  🙂

Copyright © 2011 Simple Healthy Homemade. All rights reserved

Roasted pumpkin seeds

image

Had I only tried this sooner. I always thought that it would be way cumbersome to clean the seeds after you scoop them out of the pumpkin, that I would just throw it all on the compost. Well, this year, I (finally) git smart and decided to try roasting pumpkin seeds. Now in my defense, since I am not from here, pumpkins are not the main focus of our entire fall season, so I really did not grow up wit the pumpkin mania that hits the US every year 😉
To make cleaning them easier, scoop the seeds out first, using a spoon. Then remove all the stringy stuff. Place he seeds in a collander and with the water running, using your dish brush, clean and swirl the seeds.
Let them drip a little then spread on paper towels and allow to dry. Season with ingredients below and spread in a single layer on a (aluminium foil lined for easy clean up) baking sheet. Roast in a preheated oven at 325 for 20-25 minutes or until the seeds pop! (Haha, anyone remember ‘ Music & Lyrics‘ ? ), stir after 10 minutes.

But to make your life even easier, I tried it out in the toaster oven, and it works there too, yay for easy and quick! What can I say, I am a busy girl and the toaster oven has served as my version of a microwave lately.

Below recipes are for about  1 cup seeds, use less oil, if your pumpkin had less seeds or you’re using squash seeds. Unless of course, you had a zombie squash, then things are different…

Plain:

  • toss pumpkin seeds with 1-3 tsp oil (depending on amount and size of seeds)
  • 1/2 tsp salt

Spiced:

  • toss pumpkin seeds with 1-3 tsp basting oil
  • 1/2 tsp salt
  • 1/2 tsp paprika, sprinkle on 5 minutes before done roasting*
  • (if you’re really into spice, use cayenne instead)

* Note: If attempting in the toaster oven, put the paprika on AFTER the seeds are roasted

image

Sorry no more toasted seed pictures, the seeds are too tasty to wait and do you know how hard it is to make beige or brown little seeds look pretty in a picture? 🙂

Copyright © 2011 Simple Healthy Homemade. All rights reserved.

Kabocha (or Butternut Squash) Chowder

image

There is simply nothing better than dipping your spoon into a steamy bowl of soup after being outside on a cold and windy day! I had sampled some fabulous roasted butternut squash at one of the grocery stores in the area, and it’s been working its way through my mind for re-creation and sharing soon 😉 However, when I came in after riding my bike today, there was no patience left for roasting anything. And since it was cold, I was hungry and I had a Kabocha squash sitting on the counter waiting for the perfect opportunity to turn into an awesome meal, soup it had to be!

If you’re not familiar with Kabocha Squash, it’s very similar looking to a Buttercup squash in that it has a dark green shell, but you could really use Butternut, Buttercup or Kabocha for this. Kabocha will be sweeter than  the other types and most likely it’s the brightest colored.

image

Ingredients

  • 1 md Kabocha or butternut squash, seeded, peeled and cut into pieces
  • 1 tbsp coconut or olive oil
  • 1/2 cup coconut milk (or regular cream*)
  • 1/2 red onion, chopped
  • 1 tbsp Madras curry powder
  • 1 tsp salt
  • water
* If using cream, recipe is no longer vegan or dairy free

Directions

  1. In a large pot, heat oil on medium and add onions and squash pieces. Cook stirring occasionally until onions are softened but not brown
  2. Add curry powder and cook until flavorful, then add enough water to cover squash by about 1/2″ (you can always add more to thin the soup, but cooking excess liquid off takes a long time.) Bring to a boil, cover half and simmer until squash is very soft.
  3. Remove pot from heat and using an immersion blender, blend until smooth and there are no more pieces (alternately you can blend in batches in your food processor or blender, but make sure you wait for the soup to cool down some first and don’t fill too much)
  4. Return to stove, add salt and 1/2 cup coconut milk (or regular cream) stir until dissolved.
  5. Serve each bowl garnished with a spoonful of coconut milk or cream, using a tooth pick, stir just a little to form a swirl pattern.

Makes 4 to 6 servings.

Pretty eats!

image

Go ahead, connect to your inner Picasso!

Copyright © 2011 Simple Healthy Homemade. All rights reserved.