Roasted pumpkin seeds

image

Had I only tried this sooner. I always thought that it would be way cumbersome to clean the seeds after you scoop them out of the pumpkin, that I would just throw it all on the compost. Well, this year, I (finally) git smart and decided to try roasting pumpkin seeds. Now in my defense, since I am not from here, pumpkins are not the main focus of our entire fall season, so I really did not grow up wit the pumpkin mania that hits the US every year 😉
To make cleaning them easier, scoop the seeds out first, using a spoon. Then remove all the stringy stuff. Place he seeds in a collander and with the water running, using your dish brush, clean and swirl the seeds.
Let them drip a little then spread on paper towels and allow to dry. Season with ingredients below and spread in a single layer on a (aluminium foil lined for easy clean up) baking sheet. Roast in a preheated oven at 325 for 20-25 minutes or until the seeds pop! (Haha, anyone remember ‘ Music & Lyrics‘ ? ), stir after 10 minutes.

But to make your life even easier, I tried it out in the toaster oven, and it works there too, yay for easy and quick! What can I say, I am a busy girl and the toaster oven has served as my version of a microwave lately.

Below recipes are for about  1 cup seeds, use less oil, if your pumpkin had less seeds or you’re using squash seeds. Unless of course, you had a zombie squash, then things are different…

Plain:

  • toss pumpkin seeds with 1-3 tsp oil (depending on amount and size of seeds)
  • 1/2 tsp salt

Spiced:

  • toss pumpkin seeds with 1-3 tsp basting oil
  • 1/2 tsp salt
  • 1/2 tsp paprika, sprinkle on 5 minutes before done roasting*
  • (if you’re really into spice, use cayenne instead)

* Note: If attempting in the toaster oven, put the paprika on AFTER the seeds are roasted

image

Sorry no more toasted seed pictures, the seeds are too tasty to wait and do you know how hard it is to make beige or brown little seeds look pretty in a picture? 🙂

Copyright © 2011 Simple Healthy Homemade. All rights reserved.

Pumpkin Cheesecake Minis

image

Ahhh it’s Fall, and I love me some pumpkin cheese cake. But ever notice how heavy that stuff is? I have a hard time finishing those huge pieces one is supposed to eat. How about bite sized, nah, too small maybe 3-4 bites? Now we’re talking! And while we’re at it, make it easy and quick as well.

That’s right, my friends, I want my (cheese) cake and eat it too (could not resist that one) And as you might know, I am not one for letting anything go to waste and so I was going through my fridge to see what’s on hand that might be useful.

image

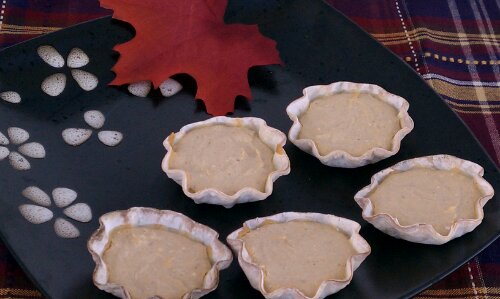
The result? SUPER EASY, and besides the crust, NO BAKING! And to top that, you can make these in the toaster oven, in fact they turn out better in the toaster oven 🙂 Win!
Here is my secret weapon of choice: left over pot sticker wrappers! That’s right, and we are going to blind bake (or toasterize)  them into crunchy littlte tartlet shells.

You need:

  • 4 oz cream cheese (1/2 bar, pack, block? what do you call that?), softened
  • 3-4 tbsp pumpkin puree (from can)
  • 2 tbsp suconat or coconut sugar
  • 1/8 tsp cinnamon
  • 1/8 tsp pumpkin pie spice mix
  • 1/8 tsp vanilla
  • 8-10 pot sticker wrappers (or wonton wrappers, trimmed to a round shape)

image

Directions

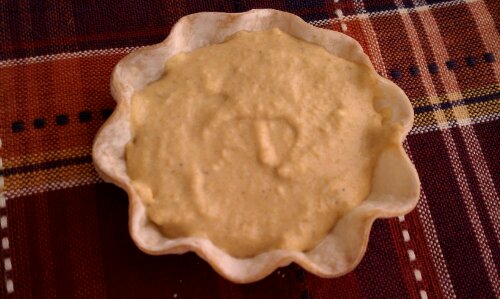
  1. Place pot sticker wrappers in individual Madeleine forms or muffin tins, place in toaster oven for about 5-6 minutes, being careful not to let them get too brown, trust me, it goes quickly. On mine I set it right between the light and the dark setting. If your toaster oven has a temp setting, turn it down to 400, but leave it on toast (depending on your muffin cups/ Madeleine forms it might take more or less time, shiny metal reflects the heat…)   Alternately, using your oven, bake at 350 for 10 to 12 minutes, or until just slightly golden. They will crisp up more as they cool.
  2. In the meantime place softened cream cheese in a bowl, add the coconut sugar/sweetener of choice, and stir until completely incorporated.
  3. Add spices and pumpkin and mix until uniform.
  4. When the shells are cooled a bit, fill each using a tablespoon.
  5. Refrigerated for min. 1 hour to allow to get firm, prior to serving.

Note: these are best made and eaten within a day or so, since the crust will soak up the moisture from the filling and get progressively less crunchy.

image
Copyright © 2011 Simple Healthy Homemade. All rights reserved.

Roasted Salmon with Coriander-Paprika Glaze

Our Sunday night ‘still hanging on to summer’ dinner 😉


Salmon is one of those cold water fish, high in Omega-3’s, we all know by now we’re supposed to have more of ‘those ones’ in our diet, but how to go about it?

Last Weekend I created this quick and easy recipe that can be whipped up in a minute with minimal effort. And let’s face it, I haven’t met anyone that could not use another 10 minutes recipe! That’s how simple this roasted salmon is to make, although it tastes and looks like you labored in the kitchen for a lot longer 😉 And who doesn’t like to get some easy earned praise?

Ingredients

  • 2 pieces of salmon, about 3-4 oz each
  • 1 tbsp lemon juice
  • 1 tbsp olive oil
  • 1 tbsp whole coriander seeds, crushed in a mortar
  • 1 tsp honey
  • 1 tsp paprika (sweet)
  • 1/8 tsp salt

Directions

  1.  Crush the coriander seeds in a mortar or use a spice mill
  2. Combine lemon juice, olive oil and honey in a small bowl
  3. Add coriander, paprika, and salt, and stir well until incorporated
  4. brush the salmon fillets all over with the glaze and bake in the middle of the preheated oven at 400F for 10 minutes, or until opaque through, brushing tops one time at 7 minutes (10 minutes should be all it takes, unless you have an exceptionally fat pieces of fish)

You could use any extra glaze as seasoning for roasting red bell pepper slices alongside the salmon like we did here…

image

or just have the salmon with some grilled eggplant and hummus spread!

either way: make it.  It’s super yummy!

Rainy Day Banana Pancakes (Egg Free)

So last weekend it was gray and rainy outside and I was cleaning the house, (not my favorite chore, it’s so unsatisfying, don’t you think? As soon as you’re done, you gotta start all over) listening to music is a good option to make it more fun, right? Well, my Ipod played “Banana Pancakes” by Jack Johnson.

Take a listen: Amazon.com: Banana Pancakes: Jack Johnson: MP3 Downloads.

It made me hungry, it made we want to have some, right then and there. I could smell them… So on the list for Saturday Breakfast they go 🙂 As I happily, pj’s and all, was ready to start the project: NO EGGS. What to do now? Option A: get changed and go to the store, option B: figure out how to make it without. It’s Saturday and I really don’t want to face the world, the rain is pouring down here in PA (probably some other leftover part of another tropical storm?) so I went about my quest for egg-less pancakes. There’s a German saying: Not macht erfinderisch (transl: Need makes one inventive 😉

image

I could have used Bananas as a topping, but there were these peaches on my counter, waiting to be eaten.

A dollop of greek yogurt…

image
… and a drizzle of maple syrup
Success!

Turns out it’s not the eggs at all that make the pancakes fluffy and light, but the baking powder/soda. Good to know

image

Ingredients:

  • 1/2  cup whole wheat pastry flour
  • 1/2 cup oat flour
  • 1 cup (non dairy) milk ( I used almond milk, unsweetened)*
  • 1 tsp baking powder
  • 1/2 tsp baking soda
  • 1 tblsp (coconut) oil
  • 1 tblsp suconat, or sugar, honey (optional)
  • 1/2 ripe banana, mashed
Mix the dry ingredients, then stir in the milk, oil and banana.  Moisten a paper towel with some oil, wipe the skillet, heat, and add the pancake batter by the 1/4 cup full. Flip over when bubbles appear on the surface.
Serve with:
-Sliced ripe peaches, greek yogurt, and maple syrup
-Banana and caramelized pecans
Serves 2, (Makes 6-7 pancakes)
* you can also use buttermilk, or coconut milk, make sure you stir/shake the can well and since it’s thicker, you may need to spread out the pancakes a bit while they start cooking.  I use oat flour, I like the bit nutty flavor it gives the pancakes. Enjoy!
What kind of substitutes in needy time have you had success with?
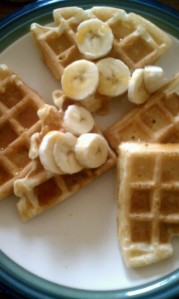
                          You can also make waffles …
And the best part? Make the whole recipe, or double and keep the extras individually wrapped in the freezer, pop in the toaster oven until yummy! for those morning when you have no time…
Copyright © 2011 Simple Healthy Homemade. All rights reserved.