Kabocha (or Butternut Squash) Chowder

image

There is simply nothing better than dipping your spoon into a steamy bowl of soup after being outside on a cold and windy day! I had sampled some fabulous roasted butternut squash at one of the grocery stores in the area, and it’s been working its way through my mind for re-creation and sharing soon 😉 However, when I came in after riding my bike today, there was no patience left for roasting anything. And since it was cold, I was hungry and I had a Kabocha squash sitting on the counter waiting for the perfect opportunity to turn into an awesome meal, soup it had to be!

If you’re not familiar with Kabocha Squash, it’s very similar looking to a Buttercup squash in that it has a dark green shell, but you could really use Butternut, Buttercup or Kabocha for this. Kabocha will be sweeter than  the other types and most likely it’s the brightest colored.

image

Ingredients

  • 1 md Kabocha or butternut squash, seeded, peeled and cut into pieces
  • 1 tbsp coconut or olive oil
  • 1/2 cup coconut milk (or regular cream*)
  • 1/2 red onion, chopped
  • 1 tbsp Madras curry powder
  • 1 tsp salt
  • water
* If using cream, recipe is no longer vegan or dairy free

Directions

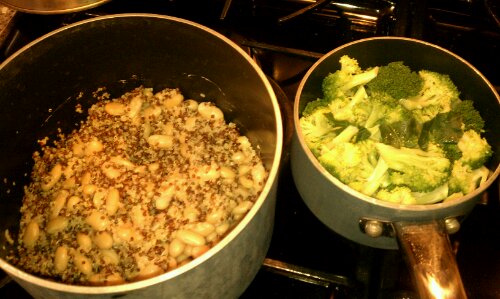
  1. In a large pot, heat oil on medium and add onions and squash pieces. Cook stirring occasionally until onions are softened but not brown
  2. Add curry powder and cook until flavorful, then add enough water to cover squash by about 1/2″ (you can always add more to thin the soup, but cooking excess liquid off takes a long time.) Bring to a boil, cover half and simmer until squash is very soft.
  3. Remove pot from heat and using an immersion blender, blend until smooth and there are no more pieces (alternately you can blend in batches in your food processor or blender, but make sure you wait for the soup to cool down some first and don’t fill too much)
  4. Return to stove, add salt and 1/2 cup coconut milk (or regular cream) stir until dissolved.
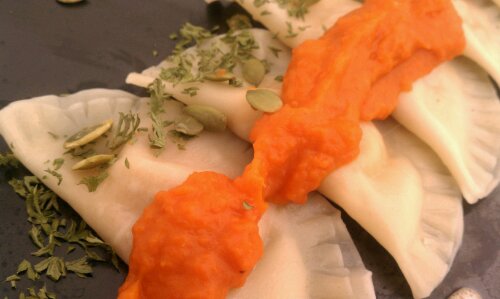
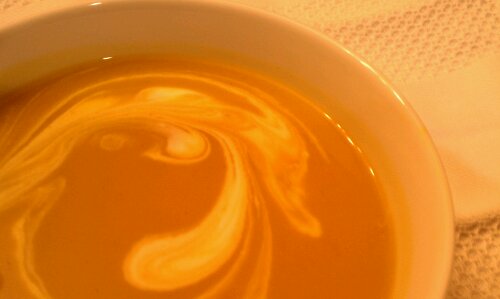
  5. Serve each bowl garnished with a spoonful of coconut milk or cream, using a tooth pick, stir just a little to form a swirl pattern.

Makes 4 to 6 servings.

Pretty eats!

image

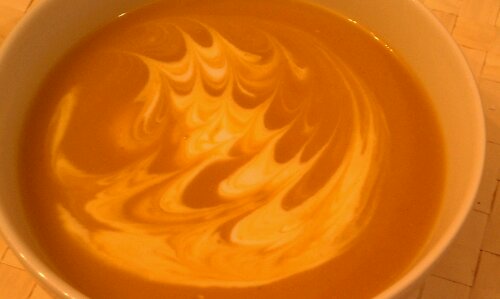
Go ahead, connect to your inner Picasso!

Copyright © 2011 Simple Healthy Homemade. All rights reserved.

Pumpkin Goat Cheese Ravioli

image

As always, I am looking for creative ways to use seasonal produce and after getting some real life pumpkin (the convenience of canned could not keep me from trying this in the end) I had to use the resulting puree up, and trust me, it makes quite a bit. I had extra to put in the freezer! And it’s really easy to do (Tasty Yummies has a more detailed set of instructions, if you like), cut the pumpkin in half, scoop the seeds and stringy ‘innards’ out (keep the seeds, clean them and keep for roasting later) place halves cut side down in a baking dish, adding 1/2″ water, and bake in a preheated oven at 350F for 40-50 minutes, (depending on the size of your pumpkin), or until the flesh is soft when pierced with a fork. Scoop the flesh out, purée and voila!
Alternately, if you got a smaller pumpkin, you can also cut, scoop the seeds and cook it in the microwave until the skin is soft when pierced and peel the skin off the slightly cooled halves using a vegetable peeler!

Keep any seeds to make roasted pumpkin seeds later!

image
You can use the ravioli right away or freeze them for later use

image
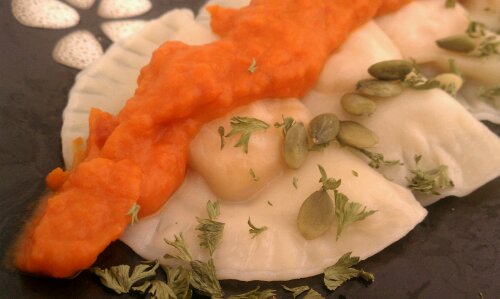
Serve with Roasted Red Pepper ‘Cream’ Sauce

Ingredients

  • 1/2 cup fresh pumpkin puree (you can use canned)
  • 2 1/2 to 3 oz fresh goat cheese
  • 1/2 tsp salt
  • 1/4 tsp white pepper
  • 1 pack Pot sticker wrappers or Wonton wrappers

Directions

  1. Mix the first four ingredients in a bowl
  2. Using 4 wrappers at a time, place them on work surface, place one teaspoon of filling in the center, brush edges with water and fold over and seal, crimping edges using the tines of a fork
  3. place all the ravioli on a wax paper lined baking sheet and cover with plastic wrap to prevent drying while you complete step 2 with the rest of the wrappers
  4. Either cook right away: Bring a pot of water to a boil and drop ravioli in, cooking until they float to the surface, about 3 minutes.
    You can also freeze them for later use: Freeze on the sheet and once frozen store in zip top bags until ready to use. Do not defrost, but cook from frozen
  5. Serve with Roasted Red Pepper & Pumpkin Cream Sauce.

image

or try a Tarragon Cream Sauce…

image

Copyright © 2011 Simple Healthy Homemade. All rights reserved.

Roasted Red Pepper and Pumpkin ‘Cream’ Sauce

image

Glorious colors of fall! Here the leaves have finally turned color and as I am typing this I can see the red and yellow leaves glow in the sunlight, and the bronze and ‘still green’ leaves add depth to the shadows. The birds have returned to the bird feeder in droves, the nights finally have that crisp quality you only experience on an early morning in fall and I am enjoying the view to say the least.

image
To celebrate fall, with its vibrant orange of pumpkins, golden corn field and that last rest of summer’s warmth int he afternoon, I roasted up a brightly colored, mighty tasty and versatile sauce/dip/spread. Enjoy!

Ingredients

  • 1 red bell pepper
  • 1 cup chopped cooked pumpkin (or canned)
  • 1 tbsp olive oil
  • 1 pinch salt

Directions

  1. Roast whole red pepper until blackened in spots all over by holding it over a gas flame or placing under the broiler, then place in paper bag to cool a bit (the steam will loosen the skin making it easier to peel, added bonus, you won’t burn your fingers as much).
  2. Peel red pepper (don’t have a guy do this, for some reason their hands are not made the same as ours and they cannot handle heat, as per my experience 😉 ) , this works best using a paper towel and literally rubbing the skin off. Cut in half and discard the seeds, then chop flesh.
  3. Place pepper in your food processor or blender. I use a really cute mini processor for sauces and dips. And blend until you have a chunky mess, add the olive oil, blend until fairly smooth.
  4. Add the pumpkin and salt and process some more. The result should not have any chunks left in it but be smooooooth.
  5. Gently reheat to use over pasta, like the Pumpkin Goat Cheese Ravioli for example or chill and use as a spread for sandwiches or serve cold as a dip for veggies.                              Yields about 1 1/2 cups.

image

Copyright © 2011 Simple Healthy Homemade. All rights reserved.

Grilled Mediterranean Eggplant with Hummus Spread

image

Yep, I am still clinging on to summer, end of summer denial? Maybe juuust a bit… In my defense, I have embraced fall at least as far a pumpkins go, so think I am alright. But with how the weather was this past week end and the beginning of the week, it was grillin’ time, baby! And farmers markets and road stand are all still loaded with eggplant and zucchini, and other late summer crops, it be a shame to not grill up some yummies!

Ingredients

  • 2 md eggplant
  • salt
  • extra virgin olive oil
  • 3-4 tbs Hummus

image

  1. cut eggplant into 1/4″ thick slices lengthwise, salt on both sides and place in a colander in your sink to drain for 20 minutes (you will remove the excess salt in the next step, so no worries)
  2. Preheat gas grill or light the charcoals!
  3. pat or wipe dry with paper towel, and spray with olive oil (using your ‘Misto’) alternately, you can also use a brush to lightly brush oil onto both sides of the eggplant
  4. Grill on medium until grill marks appear, turn over and grill, with the cover down, until tender
  5. Place on platter and serve drizzled with Hummus Spread
  6. For Humus Spread: In a small bowl mix together the hummus with 2-3 tbsp water, stir until smooth.

Goes well with ‘Roasted Salmon with Coriander-Paprika Glaze’ or a nice Bison steak.

And guess what’s for desert… Pumpkin Cheesecake Minis! (recipe soon)

image

Copyright © 2011 Simple Healthy Homemade. All rights reserved.

‘Summer in a Jar’ (Canned European Plum Compote)

image

On Saturday we spend part of the day rummaging and discovering our way through a local antique place. I got some great deals on glass custard dishes, and a couple of old glass bottles we’ll be using to store my home made salad dressing (like the Greek Feta Buttermilk Dressing). It was rainy and the the temperature was steadily dropping, so being inside for several hours looking through old kitchen and household items, books and furniture was fun!

The trees behind my house are changing color, the first touches of fall, the first signs of frost (it only went down to 37 at my house, yipee!), and I have to come to terms with the fact that summer is definitely, absolutely over. No more denial. It’s FALL! Don’t get me wrong I LOVE fall, it’s just I really, really, REALLY liked summer this year and it’s hard to let go of something dear. In order to be able to take advantage of end of summer, super ripe, bursting with flavor European plums (aka prune plums, they are the smaller, oval purple/blue ones, that look a bit hazed over vs shiny) for a little while longer, I decided to cook them up into a compote, that can be used on Crêpes, pancakes or eaten as s desert (cold or warmed up) with some whipped cream or stir into greek yogurt as a treat!

or over cottage cheese…

If you live near an Italian or even Russian Market, you might have an easier time finding this old world favorite as not all stores are carrying them in our area and the seasonal availability is limited to a short window of opportunity. At my parents garden in Switzerland they would usually ripen sometime in late August or early September.

image

Today, after having found a nice (hopefully not quite yet) last batch at the farmers market, Now let’s see if we can make that preserving magic happen, for when fall or winter really hits and we are all longing for something that tastes of SUMMER!

Ingredients

  • 5 cups prune plums, halved, pitted (or 4 cups plums and 1 cup apple)
  • 1 -3 tbsp sucanat/rapadura*, raw sugar or other real sweetener of choice
  • 1 1/2 cups water
  • 1 tbsp lemon juice
  • 1/2 tsp cinnamon
  • 1/2 tsp vanilla
  • 1 tbsp tapioca
  • 3 pint canning jars and lids, bands, washed in the dishwasher
  • 21 qt water bath canner with canning rack
  • small sauce pan with boiling water ( to sterilize lids)

Directions

  • Prep the canner: fill with required amount of hot water and bring to a simmer. Heat water in small sauce pan, add the lids to it and bring to a simmer.
  • In a medium sauce pan, combine the plums with the rest of the ingredients above and bring to a gentle simmer, stirring occasionally . Keep at a simmer of 5 minutes, then remove from heat, cover and set aside.

image

    • If your jars are still hot (they juts came out of the dishwasher) sit them on a kitchen towel and fill one at a time with the compote, using a ladle and a canning funnel, leaving a 1/2″ head space (If they are cold, heat them submerged in the canner, in order to prevent them from breaking from the quick temperature change)
    • Wipe rim with clean paper towel, so not compote or juice clings to the top, then center one of the prepares lids on top, then tighten band (not too much, juts fingertip tight) with your fingertips only! When all the jars are filled and lidded (is that a word?), place them on the canning rack an lower into your canner, making sure all jars are covered by 1″ of water.

image

  • Bring the water in the canner to a boil and process for 30 minutes, adjusting for altitude
  • When time is up, turn off heat and leave them in the water bath for another 5 minutes, then lifting the rack up an hooking it to the sides of the pot, remove the jars gently (don’t shake or tighten or anything) place on a kitchen towel to cool off completely.
  • check in 24 h if the seal is secure (Lid does not flex up and down when pressed in the middle) place any not properly sealed jars in the fridge and eat quickly (just the content, please)
  • Label and store, or gift 🙂
Copyright © 2011 Simple Healthy Homemade. All rights reserved.

Hummus

image

A few years back, I decided to try and cook chickpeas instead of getting the canned variety. I got a pound bag, soaked them overnight, and cooked them the next day. I have never looked at legumes the same way again. The flavor is incomparable, the taste of freshly cooked chick peas is almost nutty, yummy!

Now what I do is I will soak a couple of different varieties of dried beans and go on a  bean cooking spree: Cooking a pound at a time in my Zyliss Pressure cooker (depending on the size cooker you got, you might be able to do more than one pound) after they are done and cooled, I portion them out in individual ‘servings’, usually in snack size zip top bags (have you noticed, they seem to only be available as store brand?) and freeze. Then whenever I want to make a bean soup, hummus or a salad, I just defrost what I need and can skip the high sodium and whatever else might live in those cans of beans. For soups, I literally just drop the frozen parcel in, hummus you gotta let it defrost in the fridge overnight or use your microwave.

image

Ingredients

  • 1 can chickpeas or equivalent frozen, defrosted
  • 3 tbsp lemon juice
  • 2 tbsp tahini ( sesame seed paste)
  • 1 tbsp olive oil
  • 1 tsp ground cumin
  • 1/2 tsp salt (use less if using canned)
  • 1/8 tsp ground white pepper
  • 1 dash cayenne pepper
  • 1 to 3 tbs water

Directions

Blend all ingredients in a food processor/blender, adding water until desired consistency is reached.

Serve as a dip with toasted pita chips or vegetables, or thin and use as a spread on grilled veggies

image


Unfinished Business: Grilled Mediterranean Eggplant with Hummus spread: taking advantage of the summer like weekend, we fired up the grill and had these puppies with a juicy, lean and clean bison steak 🙂


And Sunday night’s dinner, you ask? Oven roasted salmon with a coriander-paprika glaze… As I said, unfinished business, stay tuned, I will get to it 🙂

image

image

Copyright © 2011 Simple Healthy Homemade. All rights reserved.

Sprouted Quinoa Broccoli and White Bean Salad with Pesto Dressing

In the colder months I do rarely eat salad. It just seems to go against my nature. And since the temperatures suddenly dropped below 50, (last week it was 80-some in the afternoon) I prefer something warm right now. You can enjoy this both warm or cold, we had it warm as a main dish first, and then as a side cold from the fridge the next day. Taking advantage of late summer’s bounty of fresh broccoli and if you’re lucky enough to get some fresh shelling beans, that would probably be double awesome! I didn’t and it is fantastic no matter what. I do generally like to cook my own beans, instead of using canned. For a lot of the varieties, the flavor is incomparable, so be warned, once you start there is no going back… If you use canned beans, be sure to rinse them real good to get some of that excess salt off of them before using.

Ingredients

  • 1/4 cup red quinoa
  • 1/4 cup white quinoa
  • 2 cups chopped broccoli ( stems and florets)
  • 1 cup white kidney beans (cannellini)
  • 3 heaped tblsp homemade pesto (or a good store bought variety)
  • 5 tblsp Greek Feta dressing with Buttermilk

image
…soaking the quinoa until it sprouts…

image

Directions

  1. Rinse and then soak Quinoa in enough water to cover by 1/4″, cover, let stand overnight or up to 20 h(You could skip this step and just use the Quinoa plain out of the box)
  2. Pour Quinoa and water into a sauce pan and add water to just cover the sprouted grains ( If you skipped the sprouting, you most likely need a bit more water), bring to a boil and cook until tender and all water is absorbed, about 10 minutes.
  3. In the meantime, steam the broccoli pieces in a seperate sauce pan until crisp-tender and bright green, drain and set aside
  4. When the Quinoa is just done (the white grains will look translucent) add the beans to heat them up.
  5. Mix the pesto and the greek feta dressing in a large bowl, add the quinoa and beans, and the broccoli, gently mix until the dressing is mixed in

image
Enjoy hot or cold!

Serves 2 as a main, 4 if used as a side dish/salad

Yum!

Copyright © 2011 Simple Healthy Homemade. All rights reserved.