Peach Orange Corn Muffins

image

I love the taste and texture of corn bread, and corn muffins are very close, but there’s always like 5 sticks of butter in those cornbread recipes, and while I decidedly like butter, I think there is a limit before the result is more of a garden variety of ‘fried food’ as opposed to a bread or muffin (don’t even mention what it might do to the inside of you) So that needed to be fixed, but I did not want to sacrifice the awesome moist crumb that so often is characteristic of buttery muffins, so what’s a hungry girl to do? First of, I asked myself, is it really the butter that makes them moist? I mean, have you mashed a banana lately? Or cut up some peaches? There is quite some liquid in there, so off to the kitchen we go and since I had frozen peaches on hand…

image

I know, I known… Let’s back it up a minute here, I know what you’re thinking, ‘does she know it’s summer?’ Ehhm, yes, it’s quite hot, so… but here’s how it happened: I couldn’t resist to buy one of those whole pecks of ripe peaches at the farmers market the other week, it smelled soooooooo good! I know you would have bought it too. And since they were only a day away from spoiling, I had to chop and freeze most of them right away. (For the record, I did have some fresh peaches on the side). So there I am with my frozen, sliced and chopped peaches, and heck yes, I was going to use them.  But drop the butter, use dairy instead, yes maybe the fromage blanc I made, to keep it soft and moist without the butter.

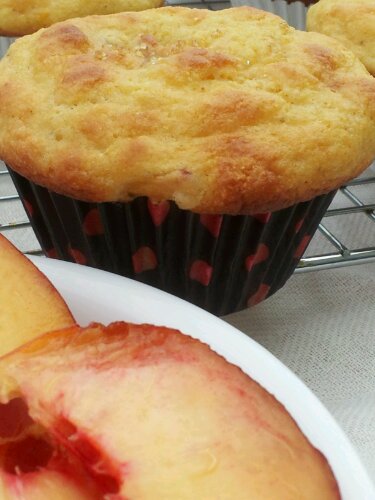
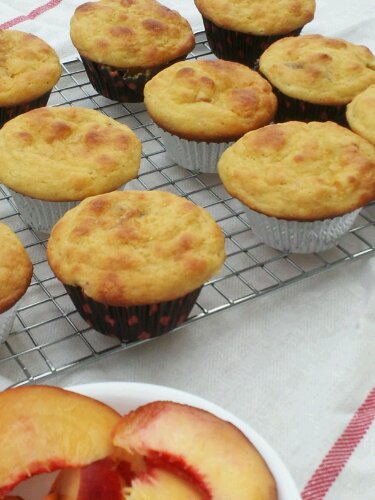
After some near fails (the ones that collapsed totally the moment they came out of the oven) I nailed it and here is your healthy, yet moist and airy corn muffin with peaches. Yes it is both low fat AND low in sugar. I think you just need to go over to the kitchen and try a batch yourself!
image

Ingredients

  • 1 1/2 cup fromage blanc, made from whole milk*
  • 1 cup all purpose flour
  • 1 cup cornmeal
  • 1 to 1 1/2 cups chopped frozen peaches, bite size chunks
  •  1/2 cup milk
  •  1 extra large egg (or two smaller ones)
  • 1/2 cup + 2 tbsp turbinado or granulated coconut sugar
  • 1 tbsp coconut oil, liquid
  • 2 tsp baking powder
  • 1/2 tsp baking soda
  • 1 tsp orange zest, (if using dried reduce to 1/2, or you could use natural orange essence or flavor)

* I have also successfully made this using half greek yogurt, half sour cream, about  3/4 cup each, plus or minus

Directions

  1. Preheat oven to 400ºF.
  2. Remove the peaches from the freezer.
  3. In a large mixing bowl, mix the flour, cornmeal, baking powder and baking soda and 1/4 cup sugar and set aside.
  4. In a separate large bowl, mix the egg(s), fromage blanc (or yogurt and sour cream), milk, coconut oil, orange zest until well blended.
  5. Add the wet mixture to the bowl with the flour, stir just until combined, then stir in the peach pieces and divide among 12 prepared muffin cups. (Line them for easy cleanup)
  6. Bake 24 to 30 minutes or until the tops are beginning to brown and the center is set.
  7. Let cool in the muffin cups for 15 minutes before digging in (it seems to help the muffins not stick to the paper liners like mad), then you may devour them and claim the muffin tin only made 11 9 muffins or finish cooling on a rack and share. Enjoy!
image

© 2012 SimpleHealthyHomemade

Blueberry Oatmeal Muffins

image

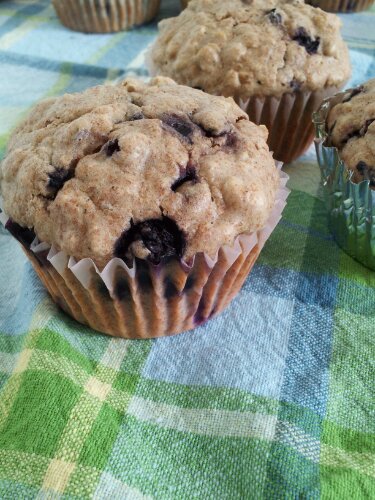
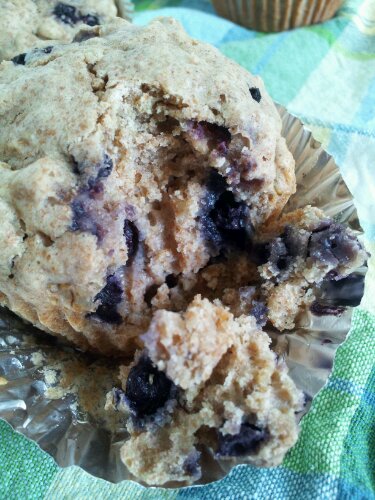
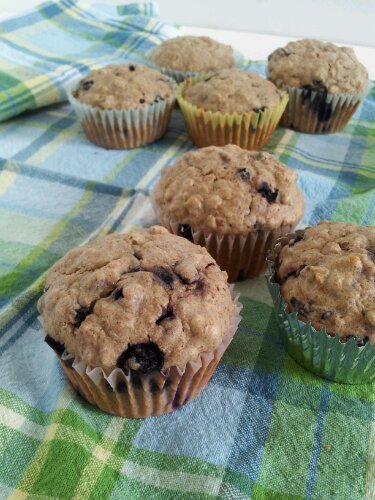
I wanted to make eat something sweet, desert, something baked, with that slight crunch when you bite it, so chocolate or ice cream was out… muffins, maybe. But i really needed to make breakfast. So in order to consolidate those two goals, it had to be at least somewhat on the healthy side, like cake was out. After some pondering and some back and forth I decided on blueberries and oatmeal. Oatmeal had to be in there due to its breakfast-y-ness and well, it’s also kinda good for you, or so I am told 😉

image

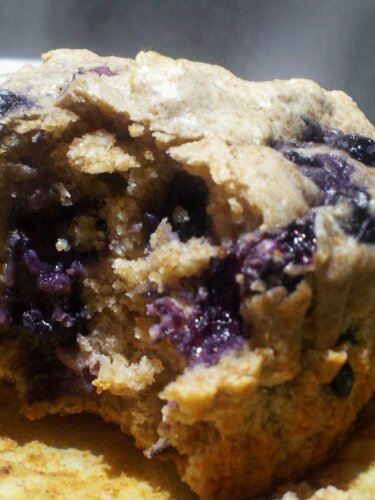
My first attempt was a fat-free (besides what was in the egg) version. Well let’s just say they, we don’t talk about those around here anymore… Happy to say that by attempt two I was cured of that idea and came up with these, a low sugar blueberry muffin.

I know many of you folks are looking for low fat versions, and fret not, I am going to figure it out a good one that works soon, I am not giving up that easy. Just be wary of anything at the store that’s labeled fat free or low fat. That claim to fame is usually pretty short lived when you look at the facts. Pretty much all store bought items that are low in fat automatically are high in something else (sugar to name the least offensive option).

image

Ingredients

  • 1 cup old fashioned rolled oats
  • 2 cups whole wheat pastry flour*
  • 1/2 cup butter, softened
  • 1/4 cup sugar or maple syrup or agave nectar
  • 1 tsp baking powder
  • 1 tsp vanilla extract
  • 3/4 to 1 cup milk
  • 2 eggs
  • 1 cup fresh or frozen blueberries

*use less liquid if you are using all purpose flour

image

Directions

  1. Preheat oven to 350º F
  2. Prepare a standard muffin tin with cupcake liners, set aside.
  3. Mix the dry ingredients in a bowl, set aside.
  4. In a medium bowl, beat butter until soft, add sugar and stir until incorporated, then add the eggs, add the milk and vanilla extract.
  5. Add the wet ingredients you just mixed up to the dry ingredients and stir just until mixed, then add the blueberries and gently fold into the dough.
  6. Divide among the prepared muffin cups and bake until golden and a toothpick tester comes out clean, 20-24 minutes.
  7. Let cool in the muffin pan on a rack for 20 minutes before removing the muffins.

Makes 12

image

© 2012 SimpleHealthyHomemade

Super Natural Mango Ice Cream

   imageSoft serve state…image…or popsicle, fantastic either way!  

You may have notice that I am obsessed enamored with mangoes. For more on this delicious fruit, see the Mango Cheesecake and the Mango with Sticky Rice posts and a fun side salsa, geeez, I guess I am kinda crazy about them. Since it is really hard to describe a flavor so exotic and sweet that it transports you to faraway places where the sun rises red through the early morning haze and you hear a peacock’s cry in the distance. The view takes your breath away as daylight slowly uncovers the scenery, like unrolling an exquisite silk tapestry…

Well, beyond dreaming, this is not going to get much words from me, except it’ only 2 ingredients and a must-try! No added sugar since mangoes are sweet as a dream, and if you use coconut milk, the whole thing is vegan.

Remember to start this the day before you want to eat the super natural mango ice

Ingredients

  • 2 champagne mangoes, peeled, cut into 1/2″ chunks
  • about 3/4 cups coconut milk (or half & half*)

*If using half & half, the mango ice is no longer vegan

Directions

  1. Chop and freeze the mango pieces until rock hard. (best overnight, but minimum of 6 hours seems to work)
  2. Blend the chopped, frozen mango pieces, until they look crumbly, like such…image
  3. With the machine running, slowly pour in coconut milk (or half and half, if going the dairy route) until the mango crumbles start to blend into a homogenous mass.image
  4. Either serve right away (texture is soft serve) or scoop into a small dish or popsicle molds and freeze until solid. Will keep for several weeks, if you can keep your fingers off of it 🙂

image

© 2012 SimpleHealthyHomemade

Whole Wheat Animal Crackers

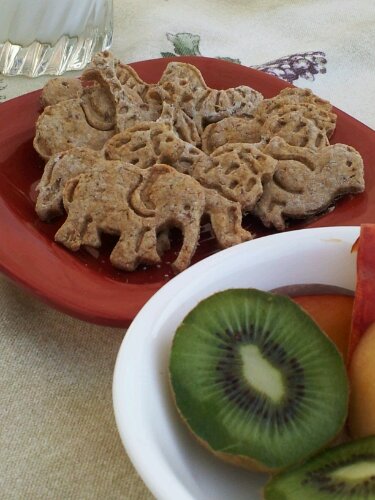
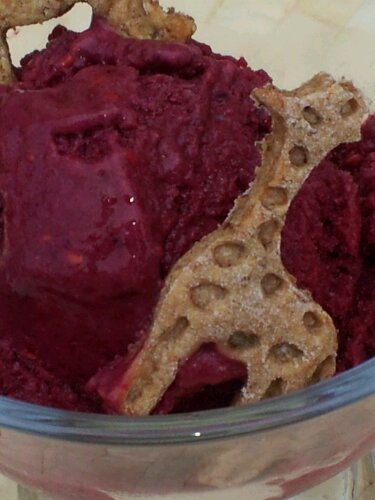
imageYes, I know you saw it coming, I mean after the Berry Ice populated with Lions and Giraffes (Ostrich looking, if you ask my boyfriend, but then again, he’s no biologist 😉 there was no question that the rest of the animal kingdom would soon show up on my blog as well. What can I say, they are just too darn cute!

image

I had searched for the perfect cutters for this recipe for  a while, square was just not an option, but plain old animal crackers from the store didn’t cut it either. Do you get that craving for crunchy as well? And I can;t shut it up with a crunchy apple, no it’s a different crunch I am after. So I set out to revamp and recreate animal crackers, surely there would be a better version one could come up with than the store  sold ones. Starting with a lot less sugar than any commercial product would contain, I added ground almond and flax meal to boost the nutrient and flavor and whole wheat to give them some substance.

image

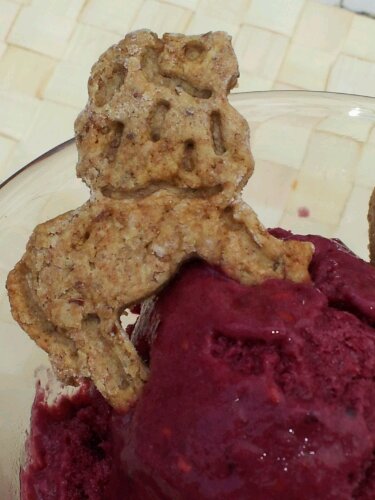
Animal crackers on Very Merry Black Berry Ice are the best!

image

Ingredients

  • 2 cups stone ground whole wheat pastry flour
  • 1/2 cup almond meal/ground almonds
  • 1/2 cup palm sugar (dry) or rapadura
  • 1/4 cup millet or oat flower
  • 1/4 cup half & half (or cream or milk)
  • 1/4 cup flax meal
  • 2 lg eggs
  • 1/2 tsp vanilla extract
  • 1 tsp baking powder
  • 1/4 cup coconut oil
  • 1/2 tsp salt

Directions

  1. Mix dry ingredients in a bowl, set aside.
  2. Gently soften or melt coconut oil, if it is hard. Mix in the vanilla, eggs and 1/4 cup half and half.  Add the wet ingredients to the dry and mix until a  cohesive dough forms. If it is too crumbly, add a little more half & half.
  3. Form dough into ball, cover and refrigerate for at least 2 hours or until dough isn’t soft anymore.
  4. Preheat oven to 350ºF.
  5. Roll out to 1/4″ thickness, press the cookie cutters into the dough (mine have a plunger to stamp the design onto the cookies after they are cut) and place the cookies onto a lined cookie sheet.
  6. Bake for 10-13 minutes, or until slightly browned on the bottom
  7. Let cool on rack before devouring them all 🙂

image

© 2012 SimpleHealthyHomemade

Very Merry Blackberry Ice

image

Many of you are wondering what kind of treat to serve for your 4th of July celebration. It has to be tasty, should ideally not be too filling and still feel good after a full meal, good for a hot barbecue day, but at the same time, you don’t want to go overboard on the calories either. I got just the treat for you: ice cold and healthy and you don’t even need an ice cream maker!
To your rescue comes…

Three ingredient blackberry ice!

I have not read up on my ice box deserts lately, but I suspect that this should actually be called ‘gelato’, since I am not only using cream…imagevery very exited about my animal cracker cookie cutters 🙂
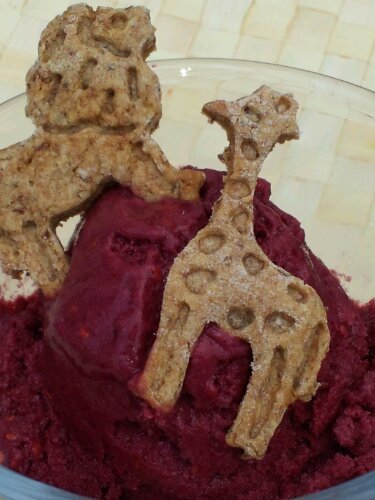
image You can vary the amount of sugar you add to this, depending on how sweet the berries are. Just remember to start this half a day in advance or use already frozen berries.
Ingredients

  • 12 oz (big carton/box) blackberries
  • 6oz box raspberries or some strawberries
  • 3 tablespoons sugar
  • 1/2 cup to 1 cup half & half, whole milk or cream

image

Directions

  1. Wash and gently dry the berries by shaking them a little in a colander. Place back into original container and freeze until rock hard, about 6 hours (depends on the freezer)
  2. In the bowl of a good food processor, combine the berries and the sugar, pulse until everything is crushed and starts to resemble a powder.
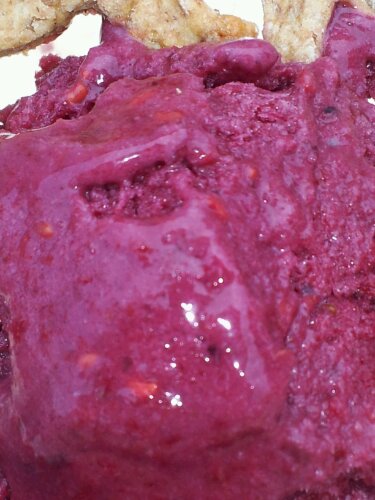
  3. With the machine running, in a slow stream add milk or half & half through the feed hole on the lid of the blender bowl. You may have to scrape down the sides once or so as you are going through this, but work quickly as the berries will start to thaw rapidly as you are processing them. Keep adding half&half until the berries and the dairy form a creamy mass. The ice cream will be quite soft (almost like soft serve) either eat right away, or place in the freezer for approximately 15 to 20 minutes to firm up a bit before serving. image
  4. Enjoy with animal crackers or any other crunchy item you enjoy 🙂

image

© 2012 SimpleHealthyHomemade

Granola Power Bars

image

Hiking or kayaking was on my list for the past weekend, but the weather has been a little , shall we say, un-cooperative. Since last night it literally thunderstorms every hour. So I have been limited to moving out onto the deck with book, cookie and tea, then back in, then back out with juice and book, then back in…  My poor kitty ‘Einstein’ is terrified of thunderstorms. He runs into the basement and hides. He’s been there pretty much all day 🙁 saw him once, I think I will take some water and food down to his little corner… Poor fellow.

image

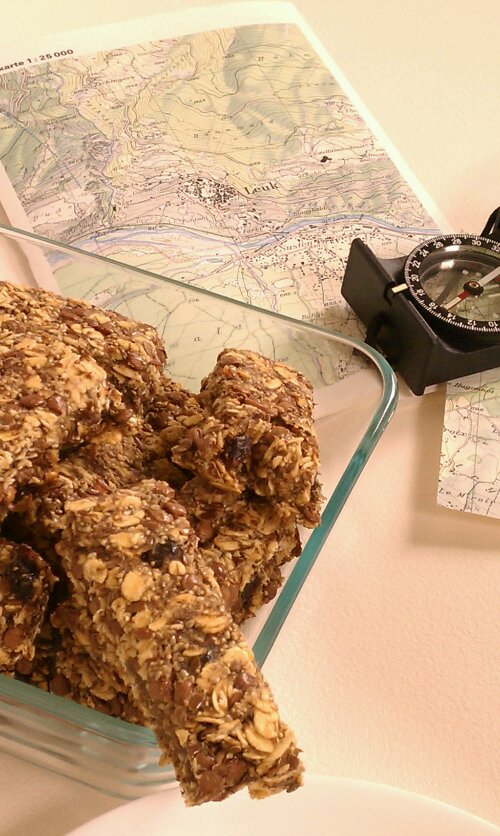
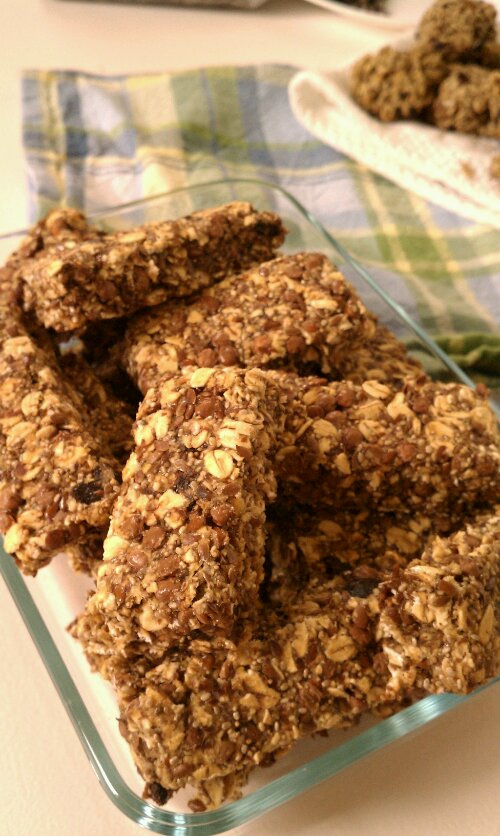
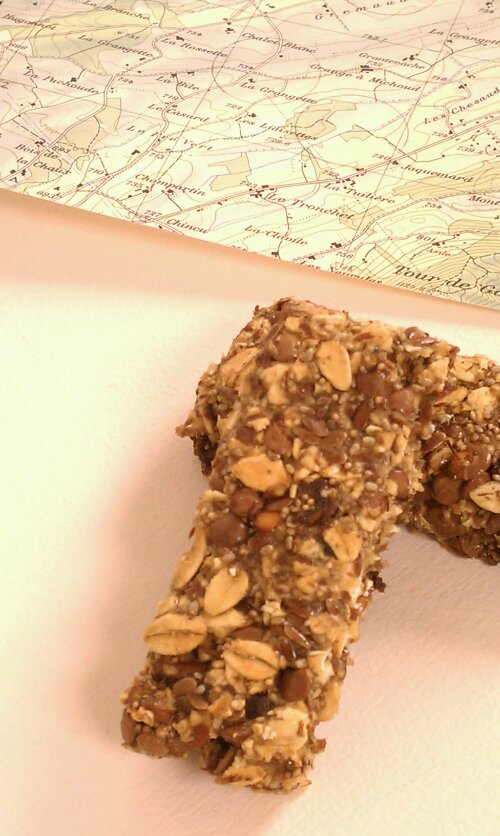
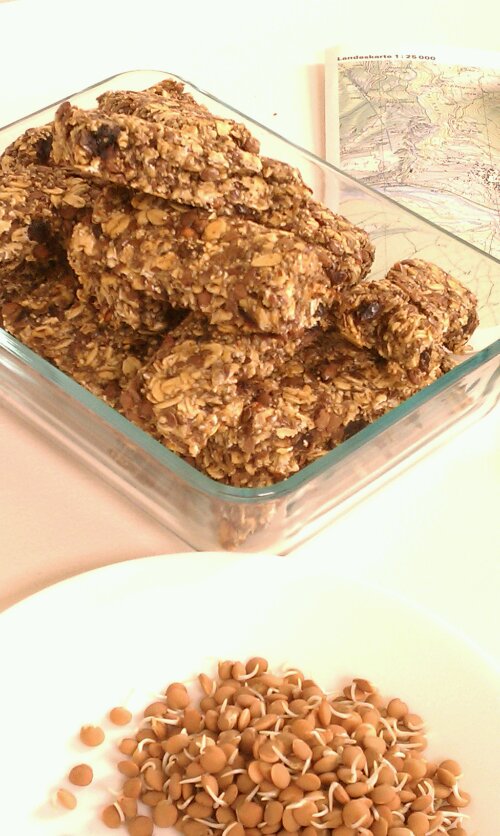
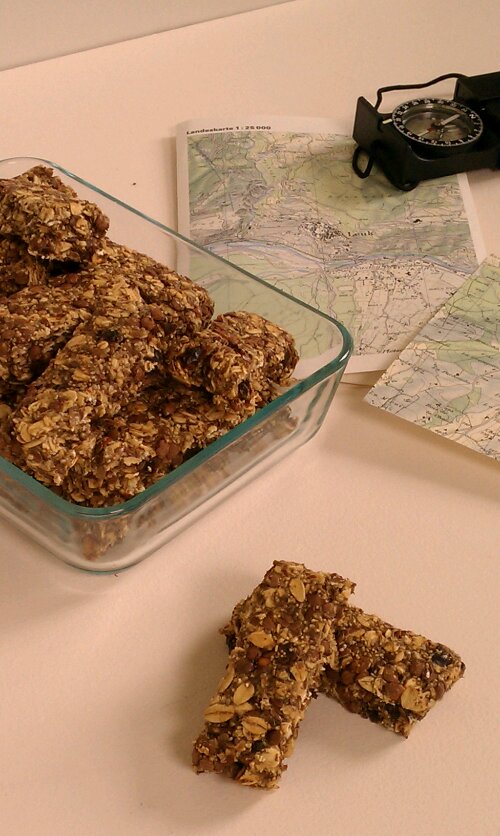
But on the upside of things, being limited to close to the house, I had plenty of time coming up with something that would be yummy (criteria number one), give me some sustained energy (i.e. complex carbs) and would be portable enough to take along, you know on hikes and such. Like a power bar. And since I really, really liked the granola I made recently (and this one), I started there with my ingredient list… And as an added bonus I supplemented with sprouted lentils for protein. To try lentils was an idea I got from Leanne’s Beach Bum Trail Mix Doesn’t that just look awesome? Heck, if they can go into trail mix, imagine how they would be sprouted and put into bars!

image

Ready for outdoor adventures! If only it stopped pouring…

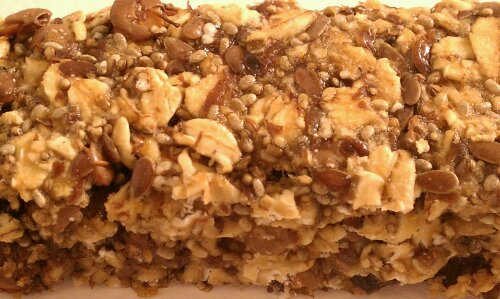
imageEven my boyfriend, who’s not all that concerned with healthy eating, loves these!
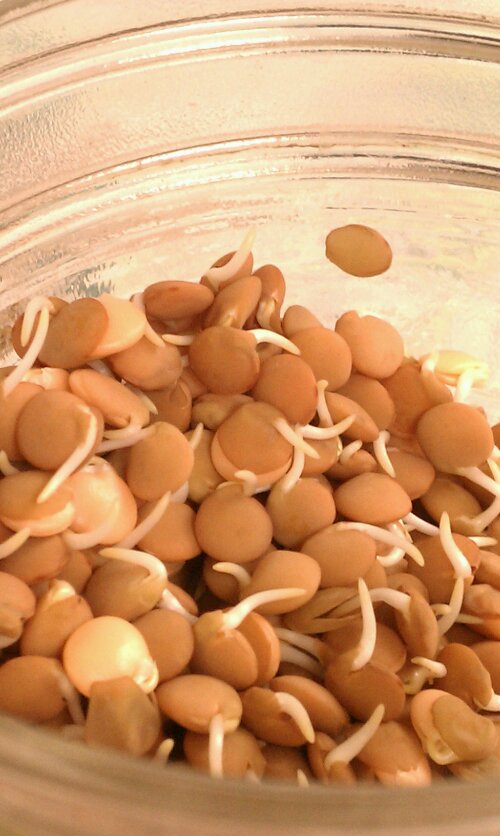
imageSprouted Lentils, before drying

Ingredients

  • 2 cups old fashioned rolled oats
  • 1/2 cup popped amaranth grain (buy or do it yourself)
  • 3/4 cup sprouted (and dried*) red lentils
  • 3/4 cup date pieces or chopped dates
  • 1/2 cup sweet brown rice flour
  • 1/4 cup flax seed
  • 1/4 cup flax meal
  • 1/4 cup chia seeds
  • 1/4 cup apple sauce
  • 1 cup water
  • 1/4 cup peanut butter
  • 1/4 cup rice syrup
  • 1/4 cup honey or agave nectar

* to dry the lentils after sprouting, preheat oven to 350F and place sprouted lentils out on a baking sheet. Cook for about 25 minutes, until crunchy. imageOk, so I got a bit picture happy. Did I mention, it was raining all day?

Directions

  1. Mix oats through brown rice flour in a large bowl, set aside
  2. Mix flax seed, flax meal, chia seed, water and apple sauce, let rest 20 minutes. Then add the sweeteners and the peanut butter and mix until well combined.
  3. Add the wet mixture to the dry ingredients in the bowl and stir until incorporated.
  4. Spread on a lined baking sheet (a US quarter sheet or half of a bigger cookie sheet works well) until about 3/4″ thick
  5. Bake at 350 for 60 to 65 minutes, checking and turning the sheet after 40. Then turn oven off and leave them in the oven overnight.
  6. In the morning, cut into rectangles roughly 1″x 4″, makes about 24

imageI used one side of a US half sheet size. Spread it out, it won’t go anywhere. And makes for some odd shaped bars at the end, you know, the ones YOU have to eat right away, to make it neat 😉
imageCopyright © 2012 Simple Healthy Homemade. All rights reserved
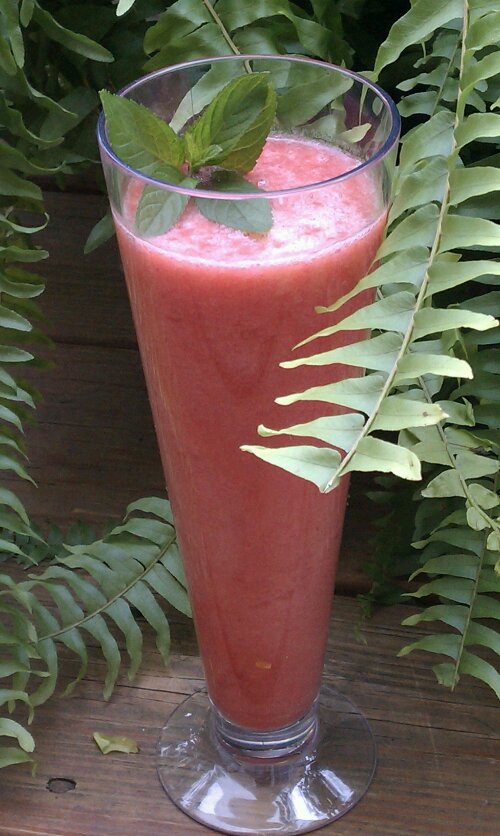
Strawberry Jicama Juice with Mint

image

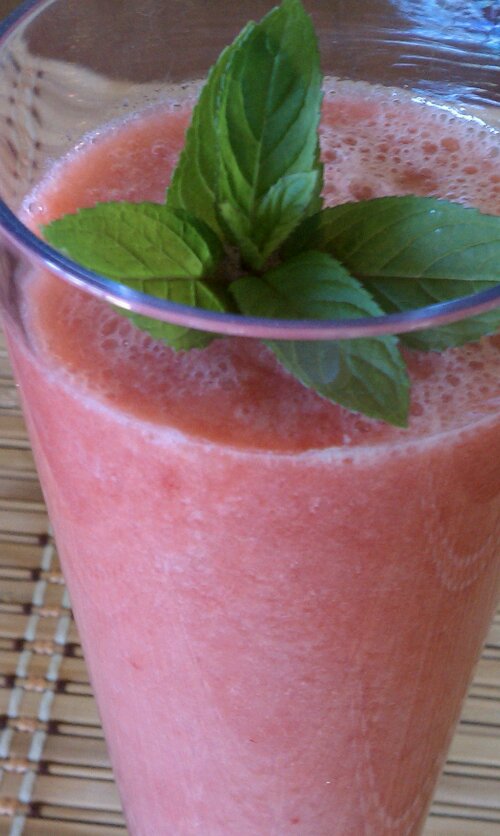
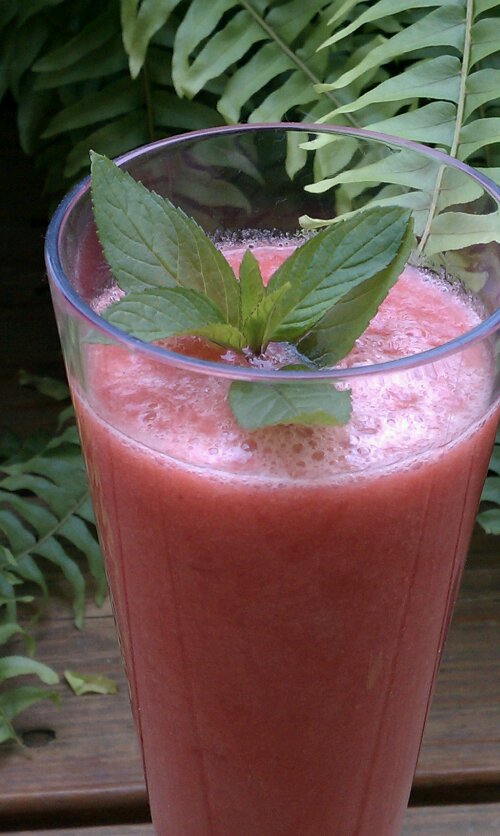
In  the last couple of weeks, I have re-introduced juices into my days again. No no, not OJ from a box. We all realize by now how not so good that might be for you. If you don’t yet, just think about the fact that diabetics are given orange juice when their blood sugar gets dangerously low, to quickly bring it back up… On some days juicing is an easy way to up my vegetable intake, and at least get to some of the nutrition I really should eat but don’t always have time for.

image

I will not get up on my soap box about sugar today, waaaaay to hot for climbing, but on hot days like this, eating is sometimes not something I feel like doing, but using my juicer always seems to come in handy. My general rule of thumb would be to use fruit only to sweeten your (green, yellow or red) vegetable juices, unless… unless of course you are making a desert. Well, here is more of a desert version, you know, to balance out the green juices in your life 😉

image

Ingredients

  • 1/2 lb strawberries
  • 1/2 medium Jicama, brown skin peeled off
  • 1/2 cucumber, peeled
  • 1 Chinese pear, quartered and seeds removed
  • 2 sprigs mint, plus some leaves for garnish

Directions

  1. Per your juicer’s guidelines, juice all the ingredients: I started with the softest things, the strawberries. Don’t push down, or you won’t get much juice from them, gently feed them through. Either juice the mint sprigs, or usig a wooden drink mottler, bruise them in the glass before serving the drink. Then juice the Jicama, the cucumber and the pear.
  2. Pour over ice, garnish with mint leaves and serve!
  3. Save the strawberry pulp for another use, unless you have a super Juicer and there is almost nothing left, you can use the rest for baking, pancakes or pop sicles

I bet this would be awesome spiked with lemon vodka… Tropical Island gettaway, here I come! …

image

Copyright © 2012 Simple Healthy Homemade. All rights reserved
Gluten-free Vegan Oatmeal Cacao Nib Cookies

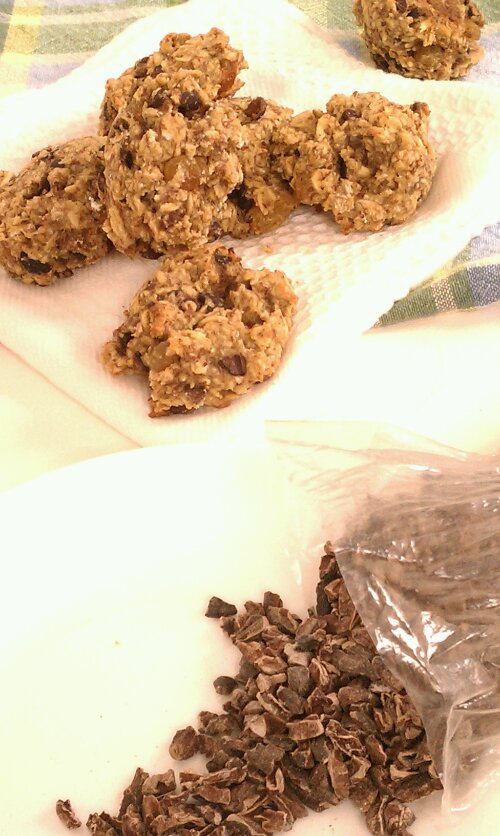
image Oh yeah, AND raisins!

These are so ridiculously awesome. The cacao nibs give them a dark chocolate flavor you can smell from the oven all while being gluten-free and low sugar! A quick word on cacao nibs/cacao bean: coming from the Theobroma cacao tree,  sometimes wrongly labeled cocoa nibs/cocoa bean, which from my understanding refers only to the extracted butter or powdered stuff. The mayan word is: kakaw, they might be on to something, I mean, they’ve only been using the stuff for ever. Just sayin’

Gosh, you have no idea, but just writing about those cookies makes my mouth water, and of course they are already gone… (I see some more baking coming up in this girl’s future) They are chewy and fragrant and yes, the texture is somewhat different than regular oatmeal cookies, after all there are mostly oats in there (and they are made without gluten flour).

imageDark cacao nibs (essentially pieces of cacao bean) 

If you are cultivating your sweet tooth, please feel free to use more ‘sweet stuff’. The cookies here are getting some of their sweetness from the raisins, but they would be a perfect treat for my Dad, who doesn’t really like sweets. I am a big believer in flavor over just plain sweet, or salty for that matter; and these cookies fit the bill perfectly.

image

Ingredients

  • 2 cups rolled oats
  • 1/2 cup millet flour*
  • 1/4 cup golden raisins
  • 1/2 cup cacao nibs
  • 1/4 cup flax meal
  • 2 tbsp chia seeds
  • 3/4 cup water
  • 1/4 cup almond or other nut butter
  • 1/4 cup agave nectar, maple syrup or honey**

* I used millet because of its sweet, nutty flavor, but you could most likely use other gluten-free flours

**if using honey, the cookies are no longer vegan

image

Directions

  1. Preheat oven to 350ºF
  2. In a large bowl, combine first four ingredients (oats through cacao nibs)
  3. In a separate bowl, mix flax meal and chia seeds with the water, set aside and let rest for 10 minutes.Then stir in the agave nectar and almond butter
  4. Stir the flax mix into the bowl with the oats, add up to another 1/4 cup of water if dough looks too dry.
  5. Drop cookies by the rounded tablespoon onto a prepared baking sheet, and bake until golden brown on the bottom and just starting to turn golden on top, about 8 to 11 minutes.

Makes about 30

imageCopyright © 2012 Simple Healthy Homemade. All rights reserved
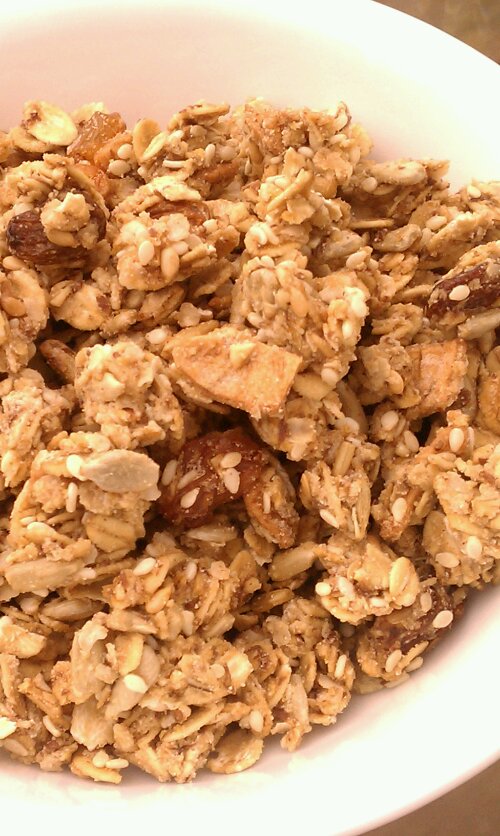
Apple Raisin Granola

image

I am back after taking a mini vacation up to a beautiful Bed & Breakfast in New Hampshire. Right on Lake Winnisquam. Sometimes you just need to get away from it all… Ahhh! It’s just the best to have someone make a lavish breakfast for you, and there were always freshly baked cookies. It’s like visiting your favorite Grandma, without having to help out in the kitchen 🙂 More on that soon! But before leaving, I had to make a few things that I could bring, for snacks and since I really did not know about the whole cookie thing they had going until we got there… And besides we were going to be on the road for six or seven hours. So I decided on another granola. Thanks to Heidi over at LightlyCrunchy who made this fantastic Apple Cranberry Granola, I was inspired to add the apple rings to my granola instead of just indiscriminately munching on them. I had never thought of using up my dried apple rings in a granola, what an ingenious idea!  

imagebefore adding milk or yogurt, can’t decide which I like best…

I go through phases, I find something, love it eat a whole bunch and then, not sure, but forget about it for a while? or get kind of tired of the taste? Anyhow I found myself with a good size bag of dried apple rings living in my cupboard, so now it can find its way into my breakfast and snacks 🙂 Delicious! The only thing I will work on for next time? Portability. Try eating granola while in the car… Not easy!

image

Ingredients

  • 2 cups rolled oats
  • 1/2 cup quinoa flakes
  • 1/2 cup dried apple rings, chopped
  • 1/4 cup sesame seeds
  • 1/4 cup golden raisins
  • 1/2 cup sunflower seeds
  • 1/2 cup brown rice flour
  • 1/4 cup brown rice syrup
  • (1/4 cup agave nectar or honey, optional*)
  • 3 tbsp coconut oil, melted
  • 4 tbsp flax meal/ground flax seeds mixed with 6 tbsp water, let rest 5 minutes

* If you are making this for the first time, use the additional sweetener (the honey or agave syrup) especially if you are trying to transition kids or the ‘I don’t have a sweet tooth’ husbands to a lower sugar diet, then over time gradually reduce the amount of sweetener added

Directions

  1. Preheat oven to 275º F
  2. Mix all the flakes, flour and seeds with the raisins and the apple pieces
  3. In a separate bowl, mix the wet ingredients: rice syrup, honey/agave, coconut oil and the flax meal mixed with the water.
  4. Add the wet ingredients to the oat mixture, stir well until evenly distributed, spread on a lined baking sheet and bake for 20 minutes. Stir, bake 10 minutes, stir again and bake for an additional 10 minutes.

image

Copyright © 2012 Simple Healthy Homemade. All rights reserved

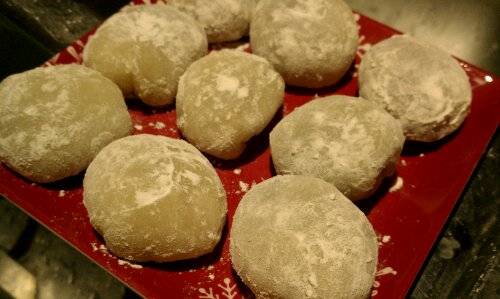
Daifuku

image

Glutinous rice cakes or Daifuku are something you can find at Asian markets all over the world, and that’s where I found them first. But if you know me a little, at some point I can’t leave it at that. I gotta know how it’s made.To ease your fears, no, I wasn’t the kid that opened up the belly of my dolls to find out what was inside. But I suspect that one of the reasons as to why not, might have had to do with me understanding that it would destroy them and my mom most certainly would not find willful destruction (no matter how lofty and glorious the reason behind it might have been) a good enough reason to buy another one. Oh yeah, from the days before the entire living room turned into a toy store when folks have children.

So, back to the subject at hand, I am just intrigued by how things are made, and why. You know that show on tv ‘how things are made’? If I had a tv, totally down my ally :). So of course that does not stop at food either and since part of my philosophy is if you can’t make it yourself, don’t eat it, I had to give this one a shot.

I searched the internet and found tons of recipes, some traditional, using a stove top method, some very elaborate on how to decorate, color or shape into flowers. So this recipe is adapted from various internet sources and in the end, I opted for an easy microwave option to make the dough…

image

Not quite as pretty and uniform as from the store…

You need to get Mochiko, or glutinous rice flour, which is the main ingredient in these, and something to fill the little cakes with. Traditionally Koshi-an, a sweetened Adzuki (red) bean paste is used, or a, also sweetened, smooth white bean paste, but I have in the past made them using sweetened chestnut puree. Besides sugar, the only other thing you need is potato starch, so the dough doesn’t stick to everything

imageI have a nagging feeling that the translator flunked English class…

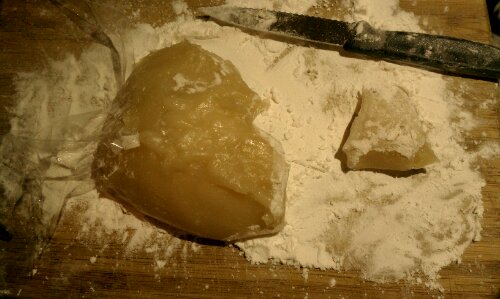
imageMake sure the entire work surface is covered in corn, I mean potato starch. Cut off a chunk of dough…

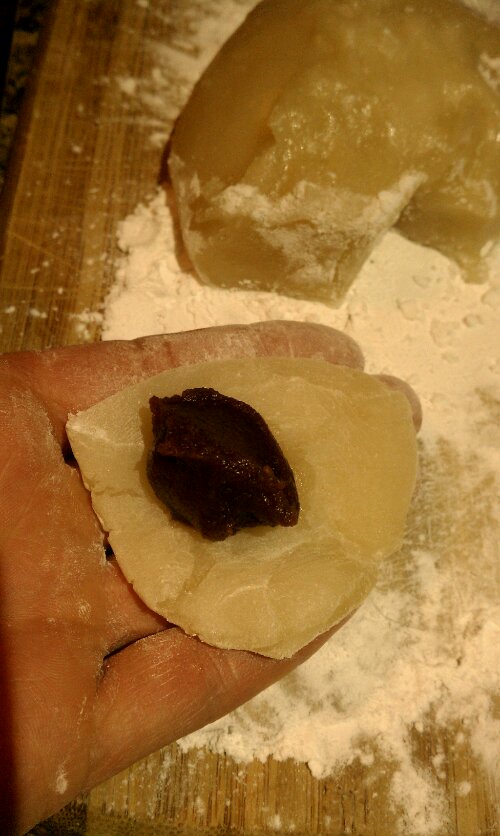
image…place the filling in the center…

imagethen  wrap the dough around it, making a little pillow… And finished!

Ingredients:

  • 3/4 cup Mochiko (sweet rice flour, also called glutinous rice flour)*
  • 1/4 cup sugar
  • 3/4 cups minus one tablespoon Water
  • 1 tsp pandanus leaf or vanilla extract (optional)
  • about 1 cup Red Bean paste (or other sweet filling)
  • Potato starch or other ‘..starch’ to keep the cakes from sticking to everything

* even though the name suggests it, there is not gluten in rice.

Directions:

  1. Mix the M0chiko, sugar, water and extract (if using) in a bowl, and mix well with a fork
  2. Microwave on high for 2 minutes, carefully remove the bowl (HOT) and stir, then return to microwave and cook another 1 1/2 to 2 minutes (depending on the power of your device). The dough should now be smooth and super hot.
  3. Cover a cutting board (or other work surface) with potato starch (or whatever else they sold you at the Asian market 😉 and leave the dough on it to cool slightly.
  4. When it can be touched, cut a piece of dough off (about egg yolk sized, out of lack for a better comparison), flatten into a disc and place a tablespoon fo filling in the center. Make sure the dough piece and your hands are covered in starch before you start. Note: To start, until you get the hang of it, use a teaspoon of filling, it’s a bit easier.
  5. Cover the filling with the edges of the disc so as to encase the filling completely. Set aside, seam side down, on a potato starch dusted tray or plate, and repeat until all the dough is used up.

imageCopyright © 2012 Simple Healthy Homemade. All rights reserved