5 minute Snack Cakes

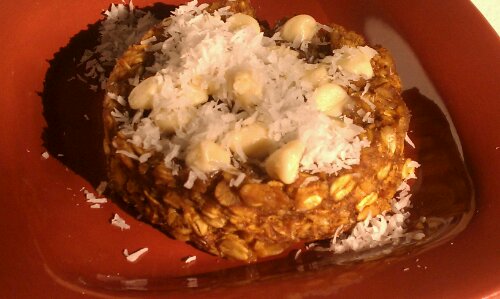
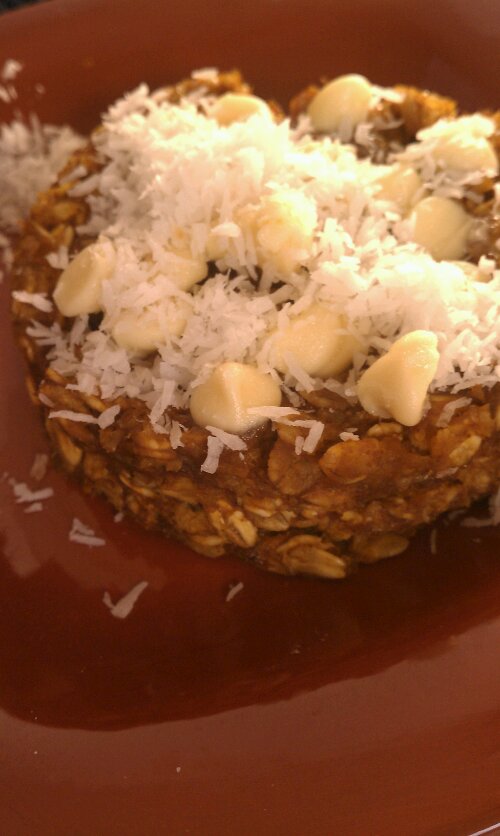
imagePumpkin White Chocolate version here shown made with rolled oats…
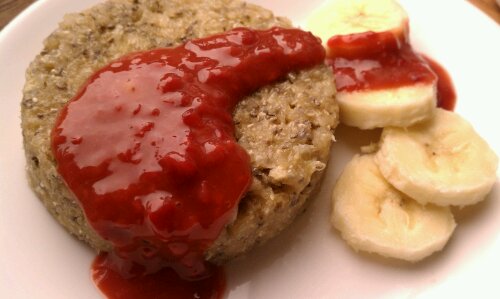
imageand Tropical Mango version with Raspberry Mango Sauce, shown made with Quinoa   (I know, it looks like Ketchup; Trust me it tastes TOTALLY different!)

For breakfast, as a snack and the best part, it’s utterly delicious cold as well AND when cold, they are portable (minus the garnish)

You can make these with rolled oats or any other flakes such a quinoa or barley flakes. You might have to adjust cooking time a little, but whatever is on hand works for these!

As an easy alternative to getting a mango, peeling and pureeing it, I have used mango baby food. One of my friends turned me onto the idea of using baby food as a flavoring for plain greek yogurt. Check the ingredients, but the brand I use has no added sugar, some flavor varieties use fruit juice to add extra sweetness. Don’t like mango? Make it juts with apple sauce or maybe a pear baby food?

image
Tropical Mango Banana Cake

Ingredients

1/2 cup quinoa or oat flakes,
1/2 ripe banana (1/4 cup)
1/4 cup mango purer (use 1 small glass of mango baby food, 4 oz)
1 tbsp sugar (palm sugar, etc)
(1 tbsp Chia seeds, optional)
1/4 cup rasbperries, frozen or fresh
Mix 1/4 cup of the mango, banana, oats (or quinoa), sugar, and Chiang seeds if using in a bowl
Grease two 8 oz ramekins with some oil on a piece of papertowel
Fill and smooh the top
Microwave on high for 3-5 minutes, depending on the power of your device. It’s done when the top does not look liquid anymore and the sides gently separate from the bowl.
Run a knife around the edge, inverted on a plate and serve with raspberry mango sauce (below), or your favorite topping. Such as maple syrup, almond butter, Apple sauce.
Or eat out of the bowl

For the raspberry mango sauce, heat the raspberries in a small saucepan then stir in the remainder (1/4 cup) of the mango puree
image
Pumpkin White Chocolate Oat Cake

Ingredients

1/2 cup rolled oat or quinoa flakes
1/2 cup pumpkin puree
1 tbsp sugar
1 dash cinnamon
1 dash pumpkin pie spice
1/4 tsp vanilla
White chocolate chips  and coconut for garnish (optional)

Mix all ingredients except chocolate and coconut in a bowl, then divide into two 8oz prepared ramekin forms.
Microwave on high for 2 min 30 sec to 3 minutes.

Run a knife around the edge, inverted on a plate and decorate with white chocolate chips, cover with the just removed ramekin and allow heat to steam the chocolate until soft (you can also re-microwave for 30 seconds), serve with coconut, or your favorite topping.

Copyright © 2011 Simple Healthy Homemade. All rights reserved

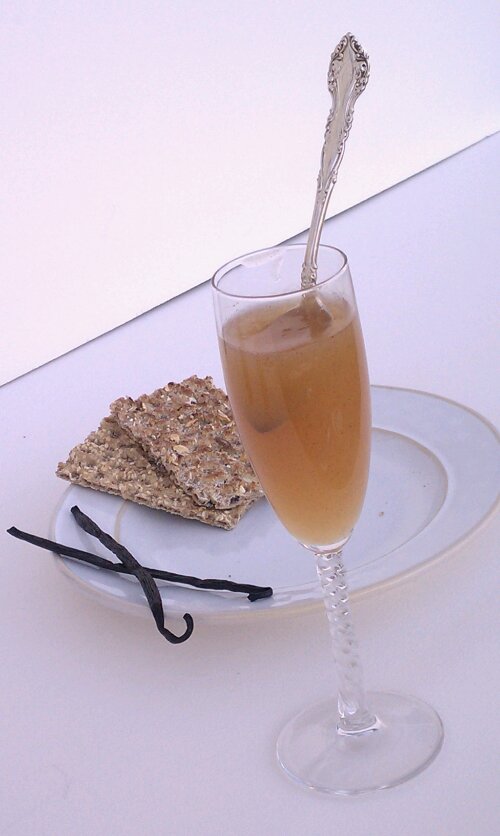
Pear Vanilla Butter

image

Lately I have just been feeling like changing things. From putting summer clothes away, ‘Tiffany-ing’ my bathroom windows,

image

and just generally fixing up and changing things around the house. Home Depot has been my friend (if not my wallet’s…) and I will soon be the proud owner of a real garage door opener! Hey, it only took four and a half years of living here, but now in the winter, in the snow or rain, I can actually use my garage for what it was meant for. Right now I have to leap out of the car, unlock the garage door, (had to get a separate key chain for that), open it, run back to the car and drive in = Completely useless when it pours as it literally takes less time to run to the front door. Yay! Can’t wait 🙂

I also have been thinking about adding a tile back-splash in my kitchen, currently debating on colors.

image
But here’s what I’ve come across looking for some paperwork filed away in a box in the basement… I though I ate it all, but there it was: Pear Vanilla Butter, 2008.

I have been waiting forever, ok maybe not, almost two weeks, to share this with you. It was inspired by a recipe in a cook book on preserving, but for the love of me I can’t find where it was. Luckily I had jotted down some notes and can therefore (hopefully * I was saying a prayer here*) recreate it. Trust me, it is totally worth the time spent. It is the smoothest, most delicately flavored preserve you will ever make! If the best and most beautiful parts of fall turned into a single food, it would be this elegant and sophisticated jam! Move over pumpkin and apple! ( At least for a little while)

image
I vaguely remember the original recipe saying something about ‘keeps for 3 months’, but this little gem I found smells and tastes just like I remember and while I won’t recommend you try this at home, it seems perfectly fine to me (if this is the last post on this blog, you’ll know why 😉 )

Ingredients

  • 4 lb pears, peeled, cored and diced
  • juice of 3 lemons
  • 1 1/4 cups water
  • about 5 1/2 cups sugar
  • 1 vanilla bean, slit open

Directions

  1. In a large pan, combine pears, water, lemon juice and vanilla bean. Bring to a boil, cover and simmer for 10 minutes, uncover pan and continue cooking for another 15-20 minutes, or until the pears are very soft.
  2. Remove vanilla bean and gently scrape out any seeds into the pan, using the rounded tip of a knife.
  3. Using a submersion blender*, and puree. You could also use your blender or food processor. Then press the resulting puree through a fine meshed strainer into a bowl.
  4. Measure puree into a large pan, adding  1 cup warmed sugar for every 2 cups of puree.
  5. Stir mixture over low heat until the sugar dissolves then increase the heat and boil for 15 minutes or more, stirring, until mixture becomes a thick puree and holds its shape when a little is spooned onto a cold plate.
  6. Spoon boiling pear butter into small, sterilized jars, being careful not to get burned, leaving 1/2″ head space. Immediately seal. After cooled off, check for seal, label and store in a cool, dark place for a minimum of 2 days before serving for flavors to blend.
  7. Keeps for 3 months, refrigerate once opened.

image

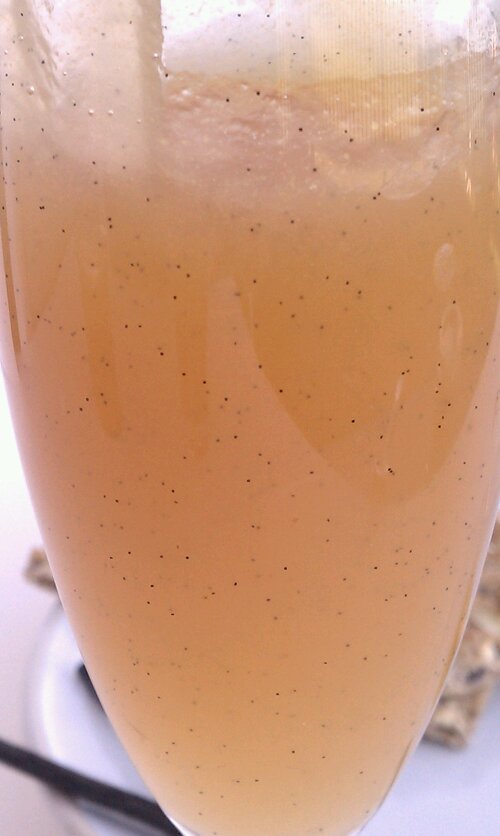
Close up.. Mmmmh see the Vanilla seeds?

image

Copyright © 2011 Simple Healthy Homemade. All rights reserved.

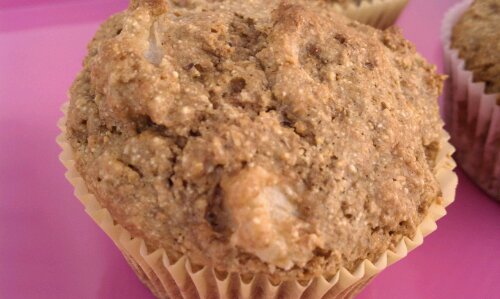
Pear Almond Muffins

image

Guess what was on sale at the farmers market this week-end? 🙂 Pears! Yumm! I love pears, when  you get them when they are juuust right, juicy, ripe but not too soft. Which is a fine balance and therefore, having bought a bunch I now gotta ‘consume’ them rather quickly.  I like apples but, let’s face it, pears are almost regal compared to a ‘commoner’ apple (No offense, Apple, love you too), maybe I just have this opinion because we can now get pretty good apples year round and they ceased to feel special, not being really seasonal anymore whereas pears are just never quite like they are in the fall… or maybe it’s because of this memory of my Mom saying ‘Pears are the queen of fruits’, who knows 🙂      Ahh the things we remember…

Besides eating pears fresh, melt chocolate chips as a sauce ( a personal favorite, use dark chocolate), roasting as a side, or baking a pear upside down cake or Tarte Tatin, oh and don’t forget, making pear vanilla butter (getting to that one later on, but it’s the very best thing you can do with your time if you have pears…and time, promise) what is one to do with  a bushel of pears?

image
Muffins! Quick, easy and portable, now we are talking!

image
Makes 12 regular size

Ingredients

  • 1/2 cup whole wheat pastry flour
  • 1 1/2 cups all purpose flour (I have used all whole wheat, it just gets a bit denser)
  • 2 tsp baking powder
  • 1/2 tsp baking soda
  • 1 1/4 cup ripe but firm pear, diced finely (from 1 to 2 pears, depending on size)
  • 1/2 cup coconut palm sugar, sugar or sucanat
  • 1/2 tsp vanilla extract
  • 1/2 tsp almond extract
  • 2 tbsp almond butter
  • 2 tbsp oil (you can leave the oil out, the consistency will change a little, but it’s still yum)
  • 1 lg egg
  • 1/4 cup milk (dairy or almond milk)

 Directions

  1. In a large bowl, mix together the first four ingredients
  2. add sucanat or coconut sugar, and diced pear and stir to coat
  3. add the remainder of the ingredients and stir until just combined then drop by the table spoons into lines muffin pan
  4. bake in a preheated oven at 400F for 15-20 minutes or until tester inserted into muffin comes out clear
  5. Let cool slightly before serving.

image

And just like that, they are all gone:)

Gotta get back to the oven, I am seeing some Pear Gingerbread Muffins in my near future…

Copyright © 2011 Simple Healthy Homemade. All rights reserved.

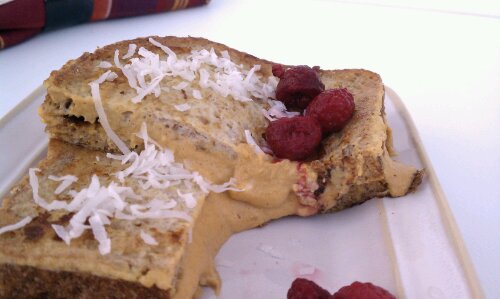
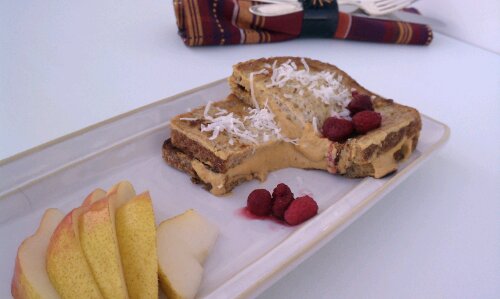
Pumpkin Cream Cheese Stuffed French Toast

image

One of my favorite breakfast spots in the area makes this amazing stuffed french toast that’s to die for.  They are, however, closed on Sundays, which would only be like the perfect brunch day. So obviously it was only a matter of time until I had to try and recreate so I could have it anytime. Ahh the convenience of it 😉 And of course I will still go and have breakfast there, some days there is nothing better than to just sit down and have someone do all the work for you, including the dishes 🙂

Here’s my version using, you guessed it, some of that pumpkin that’s still left over from making pumpkin lattes, mini tartletts and goat cheese pumpkin ravioli. If you cook for one or two people only, you gotta be inventive and use what you have several different ways, so it doesn’t go bad, and I am not one to waste anything if I can help it, so bare with me if you feel pumpkin OD coming on. I’ll be onto something else soon, I promise.

image

Any bread will work for this, crusty bread just has to be soaked a bit longer. We used to make a dish like this back home, using any leftover day old bread, although we didn’t call it ‘french toast’, and we did not stuff it with anything.

Ingredients

  • 4 slices of toast bread (or any day old bread, roughly equivalent in size, I used Ezekiel)
  • 2 eggs, beaten
  • 1/2 cup milk, warm
  • coconut oil for cooking
  • 4 oz cream cheese
  • 1/4 cup pumpkin puree
  • 2 tbsp granulated palm sugar, or sweetener of choice
  • 1/4 tsp cinnamon
  • 1/4 tsp pumpkin pie spice
  • optional grated coconut for garnish, toasted if desired

Directions:

  1. Soften cream cheese, and stir until smooth
  2. Add the spices, sugar and the pumpkin puree, mix until incorporated.
  3. Place milk and eggs in two separate deep flat dishes
  4. Turn the bread in the milk, then turn in the beaten egg and place in heated skillet. Cook until golden brown, then flip over to cook the second side. Remove from pan and set aside and keep warm.
  5. After making the second slice, while still in the skillet, top with 3 tblsp pumpkin cream cheese mix and top with another slice of french toast, and sprinkle with toasted coconut. (If your skillet is big enough, you might be able to cook all four slices at once, but mine only fits 2)

THE best!

image
Copyright © 2011 Simple Healthy Homemade. All rights reserved.

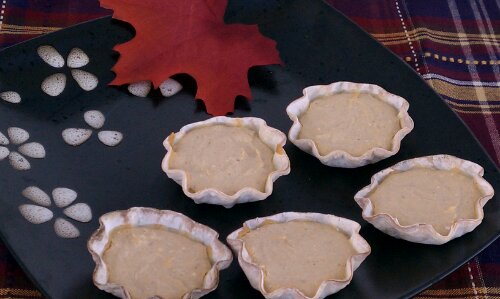
Pumpkin Cheesecake Minis

image

Ahhh it’s Fall, and I love me some pumpkin cheese cake. But ever notice how heavy that stuff is? I have a hard time finishing those huge pieces one is supposed to eat. How about bite sized, nah, too small maybe 3-4 bites? Now we’re talking! And while we’re at it, make it easy and quick as well.

That’s right, my friends, I want my (cheese) cake and eat it too (could not resist that one) And as you might know, I am not one for letting anything go to waste and so I was going through my fridge to see what’s on hand that might be useful.

image

The result? SUPER EASY, and besides the crust, NO BAKING! And to top that, you can make these in the toaster oven, in fact they turn out better in the toaster oven 🙂 Win!
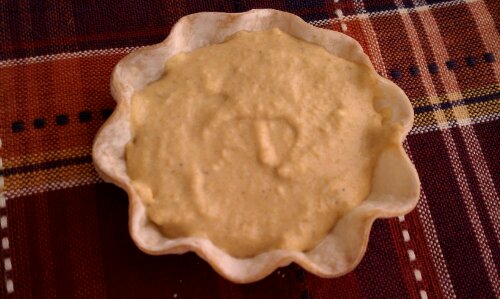
Here is my secret weapon of choice: left over pot sticker wrappers! That’s right, and we are going to blind bake (or toasterize)  them into crunchy littlte tartlet shells.

You need:

  • 4 oz cream cheese (1/2 bar, pack, block? what do you call that?), softened
  • 3-4 tbsp pumpkin puree (from can)
  • 2 tbsp suconat or coconut sugar
  • 1/8 tsp cinnamon
  • 1/8 tsp pumpkin pie spice mix
  • 1/8 tsp vanilla
  • 8-10 pot sticker wrappers (or wonton wrappers, trimmed to a round shape)

image

Directions

  1. Place pot sticker wrappers in individual Madeleine forms or muffin tins, place in toaster oven for about 5-6 minutes, being careful not to let them get too brown, trust me, it goes quickly. On mine I set it right between the light and the dark setting. If your toaster oven has a temp setting, turn it down to 400, but leave it on toast (depending on your muffin cups/ Madeleine forms it might take more or less time, shiny metal reflects the heat…)   Alternately, using your oven, bake at 350 for 10 to 12 minutes, or until just slightly golden. They will crisp up more as they cool.
  2. In the meantime place softened cream cheese in a bowl, add the coconut sugar/sweetener of choice, and stir until completely incorporated.
  3. Add spices and pumpkin and mix until uniform.
  4. When the shells are cooled a bit, fill each using a tablespoon.
  5. Refrigerated for min. 1 hour to allow to get firm, prior to serving.

Note: these are best made and eaten within a day or so, since the crust will soak up the moisture from the filling and get progressively less crunchy.

image
Copyright © 2011 Simple Healthy Homemade. All rights reserved.

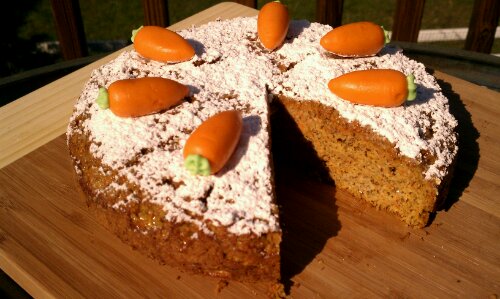
Healthy Carrot Cake

image
image

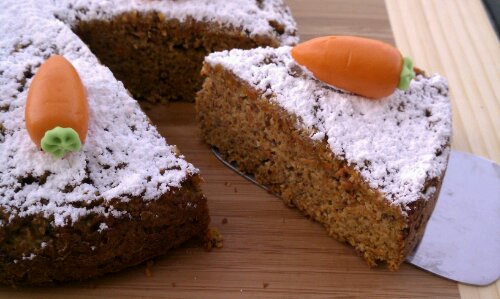
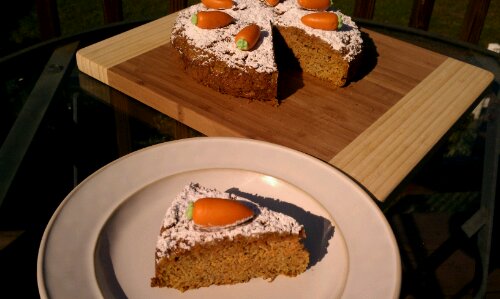
The last couple of days I have been thinking about home (the old home, where I was born and where I used to live) maybe it was brought on by roasting and eating those amazing chestnuts the other day, who can say? Anyway, we have a lot of regional specialties in Switzerland and this recipe pays homage to a Carrot Cake from the region of Aargau, and juuust in case any of you are into linguistics, the name of the dish I am going after is ‘Aargauer Rüebli Torte’. In my recipe, there is no butter or oil in the cake batter, there is limited amount of sugar compared to most regular muffin or cake recipes, hardly any flour and it can be made gluten free. It’s moist crumb is achieved without the addition of fat, in fact the only fat in it, comes from the egg yolks and the ground almonds used. Still it’s cake, it’s a desert and should be enjoyed as such, in moderation 😉 Not saying this would be a good idea, but it’s quite a way to sneak some veggies past certain people called kids 🙂

image

For simplicity reasons, you can also make muffins (simplicity, because you don’t have to try to come up with believable stories on where the missing piece of cake went 😉

image

Ingredients

  • 1/2 cup + 2 tbsp sugar
  • 5 organic eggs, seperated
  • 1 pinch salt
  • 2 tbsp warm water
  • 1/2 lemon peel
  • 1 lb carrots
  • 2 cups ground almonds, natural, not blanched (also known as almond flour)
  • 1/8 tsp allspice
  • 1/2 tsp cinnamon
  • 1/2 cup + 2 tbsp flour (use oat flour to make it gluten free)
  • 1/2 tsp baking powder

image
egg yolks , and sugar: looking dark yellow to start…


image
…and light in color after stirring

Directions

  1. Mix first four ingredients in a bowl and stir until light in color and airy
  2. add lemon peel
  3. Shred the carrots on the fine side of a grater into the egg mixture
  4. add the cinnamon and allspice, stir to combine
  5. in a separate bowl, beat the egg whites  until soft peaks form, add on top of the mix
  6. sprinkle the ground almonds on top
  7. sift flour and baking powder over top and gently incorporate the almonds, egg whites and flour.
  8. Fill into prepares 8″ spring form pan ( or grease muffin cups, you can use paper liners, only bake 25 minutes) and bake at 350 F for 50 minutes, or until tester comes out clean.
  9. After cooled completely, coat top of cake with sifted confectioners sugar, and marzipan carrots. Or make a white glaze by mixing  1tbsp lemon juice, 1-2 tbsp water and 1 1/2 cups of confectioners sugar until mixture coats back of spoon evenly. Spread over entire top and sides of cake.

image

By the way: My boyfriend, who was very adamant about not liking carrot cake, never having liked carrot cake, finally agreed to try a tiny piece, after my: ‘this is not your typical extremely sweet american carrot cake, just saying. But, alright, more for me!’ Well, he revised his opinion, in his own words: ‘OMG, this is delicious!’

image

Copyright © 2011 Simple Healthy Homemade. All rights reserved.

Surprise Visit ‘Cake-to-Biscotti’ (Vorrats Cake)

image

My sweet tooth hijacked me completely today. I think it the days getting shorter and the nights colder. Makes me wanna eat cake. Or at least make some and have on hand for when I want some, or need some because of a surprise visit or something (okay, this might just be an excuse, since I am really not sure just how long I will be able to keep my hands off of them)
The German title translates to something along the lines of stock/supply/storage cake since it is baked in canning jars and can then be kept for up to 6 months
image

( yeah right, as if anyone is going to manage that)

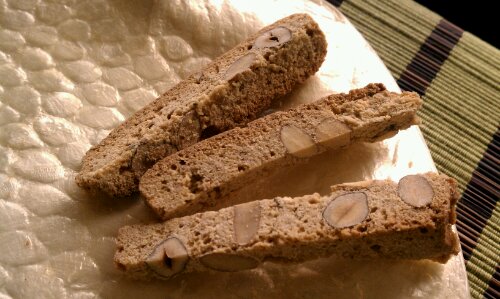
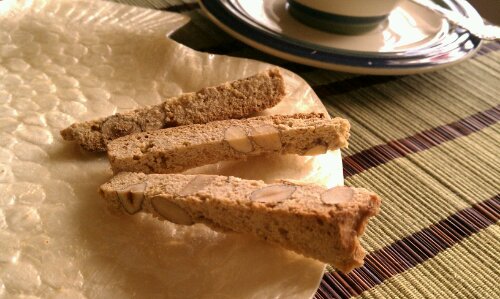
The idea is that before you serve it or gift it, you remove cake from the jar, slice it thin and bake it up till crisp, = biscotti.
imageIdeal with tea or coffee 🙂
In the background: that’s what they are supposed to look like, foreground, ‘first try’ with 12 oz jelly jars… I basically had to carve the cake out of the jars and slice them lengthwise

You wanna make sure you use wide mouth pint jars from Ball. Or any other jar that is truly straight on the inside and DOES NOT curve in at the top for the lid to thread on. I tried it with 12 oz jelly jars, they LOOK  straight on the outside, but as we all known, it’s the inside that matters much more than the outside 🙂

image

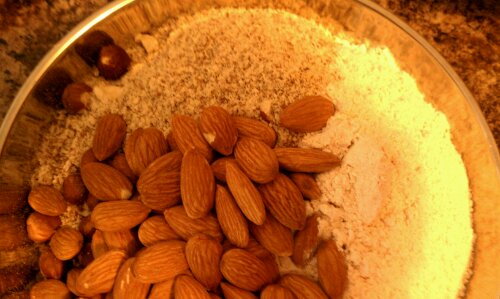
Ingredients

  • 4-5 canning jars, pint size
  • 5 eggs
  • 1/4 tsp salt
  • 1 cup sugar
  • 3 cups (+ 2 tbsp*) Flour
  • 1 cups ground almond or hazelnuts, divided
  • 1/2 cup almonds and/or hazelnuts
  • 1 tsp vanilla
  • 1/2 tsp baking powder
  • 1/2 stick butter, melted

image

Directions

  1. butter and coat jars with 1/4 cup of the ground almonds
  2. In a big bowl in warm water bath, beat eggs, salt and sugar until light and airy
  3. remove from water bath, beat a little more then stir in vanilla and gently mix in flour, baking powder, ground almonds and whole nuts
  4. fold molten butter into mixture
  5. Fill canning jars about half with mixture, tap several times to remove any air bubbles. Close jars and cover lids with aluminum foil
  6. Preheat oven to 350 F. Place large rimmed baking sheet in lower part of the oven and fill as much as possible with hot water, place jars right above that on the rack.
  7. Bake 1 1/2 hours. Let cool in the glass.
  8. To enjoy, open jar, remove cake. If you got the truly straight pint jars, it’s a piece of cake (could not resist that one) will keep up to 6 months
  9.  When unexpected guests show up, not to worry, you’re prepared! Pop a jar open, cut into 1/4″ thick slices and bake in a 250 F oven until crisp!

imageMmmmhhh!

image

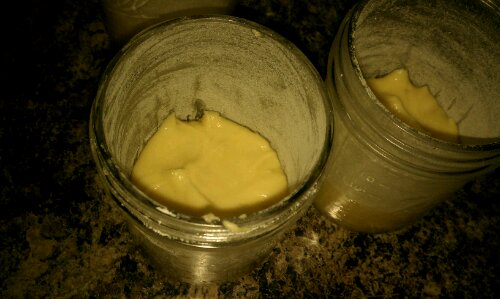
only fill about half way up

image

baking (this time the right jars…)

imagethis is the lemon versions ( will be up soon, still lives in metric land right now)

imagesliced and ‘biscotti-ed’ 

Copyright © 2011 Simple Healthy Homemade. All rights reserved.

Pumpkin Muffin Bites

Alright, i admit it: I am suffering from a pumpkin addiction at the moment, and while were at it, I have an obsession with bananas. It all started with trying to use up all those severely ripe bananas in the summer. I would buy bananas, thinking:’ good snack, conveniently packaged’ and then have an apple instead.
So I have come up with countless ways of using up those ‘end of the week, less than pretty, by themselves inedible’ (I prefer them just a bit green) bananas without having to whip up banana bread every time. Now it’s gotten to the point where I purposely buy extra bananas to let ripen fully. They are cheap, readily available and much better for you than sugar. And get quite sweet when they get to ‘really ripe’ status. So I  started using bananas as natural sweetener. (Using alternates to sugar has become more and more important to me since my boyfriend was diagnoses with diabetes last year.

And telling everyone about my quest for the perfect pumpkin latte (recipe to come soon) and my woes in finding canned pumpkin, I had several friends donate cans they found at stores. Soooo… Now I have lots of seasonal pumpkin and once a can is open, well you better use it up 🙂
That’s where these come in:

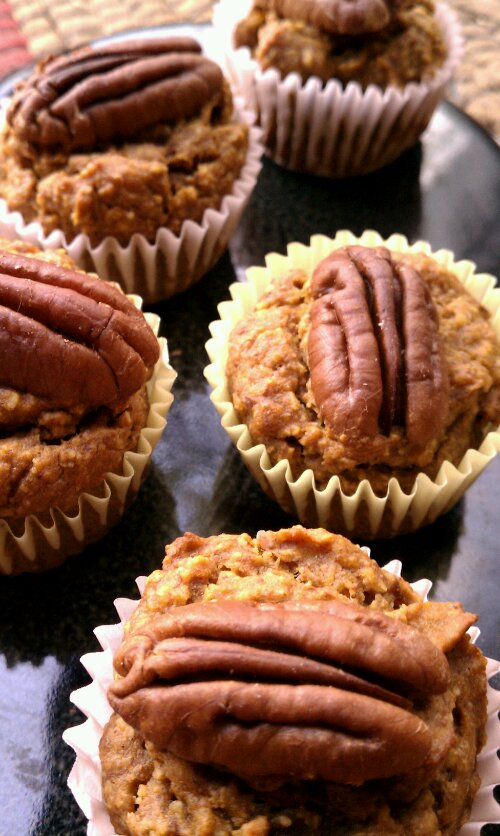
image
Pumpkin Muffin Bites!

image

Ingredients

  • 1 Mashed very ripe banana
  • 1/2 cup pumpkin puree
  • 2 tblsp cashew butter
  • 1 tsp vanilla extract
  • 1/4 -1/2 tsp Cinnamon
  • 1/8-1/4 tsp Pumpkin pie spice
  • 1-3 tblsp Sucanat*, Rapadura or date sugar
  • 1 tsp Baking powder
  • 1/2 cup Ground almonds/ almond flour
  • 1/2 cup Chickpea flour
  • Pecan halves for garnish

Directions

  1. Preheat oven to 350 F and line mini muffin pan with muffin cup liners.
  2. Mash up the ripe banana, add the pumpkin and the nut butter and stir until no lumps remain. Add Sucanat, stir.
  3. Stir in vanilla and spices, then add the chickpea and almond flours along with the baking powder and mix until combined
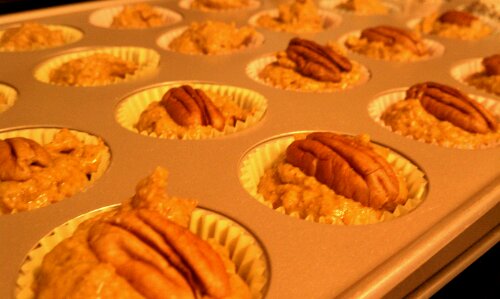
  4. drop into mini muffin pan lined with paper muffin cups by the teaspoon full and garnish each one with a pecan half.
  5. Bake in middle of preheated oven at 350F for 10-15 minutes, or until toothpick comes out clean.
  6. Cool on rack.

* Sucanat and Rapadura are dried sugar cane juice, not bleached, not refined

Super yummy, but the color before they are baked is rather questionable…just saying

image

Copyright © 2011 Simple Healthy Homemade. All rights reserved.

Sweet Potato Apricot No-Bake Macaroons

I was searching for Pumpkin Puree (the one that conveniently comes in cans) ALL OVER town, after seeing this lovely  Pumpkin Spice Smoothie — Healthful Pursuit recipe from Leanne and the Pumpkin Spice Latte over on Averie’s blog…

After three (3!!!) grocery stores without pumpkin, a store manager telling me they were out since last December, still due to  a shortage last year every one making those delicious looking lattes and smoothies, I suspect 😉

Craving the sweet, orange fall flavors, I started with the sweet potato I had on hand and went from there. At first I thought, maybe I will just adapt the smoothie or latte and use the sweet potato instead (I argued it might work, it’s sweet, orange and creamy when cooked, add the right spices, they make sweet potato pie filling…) At 9 pm after being up since 4 that morning, that seems like a great idea, trust me. And maybe it would have been…

I have to admit though, courage left me after cooking the sweet potato and here’s what I have come up with instead:
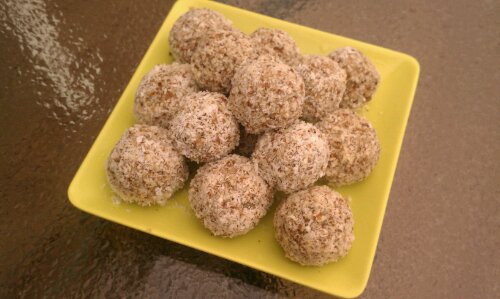
Sweet Potato Apricot No Bake Macaroons. I really wanted to call them: Sweet Potato Coconut Apricot Banana Almond Balls, but that would have been a bit ridiculoso!

image

No, sorry no drink recipe (yet)

image

They are kind of like those Energy Chunks at the Health Food store, but more tender, fresher, sugar free and softer in texture, enjoy!

No cooking/baking involved, except for the sweet potato:

image

Ingredients

  • 1/2 cup sweet potato, cooked, mashed
  • 1 really ripe banana, mashed
  • 1/2 cup almond flour/meal
  • 1/2 cup coconut shredded fine
  • 1-2 tblsp chopped dried apricot
  • (optional) 1 tblsp maple syrup or other sweetener
  • 1 tblsp chia seed
  • more coconut and almond flour for coating

Directions

  1. cook, let cool a bit and peel sweet potato, chop roughly
  2. add very ripe banana, chia seed, sweet potato (and sweetener if using) to food processor (can be done by hand as well) pulse to combine
  3. combine  chopped apricots, almonds and coconut with the food processor contends, mix until incorporated
  4. form 1 1/2″ dia balls, using a spoon to measure it out, roll between your palms, then roll in a mixture of more coconut and ground almonds
  5. Refrigerate and enjoy!

image

image

Copyright © 2011 Simple Healthy Homemade. All rights reserved.

If you can’t make it yourself…

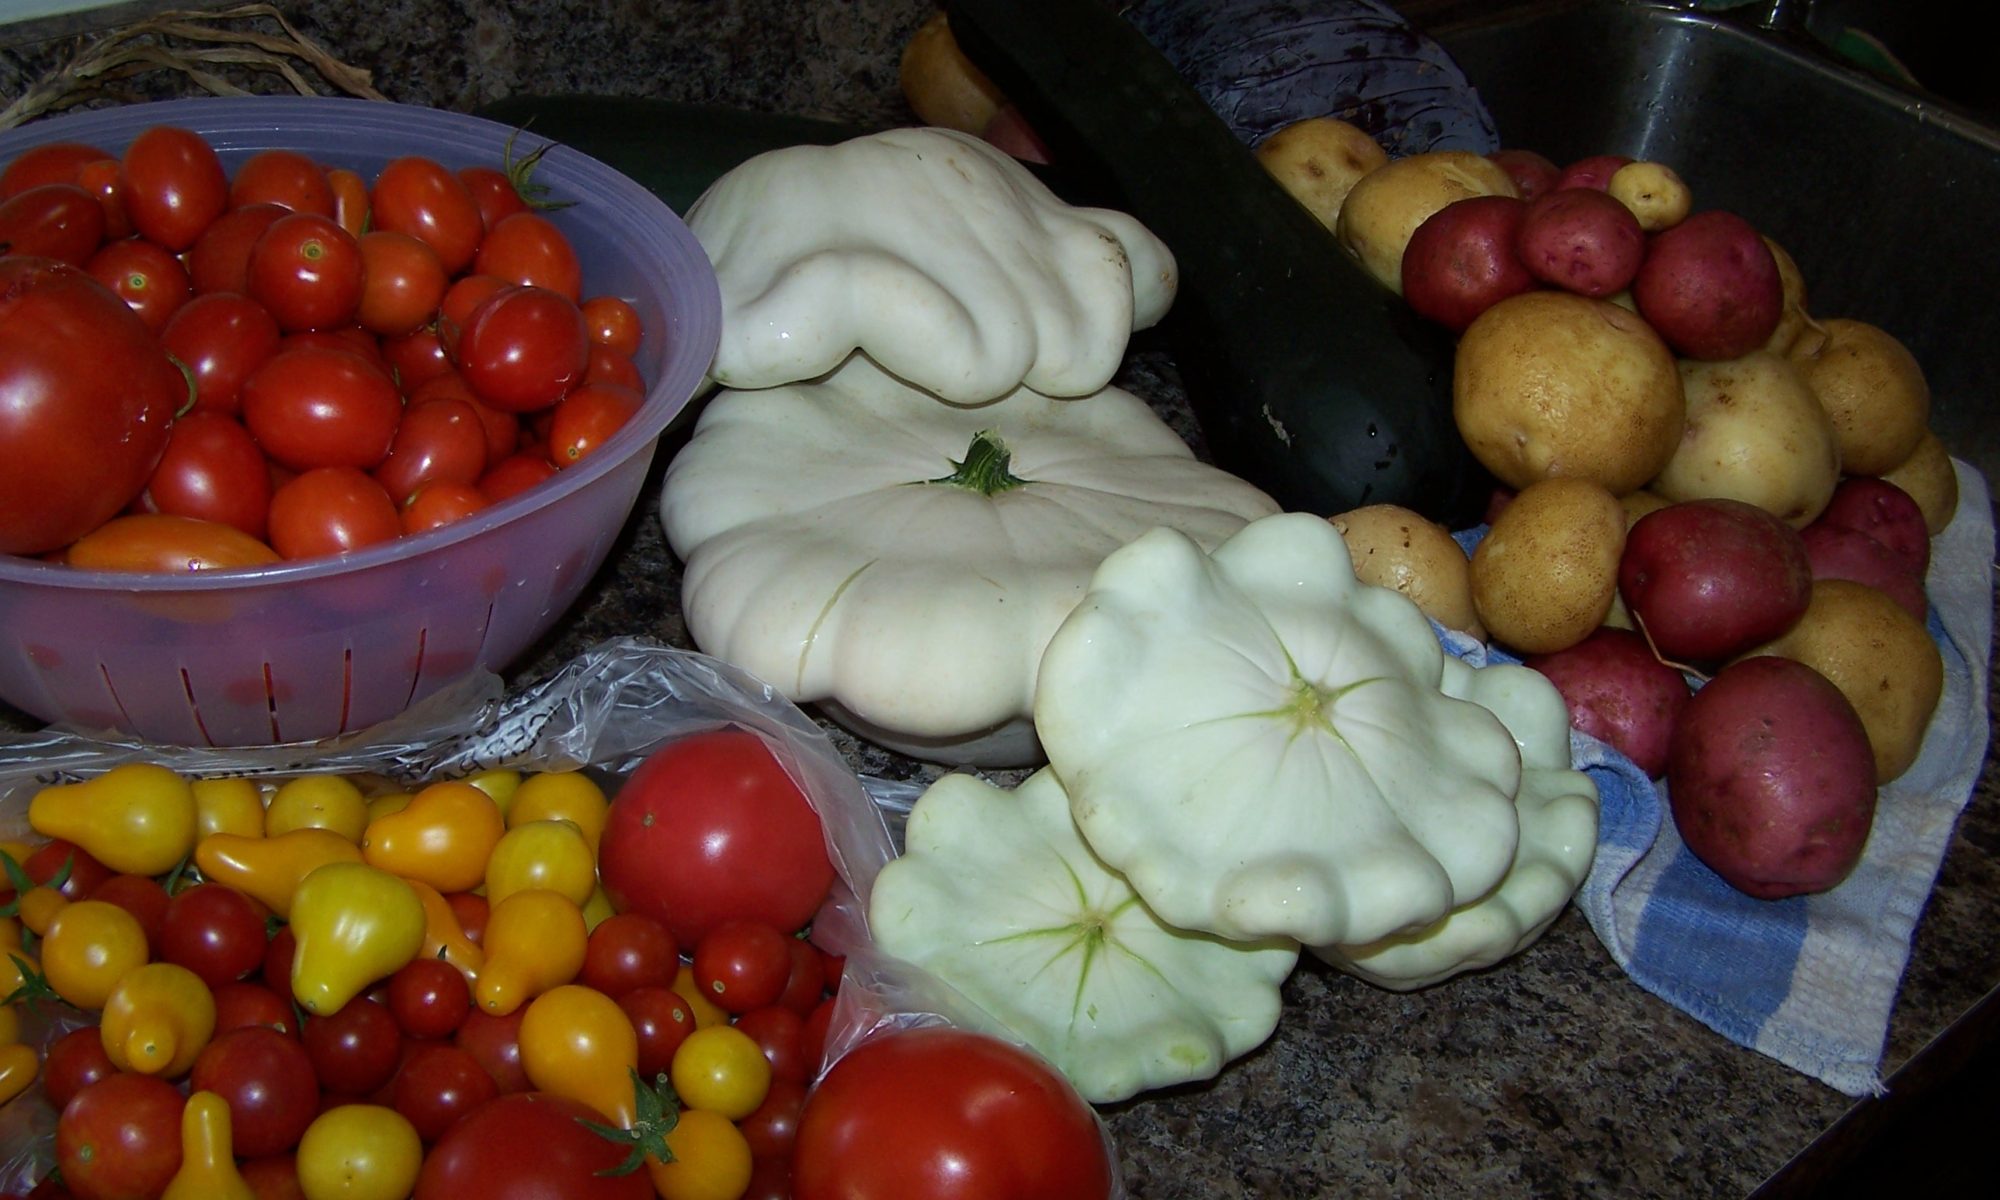
garden bounty

Lately I have found myself sucked into the computer and browsing food and recipe blogs for hours on end (…in my defense, it was rainy all week end). Sorting my thoughts on how to go about writing this cookbook I have been thinking about for some time now was my excuse for the countless hour leaking into the internet. Until it dawned on me, that maybe starting a blog about cooking (I love food), making healthy food choices and meals (I am a personal trainer and sports nutritionist) might be a good place to start sorting and organizing all the recipes (or new ones, no need to look back, right?) that in the past have lived in a 0.99 cent compositions book . And I have lots of them, notebooks with recipes that is.

I remember creating this recipe for a layered chocolate heart when I was a little girl back in  Switzerland, and how exited I was when I showed my Mom (Looking back she seemed a bit more concerned with the sticky mess I may have left behind in the kitchen, than exited about my ‘creation’, lol)

I love to make everything from scratch, because, it just plain tastes better and is better for you. If you can’t make it yourself, don’t eat it. I am not saying that I always make everything myself, but I will stay away from things I could not make, even if I had the right tools and would put all the effort into it. I have tried to make everything from sushi rolls to goat cheese to gluten free baked goods, just to see if I can do it (…and I am a very curious person and how stuff is made intrigues me), but more on that another time.

I believe healthy food should be flavorful, super yummy and not leave your wallet empty!

Welcome to      Simple. Healthy. Homemade!

🙂 Simone


Copyright © 2011 Simple Healthy Homemade. All rights reserved.