Risotto milanese

Not quite conventional saffron risotto.

The creaminess of a good risotto is pure comfort food, at least to Europeans. However you look at it though, usually the recipe involves days of stirring over low flame (ok, I’m exaggerating slightly here) to reach that creamy state any self respecting risotto cook strives for. Since time isn’t always that easy to come by in my life, I needed something less traditional (sadly), but no less delicious or authentic tasting and most of all time saving, or at least work saving. I can see you frown, my purist friends, but since I made Osso Buco in the slow cooker, and therefore am already in the purgatory of purist cooks, I figured a little more deviation from the conventional path couldn’t hurt too much more.

image

So instead of adding water by the spoonful and being shackled to your pot for the purpose of slow and steady stirring, my quick version let’s you complete other tasks since it takes much less work. To make up for the blasphemy of bastardizing the preparation technique, I tried appeasing the food gods by adding extra saffron. You know: give some, take some. 😉
It’s utterly creamy and delicious, even without the long stirring and I think it can hold its own next to any traditional risotto, especially considering it’s weeknight fare!

image

Saffron is the most expensive spice by weight (worth thousands of dollars per pound!!) which isn’t surprising given that only about 5-7 pounds can be produces a year from an acre of land and the harvesting process is delicate and labor intensive. Saffron threads are the dried stigma of a fall flowering crocus variety and they have to be harvested by hand. By use however it isn’t all that expensive, since a little goes a long way and you only need about a pinch for a nicely flavored and colored risotto. And if you have a little land, (a flowerbed works perfect) you could order yourself some saffron crocus bulbs like me and harvest some of your own each year. I dry them on paper towels on top of my fridge, where they are out of the way.

image (this makes enough for 2 people/servings or to go with the slow cooker Osso Buco)

Ingredients

  • 1/2 cup Arborio, Vialone or Carnaroli rice
  • 1 small shallot, finely diced
  • 1 tbsp olive oil
  • 1/2 tsp salt
  • water (or broth)
  • 1 pinch of saffron threads
  • Parmiggiano Reggiano (Parmesan), to shave on top

Directions

  1. In a medium sauce pan heat the oil, the  add the shallot and cook until translucent. Add the rice and stir until all grains are coated.
  2. Add 2 cups of water and bring to a slow boil, stirring every couple of minutes, season with the salt, turn down if it starts to boil to rapidly.
  3. Cook for about 10 minutes, stirring every couple of minutes, then remove about 3-4 tbsp liquid, let cool slightly, add the saffron threads to hydrate and let sit for a couple of minutes before adding back to the rice.
  4. Add water, 1/2 cup at a time, while you are cooking the risotto, as the water gets absorbed. Your goal is to cook the rice to a nice and soft consistency and not have it swimming in water, keep stirring every so often.
  5. Cook until the rice is tender and creamy, adding water if necessary and stirring as above, total time is about 20 to 25 minutes, depending on the amount you make and I think also, the age of the  rice.
  6. If there is just a little liquid left when the rice is done, cover and let sit off the heat, the high starch content will absorb the excess moisture while it sits.
  7. Serve topped with shaved Parmiggiano Reggiano

image

Copyright © 2012 Simple Healthy Homemade. All rights reserved

Kale #1 with Golden Raisins

image

Kale is one of my favorite no-brain vegetables. Not because it isn’t good for your brain or you, no, but because I find it’s so easy to make it yummy that there isn’t a whole lot of thinking involved in figuring out how to prepare it.

In case you’re doubting me on the healthiness of kale, here are some facts:

  • One cup of kale contains 36 calories, 5 grams of fiber, and 15% of the daily requirement of calcium and vitamin B6 (pyridoxine), 40% of magnesium, 180% of vitamin A, 200% of vitamin C, and 1,020% of vitamin K. It is also a good source of minerals copper, potassium, iron, manganese, and phosphorus.
  • Kale’s health benefits are primarily linked to the high concentration and excellent source of antioxidant vitamins A, C, and K — and sulphur-containing phytonutrients.
  • Carotenoids and flavonoids are the specific types of antioxidants associated with many of the anti-cancer health benefits. Kale is also rich in the eye-health promoting lutein and zeaxanthin compounds.
  • In fact, researchers can now identify over 45 different flavonoids in kale. With kaempferol and quercetin heading the list, kale’s flavonoids combine both antioxidant and anti-inflammatory benefits in way that gives kale a leading dietary role with respect to avoidance of chronic inflammation and oxidative stress.
  • Beyond antioxidants, the fiber content of cruciferous kale binds bile acids and helps lower blood cholesterol levels and reduce the risk of heart disease, especially when kale is cooked instead of raw.

Now that’s quite a track record, don’t you think?

This time, I sweetened the deal with some golden raisins that I found hiding in my cupboard, it was just a little handful, had to be used up, as space can be at a premium around here, with all the different food things I want to try. And have you ever noticed how you can almost never find just enough for one meal, as in ‘just to try it’? Yep, so I end up with a whole box of this and a bag of that, barley couscous and mochiko (sweet rice flour) are prime examples of that. So using up and finishing up things always makes me feel good since I might get to try something else!

So simple, healthy and quick, here we go!

image

Feeds 2 as a side (around here though, I have been known to polish off a bunch of kale by myself, so use your judgement)

Ingredients

  • 1tbs oil
  • 1 bunch kale, washed and de-stemmed
  • 1-2 tbsp golden raisins
  • 1/2 cup water
  • salt to taste
  • 1 tbsp cider vinegar

Directions:

  1. Strip the leaves off of the stem (discard hard stems) and tear into smaller pieces if necessary. Wash and spin dry using a salad spinner
  2. Heat the oil in a large skillet, then add the washed and torn kale leaves. Sprinkle some salt over top.
  3. Add water and raisins and cover with a lid (even if the lid does not fit down onto the pan, juts balance it atop the kale)
  4. Cook until the kale is soft and reduced in volume. 5-10 minutes. (This depends on the age of the kale plant: If you have fresh kale from your garden in the early spring, it will take a lot less than mid winter, kinda tough plants that overwintered in your garden)
  5. Add cider vinegar, cover and cook another minute or two, then uncover and finish cooking until most of the liquid has evaporated.

image
Copyright © 2012 Simple Healthy Homemade. All rights reserved

Roasted Brussels Sprouts

image

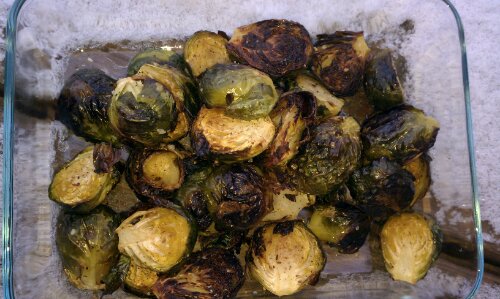
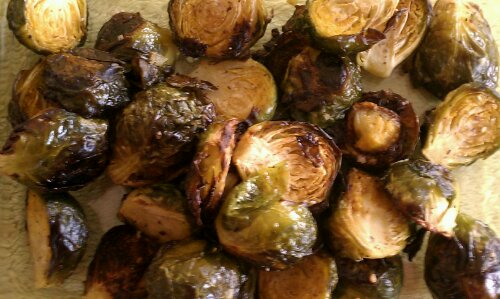
It snowed yesterday. Not much really, but steady from about 1 o’clock until 11pm. And what does one want to do when snow is falling? Eat stuff that makes us feel warm. Like yummy roasted vegetables. Granted it wasn’t all that cold, but roasting vegetables never needs much convincing in the form of good reasons, sooo…

image

Roasted vegetables it was, and soup, and more roasted vegetables 🙂 Ahhh, the way the heat of an oven transforms simple, lowly vegetables into something so utterly delicious, it almost melts in your mouth!

imageSee the snow?

Ingredients

  •  1 lb Brussels Sprouts, cleaned and cut in half
  • 1-2 tbsp olive oil
  • 1 1/2 tsp flake salt (fleur de sel, french grey sea salt or kosher)
  • 2 tsp zahtar seasoning (Middle Eastern spice blend, or you could add a sprinkle of lemon juice, sesame seeds and some thyme)

Directions

  1. Preheat oven to 380°F
  2. In a large bowl, toss the cut Brussels sprouts with the oil until evenly coated
  3. Transfer to foil lined baking sheet (easy clean up), sprinkle with salt, and zatar seasoning.
  4. Roast for about 30 -35 minutes, or until tender and browned in spots. Stirring once halfway through.

Other great things to do with Brussels Sprouts:

And next I made some roasted carrots. I mean why stop, when we’re having so much fun??

image

Copyright © 2012 Simple Healthy Homemade. All rights reserved

Colorful Vegetable Soup with Celery Root

image

Celery Root or Celeriac is what we use back home as winter vegetable for soups, salads, stews, you name it. It’s cheap, readily available and has a great flavor both raw and cooked. You could most definitely use regular green celery, which has a bit more of a pungent flavor, compared to the almost a bit nutty or earthy flavor of the root crop.

Cerliac

Making vegetable soup from scratch could not be easier, and I am giving you a basic recipe that can be made in as many variations as there are cooks.

For this particular soup I chose colorful veggies, and I am foregoing the usual potato for the sake of the ‘getting lean in the new year’ and all the paleo eaters out there and I am using, as I just said, celery root instead, which has a much lower Glycemic Index (GI) than a potato. choosing vegetables (and foods in general that are low on the glycemic scale keeps you full longer, therefore helping to control your appetite. In very simple words (yes there is more to it, but I’ll spare you) the idea behind the glycemic index is to measure how quickly a particular food affects your blood sugar/insulin response, meaning how quickly the sugars in it get digested and find their way into your blood stream.
image

Alright, now that we fed the brain, let’s look at our tummy 🙂

Ingredients

  • 1/2 medium onion, peeled and chopped
  • 1/2 celery root, peeled and cut into chunks
  • 3-4 large tomatoes, diced * see note
  • 2 carrots, diced
  • 1/4 to 1/2 a head of cauliflower, separated into florets (depending ont he size of the cauliflower you get)
  • 1/4 of a head of a medium savoy cabbage, cut into chunks (or use some leaves off a large one)
  • 4-5  stalks Swiss Chard, chopped(any color you like, rainbow colors look pretty)
  • 1 tsp salt

* I used frozen ones from my Garden in the summer: when they are at the peak of ripeness, just chop and put in zip top bags for soup in the winter. Alternately you could use a can of no salt added diced tomatoes)

Makes one 3 1/2 qt pot full

Directions

  1. In a stock pot (mine is 3 1/2 qts, or so it says on the bottom) heat one tablespoon on olive or coconut oil over medium, then add the onions,a dn cook until translucent but not brown
  2. Add the celery and carrots, stir and cook until the onions are beginning to brown
  3. Add the tomatoes, with any juice that collected on the cutting board (if using frozen, partially thaw in the fridge overnight) stir and allow to cook 5 minutes to allow some of the juices to come out
  4. Add water to cover the vegetables and bring to a boil, cook 5 minutes, then add the cauliflower and chopped Swiss Chard, bring to a boil again,then reduce the heat, add the salt and simmer until celery, carrot and cauliflower are tender when pierced with a fork.
  5. Serve hot with some crackers or a slice of rustic bread, or enjoy as a first course.

To make this your own:

  • Instead of celeriac, use 2-3 stalks of celery and a medium potato
  • Use kale instead of Swiss Chard (but remove the tough stems)
  • Use spinach,  but add right before serving into individual bowls, ladle hot soup over
  • Don’t like cabbage? Leave it out
  • Instead of cabbage and kale, use thin cut or quartered Brussel sprouts
  • Add green beans or snow peas towards the end of cooking time
  • Leave out the tomatoes
  • Go through your fridge, anything vegetable can most likely be used up in your yummy soup, the potions are endless 🙂

image

Copyright © 2012 Simple Healthy Homemade. All rights reserved

Chocolate Pear Overnight Pudding

image

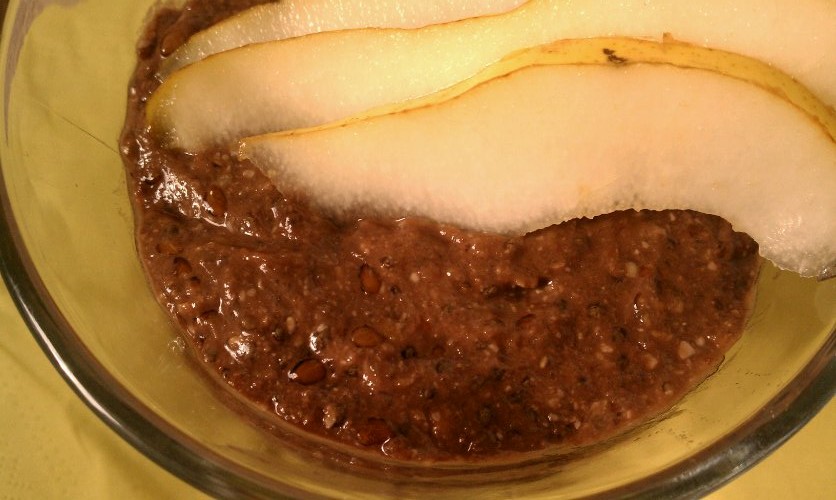
I have been wanting something sweet, but not too sweet. Chocolate-y, but not actually chocolate, difficult right? Since I have drastically reduced my (refined) sugar intake, my taste buds realize just how much added sugar there is in everything. It’s just like salt, once you’re used to using less, you can taste its overabundance in everything. And as for sugar, many items I just plain don’t find enjoyable, no flavor just extremely SWEET. I remember how after every visit back home, I cannot eat commercially made salad dressing for a couple of months, they are sweet and it just tastes funny to me (I get vinegar & oil )

But back to the program: Make this the night before, enjoy as a healthy breakfast cold out of the fridge or heat in the microwave.

Since I started making these, I have been absolutely addicted to them, the pictures don’t do the taste justice. It’s a perfect healthy treat, desert or breakfast, YES all three ;). I’ll have some versions and variations coming up for you soon.

Yay, chocolate pudding any time!!

image

Inspired by Leanne’s Banana Cherry Pudding

Ingredients:

  • 1 ripe pear, diced
  • 1/2 cup almond milk (or regular milk)
  • 2 tbsp flax seed, roughly crushed with mortar and pestle
  • 2 tbsp chia seed
  • 2 tbsp ground almond (aka almond flour)
  • 1 1/2 to 2 tsp cocoa powder
  • 1 tbsp honey or maple syrup (optional, if you like things a bit sweeter)

Directions

  1. Combine chopped pear, cocoa, and almond milk in a glass dish or bowl, stir until cocoa is incorporated
  2. Using your handheld blender, blend until smooth
  3. Add flax seed, chia seed and ground almond, stir, cover and refrigerate overnight
  4. In the morning, eat chilled out of the fridge, or heat in the microwave for about 30 to 45 seconds

Copyright © 2011 Simple Healthy Homemade. All rights reserved

Creamy Mushroom Soup

image

One thing that I really love about the colder months is soup! I could live on soup. If all I could eat for the rest of my days is soup, I’d be happy. Ok, maybe something crunchy to go on the side…

Soups are warming when it is cold, easy to make, easy to reheat and mostly pretty cheap to make as well. A lot of times when it is cold, I do not drink as much water as I should and as I do in the summer, I am just not as thirsty and I think soup has that added benefit of liquid 😉

To achieve the creamy consistency without added fat, I used some sweet potato, but since the mushrooms are braised and caramelized first to intensify their flavor, you can’t tell that there is anything except mushroomy goodness in the soup!

image…shown here with Garlic Thyme Sweet Potato Straws

Ingredients

  • 12 oz crimini or baby bella mushrooms, cleaned and sliced
  • 1 md shallot, minced finely
  • 1 md sweet potato, peeled and chopped
  • 2 tbsp Olive oil
  • Salt

Directions

  1. In a heavy pot, heat oil over medium. Add the diced shallot and cook until softened and browned.
  2. Add the sliced mushrooms, sprinkle with salt, stir, cover and turn heat to medium low. Cook for 15 -20 minutes, stirring every couple of minutes. The mushrooms will start to release their juices and cook.
  3. Uncover and cook, stirring occasionally until the liquid is reduced and the mushrooms start to caramelize and brown in bits, about 5 minutes.
  4. Add water and the sweet potato to the pot. Add enough water to cover the mushrooms and sweet potato by 1″ to 1 1/2″ (remember, you can always add more water, trying to boil it off, is much harder). Add 1/2 tsp salt (or to taste) and bring to a boil.
  5. Cook until the sweet potato is very soft.
  6. Remove from the heat, let cool slightly, then using a handheld blender/immersion blender (if you don’t have one, you NEED one, seriously), puree the soup. (alternately you could use your food processor/blender and blend the soup in batches, being careful not to overfill the container)

Serve with Garlic Thyme Sweet Potato Straws, croutons or a slice of hearty home made bread.

If you really want your soup to be super creamy, you could add 1/2 cup half-and-half (or coconut milk to keep it vegan).

Makes 4-6 servings

image

Copyright © 2011 Simple Healthy Homemade. All rights reserved

Roasted Pumpkin with Thyme Basting Oil

image

The Farmers market had a glorious amount of pumpkins! So much to choose from so many varieties. From your standard orange sugar or pie pumpkin to gray and hazy green looking varieties, they had it all. After roasting a quarter of the one I settled on and since it was an exceptionally beautiful (and BIG) representative of the pumpkin family, I made gnocchi with another quarter and pumpkin puree with the rest.

If your pumpkin seems very juicy, you might want to save that one for a soup or puree and use for pie. This dish works best with a firm pumpkin or squash. I tried it with one that was ‘liquid’, …results not convincing. Not sure why but that one time, I got one of those fairy tale pumpkins, kinda like the one in the picture and it was the juiciest pumpkin ever. Cleaning it out, it was running orange down my hands. I should have known better and turned that into, I don’t know, Pumpkin juice?

image

Ingredients

Directions

  1. Chop squash or pumpkin into 1″ cubes,
  2. Preheat oven to 450 F
  3. Toss, squash in a large bowl with 2 tbsp basting oil, then spread on a rimmed cookie sheet or roasting pan, season with salt and pepper to taste and place on the middle rack.
  4. Bake for 15 to 20 minutes, or until fork tender

Note: Any leftover pumpkin can easily be turned into a yummy soup: Just blend and add broth or milk, bring to a boil and serve hot with a slice of crusty bread on the side and some fresh toasted pumpkin seeds for garnish!

image

Copyright © 2011 Simple Healthy Homemade. All rights reserved
Simone’s Basting Oil

image

One of the local grocery stores, always has yummy samples. Often they cook stuff up right in front of you, and then, here is the part where they get you: To make the yummy stuff, you gotta get the ready made sauce, the basting oil, the finishing butter, the frozen this, the prepared that. Pffff, I am  not buying all that stuff, not only because it can get quite pricey for a girl like me who likes to cook and eat good things :), but also because often times there are unwelcome additions in some of those prepared dishes. Let’s take for example the basting oil, which makes very yummy things. I have sampled at least three so far and have ideas for, like twenty a hundred more!

The official ingredient list goes something like this: Grapeseed Oil, Canola Oil, Dried Thyme, Dried Parsley, Natural Garlic Flavor.

I see two problems with that. First, why ‘Natural Garlic Flavor’? How about some real old fashioned garlic?  And Second, I personally don’t like to use Canola oil, it’s made from a plant called Rapeseed (part of the mustard family) that was genetically engineered in Canada (The name “canola” was derived from “Canadian oil, low acid” in 1978). I am not a fan of GMO crops and avoid them, again, my personal choice.

imageHaha, see the window? 😉

But that said, basting oil is a great thing 🙂 You can use it on veggies, to flavor meats, to add some kick to a sauce, you name it, it can do it, and then some, it even washes your dishes while you sleep. Ok, now I am exaggerating just a little. So to avoid having to go without or having to go with a choice I am unhappy with, why don’t I just make that stuff? It’s cheaper and you get to control what goes in it, win and win!

Here’s my version:

  • 1 3/4 cup grapeseed oil
  • 1/4 cup extra virgin olive oil
  • 2 tbsp dried thyme
  • 1 tbsp dried parsley
  • 1 small to medium garlic clove, crushed

Directions

  1. Using a funnel, fill a glass bottle with half the grapeseed oil, then add the crushed garlic, dried thyme and parsley, stuffing it in using a chop stick, if necessary.
  2. Wash whatever got stuck in the funnel down into the bottle using the remainder of the grapeseed and olive oil.
  3. Store in a dark cool place for a week before using.
  4. Shake it up before using

image
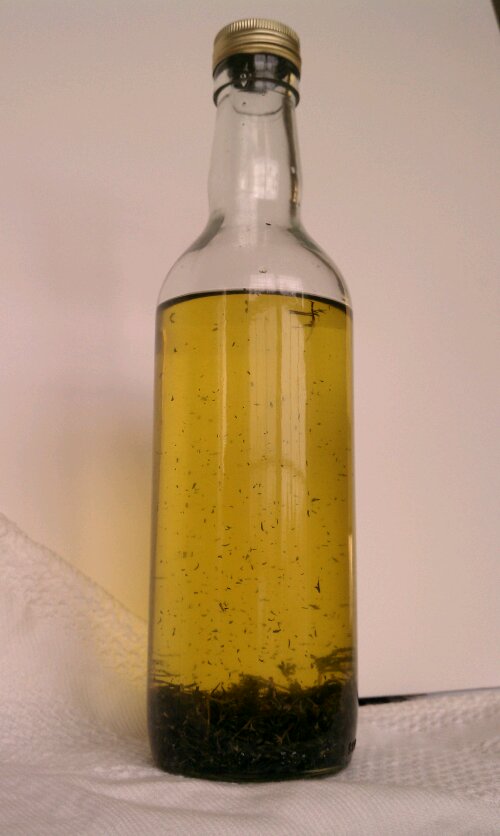
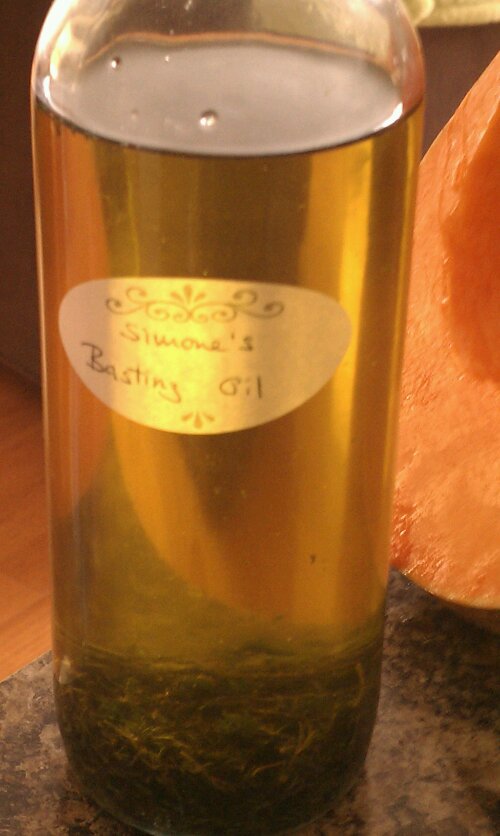
The oil starts to turn green as it sits, and the flavors blend. Use 1-2 tbsp to baste meat and vegetables for grilling or roasting, or add to pan braised dishes. Refrigerate

Copyright © 2011 Simple Healthy Homemade. All rights reserved.

Pickles

image

Swiss or German pickles, yes, German-speaking, mine are smart, they can talk. Haha, no, but they are different from what is served here in Pennsylvania (can’t speak too much for other parts of the country since pickles are not usually high on my list of local fare when I travel 🙂 ) But since I am not a big fan of dill, personally thinking it goes well with fish and fish dishes, and should remain there… needless to say, the classic ‘Dill Pickle’ is not my thing.

I will move my sandwich to higher ground to avoid cross contamination with pickle juice, if I was served a pickle after all (If I remember, I usually ask for it to be left off)

Where I am from, pickles are sour. Period. Yes, there are spices used, but none is so dominant that it overpowers all others. We like balance (or close to). Go figure we’re neutral, ha!

So after not eating pickles (besides cornichon) for years, finally the revelation came to me: ‘Make them yourself, it can’t be that hard.’ And it isn’t, in fact it is less work than making jams or preserves.

And now, since I waited the required week to allow the flavors to blend, and I tried the result… Finally, Ladies and Gentlemen, the moment you’ve all been waiting for (drum roll): I am sharing what I did and how to go about it!

image
You can see the deviant pickle jar in the back left. I used carrots to completely fill the jar. Have not tried that one yet…

Ingredients

  • 4 cups apple cider vinegar
  • 4 cups water
  • 1/4 cup pickling salt
  • 20-25 pickling cucumbers, not waxed

Per Jar: (use quart size wide mouth jars)

  • 1/2 tsp yellow mustard seed
  • 1/8 tsp brown mustard seed (for pretty)
  • 1/8 tsp whole coriander seeds
  • 3-4 black peppercorns
  • 1 bay leaf
  • 1-2 small garlic cloves, peeled
  • 1-2 pieces of shallot (a piece here is about the size of a small to medium garlic clove)

Directions

  1. Bring water in a water bath canner to a boil, sterilizing the jars by cooking for 10 minutes.
  2. In a sauce pan in simmering water, sterilize the lids.
  3. In a large sauce pan, heat the water, cider vinegar and salt, stirring until salt dissolves. Bring to a simmer
  4. Scrub cucumbers and remove jars from water. Empty the water back into the canner,  fill jars with the cucumbers, then add the spices to each jar. Fill with vinegar mix, leaving a 1/2″ head space. Center a lid on top and secure with a band. Repeat with remaining cucumbers and jars, when all are sealed, place on canning rack and lower into the boiling water of your water bath canner. Process for 10 minutes, then turn of the heat and let sit in the water another 5 minutes, then gently remove the jars and place on a heat proof surface*, careful not to shake or tilt the jars
  5. Wait till next day to check for seal, place any jars that did not seal properly in the fridge and consume those first.
  6. Wait one week before eating.

*The best way for me is to place the jars on a big wooden cutting board, since they have to sit undisturbed for a week, I can move the whole lot of them without having to tilt and jiggle the jars

Makes 4-5 quart size jars

Copyright © 2011 Simple Healthy Homemade. All rights reserved.

Kabocha (or Butternut Squash) Chowder

image

There is simply nothing better than dipping your spoon into a steamy bowl of soup after being outside on a cold and windy day! I had sampled some fabulous roasted butternut squash at one of the grocery stores in the area, and it’s been working its way through my mind for re-creation and sharing soon 😉 However, when I came in after riding my bike today, there was no patience left for roasting anything. And since it was cold, I was hungry and I had a Kabocha squash sitting on the counter waiting for the perfect opportunity to turn into an awesome meal, soup it had to be!

If you’re not familiar with Kabocha Squash, it’s very similar looking to a Buttercup squash in that it has a dark green shell, but you could really use Butternut, Buttercup or Kabocha for this. Kabocha will be sweeter than  the other types and most likely it’s the brightest colored.

image

Ingredients

  • 1 md Kabocha or butternut squash, seeded, peeled and cut into pieces
  • 1 tbsp coconut or olive oil
  • 1/2 cup coconut milk (or regular cream*)
  • 1/2 red onion, chopped
  • 1 tbsp Madras curry powder
  • 1 tsp salt
  • water
* If using cream, recipe is no longer vegan or dairy free

Directions

  1. In a large pot, heat oil on medium and add onions and squash pieces. Cook stirring occasionally until onions are softened but not brown
  2. Add curry powder and cook until flavorful, then add enough water to cover squash by about 1/2″ (you can always add more to thin the soup, but cooking excess liquid off takes a long time.) Bring to a boil, cover half and simmer until squash is very soft.
  3. Remove pot from heat and using an immersion blender, blend until smooth and there are no more pieces (alternately you can blend in batches in your food processor or blender, but make sure you wait for the soup to cool down some first and don’t fill too much)
  4. Return to stove, add salt and 1/2 cup coconut milk (or regular cream) stir until dissolved.
  5. Serve each bowl garnished with a spoonful of coconut milk or cream, using a tooth pick, stir just a little to form a swirl pattern.

Makes 4 to 6 servings.

Pretty eats!

image

Go ahead, connect to your inner Picasso!

Copyright © 2011 Simple Healthy Homemade. All rights reserved.