Snowstorm Venison Chili

image

On Saturday, we were hit by a super untimely snowstorm. Up to this point from what my research has revealed, the Lehigh Valley (PA) has only had a major snow occurrence (not sure where it goes from minor to major, but that’s what the weather website said) and it was 2.2″ in 1925!!! Well unofficial measurements on my deck for this one: 6.25″
My trees are still mostly green, and with all those leaves, the branches bent almost to the ground. I went out and with the help of a rake, shook the snow off the bending branches before they could snap, like three times yesterday. We lost power around noon, so there goes my ‘corn maze, then lazy weekend on the sofa watching movies…’

The last roses from my yard, dug out of the snow and brought in

No power brings back memories of being out during hurricane Isabel, a few years back, when I lived in a house with a well =fail… (For those of you that don’t know how this works: no well pump=no water, shower, toilet, I practically lived at the gym for 7 days, don’t ask…) and I had an electric stove at the time, double fail. So right now I am feeling blessed to have a gas stove so we can cook and we have lots of candles and today we hooked up my generator, to keep the fridge and freezer alive. They keep promising the power will be back by this evening, keeping my fingers crossed.
🙂
Here’s what we ate, as no power is no excuse for not having a great meal. Even though I had lots of plans for oven roasted squash with shallot finishing butter or basting oil, and a nice braised stew maybe…

image

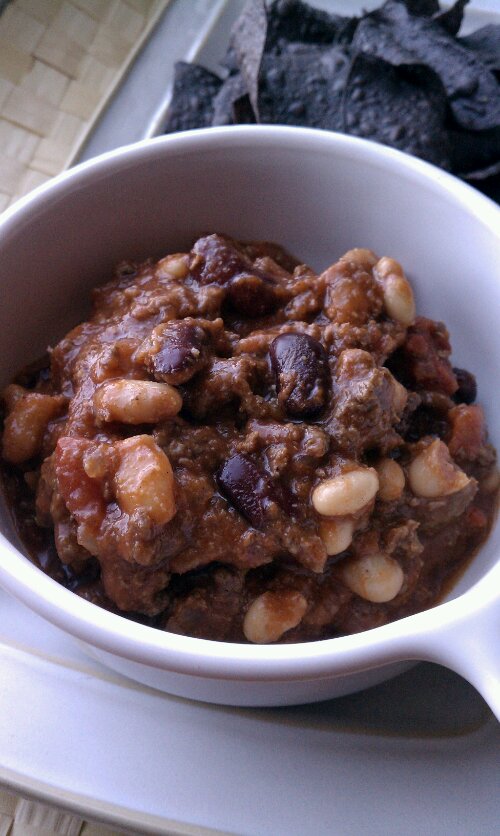
Candle light dinner, Chili and salad with Spring ‘Fall mix’ salad from the garden (dug out from under 3″ of snow. Surprisingly, I got it before it was too late!)

Ingredients:

  • 1 1/2 pd ground meat (we used venison, but you could use whatever you like, including turkey)
  • 1 can or equivalent serving frozen dark red kidney beans (if using canned, rinse in a colander to remove excess sodium)
  • 1 can or frozen portion great northern beans or other white beans of choice
  • 1 1/2 cups diced tomatoes or a 14.5 oz can diced tomatoes
  • 1 15 oz can of crushed tomatoes (or plain homemade sauce)
  • 1 8 oz can of tomato sauce
  • 1 medium red onion, diced
  • 3-4 tbsp chili powder
  • 3 tbsp corn meal
  • 1 tsp cumin powder
  • 1 tsp chipotle powder or 1 tbsp sauce from a can of ‘chipotle in adobo sauce’ (you can add more for extra heat!)
  • 1/2 tsp oregano
  • salt to taste

Directions

  1. Heat 2 tbsp oil in a big heavy pan, add the onions and cook until softened, not browned.
  2. Add the ground venison and separate into chunks using a fork. Cook, stirring occasionally until you can’t see any more pink.
  3. Add the spices and cook, stirring until fragrant.
  4. Add tomatoes,  1 cup water, crushed tomatoes and tomato sauce. Stir and let simmer for 10-15 minutes, for flavor to blend a little.
  5. Stir in corn meal and cook for an additional 5 minutes or until the Chili becomes nice and thick.
  6. Serve with corn chips or a nice hearty slice of bread

serves 4 hungry folks (5 if you serve more moderate portions)

image
Copyright © 2011 Simple Healthy Homemade. All rights reserved.

Pear Vanilla Butter

image

Lately I have just been feeling like changing things. From putting summer clothes away, ‘Tiffany-ing’ my bathroom windows,

image

and just generally fixing up and changing things around the house. Home Depot has been my friend (if not my wallet’s…) and I will soon be the proud owner of a real garage door opener! Hey, it only took four and a half years of living here, but now in the winter, in the snow or rain, I can actually use my garage for what it was meant for. Right now I have to leap out of the car, unlock the garage door, (had to get a separate key chain for that), open it, run back to the car and drive in = Completely useless when it pours as it literally takes less time to run to the front door. Yay! Can’t wait 🙂

I also have been thinking about adding a tile back-splash in my kitchen, currently debating on colors.

image
But here’s what I’ve come across looking for some paperwork filed away in a box in the basement… I though I ate it all, but there it was: Pear Vanilla Butter, 2008.

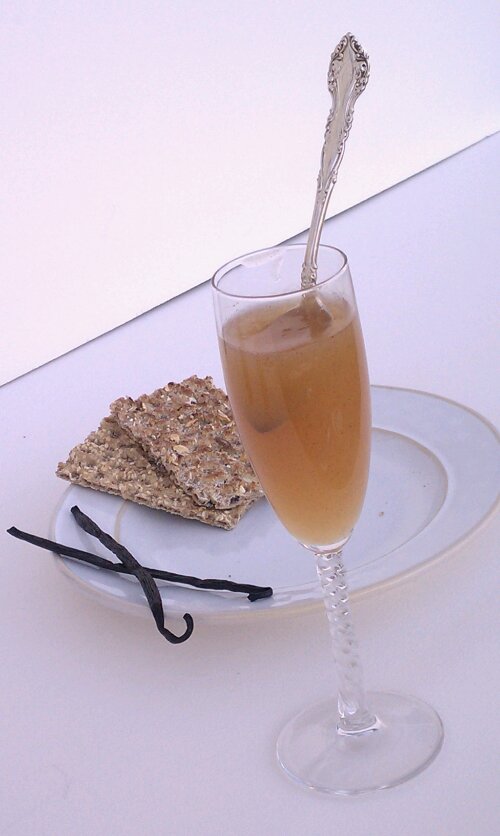
I have been waiting forever, ok maybe not, almost two weeks, to share this with you. It was inspired by a recipe in a cook book on preserving, but for the love of me I can’t find where it was. Luckily I had jotted down some notes and can therefore (hopefully * I was saying a prayer here*) recreate it. Trust me, it is totally worth the time spent. It is the smoothest, most delicately flavored preserve you will ever make! If the best and most beautiful parts of fall turned into a single food, it would be this elegant and sophisticated jam! Move over pumpkin and apple! ( At least for a little while)

image
I vaguely remember the original recipe saying something about ‘keeps for 3 months’, but this little gem I found smells and tastes just like I remember and while I won’t recommend you try this at home, it seems perfectly fine to me (if this is the last post on this blog, you’ll know why 😉 )

Ingredients

  • 4 lb pears, peeled, cored and diced
  • juice of 3 lemons
  • 1 1/4 cups water
  • about 5 1/2 cups sugar
  • 1 vanilla bean, slit open

Directions

  1. In a large pan, combine pears, water, lemon juice and vanilla bean. Bring to a boil, cover and simmer for 10 minutes, uncover pan and continue cooking for another 15-20 minutes, or until the pears are very soft.
  2. Remove vanilla bean and gently scrape out any seeds into the pan, using the rounded tip of a knife.
  3. Using a submersion blender*, and puree. You could also use your blender or food processor. Then press the resulting puree through a fine meshed strainer into a bowl.
  4. Measure puree into a large pan, adding  1 cup warmed sugar for every 2 cups of puree.
  5. Stir mixture over low heat until the sugar dissolves then increase the heat and boil for 15 minutes or more, stirring, until mixture becomes a thick puree and holds its shape when a little is spooned onto a cold plate.
  6. Spoon boiling pear butter into small, sterilized jars, being careful not to get burned, leaving 1/2″ head space. Immediately seal. After cooled off, check for seal, label and store in a cool, dark place for a minimum of 2 days before serving for flavors to blend.
  7. Keeps for 3 months, refrigerate once opened.

image

Close up.. Mmmmh see the Vanilla seeds?

image

Copyright © 2011 Simple Healthy Homemade. All rights reserved.

Pickles

image

Swiss or German pickles, yes, German-speaking, mine are smart, they can talk. Haha, no, but they are different from what is served here in Pennsylvania (can’t speak too much for other parts of the country since pickles are not usually high on my list of local fare when I travel 🙂 ) But since I am not a big fan of dill, personally thinking it goes well with fish and fish dishes, and should remain there… needless to say, the classic ‘Dill Pickle’ is not my thing.

I will move my sandwich to higher ground to avoid cross contamination with pickle juice, if I was served a pickle after all (If I remember, I usually ask for it to be left off)

Where I am from, pickles are sour. Period. Yes, there are spices used, but none is so dominant that it overpowers all others. We like balance (or close to). Go figure we’re neutral, ha!

So after not eating pickles (besides cornichon) for years, finally the revelation came to me: ‘Make them yourself, it can’t be that hard.’ And it isn’t, in fact it is less work than making jams or preserves.

And now, since I waited the required week to allow the flavors to blend, and I tried the result… Finally, Ladies and Gentlemen, the moment you’ve all been waiting for (drum roll): I am sharing what I did and how to go about it!

image
You can see the deviant pickle jar in the back left. I used carrots to completely fill the jar. Have not tried that one yet…

Ingredients

  • 4 cups apple cider vinegar
  • 4 cups water
  • 1/4 cup pickling salt
  • 20-25 pickling cucumbers, not waxed

Per Jar: (use quart size wide mouth jars)

  • 1/2 tsp yellow mustard seed
  • 1/8 tsp brown mustard seed (for pretty)
  • 1/8 tsp whole coriander seeds
  • 3-4 black peppercorns
  • 1 bay leaf
  • 1-2 small garlic cloves, peeled
  • 1-2 pieces of shallot (a piece here is about the size of a small to medium garlic clove)

Directions

  1. Bring water in a water bath canner to a boil, sterilizing the jars by cooking for 10 minutes.
  2. In a sauce pan in simmering water, sterilize the lids.
  3. In a large sauce pan, heat the water, cider vinegar and salt, stirring until salt dissolves. Bring to a simmer
  4. Scrub cucumbers and remove jars from water. Empty the water back into the canner,  fill jars with the cucumbers, then add the spices to each jar. Fill with vinegar mix, leaving a 1/2″ head space. Center a lid on top and secure with a band. Repeat with remaining cucumbers and jars, when all are sealed, place on canning rack and lower into the boiling water of your water bath canner. Process for 10 minutes, then turn of the heat and let sit in the water another 5 minutes, then gently remove the jars and place on a heat proof surface*, careful not to shake or tilt the jars
  5. Wait till next day to check for seal, place any jars that did not seal properly in the fridge and consume those first.
  6. Wait one week before eating.

*The best way for me is to place the jars on a big wooden cutting board, since they have to sit undisturbed for a week, I can move the whole lot of them without having to tilt and jiggle the jars

Makes 4-5 quart size jars

Copyright © 2011 Simple Healthy Homemade. All rights reserved.
Gingerbread Pear Muffins

image

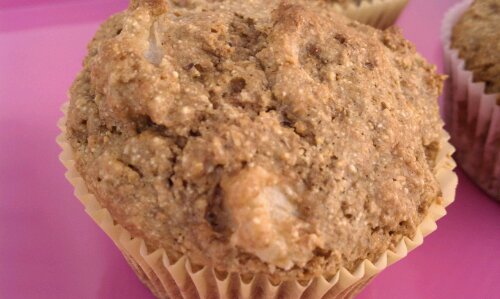
Sugar and spice and everything nice… The temps are down and it’s getting darker earlier every day. Stealthily they already play Christmas songs at Home Depot (did I mention, I have been there quite a lot lately?), it’s not even past Halloween, yet they sneak in one ore two songs, then go back to regular music. Hoping no one would notice, but HA! as it so happens, apparently my brain was a sponge for this kinda thing this past weekend and kept doing an endless playback for me until I finally caved in and made these Gingerbread Muffins.  …lovely weather for a sleigh ride together with you…

image
Even thought the name in English is Ginger Bread, the French origin of this recipe had several spices, but originally no ginger in it. It is after all called pain d’épices (spice bread) and in German there are two words ‘Lebkuchen’ (no one knows what the ‘Leb’ really stands for, kuchen is cake) or Pfefferkuchen (Pepper cake) and that recipe, you guessed, contains pepper. So apparently there are regional differences in what goes into the Gingerbread Spice mix, and the one I used had ginger, cloves, cinnamon, coriander and star anis. But any old mix would work, heck, you can even make your own, if you’re so inclined. Or you could use Pumpkin Pie spice and add ginger … and comfy cozy are we…

image
They are super delish with a hot cup of tea (or coffee)

Ingredients

  • 1 1/2 cups all purpose flour
  • 1/2 cup whole wheat flour
  • 1 ripe banana
  • 1 1/4 cup chopped pear
  • 1 tsp baking powder
  • 1/2 tsp baking soda
  • 1/3 cup granulated coconut sugar, sucanat or sugar
  • 1 tsp gingerbread spice mix (if you like it real spiced, add up to 2 tsp)
  • 1/2 tsp cinnamon
  • 2-3 tbsp water

Directions

  1.  In a mixing bowl, mash banana with a fork until well mixed
  2. Combine flours, baking powder, baking soda, sugar and spices and add to the banana
  3. Add chopped pear, and stir to combine adding water by the tablespoon as needed (You don’t want the batter to be too dry)
  4. Spoon into paper lined muffin tin and bake at 400F for 15-20 minutes or until toothpick inserted comes out clean.

Copyright © 2011 Simple Healthy Homemade. All rights reserved.

Kabocha (or Butternut Squash) Chowder

image

There is simply nothing better than dipping your spoon into a steamy bowl of soup after being outside on a cold and windy day! I had sampled some fabulous roasted butternut squash at one of the grocery stores in the area, and it’s been working its way through my mind for re-creation and sharing soon 😉 However, when I came in after riding my bike today, there was no patience left for roasting anything. And since it was cold, I was hungry and I had a Kabocha squash sitting on the counter waiting for the perfect opportunity to turn into an awesome meal, soup it had to be!

If you’re not familiar with Kabocha Squash, it’s very similar looking to a Buttercup squash in that it has a dark green shell, but you could really use Butternut, Buttercup or Kabocha for this. Kabocha will be sweeter than  the other types and most likely it’s the brightest colored.

image

Ingredients

  • 1 md Kabocha or butternut squash, seeded, peeled and cut into pieces
  • 1 tbsp coconut or olive oil
  • 1/2 cup coconut milk (or regular cream*)
  • 1/2 red onion, chopped
  • 1 tbsp Madras curry powder
  • 1 tsp salt
  • water
* If using cream, recipe is no longer vegan or dairy free

Directions

  1. In a large pot, heat oil on medium and add onions and squash pieces. Cook stirring occasionally until onions are softened but not brown
  2. Add curry powder and cook until flavorful, then add enough water to cover squash by about 1/2″ (you can always add more to thin the soup, but cooking excess liquid off takes a long time.) Bring to a boil, cover half and simmer until squash is very soft.
  3. Remove pot from heat and using an immersion blender, blend until smooth and there are no more pieces (alternately you can blend in batches in your food processor or blender, but make sure you wait for the soup to cool down some first and don’t fill too much)
  4. Return to stove, add salt and 1/2 cup coconut milk (or regular cream) stir until dissolved.
  5. Serve each bowl garnished with a spoonful of coconut milk or cream, using a tooth pick, stir just a little to form a swirl pattern.

Makes 4 to 6 servings.

Pretty eats!

image

Go ahead, connect to your inner Picasso!

Copyright © 2011 Simple Healthy Homemade. All rights reserved.

Pear Almond Muffins

image

Guess what was on sale at the farmers market this week-end? 🙂 Pears! Yumm! I love pears, when  you get them when they are juuust right, juicy, ripe but not too soft. Which is a fine balance and therefore, having bought a bunch I now gotta ‘consume’ them rather quickly.  I like apples but, let’s face it, pears are almost regal compared to a ‘commoner’ apple (No offense, Apple, love you too), maybe I just have this opinion because we can now get pretty good apples year round and they ceased to feel special, not being really seasonal anymore whereas pears are just never quite like they are in the fall… or maybe it’s because of this memory of my Mom saying ‘Pears are the queen of fruits’, who knows 🙂      Ahh the things we remember…

Besides eating pears fresh, melt chocolate chips as a sauce ( a personal favorite, use dark chocolate), roasting as a side, or baking a pear upside down cake or Tarte Tatin, oh and don’t forget, making pear vanilla butter (getting to that one later on, but it’s the very best thing you can do with your time if you have pears…and time, promise) what is one to do with  a bushel of pears?

image
Muffins! Quick, easy and portable, now we are talking!

image
Makes 12 regular size

Ingredients

  • 1/2 cup whole wheat pastry flour
  • 1 1/2 cups all purpose flour (I have used all whole wheat, it just gets a bit denser)
  • 2 tsp baking powder
  • 1/2 tsp baking soda
  • 1 1/4 cup ripe but firm pear, diced finely (from 1 to 2 pears, depending on size)
  • 1/2 cup coconut palm sugar, sugar or sucanat
  • 1/2 tsp vanilla extract
  • 1/2 tsp almond extract
  • 2 tbsp almond butter
  • 2 tbsp oil (you can leave the oil out, the consistency will change a little, but it’s still yum)
  • 1 lg egg
  • 1/4 cup milk (dairy or almond milk)

 Directions

  1. In a large bowl, mix together the first four ingredients
  2. add sucanat or coconut sugar, and diced pear and stir to coat
  3. add the remainder of the ingredients and stir until just combined then drop by the table spoons into lines muffin pan
  4. bake in a preheated oven at 400F for 15-20 minutes or until tester inserted into muffin comes out clear
  5. Let cool slightly before serving.

image

And just like that, they are all gone:)

Gotta get back to the oven, I am seeing some Pear Gingerbread Muffins in my near future…

Copyright © 2011 Simple Healthy Homemade. All rights reserved.

Four Greens Vegetable Soup

image

Today I got myself a Crinkle Cutter! I know, I know that might not sound very exiting for you, but I am a sucker for kitchen gadgets, especially when they are on sale. And it just so happened that my local grocery store had them on closeout sale… what can I say

image

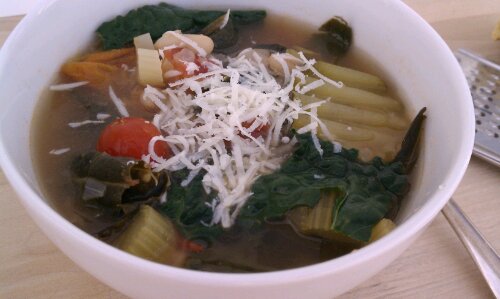
So now being the proud owner of a brand new crinkle cutter, I realize there are many, many things that could be ‘crinkled’ with this, but to start I decided to try it on something relatively soft, hoping to get an easy start, and picked zucchini. And since tonight they are calling for the first frost of the season a yummy vegetable soup seemed like the perfect fit.

As we are heading into the colder months with people worried about getting sick, many stay cooped up inside more than is good for them and a good many eat less vegetables than in the summer exposing them to higher risk of in fact getting sick, while also being exposed to more recycled air in a heated environment. Soooooo, I wanted to make something to give your system an antioxidant boost and what tastier and better way than greens could there be?

So for this mean-lean-green bad boy we are going to use kale, spinach, celery and zucchini (ok, ok, I know, not a ‘green’ but c’mon, you can see the color, right? 😉 )

image

Ingredients:

  • 1 tbsp oil
  • 1/2 red onion, finely diced
  • 4 stalks celery, chopped
  • 1 small zucchini (crinkle cut, or sliced into 1/4″ rounds)
  • 1 can or 1 qt size bag frozen tomatoes *(if using canned, pick one that is either no salt added or a low sodium version)
  • 1 can canellini beans, drained and rinsed or 1 portion frozen **(snack bag size)
  • 1 good quality vegetable buillon cube, for making 2 cups(I use Rapunzel no salt added)
  • 1/2 to 1 tsp salt
  • 2 good hand fulls lacinato kale, center stalk removed, washed and trimmed
  • 3 to 4 oz baby spinach
  • small amount of whatever other veggie you have on hand that could stand to get used up (I had a little broccoli left)
  • Parmesan for grating on top (optional, note that using Parmesan would make the recipe no longer vegan or dairy free)
* Note: I have had great success dicing and freezing a bumper crop of tomatoes in zip top bags and using it instead of canned for soups and stews in the winter. Leave cherry tomatoes whole.
**Note: To save time, money and cut salt from your diet, buy dried beans, soak and cook them, (I use my pressure cooker) and freeze in snack size baggies to be used like you would canned.

Directions

  1. Heat oil in a soup pan, add the onion and cook over low until glazed and starting to turn soft
  2. Add celery, stir and cook until you can smell the celery, then add the tomatoes
  3. Fill the pot with water until the vegetables are covered by about 2″ of water, add salt and bouillon cube and if using tomato paste and parmesan chunk.
  4. Bring to a boil
  5. Add kale, zucchini and beans, cook until kale is soft.
  6. Divide spinach into serving bowls, using about 1 cup per dish, ladle the hot soup over and serve, if desired, with fresh grated Parmesan.

Makes about 6 bowls ( Serves six as a first course)

image
Copyright © 2011 Simple Healthy Homemade. All rights reserved.

Pumpkin Goat Cheese Ravioli

image

As always, I am looking for creative ways to use seasonal produce and after getting some real life pumpkin (the convenience of canned could not keep me from trying this in the end) I had to use the resulting puree up, and trust me, it makes quite a bit. I had extra to put in the freezer! And it’s really easy to do (Tasty Yummies has a more detailed set of instructions, if you like), cut the pumpkin in half, scoop the seeds and stringy ‘innards’ out (keep the seeds, clean them and keep for roasting later) place halves cut side down in a baking dish, adding 1/2″ water, and bake in a preheated oven at 350F for 40-50 minutes, (depending on the size of your pumpkin), or until the flesh is soft when pierced with a fork. Scoop the flesh out, purée and voila!
Alternately, if you got a smaller pumpkin, you can also cut, scoop the seeds and cook it in the microwave until the skin is soft when pierced and peel the skin off the slightly cooled halves using a vegetable peeler!

Keep any seeds to make roasted pumpkin seeds later!

image
You can use the ravioli right away or freeze them for later use

imageServe with Roasted Red Pepper ‘Cream’ Sauce

Ingredients

  • 1/2 cup fresh pumpkin puree (you can use canned)
  • 2 1/2 to 3 oz fresh goat cheese
  • 1/2 tsp salt
  • 1/4 tsp white pepper
  • 1 pack Pot sticker wrappers or Wonton wrappers

Directions

  1. Mix the first four ingredients in a bowl
  2. Using 4 wrappers at a time, place them on work surface, place one teaspoon of filling in the center, brush edges with water and fold over and seal, crimping edges using the tines of a fork
  3. place all the ravioli on a wax paper lined baking sheet and cover with plastic wrap to prevent drying while you complete step 2 with the rest of the wrappers
  4. Either cook right away: Bring a pot of water to a boil and drop ravioli in, cooking until they float to the surface, about 3 minutes.
    You can also freeze them for later use: Freeze on the sheet and once frozen store in zip top bags until ready to use. Do not defrost, but cook from frozen
  5. Serve with Roasted Red Pepper & Pumpkin Cream Sauce.

image

or try a Tarragon Cream Sauce…

image

Copyright © 2011 Simple Healthy Homemade. All rights reserved.

Roasted Red Pepper and Pumpkin ‘Cream’ Sauce

image

Glorious colors of fall! Here the leaves have finally turned color and as I am typing this I can see the red and yellow leaves glow in the sunlight, and the bronze and ‘still green’ leaves add depth to the shadows. The birds have returned to the bird feeder in droves, the nights finally have that crisp quality you only experience on an early morning in fall and I am enjoying the view to say the least.

image
To celebrate fall, with its vibrant orange of pumpkins, golden corn field and that last rest of summer’s warmth int he afternoon, I roasted up a brightly colored, mighty tasty and versatile sauce/dip/spread. Enjoy!

Ingredients

  • 1 red bell pepper
  • 1 cup chopped cooked pumpkin (or canned)
  • 1 tbsp olive oil
  • 1 pinch salt

Directions

  1. Roast whole red pepper until blackened in spots all over by holding it over a gas flame or placing under the broiler, then place in paper bag to cool a bit (the steam will loosen the skin making it easier to peel, added bonus, you won’t burn your fingers as much).
  2. Peel red pepper (don’t have a guy do this, for some reason their hands are not made the same as ours and they cannot handle heat, as per my experience 😉 ) , this works best using a paper towel and literally rubbing the skin off. Cut in half and discard the seeds, then chop flesh.
  3. Place pepper in your food processor or blender. I use a really cute mini processor for sauces and dips. And blend until you have a chunky mess, add the olive oil, blend until fairly smooth.
  4. Add the pumpkin and salt and process some more. The result should not have any chunks left in it but be smooooooth.
  5. Gently reheat to use over pasta, like the Pumpkin Goat Cheese Ravioli for example or chill and use as a spread for sandwiches or serve cold as a dip for veggies.                              Yields about 1 1/2 cups.

image

Copyright © 2011 Simple Healthy Homemade. All rights reserved.

Pumpkin Cream Cheese Stuffed French Toast

image

One of my favorite breakfast spots in the area makes this amazing stuffed french toast that’s to die for.  They are, however, closed on Sundays, which would only be like the perfect brunch day. So obviously it was only a matter of time until I had to try and recreate so I could have it anytime. Ahh the convenience of it 😉 And of course I will still go and have breakfast there, some days there is nothing better than to just sit down and have someone do all the work for you, including the dishes 🙂

Here’s my version using, you guessed it, some of that pumpkin that’s still left over from making pumpkin lattes, mini tartletts and goat cheese pumpkin ravioli. If you cook for one or two people only, you gotta be inventive and use what you have several different ways, so it doesn’t go bad, and I am not one to waste anything if I can help it, so bare with me if you feel pumpkin OD coming on. I’ll be onto something else soon, I promise.

image

Any bread will work for this, crusty bread just has to be soaked a bit longer. We used to make a dish like this back home, using any leftover day old bread, although we didn’t call it ‘french toast’, and we did not stuff it with anything.

Ingredients

  • 4 slices of toast bread (or any day old bread, roughly equivalent in size, I used Ezekiel)
  • 2 eggs, beaten
  • 1/2 cup milk, warm
  • coconut oil for cooking
  • 4 oz cream cheese
  • 1/4 cup pumpkin puree
  • 2 tbsp granulated palm sugar, or sweetener of choice
  • 1/4 tsp cinnamon
  • 1/4 tsp pumpkin pie spice
  • optional grated coconut for garnish, toasted if desired

Directions:

  1. Soften cream cheese, and stir until smooth
  2. Add the spices, sugar and the pumpkin puree, mix until incorporated.
  3. Place milk and eggs in two separate deep flat dishes
  4. Turn the bread in the milk, then turn in the beaten egg and place in heated skillet. Cook until golden brown, then flip over to cook the second side. Remove from pan and set aside and keep warm.
  5. After making the second slice, while still in the skillet, top with 3 tblsp pumpkin cream cheese mix and top with another slice of french toast, and sprinkle with toasted coconut. (If your skillet is big enough, you might be able to cook all four slices at once, but mine only fits 2)

THE best!

image
Copyright © 2011 Simple Healthy Homemade. All rights reserved.