Beans and how I cook them

imageSoaking the beans in plenty of water overnight is essential

With making most things from scratch, the question sooner or later arises: What about beans? As I have mentioned before, I do cook my own beans and then package them rather than buying cans. It’s first of all cheaper, then it’s also better for the planet and most likely much healthier for you, not only due to the sodium content in most canned varieties but due to the materials used in the can lining that have come under more and more scrutiny lately. And if that does not have you convinced to cook dried beans, maybe the fact that they just taste so much better will! And it is really not all that time consuming if you are organized about it. Yes, it is easier if you have a pressure cooker, like the one I brought back with me from Switzerland. Mine is a Kuhn-Rikon Duromatic, kinda like this one, but any good quality pressure cooker would make your life easier, not just for beans (Do NOT get the cheapo ones with the wiggly-rocking-weight-thingy balanced on top, not worth it)
imagethe next morning: after soaking

I usually cook a couple of pounds of beans in one day, depending on the size of your cooker (refer to the manufacturers guidelines) about a pound at a time. So yes, I will cook several batches, one after another and then store them in the freezer for an easy addition to soups and other meals. I know some resources say that you can cook the beans without soaking, or ‘quick soak’ them by letting them sit in boiling water, here’s my experience: You know all the things beans are supposed to do to you, the bad things why folks don’t want to eat beans? In my experience, the gentler you prepare the beans the less they cause you to have to forego your upcoming social appointments. 😉 That includes soaking them overnight, draining and rinsing them before putting them in the cooking pot and cooking over gentle heat. Yes, it takes a bit longer but the results are way worth it.

Trust me.

Have I ever led you astray? No? See!

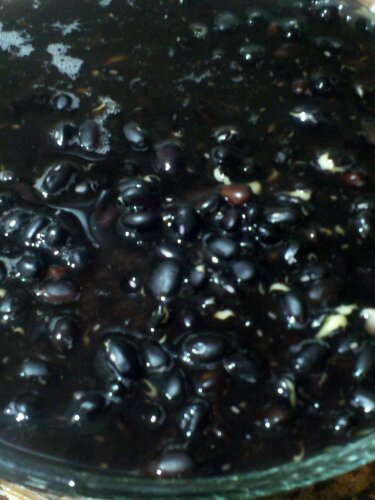
image Finished Product: Black eyed peas

Here’s the way I like to do it. You need:

  • 1 lb dry beans, soaked overnight
  • water
  • snack sized zip top baggies (about 6-8 per pound)
  • 1 or 2 gallon sized freezer bag
  • pen for labeling

For most beans: 1 pound dried beans = 2  cups dried = 4 – 5 cups cooked beans= 3-4 cans of beans!

  • Rinse the dried beans in cold water, then to soak overnight place in a good-sized bowl (the beans will swell and get bigger as they soak up the water) and cover with cold water. You want them covered by at least two inches of water.
  • In the morning drain and rinse the beans, then put them in the cooking pot of your choice
  • Option A: Regular pot is fine, just cover with plenty of water and bring to a boil then reduce and simmer until tender, can take 1-2 hours depending on the variety.  
  • Options B (my preferred method): Pressure Cooker, (following manufacturers guidelines) For mine that means cover with about a finger’s width of fresh water, close the lid and place on the stove over medium heat. Slowly heat until the pressure valve gets up to the first red ring, turn heat to low and set your timer (*see below). 
  • After releasing the pressure from the cooker by running cold water over it, open and drain the cooked beans in a colander in your sink until cool, then package in snack sized zip top bags, and store 6 to 8 baggies in a gallon sized bag labelled with the type of bean and the date before putting in the freezer.

*Some of my favorites are listed below; with the times that I have found produce perfectly cooked beans (I will update as I add more species and specifics)

All ready to freeze, packaged in portions ( I could probably have let them cool a little longer,a s you can see there is condensation in the bags)

And please understand that every pressure cooker is different, the beans could be fresher or older, so you do need to experiment a little. A lot of times I can tell by the smell of the steam escaping the pot if they still smell ‘green’ and need more cooking. I pre-soak all of these beans, unless otherwise stated. I also find that letting the pot stand off the heat for a while before releasing the pressure by running cold water over the outsides and the top keeps the beans nicer. NEVER EVER try to open a cooker that is still under pressure, this could be highly dangerous as the water still boils inside the cooker long after it’s been removed from the fire! Also too drastic of a pressure change and they tend to burst, same when you cook them at too high a pressure, so stick with the first red ring. This is not an activity to watch TV next to. 

Type of bean: time at first red ring: standing time before releasing pressure:

  • Small Red: 4-5 minutes: 5 minutes: then run cold water over sides and top
  • Adzuki Beans: no soaking 5 minutes: 6 minutes: then run cold water over sides and top
  • Baby Lima: 5-7 minutes: 3 minutes: then run cold water over sides and top
  • Black Eyed Peas: 6-8 minutes: 4 minutes: then run cold water over sides and top
  • Cannellini Beans: 8 minutes: 4 minutes: then run cold water over sides and top
  • Black Beans: 9 minutes: 6 minutes: then run cold water over sides and top
  • Red Kidney Beans: 10-12 minutes: 6 minutes: then run cold water over sides and top
  • Pinto Beans: 10-12 minutes: 6 minutes: then run cold water over sides and top
  • Chick Peas: 10 minutes: 4 minutes: then run cold water over sides and top

Some tips:

*Buy beans at a place where they have a quick turnover. WHile they are dry and will keep a long time, quality will diminish over time, just like with anything else you eat. Buy your beans at a latin or indian grocer, folks that eat a lot of beans tend to not have them on the shelf as long.

* Don’t salt beans until they are cooked, or you are adding to the cooking time! (I usually forget in the end and just salt when using the beans)

*Do not mix beans from two packages bought at different times. Cooking time varies with how old and dry the beans are as well as by variety and a new bag plus one that just showed up in the back of your pantry could cook at different times leaving some beans hard and some mushy.

image

© 2012 SimpleHealthyHomemade

Campfire Chili

imageCooking under the stars always makes things have a special taste. Whether cooked over the fire or on a camp stove does not seem to matter. I guess you could even get ok good results at home, IF you really have to 😉 but I strongly believe the view and therefore the mood you’re in while cooking influences the result and how could anything not be fantastic, having a view like that?  ‘Cooked with love’ as my Peruvian friend likes to say. Or maybe ‘with peace in your heart’ would be more fitting.image

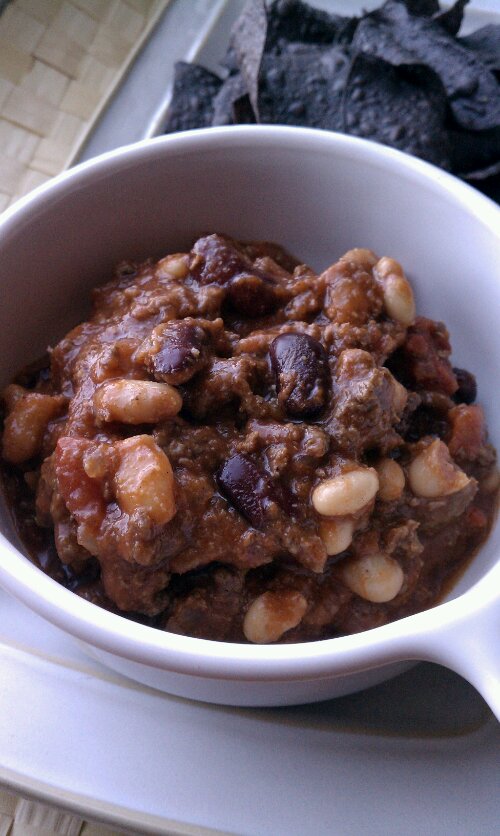
For this easy and quick dinner I am using a variety of beans, to add some visual as well as textural interest, and you can certainly substitute your favorite beans for what was used here. Making this at home I would totally use frozen beans (I cook dried beans and freeze them in portions) but since this was going to be one of our optional meals, I brought some cans along so it wouldn’t spoil if we decided against it. If using cans just make sure you rinse them really well, they usually pack quite a punch of sodium. To get ‘the look’ below, use 3 different types of beans and some corn (the regular size can, US 15.5 oz) just understand that variety comes at a price: This dish feeds half an army (6 people) And since it was just the two of us, we ate it three times, with a side of cheddar corn muffins. The really awesome part about the quantity is we had leftovers (stored on the ice in the cooler) to take home and have for dinner after our trip. Nothing like coming back from an active vacation and dinner is ready 🙂

image

You may have notices that there is no onion in this recipe, and you could certainly add onion. We wanted to. Sadly for us however, the onion sat safely back at home in a bag with the extra cucumbers from the market, in the crisper drawer of the refrigerator. But as I learned, with the right (rest of the) ingredients, that isn’t a problem at all and we could not even tell it was missing at all. Use a big can of San Marzano tomatoes if available, they are awesome for Chili. Yes, I am aware that they are Italian :), but trust me, makes all the difference. That and my secret ingredient, the steak seasoning.

imagecooking with wind guard and view of the lake

Ingredients

  • 1 can dark red kidney beans (15,5 oz)
  • 1 can butter beans (15.5 oz)
  • 1 can small red beans (15.5 oz)
  • 1 can no salt added corn (15.5 oz)
  • 1 can San Marzano tomatoes whole peeled (or stewed, chopped tomatoes) 28 oz (big can)
  • 2 lb mixed ground meat (half venison, half beef is fab)
  • 4-6 tablespoons medium to hot chili powder (Penzey’s makes an awesome one)
  • 1 tsp chipotle powder
  • 2 tsp steak seasoning (such as the one from La Cense or  Chicago Steak Seasoning)
  • salt and pepper to taste

Directions

  1. Heat some oil in a pot over medium, add the ground meat, and proceed to cook and break apart using a spatula until the meat is cooked and not pink anymore.
  2. Add the spices and the tomatoes, then stir in the rinsed beans and corn (don’t open all the cans before hand, in case you run out of space, you can pass on one of the cans, bug make sure the ones you use are well rinsed)
  3. Cook until slightly thickened, taste and adjust seasonings if necessary. The longer you stew it the more the flavors will blend (or heat, cook 10 minutes, and wait for the leftovers to do that)
  4. Serve with some Cheddar Corn Muffins and maybe a glass of full bodied red…

By the way, this is soooo easy to make, even a novice cook can whip it up in no time!

image

© 2012 SimpleHealthyHomemade

3 Pepper Bean Soup

image

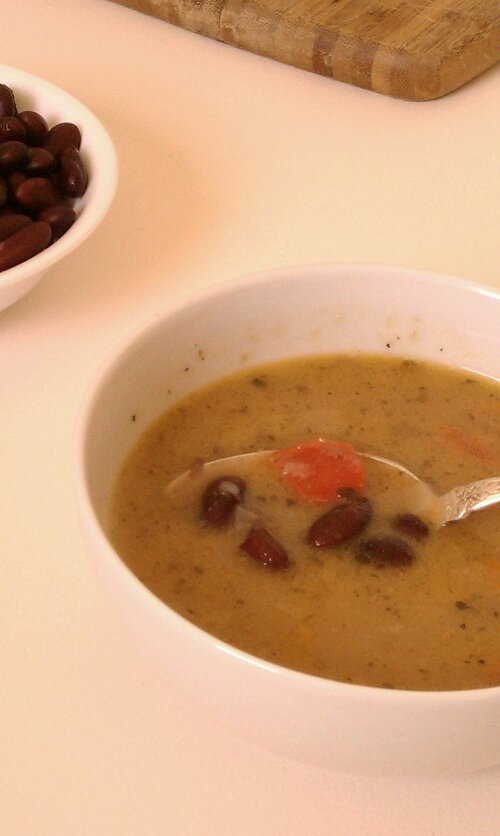
Some days it just has to be a quick and easy soup. I literally made this one in between answering emails and studying. Like many soups the active time is minimal and the result is totally worth it.

For me soups can be eaten any time of year and day, for that matter (I had this one for breakfast the other day and it was delicious, and yes, I know I am wierd). And usually the ingredient list goes by the content of my refrigerator and freezer in the colder months, my garden or the farmers market the rest of the year.

This particular recipe ends with kind of a ‘build your own’ option, a more brothy one with hearty chunks or a little thicker and more creamy option. Depending on the mood and/or the outside temperature you can vary it accordingly. Okay, you can’t go back from creamy to chunky, but it works the other way round. Either way, you can’t go wrong.

If you feel like it, you can add some cooked, shredded or diced chicken or beef.

imageIt’s very hard to take pretty soup pictures 🙁 the taste will have to make up for it

Ingredients

  • 1 medium red onion, diced
  • 1 large garlic clove, thinly sliced
  • 1/2 red bell pepper
  • 1/2 yellow bell pepper
  • 1-2 small Thai chili peppers (or other hot pepper), sliced thinly
  • 4 cups beef broth (or vegetable broth for vegetarian option)
  • 2 1/2 cups red beans, cooked, such as dark red kidney beans, or small red beans (if you don’t cook them and freeze them, from 2 cans)
  • 1/2 tsp dried oregano
  • salt & freshly ground pepper to taste (I used 1 tsp, but the broth I used, has no salt in it)
  • 1 tbsp apple cider vinegar
  • water, to thin the soup if it get’s too thick

image

Directions

  1. In a large stock pot, heat up some oil over medium heat. Add onions and cook until translucent. Add garlic and cook juts until it changes color to light golden
  2. Add bell pepper and hot pepper, cook 8 minutes or until onions are tender.
  3. Add broth and beans. (If using canned beans, rinse them before adding)
  4. Cook about 10 minutes or until slightly thickened, then remove about 1 cups of the soup including beans, and puree, or mash the beans with a fork for a very chunky soup. If you want a thick and creamy soup, puree 2 cups.
  5. Add the cider vinegar and cook for another 2 minutes. (trust me on that one, it is essential)

image

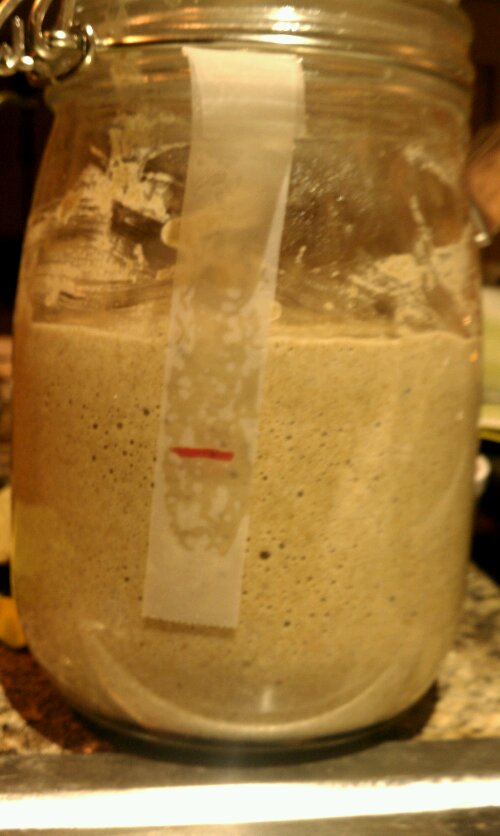
Happy to say that my Rye Sourdough seems to finally take off 🙂 More on that later though

imageCopyright © 2012 Simple Healthy Homemade. All rights reserved
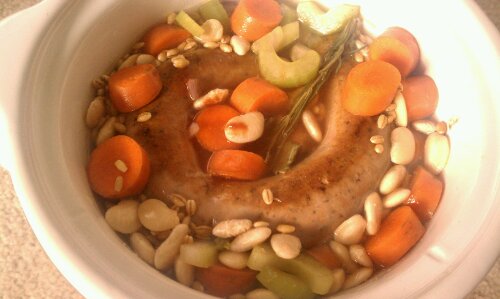
Sausage and White Beans ‘Slow Cooker Friday’ Stew

image

As the colder and shorter days arrive, and I know some of you are starting to get ready for the holidays, I tend to be drawn to soups and slow cooked dishes. I shop and eat with the seasons. Many of you already realize that in the summer months you are drawn to fresh crisp salads, raw vegetables and fruits and but now you naturally gravitate towards warming dishes as the temperatures start coming down. This is all part of the seasonal gear shift getting into the colder months. Nature hibernates and rests. So sit and sip some tea in front of the fireplace and read a good book, take your time, slow down and rest.

Eating fresh and local means to be in sync with nature more. Eating with the seasons takes into account that fruits and vegetables are at their peak of nutritional value when ripe, and the longer they have to travel until they get to you, the sooner (before ripeness) they have to be picked. Once the produce is picked and disconnected from the plant or root that it grew on, it is as nutritious as it is ever going to be, it can’t ‘make’ any more nutritional value. At the same time, the clock starts ticking and its nutritional value diminishes over time. For those of us on the East Coast, just think about how long it takes a truck to get here from California… Seasonal eating involves eating more locally grown and harvested produce. It has to travel less far to get to a store near you = it’s nutritional content is higher, therefore better for you. Yes, that means in the winter, strawberries and cantaloupe are not going to be as good or as good for you (high in nutritional content), as when they are in season. However apples, pears and oranges are at their peak.

image
Even though I love to cook, and admittedly spend a lot of time in the kitchen, on Fridays specially now that it gets dark so early, I like to take a break. I know many of you understand this feeling, after a long week, you just want to relax. That’s where this series of recipes comes in: Slow Cooker Friday! Simple and easy to prepare, pile it all in the slow cooker and forget about it until you come home to wonderfully flavorful dinner and a kitchen that smells like you just spent hours laboring over the stove!

To get the best dried beans, make sure they are not too old. In addition to loosing nutritional value, they will take longer and longer to cook. The best places for (fresh) dried beans I find are stores with a large Latino or Indian customer base. Remember, you will need to start this recipe the night before, as you are going to be soaking the beans overnight. I have also added barley to this recipe, since beans and grains together make up a complete protein, good to know if you are vegetarian!

image
Easy and it is also an end of the month kinda recipe, using sausage, and dried beans to maximize your $$!

Note: I use a 2 qt round slow cooker, which usually makes enough for 2 hungry people, plus a round of leftover for as many.

Ingredients

  • 1/2 to 1 lb sausage of your choice (I used a spicy garlic turkey sausage this time, but sweet or hot italian sausage works great too!)
  • 1 cup baby lima beans (about 1/2 lb)
  • 1/4 cup barley
  • 2 celery ribs, chopped
  • 2 carrots, chopped
  • 1 tsp salt
  • 1 sprig of rosemary or 1/2 tsp dried
  • 1 bay leaf

Directions

  1. Soak the beans the night before in a bowl with cold water.
  2. Chop the carrots and celery ribs and place in the slow cooker insert. Then drain the beans and layer over top the vegetables. Add the bay leaf and rosemary and sprinkle with salt.
  3. In a skillet brown the sausage by cooking it without turning for about 5 minutes per side. Place in the slow cooker on top of the veggies.
  4. Fill the slow cooker insert with water to just cover the ingredients by 1/2″, turn your cooker on low and cook for 5 hours.
  5. Come home to a wonderful dinner 🙂

Serves 4

Copyright © 2011 Simple Healthy Homemade. All rights reserved

Snowstorm Venison Chili

image

On Saturday, we were hit by a super untimely snowstorm. Up to this point from what my research has revealed, the Lehigh Valley (PA) has only had a major snow occurrence (not sure where it goes from minor to major, but that’s what the weather website said) and it was 2.2″ in 1925!!! Well unofficial measurements on my deck for this one: 6.25″
My trees are still mostly green, and with all those leaves, the branches bent almost to the ground. I went out and with the help of a rake, shook the snow off the bending branches before they could snap, like three times yesterday. We lost power around noon, so there goes my ‘corn maze, then lazy weekend on the sofa watching movies…’

The last roses from my yard, dug out of the snow and brought in

No power brings back memories of being out during hurricane Isabel, a few years back, when I lived in a house with a well =fail… (For those of you that don’t know how this works: no well pump=no water, shower, toilet, I practically lived at the gym for 7 days, don’t ask…) and I had an electric stove at the time, double fail. So right now I am feeling blessed to have a gas stove so we can cook and we have lots of candles and today we hooked up my generator, to keep the fridge and freezer alive. They keep promising the power will be back by this evening, keeping my fingers crossed.
🙂
Here’s what we ate, as no power is no excuse for not having a great meal. Even though I had lots of plans for oven roasted squash with shallot finishing butter or basting oil, and a nice braised stew maybe…

image

Candle light dinner, Chili and salad with Spring ‘Fall mix’ salad from the garden (dug out from under 3″ of snow. Surprisingly, I got it before it was too late!)

Ingredients:

  • 1 1/2 pd ground meat (we used venison, but you could use whatever you like, including turkey)
  • 1 can or equivalent serving frozen dark red kidney beans (if using canned, rinse in a colander to remove excess sodium)
  • 1 can or frozen portion great northern beans or other white beans of choice
  • 1 1/2 cups diced tomatoes or a 14.5 oz can diced tomatoes
  • 1 15 oz can of crushed tomatoes (or plain homemade sauce)
  • 1 8 oz can of tomato sauce
  • 1 medium red onion, diced
  • 3-4 tbsp chili powder
  • 3 tbsp corn meal
  • 1 tsp cumin powder
  • 1 tsp chipotle powder or 1 tbsp sauce from a can of ‘chipotle in adobo sauce’ (you can add more for extra heat!)
  • 1/2 tsp oregano
  • salt to taste

Directions

  1. Heat 2 tbsp oil in a big heavy pan, add the onions and cook until softened, not browned.
  2. Add the ground venison and separate into chunks using a fork. Cook, stirring occasionally until you can’t see any more pink.
  3. Add the spices and cook, stirring until fragrant.
  4. Add tomatoes,  1 cup water, crushed tomatoes and tomato sauce. Stir and let simmer for 10-15 minutes, for flavor to blend a little.
  5. Stir in corn meal and cook for an additional 5 minutes or until the Chili becomes nice and thick.
  6. Serve with corn chips or a nice hearty slice of bread

serves 4 hungry folks (5 if you serve more moderate portions)

image
Copyright © 2011 Simple Healthy Homemade. All rights reserved.