A while back I discovered that my farmers market offers raw milk, and I started drinking raw milk again. I switch back and forth between regular (cow) milk and goat milk. I have made goat cheese and fromage blanc and mozzarella, and butter. You’d be surprised to find just how easy this is, using modern convenience tools like a blender. No shaking a barrel for hours and NO, nononono, you do not get one of these:
 or
or 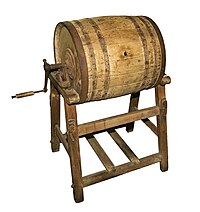
To me, raw milk is the only milk worth drinking, hands down, and not just due to the taste (more here). Not only are my food decisions based on how any given food tastes, but also how it is raised. And raw milk dairies are (at least in this country) organic, my milk is from pastured, grass fed cows (you know, happy out on the pasture vs. in a dark stable tied up somewhere), so far all the raw milk diaries I have visited care a great deal about their animals and take care of them like you and I would. From a regulatory stand point, raw dairies are generally under much more scrutiny, for cleanliness, safety etc. The cows have names. Ok that part might not make the milk taste better, but wouldn’t you agree that if you name your animals, they are closer to your heart than if they just have a number? 🙂

Mound of butter, by painter Antoine Vollon
Ever read the label of supermarket butter? One of the most surprising ingredients often is coloring. Now why would there be food coloring in your butter making it, presumably prettier, more buttery looking maybe, that is more yellow? Do we and if so why do we think it’s better if it’s yellow? If butter isn’t yellow after it’s made, then why would we think it needs to be? Complex questions you are asking, or then again not. Butter USED to be more yellow, at least in 1875 (see the painting above) when the cows where still out on the field, eating what they were meant to eat : Grass. Since most of your generic super market cows here in the US are kept indoors and fed a mixture of corn and cornstalks fortified with vitamins and minerals, the color doesn’t turn out quite the same. And it seems that people are smarter than we give ourselves credit for and somehow remember that butter is supposed to be yellow and it is more nutritious that way and this is where we get duped: color is added and our little minds are happily appeased into thinking yummy healthy butter. A little sad, I know. BUT since it is soooo easy to make your own, from good fresh cream, you can have great butter again in less than 15 minutes of work. When you start making butter you will notice that the color of the resulting product changes throughout the season, in the spring when the cows are out on the lush, fast growing spring pasture, the butter is a sunflower yellow, almost orange! But no matter what time of year, there still is more color in it than the regular stuff from the store. And taste!
First off, you do need cow milk to start. Goat milk is higher in fat,but naturally homogenized, so that the cream does not separate and rise to the top.
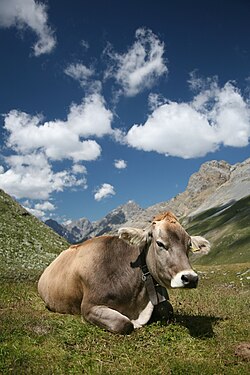 vs
vs 
Brown Swiss (Cow) Domestic Goat
Juuuuust in case you were doubting your animal knowledge 😉
After bringing the milk home (it comes in half-gallon glass bottles) I pour it into a wide mouth glass container that I keep for just that purpose and stick it in the fridge. It needs to sit overnight since the transport home and the pouring it from on e in to another container mixes up the milk, like I do by shaking it before pouring a glass, if I am not going for butter. Wide mouth because the next morning, I can easily scoop the cream off the top using my silver gravy ladle from the thrift store.
Gently skim the top layer off the milk, it will appear a bit darker, cream colored instead of white (no pun intended) and put it right into the blender bowl.

After that all that’s left to do is whirl the cream until the fat particles start clumping together.

The process goes in stages, at first the cream is liquid and gets sloshed around, then it becomes thicker and has a creamy consistency (In my blender it never get’s whipped like when using egg beaters, but noticeably thicker, but if you use egg beaters, it becomes whipped cream first, the kind Grandma used to make, thick and rich, juts keep going you’re not there yet)

keep blending on low, if you have that setting and the cream will start to get liquid again, separating into lumps of yellow goodness and buttermilk.

it’s just starting…

here you can see from the side, how it separates


You can rinse the butter in a bowl with ice water, using your hands to ‘knead out’ the rest of the buttermilk but I find the automated way a tad easier and since the blender needs to be washed anyways…
just make sure you rinse all the butter milk out, or it will go rancid.
My lump of butter!

© 2012 SimpleHealthyHomemade