There are many, many versions of granola, and I have made countless of them in the past, but no matter how much I would tinker and change the recipe, I found that they would never get quite like the ones you buy in a box. Lately I was re-inspired to give it another try by seeing such yummilicious recipes as LightlyCrunchy’s chocolate granola (doesn’t that sound super delish?) and I am just intrigued by Leanne’s idea of using sprouted lentils for her granola recipe, on my list to try…

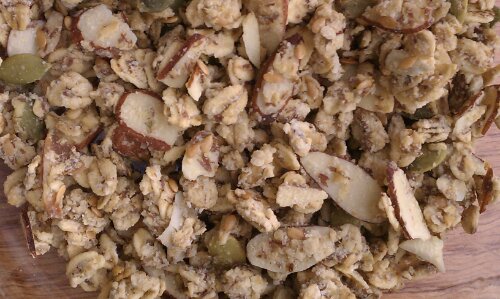
So back to my granola story. In the past they either got REALLY crunchy (and I know there are some at the store you better add to the milk or yogurt a good while before you plan on eating it, tried them too) or they are just flavored roasted rolled oats, yummy, oh yes, but what I am looking for are those clumps or clusters that are crunchy, yet you don’t lose a tooth biting into them if you decide to just grab a handful at random. So crunchy clusters that crunch apart when you bite them, if that makes sense. But I have never been able to replicate that, no matter how much I doctored the recipes, that is, at least not until now! (Maestro, drum roll please!)
 See? Got the clusters I wanted!
Yes, I could just go on and buy some every once in a while (which is what I have been doing), when the urge overcomes me, but you see, besides being quite expensive, in my opinion, there are several problems with most granola. They either contain soy (I am staying away from soy, almost all of it in the US is gmo and besides, unfermented soy contains phytoestrogens, which I try to avoid. Phytoestrogens are plant based estrogen like compounds, and a lot of cancers are hormone fueled…) or soybean oil (or vegetable oil, same difference in the end), gluten, (which normally I have no issue with, but for allergy season, I mostly cut it out of my diet, and what do you know? My accupuncturist was right! Shhhht, but I have been with hardly any seasonal allergy symptoms this year!!!! Yes, I am going and knocking on some wood right now… ) So even though I generally am perfectly capable of eating gluten and have no (visible) symptoms or reactions to it, I know a lot of my readers have to watch it.
And lastly the sugar content upsets my apple-cart, (in the spirit of full disclosure, I admittedly have only a vague idea of what an apple-cart looks like… I am gonna have to google that one) I often wonder, why so awfully sweet? But the answer probably lies in the general over use of sugar and the resulting ‘taste immunity’ to the sweetness of it, so they keep having to add more to all the processed food so people buy theirs over the competition. Once you start moving towards eating cleaner, for starters, less stuff in boxes, less sugar (or better no sugar), you will start to notice the natural sweetness in say carrots or red bell peppers again.
Oh boy am I exited about this one! And the possibilities… can’t wait to play some more with it, I already got some trials running and some definite winners on flavor combinations coming up shortly!
And gosh, it smells so good, you’ll totally want to eat some while it is in the oven, but try and wait, totally worth it 🙂

Ingredients
- 2 cups old fashioned rolled oats
- 1/2 cup sliced almonds
- 1/2 cup mixed pumpkin, flax and sunflower seeds
- 1/2 cup brown rice flour
- 1/4 cup quinoa flakes
- 2 tbsp coconut oil
- 1/4 cup rice syrup
- 2 tbsp honey or agave syrup (you can start with 1/3 cup and transition down to 2 tbsp, if you still like things conventionally sweet)
- 3 tbsp ground flax seed/flax meal
- 6 tbsp water
- 1 tsp vanilla extract
Directions
- Preheat oven to 275º F
- Mix oats through quinoa flakes in a large bowl.
- In a separate bowl, gently heat brown rice syrup, honey and coconut oil until liquid.
- Meanwhile stir water into flax meal, let sit 5 minutes.
- Add vanilla and flax mixture to rice syrup, stir then add to the big bowl with the oat mixture. Stir until evenly moistened.
- Spread on a lined cookie sheet and bake at 275º F for 15 minutes, stir, bake another 10 minutes then stir again, and bake another 10 minutes. Cool on the baking sheet
- Let cool completely before storing so it has a chance to crisp up.
The only downside to this is it makes me want to eat some every time I look at it…
 Copyright © 2012 Simple Healthy Homemade. All rights reserved


