Ricotta and Spinach Malfatti

image

I have a secret fascination with gnocchi, or dumplings or whatever you want to call them. I think the part that really gets me is the fact that you make a sort of dough and then dump it in boiling water, AND if you do it right, it doesn’t fall apart but cooks and comes out of the water the same shape it went in. Seems crazy that should work at all, right?


In the center shown with slow cooker sauce and sweet potato

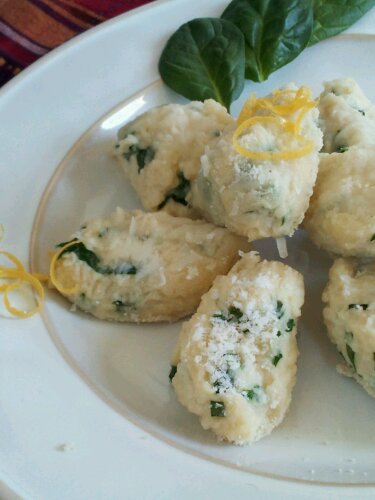
Well, since we are on the topic, here’s another one I tried recently. With the fall weather setting in, I am veering over towards more substantial foods, but this one is surprisingly light and delicate, for a dumpling. It’s mostly ricotta after all! Still fascinated that they hold together in the water, although it just occurred to me, duh, that pasta is essentially dough as well, cooked in water. I guess the fact that pasta is much drier and flat never allowed me to make the connection? 🙂 Now granted these are a bit more delicate than Spaghetti, and need special precautions, but as long as you keep the water just below a serious boil, you’re good to go. And they are worth every minute spent on making them. Don’t let the long list of steps scare you off, they are much easier to make than it is to describe how to make them, seriously!

image

Malfatti which translates literally as ‘ badly made’ are a regional specialty from Italy. I had first seen them on menus and tables back in Europe, then heard about them again when I started reading Robert’s blog, and his recent post on flour-less Malfatti reminded me to finally give them a try. Not flour-less, I’ll leave that for later, since that seems to require a bit more dumpling experience, I hear.

image

Another thing to keep in mind before running to your kitchen: all the recipes I saw recommended draining the ricotta in a cheesecloth lined colander, in the fridge overnight, some with a weight on it. However my ricotta did not cooperate and drained nothing, so here’s my solution: When ready to make the dough, blot with several changes of paper towels, squeeze and blot several times before placing in a large bowl.

image

So here’s what you need for the ‘screwed ups’ or Malfatti

Ingredients

  • 2 cups ricotta, drained in cheesecloth in the fridge overnight
  • 1/2 to 3/4 cups flour
  • 1 egg yolk
  • 1/2 tsp salt
  • semolina (or corn meal) for dusting so they don’t stick
  • 1/3 cup grated Pecorino Romano or other hard italian cheese

image

Directions

  1. Drain the ricotta overnight in the fridge in a cheesecloth lined colander over a bowl or blot with several changes of paper towels, squeeze and blot several times before placing in a large bowl.
  2. Separate the egg yolk from the egg white, reserve egg white for another use, and add the yolk to the ricotta bowl.
  3. Cut the spinach leaves into a chiffonade (roll up a few at a time and slice thinly) then add with the salt to the ricotta. Stir with a fork until mixed.
  4. Sprinkle 1/2 cup of the flour over the ricotta mixture and using a spatula or your fingers, gently incorporate until just coming together.
  5. Prepare a baking sheet with a non stick mat ans sprinkle with semolina.
  6. Generously flour a work surface, turn out the dough onto the surface an knead 4 to 5 times. (Do NOT overmix or the dough will get tough = not good)
  7. In the meantime, bring a large pot of salted water to a boil, then reduce heat until just at a simmer and no big bubbly movement can be seen in the water.
  8. Using 2 teaspoons, cut a piece from the dough, shape and place on the prepared baking sheet. Repeat with remaining dough. Sprinkle all the Malfatti with semolina while they are ‘waiting’
  9. Gently slide dumplings into simmering water, 5 to 6 at a time and cook until they float to the surface. Scoop out using a wire skimmer and place back on the baking sheet.
  10. Preheat broiler on low and when they are all cooked, sprinkle with the Pecorino and quickly finish the Malfatti in the oven until the cheese melts, they should stay white.
  11. Serve with any sauce that makes you happy.

image

© 2012 SimpleHealthyHomemade
Spaghetti Squash Leftover Bake

image

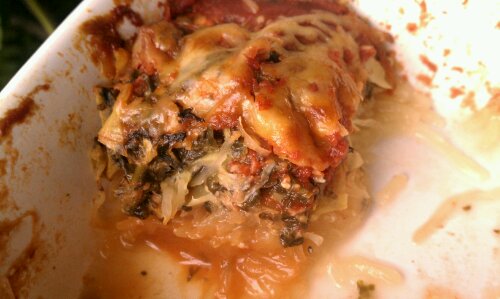
It’s a glorified leftover dish everyone will be exited about. It’s vegetarian, its cheap and it uses leftovers, option for no leftovers following as well. I mean, who has spinach artichoke dip leftovers? Pffffft!

For a long time I did not dare to eat this interesting item, it just seemed… wrong and I had no idea what to do with it once it would find its way into my kitchen. Stringy things are not usually a good thing when it comes to veggies, like stringy beans or the wire like strings in tough snowpeas that quite nearly strangle unsuspecting eaters. But finally curiosity won out and I have departed from the ‘just put spaghetti sauce over it’ approach that is generally the extend of creativity people come up with when confronted with the ‘what to do after it’s cooked’ question.

image

So while this particular squash can’t quite keep up nutrition wise with some of the other members of the winter squash family, its high water content kinda work against it there. Not to say it’s unhealthy, by no means, it’s just not as nutritionally dense as some of the other ones, but it’s a great low calorie, low carb choice!

One of the issues I have with this, like some of the other winter squashes as well, is what to do with it all? I am a one person household on most days and I really, really would like to not have to eat the same for lunch and dinner all week. Maybe I am weird that way, but hey, there’s worse 😉 Well, I have found that cooked spaghetti squash freezes quite happily for a couple of months, stored in zip top sandwich baggies. That way it’s ready to defrost in my fridge for whenever I need it.

So first, yes you do need to bake (or microwave) the thing to cook its interior.  Prick it with a fork all over so it doesn’t blow up on you, and either cut in half, scoop the seeds and discard and place cut side down on a baking sheet in the 350ºF oven until tender, or microwave without cutting in half until tender and easily cut in half (Careful, extremely freakin’ hot)

Once it’s cooled to an acceptable temperature, using a fork, scrape the stringy flesh into a bowl. Portion up as convenient and freeze until needed!

image

For two people as a side (or small meal) or 1 hungry eater

You need:

  • 1 cup cooked Spaghetti Squash (defrosted if frozen)
  • 1 cup Spinach Artichoke Dip (or 1/2 cup chopped artichoke hearts, 1 cup chopped fresh baby spinach, chopped & 1/2 cup italian cheese mix, microwave until cheese is melted and spinach wilted not quite as creamy, but works)
  • 1/2 of a 8 oz can tomato sauce
  •  1/4 cup of Italian cheese for the top (use a mix that has more than just mozzarella, so you get better flavor

Directions

  1. Preheat oven to 350ºF
  2. In an oven proof 2 cup square dish layer spaghetti squash, then top with Spinach Artichoke Dip, followed by tomato sauce by the spoonfuls. Top all of it with a handful of cheese.
  3. Bake until heated through and bubbly, cheese is melted and beginning to brown (about 15-20 minutes)

image

Copyright © 2012 Simple Healthy Homemade. All rights reserved

Lighter Spinach Artichoke Dip

image

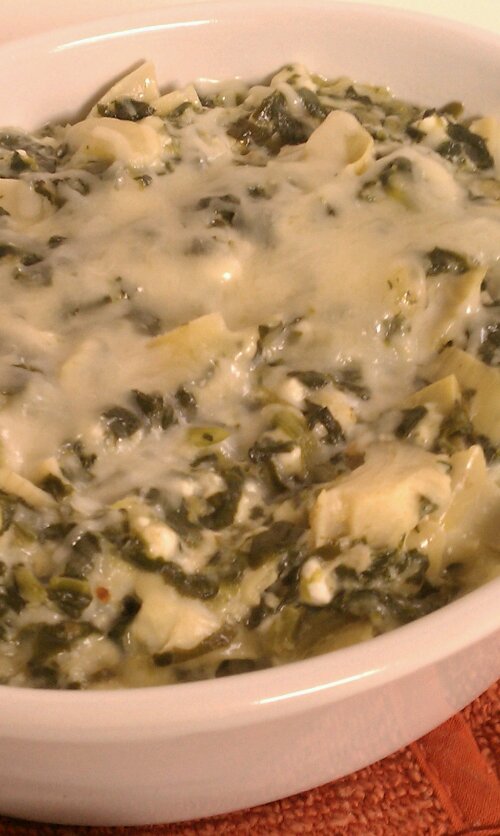
This proves that Spinach Artichoke Dip does not have to be a totally unhealthy indulgence. Well, it’s not quite diet food either, but besides being much lower in sodium than any restaurant version out there, this also has a lighter hand on piling on the fat calories and you get a good bit of veggies.

imagePlus you get waaaaaaaaaaayyy more Artichokes when you make it yourself 😉

imageMake extra, it makes a terrific layering ingredient to so many things     (like Fish Wellington, and Spaghetti Squash Bake)
Ingredients

  • 1 pack frozen chopped spinach (10 oz), thawed
  • 1 pack frozen artichoke hearts (9 oz), thawed or canned (if using canned, drain and rinse)
  • 1 clove garlic
  • 1/2 cup cottage cheese
  • 1/2 cup thick fromage blanc (or sour cream)
  • 1 cup Italian cheese blend, shredded (mine had 5 cheeses in it) + some for topping …sometimes when I am really hungry, I use 2 cups 😉

image

Directions

  1. Squeeze the defrosted spinach until mostly drained. set aside.
  2. Chop the artichoke hearts into small pieces (chunks are fine, just remember you have to be able to ‘dip’ it up)
  3. In  a pan, heat a tablespoon oil, then add the minced garlic and stir, cooking carefully until golden, but not brown.
  4. Add the Spinach, Artichokes and the Fromage Blanc, stir then add the cottage cheese and heat until it gets stringy.
  5. Add the Italian cheese mix, and heat until melted, pour into a serving dish or oven proof form and sprinkle with some more cheese, cover and allow the cheese topping to melt. Serve with veggies or corn chips for dipping.
  6. Can be made in advance, cover and refrigerate, then reheat in the oven at 350 until hot and melted, or microwave until hot.

image

Copyright © 2012 Simple Healthy Homemade. All rights reserved

Kale Mushroom and Meatball Skillet

image

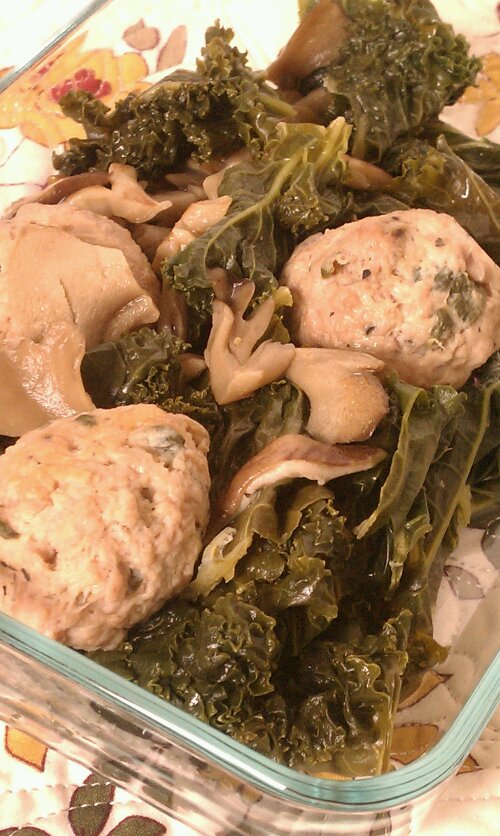
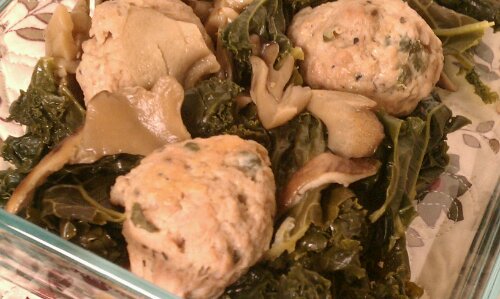
The darker the green the more nutritious a plant is, we have all heard that. And as far as color goes, you can’t get much darker than kale. Now for many this is sort of a strange new vegetable. Your Mom never made it unless you happen to be from Northern Europe or maybe Italy. If you grow it in your own garden and it’s young, it can be eaten raw on a salad. But this time of year and coming from the store, the leaves are more made for cooking. Here I made mushrooms and chicken meatballs to round out the meal. All done and only one pot to clean. I am including a simple meatball recipe, but I have also made this using ready made chicken sausage from Carl, my favorite poultry guy at the farmers market.
image

The true advantage of using sausage is it comes on its own ‘keep your hands mostly clean’ dispenser 😉 just squeeze off a portion and ‘dispense’ into the pan, one meatball at a time, kinda like squeezing toothpaste. (If you go with sausage, make sure you know what is in them, as sausage can be an excuse to use up whatever is on hand… The ones I get are awesome, made from skinless chicken breast meat, spinach, feta and some salt, that’s it! )

imageleftovers, ready to take to work

Serves 2 hungry mouths

Ingredients

  • 1 bunch of kale
  • 1 lb of chicken breast, ground (or sausage)
  • 1/4 cup feta cheese, crumbled
  • 1 cup baby spinach, lightly packed,
  • 1 1/2 cups mixed mushrooms, chopped ( I had shiitake and maitake that needed to be used)
  • 2 tbsp Apple cider vinegar

Directions

  1. To make the meat balls:
  2. Mix ground chicken, chopped spinach and crumbled feta in a bowl, and form into ping-pong ball sized meat balls. If you wet your hand a little, the whole thing sticks less. (If you are using sausage, skip this step)
  3. Clean and wash the kale, then separate the leaves from the tough stems. I usually rip the leaf off, or even strip it off the stem by pulling the stem through between thumb and index finger. Or you can use a knife. Cut or tear into pieces
  4. Heat a little oil in a skillet, add the chopped mushrooms and saute until lightly brown.
  5. Add the meatballs, cook until browned on one side.
  6. Pile the kale on top, all of it (if it looks like it is going to come out of the pan, just add half, wait for it to cook down a bit, then add the rest), add 1/2 cup if water, place (or balance, if there’s a mountain in your pan) a lid on top and allow to cook covered.
  7. After 5 minutes, check to see if there is still any water left, if not, add a little more. Cook until the kale is tender and the meatballs are cooked through.
  8. Add apple cider vinegar, toss and cook another 2 minutes to allow the flavors to blend.

image

Copyright © 2012 Simple Healthy Homemade. All rights reserved

Spinach and Pomegranate Salad

image
What to take for lunch? Since most of us here don’t get to go home and have a home cooked meal, and PB&J really isn’t a healthy option (I can hear you all scream right now), take out and fast food… well I don’t think I need to go into detail on that (no, salad from McDonald’s isn’t health food either). I got the idea to add pomegranate seed to a spinach salad from a local Mediterranean deli. But at a whopping $4 for a small container, what’s a girl on a tight budget supposed to do? You got it, try to make a similar concotion myself! And let me tell you, the flavor combination it amazing, it’s definitely a winner!

image
So here is a fun and yummy winter lunch box salad that would be a great side for the chicken with pepper and mushrooms, or add some fromage blanc to make it a light lunch, like I did the other day. No good picture exists to proof that, was too good, didn’t stick around long enough 🙂 And, please, don’t use just any dressing, make your own it will be infinitely better, I will of course give you one that will fit this salad perfectly!

image
Spinach  and Pomegranate Salad with Pine Nuts

Serves 4

* to get the seeds out of a pomegranate, cut in half and gently pry the seeds out of the white flesh/lining using your fingertips. I usually do this over the sink in a colander. Careful with the splatters if you pop a seed, it’s highly staining. Totally worth the effort.

image

Copyright © 2012 Simple Healthy Homemade. All rights reserved

Green Monster Power Smoothie

image

No pretty pictures, I know, but healthy and yummy none the less 🙂

There are great benefits to eating lots of greens, yes, you all heard it before, but some days it is hard to fit all that healthy stuff into your food chain between running from work to get the kids or whatever your busy life dictates. Well for days when you don’t have the time to sit down to a hearty spinach omelet you can, even if you don’t have a juicer, make yourself this amazing tasting green power smoothie. Having a juicer can be a great addition to your healthy diet, as long as you’re aware of he fact that you’ll be missing out on all the healthy fiber that you would have consumed eating the veggies. I also want to caution you on juicing fruit, you definitely want to stay HEAVY on the vegetable side. Fruit juice no matter if store-bought or homemade will affect your blood sugar level drastically, much more so than eating the whole fruit would have done. From a weight loss and even a ‘having even energy all day’ point of view, not a good thing. And if you are borderline pre diabetic, just plain BAD idea.

So in this Smoothie you’re not only going to get your greens (without feeling like a cow on the pasture) but all the healthy fiber is still there, hurray!

Added benefit when you’re maligned this with spinach: the lemon juice in the Smoothie provides vitamin c which is essential for your body to absorb the iron from the spinach!

Ingredients

  • 2 handful of Spinach leaves (or stemmed lake or collards, chopped)
  • 1 ripe banana
  • 2 cups water
  • Juice of 1 large lemon
  • 2-3 tbsp coconut/palm sugar, or honey or agave syrup (add more if you like it sweet)
  • (Optional: 2 tbsp egg white powder or protein powder)
  • You could also add a peeled Kiwi

Directions

  1. Place greens in the blender and add the two cups of water, pulse a few times to get started, pushing down the top layer of leaves if they don’t incorporate.
  2. Add the banana, lemon juice, sugar and if using protein powder. Pulse and blend until smooth
  3. Serve. Makes about 4 cups

Note: you should drink this right away, don’t make it in advance, first the Smoothie separates into solids and liquid pretty quickly (I just re-blend for the second glass) but secondly the nutrients that were happily stored inside the leaves are now exposed to the air and will start oxidizing and therefore loose potency.

image

Copyright © 2011 Simple Healthy Homemade. All rights reserved