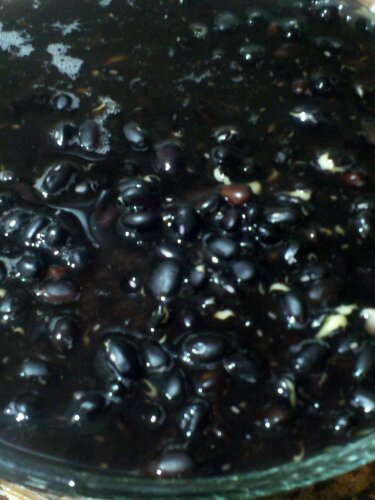
 Soaking the beans in plenty of water overnight is essential
With making most things from scratch, the question sooner or later arises: What about beans? As I have mentioned before, I do cook my own beans and then package them rather than buying cans. It’s first of all cheaper, then it’s also better for the planet and most likely much healthier for you, not only due to the sodium content in most canned varieties but due to the materials used in the can lining that have come under more and more scrutiny lately. And if that does not have you convinced to cook dried beans, maybe the fact that they just taste so much better will! And it is really not all that time consuming if you are organized about it. Yes, it is easier if you have a pressure cooker, like the one I brought back with me from Switzerland. Mine is a Kuhn-Rikon Duromatic, kinda like this one, but any good quality pressure cooker would make your life easier, not just for beans (Do NOT get the cheapo ones with the wiggly-rocking-weight-thingy balanced on top, not worth it)
 the next morning: after soaking
I usually cook a couple of pounds of beans in one day, depending on the size of your cooker (refer to the manufacturers guidelines) about a pound at a time. So yes, I will cook several batches, one after another and then store them in the freezer for an easy addition to soups and other meals. I know some resources say that you can cook the beans without soaking, or ‘quick soak’ them by letting them sit in boiling water, here’s my experience: You know all the things beans are supposed to do to you, the bad things why folks don’t want to eat beans? In my experience, the gentler you prepare the beans the less they cause you to have to forego your upcoming social appointments. 😉 That includes soaking them overnight, draining and rinsing them before putting them in the cooking pot and cooking over gentle heat. Yes, it takes a bit longer but the results are way worth it.
Trust me.
Have I ever led you astray? No? See!
 Finished Product: Black eyed peas
Here’s the way I like to do it. You need:
- 1 lb dry beans, soaked overnight
- water
- snack sized zip top baggies (about 6-8 per pound)
- 1 or 2 gallon sized freezer bag
- pen for labeling
For most beans: 1 pound dried beans = 2 cups dried = 4 – 5 cups cooked beans= 3-4 cans of beans!
- Rinse the dried beans in cold water, then to soak overnight place in a good-sized bowl (the beans will swell and get bigger as they soak up the water) and cover with cold water. You want them covered by at least two inches of water.
- In the morning drain and rinse the beans, then put them in the cooking pot of your choice
- Option A: Regular pot is fine, just cover with plenty of water and bring to a boil then reduce and simmer until tender, can take 1-2 hours depending on the variety.
- Options B (my preferred method): Pressure Cooker, (following manufacturers guidelines) For mine that means cover with about a finger’s width of fresh water, close the lid and place on the stove over medium heat. Slowly heat until the pressure valve gets up to the first red ring, turn heat to low and set your timer (*see below).
- After releasing the pressure from the cooker by running cold water over it, open and drain the cooked beans in a colander in your sink until cool, then package in snack sized zip top bags, and store 6 to 8 baggies in a gallon sized bag labelled with the type of bean and the date before putting in the freezer.
*Some of my favorites are listed below; with the times that I have found produce perfectly cooked beans (I will update as I add more species and specifics)
 All ready to freeze, packaged in portions ( I could probably have let them cool a little longer,a s you can see there is condensation in the bags)
And please understand that every pressure cooker is different, the beans could be fresher or older, so you do need to experiment a little. A lot of times I can tell by the smell of the steam escaping the pot if they still smell ‘green’ and need more cooking. I pre-soak all of these beans, unless otherwise stated. I also find that letting the pot stand off the heat for a while before releasing the pressure by running cold water over the outsides and the top keeps the beans nicer. NEVER EVER try to open a cooker that is still under pressure, this could be highly dangerous as the water still boils inside the cooker long after it’s been removed from the fire! Also too drastic of a pressure change and they tend to burst, same when you cook them at too high a pressure, so stick with the first red ring. This is not an activity to watch TV next to.
Type of bean: time at first red ring: standing time before releasing pressure:
- Small Red: 4-5 minutes: 5 minutes: then run cold water over sides and top
- Adzuki Beans: no soaking 5 minutes: 6 minutes: then run cold water over sides and top
- Baby Lima: 5-7 minutes: 3 minutes: then run cold water over sides and top
- Black Eyed Peas: 6-8 minutes: 4 minutes: then run cold water over sides and top
- Cannellini Beans: 8 minutes: 4 minutes: then run cold water over sides and top
- Black Beans: 9 minutes: 6 minutes: then run cold water over sides and top
- Red Kidney Beans: 10-12 minutes: 6 minutes: then run cold water over sides and top
- Pinto Beans: 10-12 minutes: 6 minutes: then run cold water over sides and top
- Chick Peas: 10 minutes: 4 minutes: then run cold water over sides and top
Some tips:
*Buy beans at a place where they have a quick turnover. WHile they are dry and will keep a long time, quality will diminish over time, just like with anything else you eat. Buy your beans at a latin or indian grocer, folks that eat a lot of beans tend to not have them on the shelf as long.
* Don’t salt beans until they are cooked, or you are adding to the cooking time! (I usually forget in the end and just salt when using the beans)
*Do not mix beans from two packages bought at different times. Cooking time varies with how old and dry the beans are as well as by variety and a new bag plus one that just showed up in the back of your pantry could cook at different times leaving some beans hard and some mushy.

© 2012 SimpleHealthyHomemade

 The dough is a bit sticky, so make sure you flour the work surface well
 ready for the freezer!
 They will look like little pillows 🙂
 Copyright © 2012 Simple Healthy Homemade. All rights reserved

 Soaking the beans in plenty of water overnight is essential
 the next morning: after soaking
 All ready to freeze, packaged in portions ( I could probably have let them cool a little longer,a s you can see there is condensation in the bags)
 Finishing my last bowl of soup, I thought it might be time to share this one with you instead of keeping it all to myself. Using the last tomatoes from the garden. Oh no, they have not been out on the vine for a while now. I had to pick them a while back when we were expecting a hard frost, even though they were hard and green as a granny smith apple. But oh wonder, after a couple of weeks, (yes folks, it took that long) they started to turn yellow and even a little red/orange in some spots, I guess because they remembered they were Pineapple tomatoes after all. But knowing that the flavor would not be a sun-ripened version of tomato, I decide soup might be a good bet. And since they are probably less sweet than their sun-ripened cousins, I pondered, maybe creamy would be the way to go? But I also did not want to make it too heavy or rich and full of fat, well I think I struck the balance just right, but judge for yourself. I have eaten the entire pot of soup (serves 4) over the past week, all by myself, there was no sharing here, I admit 😉
 By the way, I bet this would be even better with real ripe tomatoes
 Pretty, right? You can get the pattern from
 © 2012 SimpleHealthyHomemade


