Gluten-free Vegan Oatmeal Cacao Nib Cookies

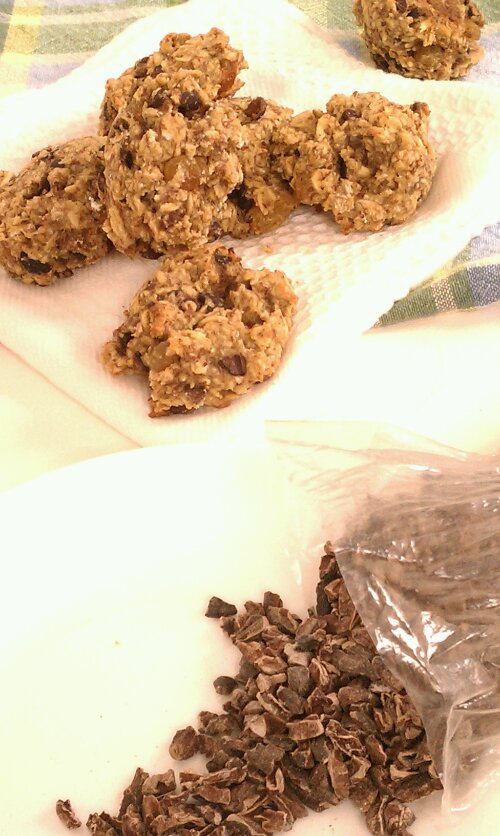
image Oh yeah, AND raisins!

These are so ridiculously awesome. The cacao nibs give them a dark chocolate flavor you can smell from the oven all while being gluten-free and low sugar! A quick word on cacao nibs/cacao bean: coming from the Theobroma cacao tree,  sometimes wrongly labeled cocoa nibs/cocoa bean, which from my understanding refers only to the extracted butter or powdered stuff. The mayan word is: kakaw, they might be on to something, I mean, they’ve only been using the stuff for ever. Just sayin’

Gosh, you have no idea, but just writing about those cookies makes my mouth water, and of course they are already gone… (I see some more baking coming up in this girl’s future) They are chewy and fragrant and yes, the texture is somewhat different than regular oatmeal cookies, after all there are mostly oats in there (and they are made without gluten flour).

imageDark cacao nibs (essentially pieces of cacao bean) 

If you are cultivating your sweet tooth, please feel free to use more ‘sweet stuff’. The cookies here are getting some of their sweetness from the raisins, but they would be a perfect treat for my Dad, who doesn’t really like sweets. I am a big believer in flavor over just plain sweet, or salty for that matter; and these cookies fit the bill perfectly.

image

Ingredients

  • 2 cups rolled oats
  • 1/2 cup millet flour*
  • 1/4 cup golden raisins
  • 1/2 cup cacao nibs
  • 1/4 cup flax meal
  • 2 tbsp chia seeds
  • 3/4 cup water
  • 1/4 cup almond or other nut butter
  • 1/4 cup agave nectar, maple syrup or honey**

* I used millet because of its sweet, nutty flavor, but you could most likely use other gluten-free flours

**if using honey, the cookies are no longer vegan
image

Directions

  1. Preheat oven to 350ºF
  2. In a large bowl, combine first four ingredients (oats through cacao nibs)
  3. In a separate bowl, mix flax meal and chia seeds with the water, set aside and let rest for 10 minutes.Then stir in the agave nectar and almond butter
  4. Stir the flax mix into the bowl with the oats, add up to another 1/4 cup of water if dough looks too dry.
  5. Drop cookies by the rounded tablespoon onto a prepared baking sheet, and bake until golden brown on the bottom and just starting to turn golden on top, about 8 to 11 minutes.

Makes about 30

imageCopyright © 2012 Simple Healthy Homemade. All rights reserved

Apple Raisin Granola

image

I am back after taking a mini vacation up to a beautiful Bed & Breakfast in New Hampshire. Right on Lake Winnisquam. Sometimes you just need to get away from it all… Ahhh! It’s just the best to have someone make a lavish breakfast for you, and there were always freshly baked cookies. It’s like visiting your favorite Grandma, without having to help out in the kitchen 🙂 More on that soon! But before leaving, I had to make a few things that I could bring, for snacks and since I really did not know about the whole cookie thing they had going until we got there… And besides we were going to be on the road for six or seven hours. So I decided on another granola. Thanks to Heidi over at LightlyCrunchy who made this fantastic Apple Cranberry Granola, I was inspired to add the apple rings to my granola instead of just indiscriminately munching on them. I had never thought of using up my dried apple rings in a granola, what an ingenious idea!  

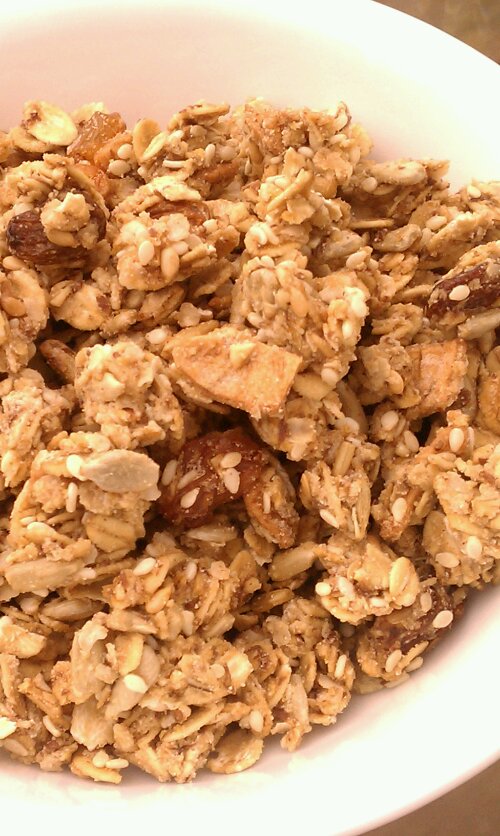
imagebefore adding milk or yogurt, can’t decide which I like best…

I go through phases, I find something, love it eat a whole bunch and then, not sure, but forget about it for a while? or get kind of tired of the taste? Anyhow I found myself with a good size bag of dried apple rings living in my cupboard, so now it can find its way into my breakfast and snacks 🙂 Delicious! The only thing I will work on for next time? Portability. Try eating granola while in the car… Not easy!

image

Ingredients

  • 2 cups rolled oats
  • 1/2 cup quinoa flakes
  • 1/2 cup dried apple rings, chopped
  • 1/4 cup sesame seeds
  • 1/4 cup golden raisins
  • 1/2 cup sunflower seeds
  • 1/2 cup brown rice flour
  • 1/4 cup brown rice syrup
  • (1/4 cup agave nectar or honey, optional*)
  • 3 tbsp coconut oil, melted
  • 4 tbsp flax meal/ground flax seeds mixed with 6 tbsp water, let rest 5 minutes

* If you are making this for the first time, use the additional sweetener (the honey or agave syrup) especially if you are trying to transition kids or the ‘I don’t have a sweet tooth’ husbands to a lower sugar diet, then over time gradually reduce the amount of sweetener added

Directions

  1. Preheat oven to 275º F
  2. Mix all the flakes, flour and seeds with the raisins and the apple pieces
  3. In a separate bowl, mix the wet ingredients: rice syrup, honey/agave, coconut oil and the flax meal mixed with the water.
  4. Add the wet ingredients to the oat mixture, stir well until evenly distributed, spread on a lined baking sheet and bake for 20 minutes. Stir, bake 10 minutes, stir again and bake for an additional 10 minutes.

image

Copyright © 2012 Simple Healthy Homemade. All rights reserved

Pumpkin & Flax Seed Granola with Almonds

image

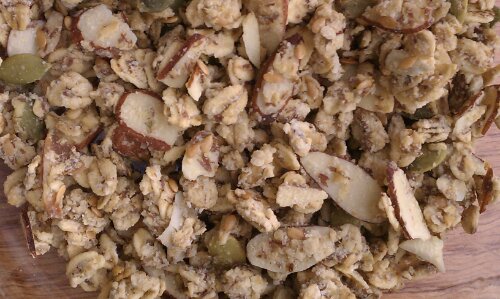
There are many, many versions of granola, and I have made countless of them in the past, but no matter how much I would tinker and change the recipe, I found that they would never get quite like the ones you buy in a box. Lately I was re-inspired to give it another try by seeing such yummilicious recipes as LightlyCrunchy’s chocolate granola (doesn’t that sound super delish?) and I am just intrigued by Leanne’s idea of using sprouted lentils for her granola recipe, on my list to try…

image

So back to my granola story. In the past they either got REALLY crunchy (and I know there are some at the store you better add to the milk or yogurt a good while before you plan on eating it, tried them too) or they are just flavored roasted rolled oats, yummy, oh yes, but what I am looking for are those clumps or clusters that are crunchy, yet you don’t lose a tooth biting into them if you decide to just grab a handful at random. So crunchy clusters that crunch apart when you bite them, if that makes sense. But I have never been able to replicate that, no matter how much I doctored the recipes, that is, at least not until now! (Maestro, drum roll please!) 

imageSee? Got the clusters I wanted!

Yes, I could just go on and buy some every once in a while (which is what I have been doing), when the urge overcomes me, but you see, besides being quite expensive, in my opinion, there are several problems with most granola. They either contain soy (I am staying away from soy, almost all of it in the US is gmo and besides, unfermented soy contains phytoestrogens, which I try to avoid. Phytoestrogens are plant based estrogen like compounds, and a lot of cancers are hormone fueled…) or soybean oil (or vegetable oil, same difference in the end), gluten, (which normally I have no issue with, but for allergy season, I mostly cut it out of my diet, and what do you know? My accupuncturist was right! Shhhht, but I have been with hardly any seasonal allergy symptoms this year!!!! Yes, I am going and knocking on some wood right now… ) So even though I generally am perfectly capable of eating gluten and have no (visible) symptoms or reactions to it, I know a lot of my readers have to watch it.

And lastly the sugar content upsets my apple-cart, (in the spirit of full disclosure, I admittedly have only a vague idea of what an apple-cart looks like… I am gonna have to google that one) I often wonder, why so awfully sweet? But the answer probably lies in the general over use of sugar and the resulting ‘taste immunity’ to the sweetness of it, so they keep having to add more to all the processed food so people buy theirs over the competition. Once you start moving towards eating cleaner, for starters, less stuff in boxes, less sugar (or better no sugar), you will start to notice the natural sweetness in say carrots or red bell peppers again.

Oh boy am I exited about this one! And the possibilities… can’t wait to play some more with it, I already got some trials running and some definite winners on flavor combinations coming up shortly!

And gosh, it smells so good, you’ll totally want to eat some while it is in the oven, but try and wait, totally worth it 🙂

image

Ingredients

  • 2 cups old fashioned rolled oats
  • 1/2 cup sliced almonds
  • 1/2 cup mixed pumpkin, flax and sunflower seeds
  • 1/2 cup brown rice flour
  • 1/4 cup quinoa flakes
  • 2 tbsp coconut oil
  • 1/4 cup rice syrup
  • 2 tbsp honey or agave syrup (you can start with 1/3 cup and transition down to 2 tbsp, if you still like things conventionally sweet)
  • 3 tbsp ground flax seed/flax meal
  • 6 tbsp water
  • 1 tsp vanilla extract

Directions

  1. Preheat oven to 275º F
  2. Mix oats through quinoa flakes in a large bowl.
  3. In a separate bowl, gently heat brown rice syrup, honey and coconut oil until liquid.
  4. Meanwhile stir water into flax meal, let sit 5 minutes.
  5. Add vanilla and flax mixture to rice syrup, stir then add to the big bowl with the oat mixture. Stir until evenly moistened.
  6. Spread on a lined cookie sheet and bake at 275º F for 15 minutes, stir, bake another 10 minutes then stir again, and bake another 10 minutes. Cool on the baking sheet
  7. Let cool completely before storing so it has a chance to crisp up.

The only downside to this is it makes me want to eat some every time I look at it…

imageCopyright © 2012 Simple Healthy Homemade. All rights reserved
Risotto milanese

Not quite conventional saffron risotto.

The creaminess of a good risotto is pure comfort food, at least to Europeans. However you look at it though, usually the recipe involves days of stirring over low flame (ok, I’m exaggerating slightly here) to reach that creamy state any self respecting risotto cook strives for. Since time isn’t always that easy to come by in my life, I needed something less traditional (sadly), but no less delicious or authentic tasting and most of all time saving, or at least work saving. I can see you frown, my purist friends, but since I made Osso Buco in the slow cooker, and therefore am already in the purgatory of purist cooks, I figured a little more deviation from the conventional path couldn’t hurt too much more.

image

So instead of adding water by the spoonful and being shackled to your pot for the purpose of slow and steady stirring, my quick version let’s you complete other tasks since it takes much less work. To make up for the blasphemy of bastardizing the preparation technique, I tried appeasing the food gods by adding extra saffron. You know: give some, take some. 😉
It’s utterly creamy and delicious, even without the long stirring and I think it can hold its own next to any traditional risotto, especially considering it’s weeknight fare!

image

Saffron is the most expensive spice by weight (worth thousands of dollars per pound!!) which isn’t surprising given that only about 5-7 pounds can be produces a year from an acre of land and the harvesting process is delicate and labor intensive. Saffron threads are the dried stigma of a fall flowering crocus variety and they have to be harvested by hand. By use however it isn’t all that expensive, since a little goes a long way and you only need about a pinch for a nicely flavored and colored risotto. And if you have a little land, (a flowerbed works perfect) you could order yourself some saffron crocus bulbs like me and harvest some of your own each year. I dry them on paper towels on top of my fridge, where they are out of the way.

image (this makes enough for 2 people/servings or to go with the slow cooker Osso Buco)

Ingredients

  • 1/2 cup Arborio, Vialone or Carnaroli rice
  • 1 small shallot, finely diced
  • 1 tbsp olive oil
  • 1/2 tsp salt
  • water (or broth)
  • 1 pinch of saffron threads
  • Parmiggiano Reggiano (Parmesan), to shave on top

Directions

  1. In a medium sauce pan heat the oil, the  add the shallot and cook until translucent. Add the rice and stir until all grains are coated.
  2. Add 2 cups of water and bring to a slow boil, stirring every couple of minutes, season with the salt, turn down if it starts to boil to rapidly.
  3. Cook for about 10 minutes, stirring every couple of minutes, then remove about 3-4 tbsp liquid, let cool slightly, add the saffron threads to hydrate and let sit for a couple of minutes before adding back to the rice.
  4. Add water, 1/2 cup at a time, while you are cooking the risotto, as the water gets absorbed. Your goal is to cook the rice to a nice and soft consistency and not have it swimming in water, keep stirring every so often.
  5. Cook until the rice is tender and creamy, adding water if necessary and stirring as above, total time is about 20 to 25 minutes, depending on the amount you make and I think also, the age of the  rice.
  6. If there is just a little liquid left when the rice is done, cover and let sit off the heat, the high starch content will absorb the excess moisture while it sits.
  7. Serve topped with shaved Parmiggiano Reggiano

image

Copyright © 2012 Simple Healthy Homemade. All rights reserved

Seed and Nut Cracker (grain free)

image

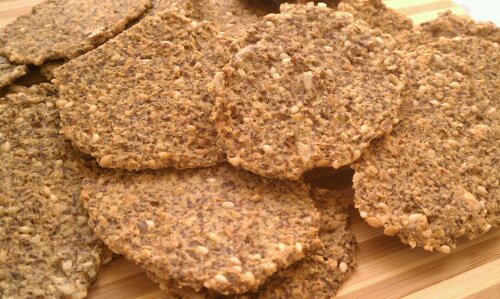
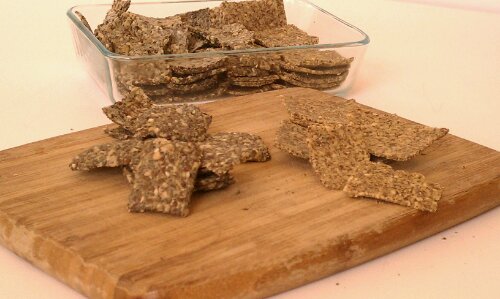
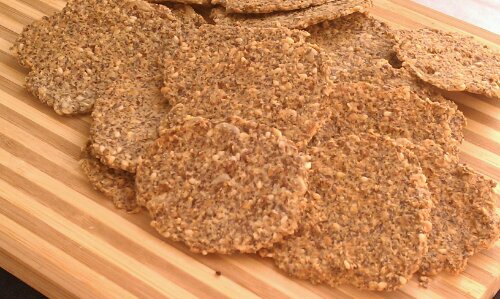
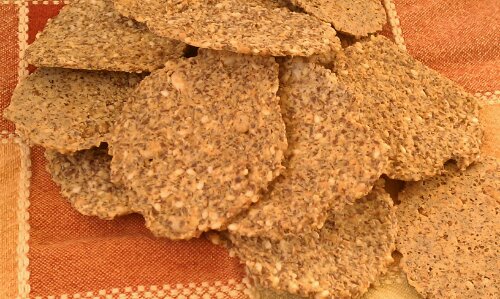
Seed or nut based crackers are yummy I daresay even addictive. But the price for a girl on a tight budget, is rather prohibitive… 🙁 So after tinkering in my kitchen (batch one and two shown here) batch 3 was the winner, hands down.

imagebatch one & two

You can make them square or round, depending on your preference. Square is a bit less work, but takes a little longer to get to that perfect crunchy state. For either one, flatten or roll out on the prepared cookie sheet (preferably lined with a silicon baking mat, that’s how I made them, if you don’t have one of those, at least use baking parchment) by covering with wax paper and rolling out, then peeling the paper layer gingerly from the top.

imagethe only downside? You could always eat more than there are left…

Ingredients

  • 1/4 cup cashews
  • 3 tbsp sun flower seeds, divided
  • 1/2 cup ground flax seeds (flax meal)
  • 1/4 cup ground almonds, natural not blanched
  • 1/4 cup quinoa flakes
  • 3/4 cup water
  • 3/4 tsp sea salt
  • 1 1/2 tbsp sesame seeds
  •  1 tbsp flax seeds, whole (golden or brown)
  • 1 tbsp butter or coconut oil, melted

Directions

  1. Preheat oven to 300°F
  2. Prepare baking sheet (if you are making these round, it will make two cookie sheets) by lining it with a silicone baking mat
  3. In a blender or a mini food processor, combine the cashew and 1 tbsp sun flower seeds, blend until it forms a coarse meal
  4. Add ground almonds, flax meal, and quinoa flakes and pulse until combined
  5. Add the water and salt, blend until well mixed
  6. If you have enough space in your mini processor, add the remaining ingredients and pulse 2-3 times, until mixed but not chopped.
  7. Round: drop onto prepared cookie sheet, 1 level teaspoon at a time, distancing about 1 12/” to 2″ apart, cover with waxpaper and roll out until less than 1/8″ thick, basically as thin as you can get it.
  8. Square: Scrape or drop dough onto cookie sheet, spread out, then cover with wax paper, and roll out super thin, (less than 1/8″ thick)
  9. Bake 30 minutes in the middle of the preheated oven, or until no longer soft and pliable. then finish baking another 5 minutes on the bottom rack
  10. Let cool before crunching away!

image

Copyright © 2012 Simple Healthy Homemade. All rights reserved

Chocolate Coconut Rounds

image

There they were, sitting timid in the middle of my fruit basket trying to pretend they were not there. Overripe bananas, like the poor step child in an old fairy tale. Since I only like to eat them when they are still a little green, these brown things in my fruit basket are definitely not my thing. But over time I have come up with various ways to use them up, using them for smoothies, pancakes or baking, after all they do provide a great source of natural sweetness without adding sugar. And yes, I have to admit before I did that, sometimes they would get thrown out. So that’s why they are scared. But fret not bananas, I have something yummy to turn you into 🙂

What do you do with your past prime bananas? Any favorites?

This recipe is grain and sugar free, the only sweetness comes from the banana, so it isn’t your traditional cookie, if you like things sweet, you might want to add 1/4 cup of sugar or some stevia. These are more like a piece of 70% cocoa chocolate, flavorful but just subtly sweet.

image
And without further ado here is how to make them:

Ingredients

  • 1/2 cup egg whites (about 4)
  • 2 ripe bananas, mashed with a fork
  • 2 cups unsweetened, shredded coconut
  • 1 cup ground almonds, natural not blanched
  • 6 tbsp cocoa powder
  • 1/4 cup almond butter (cashew butter or other nut butter would work as well)
  • 1 tbsp coconut oil
  • 1 tbsp coconut flour
  • 1 dash of salt

Directions

  1. Combine shredded coconut, ground almonds, coconut flour and cocoa powder in a bowl
  2. Add the mashed bananas
  3. Melt the coconut oil together with the almond butter and stir until smooth, add to bowl
  4. Add the egg whites
  5. Mix until everything is fully incorporated
  6. Divide dough into two portions and between wax paper, work each one into a roll of about 1 1/2” to 2″ diameter.
  7. Place in the freezer for about 1 hour or until nice and solid.
  8. Preheat the oven to 350°F
  9. Remove one roll from the freezer, and slice into rounds 1/2″ to 3/4″ thick, place ona  lined cookie sheet and bake for 15 to 20 minutes.
  10. In  the meantime, repeat the same with the other roll.
  11. Let the rounds cool down on the cookie sheet for 5 minutes before removing to a cooling rack.

image

Copyright © 2012 Simple Healthy Homemade. All rights reserved

Lemon Olive Oil Dressing

Lemon Olive Oil Dressing

  • juice of 1/2 lemon (about 1/4 cup)
  • 1/4 tsp salt
  • 1 pinch white pepper (in a pinch you could use black pepper)
  • 1 tsp parsley, dry
  • 1 tsp thyme, dry
  • 1 tbsp finely minced shallots
  • 1/2 cup olive oil (about 1 1/2 to 2 time lemon juice amount)

Directions

  1. Mix all ingredients in a lidded container and shake well then pour over your salad.

imageGreat on Spinach Salad or try over roasted Brussels sprouts!

Copyright © 2012 Simple Healthy Homemade. All rights reserved

Paprika Coriander Chicken

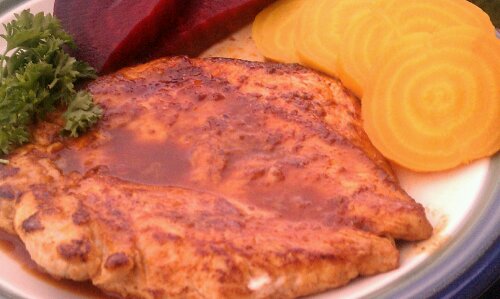
imagePaprika Coriander Glazed Chicken Breast (shown with red and golden beets)
Part I of the series: Chicken for every day of the week!

Chicken, the easy way out, right? When you just don’t feel like putting that much effort into your dinner, there’s nothing easier or quicker to cook. And let’s face it what else is as perfect of a ‘canvas’ for different flavor as mild chicken?

Each one of these recipe’s makes 2 servings, so make ahead as lunches for the week, something I started doing lately, since there are days when I simply don’t have any time to cook something and end up, you guessed it, eating less than healthy or worse, not at all. Not good, not good, at least not when you’re trying to get back to eating small meals every three hours to have more balanced energy and leave the Christmas pounds behind in January.

image

This one can be made in the pan or the oven, your preference really. It tastes delicious with steamed red and golden beets and some broccoli…

Ingredients

  • 1 chicken breast half
  • 1 1/2 tsp paprika, mild/sweet
  • 1 1/2 tsp coriander seeds, whole
  • 1 tbsp lemon juice, preferably fresh squeezed
  • 1 1/2 tsp raw honey
  • 1/8 tsp salt

Directions

  1. Pound the chicken breast between two sheets of clear wrap, using a meat mallet or bottom of a pot
  2. For the glaze, crush the coriander seeds in a mortar using a pestle, until roughly ground
  3. In a  small bowl combine crushed coriander, salt, paprika, lemon juice and honey and stir to combine
  4. Stovetop: Heat oil in a skillet over medium or
  5. Remove top layer of cling wrap from flattened chicken, and spread half of the glaze over the surface using the back of a spoon, then pick up and flip over into the pan, removing the second layer of cling wrap as you do so.
  6. Spread the remaining glaze over top of chicken in the pan, cook until bottom is nicely browned, about 2-3 minutes, flip over, cook 1 minute then add 1/4 cup water to prevent from getting too dark and dry, cook until cooked through about another 2 minutes.
  1. Oven: preheat oven to 400°F and line a small baking sheet with foil
  2. Place the chicken on the sheet, then spread half the glaze over the top, reserve the rest to re-apply once the chicken is done
  3. Bake 15-20 minutes depending on thickness, or until chicken breast is cooked all the way through, remove from oven and spread the remainder of the glaze over the chicken before serving.

image

Copyright © 2012 Simple Healthy Homemade. All rights reserved

Colorful Vegetable Soup with Celery Root

image

Celery Root or Celeriac is what we use back home as winter vegetable for soups, salads, stews, you name it. It’s cheap, readily available and has a great flavor both raw and cooked. You could most definitely use regular green celery, which has a bit more of a pungent flavor, compared to the almost a bit nutty or earthy flavor of the root crop.

Cerliac

Making vegetable soup from scratch could not be easier, and I am giving you a basic recipe that can be made in as many variations as there are cooks.

For this particular soup I chose colorful veggies, and I am foregoing the usual potato for the sake of the ‘getting lean in the new year’ and all the paleo eaters out there and I am using, as I just said, celery root instead, which has a much lower Glycemic Index (GI) than a potato. choosing vegetables (and foods in general that are low on the glycemic scale keeps you full longer, therefore helping to control your appetite. In very simple words (yes there is more to it, but I’ll spare you) the idea behind the glycemic index is to measure how quickly a particular food affects your blood sugar/insulin response, meaning how quickly the sugars in it get digested and find their way into your blood stream.
image

Alright, now that we fed the brain, let’s look at our tummy 🙂

Ingredients

  • 1/2 medium onion, peeled and chopped
  • 1/2 celery root, peeled and cut into chunks
  • 3-4 large tomatoes, diced * see note
  • 2 carrots, diced
  • 1/4 to 1/2 a head of cauliflower, separated into florets (depending ont he size of the cauliflower you get)
  • 1/4 of a head of a medium savoy cabbage, cut into chunks (or use some leaves off a large one)
  • 4-5  stalks Swiss Chard, chopped(any color you like, rainbow colors look pretty)
  • 1 tsp salt

* I used frozen ones from my Garden in the summer: when they are at the peak of ripeness, just chop and put in zip top bags for soup in the winter. Alternately you could use a can of no salt added diced tomatoes)

Makes one 3 1/2 qt pot full

Directions

  1. In a stock pot (mine is 3 1/2 qts, or so it says on the bottom) heat one tablespoon on olive or coconut oil over medium, then add the onions,a dn cook until translucent but not brown
  2. Add the celery and carrots, stir and cook until the onions are beginning to brown
  3. Add the tomatoes, with any juice that collected on the cutting board (if using frozen, partially thaw in the fridge overnight) stir and allow to cook 5 minutes to allow some of the juices to come out
  4. Add water to cover the vegetables and bring to a boil, cook 5 minutes, then add the cauliflower and chopped Swiss Chard, bring to a boil again,then reduce the heat, add the salt and simmer until celery, carrot and cauliflower are tender when pierced with a fork.
  5. Serve hot with some crackers or a slice of rustic bread, or enjoy as a first course.

To make this your own:

  • Instead of celeriac, use 2-3 stalks of celery and a medium potato
  • Use kale instead of Swiss Chard (but remove the tough stems)
  • Use spinach,  but add right before serving into individual bowls, ladle hot soup over
  • Don’t like cabbage? Leave it out
  • Instead of cabbage and kale, use thin cut or quartered Brussel sprouts
  • Add green beans or snow peas towards the end of cooking time
  • Leave out the tomatoes
  • Go through your fridge, anything vegetable can most likely be used up in your yummy soup, the potions are endless 🙂

image

Copyright © 2012 Simple Healthy Homemade. All rights reserved

Traditional Swiss Christmas Cookies

It’s not Christmas without traditions and for me going without the cookies I grew up with is unthinkable. When I first moved to this country, I was suddenly faced with the challenge of making cookies that before I would just be able to buy at the local bakery, cookies I had never made before. yeah, I did not always make everything myself. But I needed them, I mean Christmas was NOT going to come without, so I was going to find a way and I was going to learn how to make them, whipped egg whites and all. Over the years I tried different substitutes for ingredients that are not readily available in the US, and have refined and tweaked the recipes to reproduce the flavors of my home without having to fly back and what not 😉

I grew up in Basel, a city on the Rhine that had extensive trade with spices, sugar and tea long before the rest of secluded Switzerland had ready access to such luxuries, and there is extensive use of (former) exotic spices. A lot of times the recipes also have a couple of tablespoons of local cherry brandy on the ingredient list (which can be left out without altering the result significantly)

image

Over the years ground almond meal (aka almond flour) has become more readily available and my cookies turn out much better than when I tried blending the almonds in my food processor. Yeah, not a grinder, should have known, but driven by desperation (I wanted to have Christmas, after all) I sifted through the result and picking out most of the large remaining almond chunks.

Another challenge is the measurements. All my recipes are not only metric, but in grams, kilograms, deciliters and so forth. We measure ingredients by weight not volume, which I still believe gives you more accurate results in most cases, specially if you have to divide or multiply a recipe. But  for convenience in the American kitchen, I have converted all of the ingredients into imperial measurements, cups and so forth. So, worry not, no need to run out and get a food scale (although I do think it’s a good thing to have, just sayin’)

Many of the recipes that I will be sharing here are considerably healthier than your average cookie recipe. What usually happens when I bring them somewhere is this: people marvel at the different looks and how pretty it is, then they try one and are amazed that there is so much  flavor and not just plain sugary sweetness, and then they completely lose it when they learn that many of the cookies they just tried use no butter or oil and the only fat content is  natural oils from the ground almonds, many are gluten and even grain free ( a thing I never realized until this year)

There are four that absolutely HAVE to be on my list for a real Swiss Christmas,

Links will be updated as I update the recipes

Basler Brunsli (our local version of Brownies)

gluten free, grain free and butter free

Mailänderli (delicately scented with lemon, these were always the first ones my Mom would bake each year)


Zimtstärnli (Cinnamon Stars, I think this one has great potential to become a American Favorite, given it’s shape, taste and color, not to mention taste)

gluten free, grain free and butter free

Änisbrötli (Anis breads/cookies )

fat free besides the eggs


And of course there are several other that are just as good and I try to make them too, but without those four, I don’t even care if it snows or not!


image


 Chocolate Balls

Almonds and chocolate, what more could you want?

   Hazelnut Squares

wpid-2012-12-12-09.51.11.jpg


Spitzbuebe (Sablé like, translates to Rascals, I have heard them called Linzer Cookies in the US)

Orange Hearts

And I could go on and on

What is one thing that is absolutely essential to your holidays?


image

Copyright © 2011 Simple Healthy Homemade & Simone Kereit. All rights reserved