Reena’s Amba Ma Smoothie

image

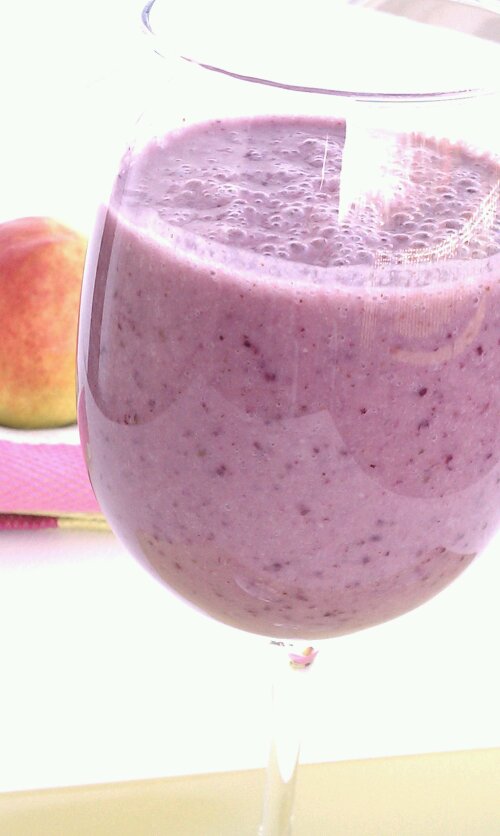
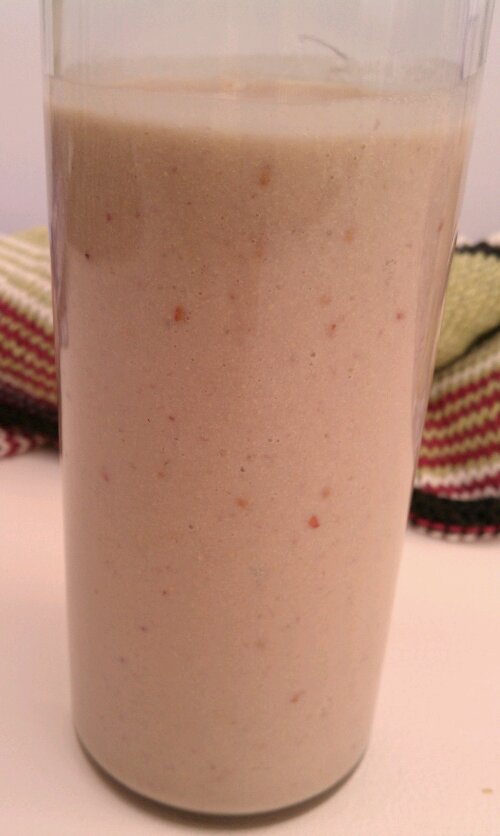
Version 1: Pineapple-Cantaloupe-Raspberry

During  the fall months, there is a particular Hindu Holiday ‘Navaratri’ during which believers perform several rituals and practice fasting. It lasts 9 nights and is devoted solely to the Mother Goddess — known regionally as Durga, Bhavani, Amba, Chandika, Gauri, Parvati, Mahishasuramardini…

File:Durgas.jpg

The story goes: After one of the Gods (Brahma) gave the demon Mahish the power not to be destroyed by man (including male Gods) because of doing a good deed for Brahma, Mahish started to cause all sorts of terror. So, the 3 forms of God, Brahma (birth or creation), Vishnu (life or preservation) and Shiva (death or destruction) combined their energies and powers and created a female form of God (Devi or Durga) to destroy the demon, (since no man could vanquish him). She represents the furious powers of all the male gods, and is the ferocious protector of the righteous, and destroyer of the evil. Durga is usually portrayed as riding a lion, and carrying weapons in her many arms.

I’ve also heard “Durga” means ‘invincible‘ and she is the personification of ‘shakti’ or divine feminine force!

Goddess of Victory of Good over Evil

For the fasting part of the ritual, nothing except Milk, nuts and fruit can be eaten during the day. And so I created this yummy smoothie in order to take advantage of all the goodness that’s to be had from milk, nuts and fruits

image

Ingredients

  • 1 cup milk (that can be almond milk or dairy milk**, your choice)
  • 1 tbsp almond butter (or other nut butter: remember peanuts aren’t really nuts)
  • 1 really ripe banana
  • 1 cup pineapple(fresh or frozen)*
  • 1 cup cantaloupe or mango pieces (fresh or frozen)*
  • 1-2 tbsp raspberries or strawberries (optional)

* Make sure that one of these is frozen. If it is still hot outside, both may be frozen or you could add some ice cubes before blending.

** If using dairy milk, the recipe is no longer dairy free or vegan

Directions

  1. Put all ingredients in the blender, starting with the banana, add fruit, then the almond butter on top and pour the liquid over top.
  2. Blend until smooth.
  3. Enjoy or pack in a cooler or lunchbox and take to work to have throughout the day.

Version 2: with Blueberries…

Ingredients, Version 2

  • 1 cup milk (that can be almond milk or dairy milk**, your choice)
  • 1 tbsp almond butter (or other nut butter: remember peanuts aren’t really nuts)
  • 2 really ripe banana
  • 1/4 cup blueberries (fresh or frozen)*
  • 1 cup peaches or pineapple (fresh or frozen)*

* Make sure that one of these is frozen. If it is still hot outside, both may be frozen or you could add some ice cubes before blending.

** If using dairy milk, the recipe is no longer dairy free or vegan

image

Directions

  1. Put all ingredients in the blender, starting with the banana, add fruit, then the almond butter on top and pour the liquid over top.
  2. Blend until smooth.
  3. Enjoy or pack in a cooler or lunchbox and take to work to have throughout the day.

And here’s a great thing to do with any leftover smoothie:

Pour into popsicle molds (or any small paper or plastic cups and add one of those wooden sticks they sell at craft stores) and freeze for a sugar free treat later.

Copyright © 2011 Simple Healthy Homemade. All rights reserved.

Grain Free Lasagna

image

Ahhh Lasagna! The whole house smells good after you make one of those…

image
Earlier this year, when I was plagued by seasonal allergies, I had been experimenting with a gluten free diet, at the time, I made some Lasagna using rice pasta, you could not even tell the difference!But I was ready for something new, so when I picked up some fantastic looking eggplant, zucchini and mushrooms, at the farmers market and walked past various types of squash, including spaghetti squash, (not ready for that one yet), inspiration hit me, a light came on and I heard a voice. Nonono no, not quite, but I said to myself, “what happens, if I just plain and simply leave out the pasta completely, replace it with thin slivers of veggie instead?” The result is not only gluten free, it is also almost Paleo 😉 (There is cheese, milk and potato starch in it, sorry folks) BUT it’s 100% grain free.

For a vegetarian version, replace the meat with diced zucchini, eggplant and shredded carrot. Adjusting the skillet time accordingly.

image

First I made a meat sauce, using homemade tomato sauce, ground bison and mushrooms…
image

Ingredients

  • 1 medium eggplant
  • 2 small zucchini
  • olive oil
  • 2 to 2 1/2 cups homemade tomato sauce (or good quality store bought)
  • 8 oz button mushrooms, cleaned and sliced
  • 1 lb ground meat (I used bison, but beef or turkey would work as well)
  • 1 med onion, diced finely
  • oregano  and basil(dry or fresh)
  • 2 tbsp butter
  • 2 tbsp potato starch/flour
  • 2 1/2 c milk
  • 1/2 tsp salt
  • 2 cups shredded mozzarella cheese

image

Directions

  1. Using a mandolin slicer, slice eggplant and zucchini into lengthwise thin ribbons (this is what you will be using instead of the pasta sheets). Set aside
  2. In a large skillet, heat a tbsp olive oil, add onion and cook over medium until softened, not browned, about 5 minutes.
  3. Add the sliced mushrooms, cover and cook on medium low until the mushrooms are starting to soften.
  4. Then add meat to skillet and cook, breaking up pieces with a fork until not pink anymore.
  5. Add tomato sauce and oregano and basil (depending on the sauce you choose, you might need less or more, suggestion for dried spices is 1 tsp oregano and about a tbsp basil), stir until mixed well and heated through. Set aside
  6. To make the Béchamel Sauce:  Heat 2 tbsp butter in a medium sauce pan over medium low until melted, add in 2 tbsp potato starch, stir until incorporated
  7. Whisk in milk and salt, and stirring continuously, bring sauce to a simmer (don’t turn up the heat, this should be done slowly), and simmer for 3-5 minutes until thickened. (Use when still warm/hot)
  8. Assembling the Lasagna: Using either one 9×13″ glass dish or several smaller ones ( I like to use dishes that are 2-4 servings and freeze several, for a quick week night dinner or lunch) start by spreading some meat sauce over the bottom of the dish, then a layer of eggplant or zucchini, followed by 3/4 cup of Béchamel sauce, a handful of mozzarella, another layer of vegetables (either zucchini or eggplant, I kept doing one layer zucchini, one layer eggplant, but you could mix and match), repeating the meat sauce and Béchamel/cheese layers, finishing with a layer of Béchamel and the rest of the mozzarella.
  9. Store in the fridge until ready to bake for dinner or bake right away: Preheat oven to 350F, bake in the middle of the oven for 30-40 minutes or until bubbly and the eggplant and zucchini are soft, when pierced with a knife. (Adjust baking time, if not storing in the fridge first)

image

image

Copyright © 2011 Simple Healthy Homemade. All rights reserved.

Grilled Mediterranean Eggplant with Hummus Spread

image

Yep, I am still clinging on to summer, end of summer denial? Maybe juuust a bit… In my defense, I have embraced fall at least as far a pumpkins go, so think I am alright. But with how the weather was this past week end and the beginning of the week, it was grillin’ time, baby! And farmers markets and road stand are all still loaded with eggplant and zucchini, and other late summer crops, it be a shame to not grill up some yummies!

Ingredients

  • 2 md eggplant
  • salt
  • extra virgin olive oil
  • 3-4 tbs Hummus

image

  1. cut eggplant into 1/4″ thick slices lengthwise, salt on both sides and place in a colander in your sink to drain for 20 minutes (you will remove the excess salt in the next step, so no worries)
  2. Preheat gas grill or light the charcoals!
  3. pat or wipe dry with paper towel, and spray with olive oil (using your ‘Misto’) alternately, you can also use a brush to lightly brush oil onto both sides of the eggplant
  4. Grill on medium until grill marks appear, turn over and grill, with the cover down, until tender
  5. Place on platter and serve drizzled with Hummus Spread
  6. For Humus Spread: In a small bowl mix together the hummus with 2-3 tbsp water, stir until smooth.

Goes well with ‘Roasted Salmon with Coriander-Paprika Glaze’ or a nice Bison steak.

And guess what’s for desert… Pumpkin Cheesecake Minis! (recipe soon)

image

Copyright © 2011 Simple Healthy Homemade. All rights reserved.

Roasted Salmon with Coriander-Paprika Glaze

Our Sunday night ‘still hanging on to summer’ dinner 😉


Salmon is one of those cold water fish, high in Omega-3’s, we all know by now we’re supposed to have more of ‘those ones’ in our diet, but how to go about it?

Last Weekend I created this quick and easy recipe that can be whipped up in a minute with minimal effort. And let’s face it, I haven’t met anyone that could not use another 10 minutes recipe! That’s how simple this roasted salmon is to make, although it tastes and looks like you labored in the kitchen for a lot longer 😉 And who doesn’t like to get some easy earned praise?

Ingredients

  • 2 pieces of salmon, about 3-4 oz each
  • 1 tbsp lemon juice
  • 1 tbsp olive oil
  • 1 tbsp whole coriander seeds, crushed in a mortar
  • 1 tsp honey
  • 1 tsp paprika (sweet)
  • 1/8 tsp salt

Directions

  1.  Crush the coriander seeds in a mortar or use a spice mill
  2. Combine lemon juice, olive oil and honey in a small bowl
  3. Add coriander, paprika, and salt, and stir well until incorporated
  4. brush the salmon fillets all over with the glaze and bake in the middle of the preheated oven at 400F for 10 minutes, or until opaque through, brushing tops one time at 7 minutes (10 minutes should be all it takes, unless you have an exceptionally fat pieces of fish)

You could use any extra glaze as seasoning for roasting red bell pepper slices alongside the salmon like we did here…

image

or just have the salmon with some grilled eggplant and hummus spread!

either way: make it.  It’s super yummy!

Hummus

image

A few years back, I decided to try and cook chickpeas instead of getting the canned variety. I got a pound bag, soaked them overnight, and cooked them the next day. I have never looked at legumes the same way again. The flavor is incomparable, the taste of freshly cooked chick peas is almost nutty, yummy!

Now what I do is I will soak a couple of different varieties of dried beans and go on a  bean cooking spree: Cooking a pound at a time in my Zyliss Pressure cooker (depending on the size cooker you got, you might be able to do more than one pound) after they are done and cooled, I portion them out in individual ‘servings’, usually in snack size zip top bags (have you noticed, they seem to only be available as store brand?) and freeze. Then whenever I want to make a bean soup, hummus or a salad, I just defrost what I need and can skip the high sodium and whatever else might live in those cans of beans. For soups, I literally just drop the frozen parcel in, hummus you gotta let it defrost in the fridge overnight or use your microwave.

image

Ingredients

  • 1 can chickpeas or equivalent frozen, defrosted
  • 3 tbsp lemon juice
  • 2 tbsp tahini ( sesame seed paste)
  • 1 tbsp olive oil
  • 1 tsp ground cumin
  • 1/2 tsp salt (use less if using canned)
  • 1/8 tsp ground white pepper
  • 1 dash cayenne pepper
  • 1 to 3 tbs water

Directions

Blend all ingredients in a food processor/blender, adding water until desired consistency is reached.

Serve as a dip with toasted pita chips or vegetables, or thin and use as a spread on grilled veggies

image


Unfinished Business: Grilled Mediterranean Eggplant with Hummus spread: taking advantage of the summer like weekend, we fired up the grill and had these puppies with a juicy, lean and clean bison steak 🙂


And Sunday night’s dinner, you ask? Oven roasted salmon with a coriander-paprika glaze… As I said, unfinished business, stay tuned, I will get to it 🙂

image

image

Copyright © 2011 Simple Healthy Homemade. All rights reserved.

Healthy Carrot Cake

image
image

The last couple of days I have been thinking about home (the old home, where I was born and where I used to live) maybe it was brought on by roasting and eating those amazing chestnuts the other day, who can say? Anyway, we have a lot of regional specialties in Switzerland and this recipe pays homage to a Carrot Cake from the region of Aargau, and juuust in case any of you are into linguistics, the name of the dish I am going after is ‘Aargauer Rüebli Torte’. In my recipe, there is no butter or oil in the cake batter, there is limited amount of sugar compared to most regular muffin or cake recipes, hardly any flour and it can be made gluten free. It’s moist crumb is achieved without the addition of fat, in fact the only fat in it, comes from the egg yolks and the ground almonds used. Still it’s cake, it’s a desert and should be enjoyed as such, in moderation 😉 Not saying this would be a good idea, but it’s quite a way to sneak some veggies past certain people called kids 🙂

image

For simplicity reasons, you can also make muffins (simplicity, because you don’t have to try to come up with believable stories on where the missing piece of cake went 😉

image

Ingredients

  • 1/2 cup + 2 tbsp sugar
  • 5 organic eggs, seperated
  • 1 pinch salt
  • 2 tbsp warm water
  • 1/2 lemon peel
  • 1 lb carrots
  • 2 cups ground almonds, natural, not blanched (also known as almond flour)
  • 1/8 tsp allspice
  • 1/2 tsp cinnamon
  • 1/2 cup + 2 tbsp flour (use oat flour to make it gluten free)
  • 1/2 tsp baking powder

image
egg yolks , and sugar: looking dark yellow to start…


image
…and light in color after stirring

Directions

  1. Mix first four ingredients in a bowl and stir until light in color and airy
  2. add lemon peel
  3. Shred the carrots on the fine side of a grater into the egg mixture
  4. add the cinnamon and allspice, stir to combine
  5. in a separate bowl, beat the egg whites  until soft peaks form, add on top of the mix
  6. sprinkle the ground almonds on top
  7. sift flour and baking powder over top and gently incorporate the almonds, egg whites and flour.
  8. Fill into prepares 8″ spring form pan ( or grease muffin cups, you can use paper liners, only bake 25 minutes) and bake at 350 F for 50 minutes, or until tester comes out clean.
  9. After cooled completely, coat top of cake with sifted confectioners sugar, and marzipan carrots. Or make a white glaze by mixing  1tbsp lemon juice, 1-2 tbsp water and 1 1/2 cups of confectioners sugar until mixture coats back of spoon evenly. Spread over entire top and sides of cake.

image

By the way: My boyfriend, who was very adamant about not liking carrot cake, never having liked carrot cake, finally agreed to try a tiny piece, after my: ‘this is not your typical extremely sweet american carrot cake, just saying. But, alright, more for me!’ Well, he revised his opinion, in his own words: ‘OMG, this is delicious!’

image

Copyright © 2011 Simple Healthy Homemade. All rights reserved.

Zucchini Griddle Cakes or Latkes

image

We all know someone who’s over productive zucchini plant fed the whole neighborhood.
One year, the seed company had messed up, and the Charantais Melon seeds turned into zucchini plants… And unfortunately for us ( and our relatives and neighbors) that was in addition to the 3 zucchini plants my parents purposefully planted. In their defense, this was when zucchini were still a fairly new thing to grow for the home gardener in my area.
We had zucchini steamed, filled, grilled, stewed, we gave a way zucchini, and after we could no longer get excitement out of people, we left them on their door step and tip toed away… We learned, after having 6 plants that summer… Have since never had more than 1 maybe 2 plants. I could not eat or smell zucchini for literally years. Thank goodness, I have since then recovered from my zucchini overdose and can happily eat it again. And here is one of my fun new ways of using up that bounty of summer, or since now it is early fall, maybe just conjure up that a last feeling of sun kissed earth!
image

Ingredients

  • 2 cups shredded zucchini
  • 1/2 cup Quinoa flakes
  • 2 Eggs, beaten (or for began option: flax seed ‘egg’ = 1tbsp ground flax seed, 3 tblsp water, let sit 3 minutes)
  • 2-3 tbsp chopped Onion
  • 1 tbsp chia seed (optional)
  • 1/2 tsp salt

image

Make them!

  1. Mix zucchini, onion and beaten eggs until combined.
  2. Add quinoa flakes, chia seed and salt, stir to incoropate.
  3. Drop by the heaped tablespoon into a heated skillet, flatten out each blob (yep, that’s a scientific term) to 1/4″ thickness.
  4. Cook until golden brown, flip over adding more olive or coconut oil to the pan, as needed.

They can also be baked instead.
Heat oven to 375 F and cook about 8 minutes per side.

Makes about 8. Serve them as a side or a savory breakfast.

Hmm, maybe I will try the rest with salsa…
image

They are light and I almost want to say fluffy, and the pictures DO NOT do them justice…

Copyright © 2011 Simple Healthy Homemade. All rights reserved.

Perfectly Roasted Chestnuts

image

Every day I drive past these trees which in the past week or so have started dropping their load of chestnuts onto the street. I was contemplating stopping and asking if I could pick some, when this morning there was a sign: “chestnuts for sale!” Awesome, I love chestnuts! I think part of their fascination is, they are one of the only true seasonal food left.
image
my freshly bought treasure, at home on the deck

I love fall, the colors of the leaves, seeing you breath in the crisp morning air…

Just as much as pumpkins are a symbol for fall throughout the new world, in Switzerland where I was born,  it’s chestnuts that ring in the shorter days.
Warming your hands on a bag of freshly roasted chestnuts while walking through the Christmas market in November, and of course, our annual family vacation to the italian speaking part of Switzerland: Ticino

Ascona, TI

Valle Verzasca, TI: of course the pictures are from pretty weather 🙂

where we would don our rain coats (it usually rained A LOT whenever we were there in the fall) and boots and go pick bags of chestnuts, trying not to let them sting you under your fingernail (I remember that pain too). Then at night my Dad would make a fire in the fireplace and we would roast and eat the bounty of the day.

I will not go into details about the one time we decided to take a couple of bags back home after vacation and kept them in the kitchen, just trust me, whenever you have chestnuts, keep them OUTSIDE on the balcony, or you’ll be chasing the inhabitants of the bad chestnuts paying the price for weeks…

🙂 Ah memories! I also remember that although fresh and good, they were not always easy to peel. We scored them, even got the special ‘chestnut scorer’ tool, but often the inner skin would stick and you’d have to gnaw it out of the shell…

But today after researching, I have found the perfect, fool proof way to roast fresh chestnuts so they are easy to peel, ust like from the street vendor!

Ready?

    • First you need fresh chestnuts (they should look full and plump and shiny if they are dull pass on them, they are not fresh and might be moldy or dry)
    • score them either across or in a X pattern through the shell on one side. There are several ways to do this, but the easiest way I found is to hold the chestnut either on a cutting board or up in your hand and cut with a serrated knife or small paring knife.
    • Bring a pot of water to a boil,  (this is the whole trick, yes, you boil them first) drop the chestnuts in and cook for about 10 minutes.

imagepre-boiled chestnuts in my grill basket, ready to go on the grill
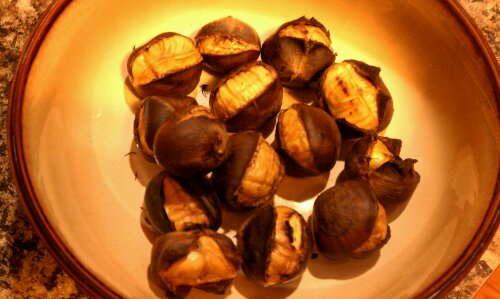
  • Drain and roast.
  • Again two different ways this can be done, the easiest is your gas grill outside, using one of those grilling baskets. (Or in a baking dish in the oven: Preheat to 425, roast for 15-20 minutes, shaking the pan or stirring twice)
  • Grill about 5 minutes per side, and  WIN! you will have perfect chestnuts!

imageYummy! 

(the whole ‘…roasting on an open fire’ might be more romantic than practical, but the grill works GREAT.

image
…and they are gone

Copyright © 2011 Simple Healthy Homemade. All rights reserved.

Sprouted Quinoa Broccoli and White Bean Salad with Pesto Dressing

In the colder months I do rarely eat salad. It just seems to go against my nature. And since the temperatures suddenly dropped below 50, (last week it was 80-some in the afternoon) I prefer something warm right now. You can enjoy this both warm or cold, we had it warm as a main dish first, and then as a side cold from the fridge the next day. Taking advantage of late summer’s bounty of fresh broccoli and if you’re lucky enough to get some fresh shelling beans, that would probably be double awesome! I didn’t and it is fantastic no matter what. I do generally like to cook my own beans, instead of using canned. For a lot of the varieties, the flavor is incomparable, so be warned, once you start there is no going back… If you use canned beans, be sure to rinse them real good to get some of that excess salt off of them before using.

Ingredients

  • 1/4 cup red quinoa
  • 1/4 cup white quinoa
  • 2 cups chopped broccoli ( stems and florets)
  • 1 cup white kidney beans (cannellini)
  • 3 heaped tblsp homemade pesto (or a good store bought variety)
  • 5 tblsp Greek Feta dressing with Buttermilk

image
…soaking the quinoa until it sprouts…

image

Directions

  1. Rinse and then soak Quinoa in enough water to cover by 1/4″, cover, let stand overnight or up to 20 h(You could skip this step and just use the Quinoa plain out of the box)
  2. Pour Quinoa and water into a sauce pan and add water to just cover the sprouted grains ( If you skipped the sprouting, you most likely need a bit more water), bring to a boil and cook until tender and all water is absorbed, about 10 minutes.
  3. In the meantime, steam the broccoli pieces in a seperate sauce pan until crisp-tender and bright green, drain and set aside
  4. When the Quinoa is just done (the white grains will look translucent) add the beans to heat them up.
  5. Mix the pesto and the greek feta dressing in a large bowl, add the quinoa and beans, and the broccoli, gently mix until the dressing is mixed in

image
Enjoy hot or cold!

Serves 2 as a main, 4 if used as a side dish/salad

Yum!

Copyright © 2011 Simple Healthy Homemade. All rights reserved.

Greek Feta Dressing with Buttermilk

Honestly, the only reason I eat salad, is because I like dressing. There I said it. I do think salads are yummy when they contain more than just lettuce, but I guess I still have not grown out of my childhood, when my Dad used to say that the slugs in the garden ate more lettuce than we (my brother and me)!

image
I know raw foods and leafy greens are healthy, but don’t be fooled, stay away from Iceberg lettuce, there is nothing in there if nutritional value, nope nada, it’s just crunchy water.

In the spring and fall, when my garden is producing lots of lettuce, I have to get creative and not only use up the prolific stream of salad greens coming out of my garden  but also the various herbs I grow.

I like the fresh and asserting flavors of Greek dishes: lemon, thyme, Greek oregano, garlic and salty feta cheese (it makes you feel like a sunny vacation). So I decided to get working and turn that into something good. Using Buttermilk and Cottage cheese gives the dressing body and thickness without the added calories of mayonnaise.

image

Ingredients

  • 1/2 cup olive oil
  • 1/4 cup apple cider or white wine vinegar
  • 1/2 cup buttermilk
  • 1/4 cup cottage cheese
  • 1/2 lemon, zest only
  • 1 md clove garlic*
  • 1 slice Feta cheese ( about 1″x 1/2″x 4″ ) chopped
  • 2 tbsp chives, fresh, chopped, divided*
  • 1 tsp oregano (from 2 fresh sprigs, leaves only)*
  • 1/2 tsp Thyme*
  • 1 tsp black pepper corns, freshly ground in Mortar

* I used all fresh herbs and ingredients. If you are using dried herbs, adjust the quantity down

image

Directions

  1. Blend all ingredients except 1 tbsp chives, oil, vinegar and buttermilk in blender until smooth.
  2. Add buttermilk, oil and vinegar, pulse to combine. Remove from blender and stir in remaining chives. Ready to enjoy!

image

So far I have used it on various lettuce & vegetable salads (muuuch better than just lettuce). And the sprouted Quinoa White Bean Broccoli salad I had today. Thinking that using it as a marinade might be good as well…
If you’re in need of an idea,
try the warm Sprouted Quinoa Broccoli and White Bean Salad‘ I had today (recipe coming tomorrow)

image

Copyright © 2011 Simple Healthy Homemade. All rights reserved.