Traditional Swiss Christmas Cookies

It’s not Christmas without traditions and for me going without the cookies I grew up with is unthinkable. When I first moved to this country, I was suddenly faced with the challenge of making cookies that before I would just be able to buy at the local bakery, cookies I had never made before. yeah, I did not always make everything myself. But I needed them, I mean Christmas was NOT going to come without, so I was going to find a way and I was going to learn how to make them, whipped egg whites and all. Over the years I tried different substitutes for ingredients that are not readily available in the US, and have refined and tweaked the recipes to reproduce the flavors of my home without having to fly back and what not 😉

I grew up in Basel, a city on the Rhine that had extensive trade with spices, sugar and tea long before the rest of secluded Switzerland had ready access to such luxuries, and there is extensive use of (former) exotic spices. A lot of times the recipes also have a couple of tablespoons of local cherry brandy on the ingredient list (which can be left out without altering the result significantly)

image

Over the years ground almond meal (aka almond flour) has become more readily available and my cookies turn out much better than when I tried blending the almonds in my food processor. Yeah, not a grinder, should have known, but driven by desperation (I wanted to have Christmas, after all) I sifted through the result and picking out most of the large remaining almond chunks.

Another challenge is the measurements. All my recipes are not only metric, but in grams, kilograms, deciliters and so forth. We measure ingredients by weight not volume, which I still believe gives you more accurate results in most cases, specially if you have to divide or multiply a recipe. But  for convenience in the American kitchen, I have converted all of the ingredients into imperial measurements, cups and so forth. So, worry not, no need to run out and get a food scale (although I do think it’s a good thing to have, just sayin’)

Many of the recipes that I will be sharing here are considerably healthier than your average cookie recipe. What usually happens when I bring them somewhere is this: people marvel at the different looks and how pretty it is, then they try one and are amazed that there is so much  flavor and not just plain sugary sweetness, and then they completely lose it when they learn that many of the cookies they just tried use no butter or oil and the only fat content is  natural oils from the ground almonds, many are gluten and even grain free ( a thing I never realized until this year)

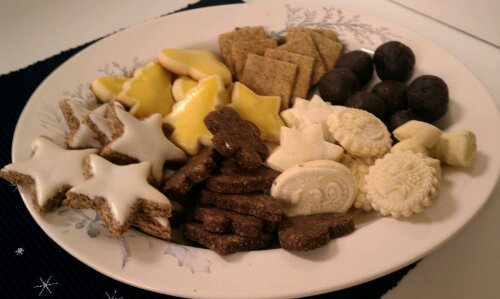
There are four that absolutely HAVE to be on my list for a real Swiss Christmas,

Links will be updated as I update the recipes

Basler Brunsli (our local version of Brownies)

gluten free, grain free and butter free

Mailänderli (delicately scented with lemon, these were always the first ones my Mom would bake each year)


Zimtstärnli (Cinnamon Stars, I think this one has great potential to become a American Favorite, given it’s shape, taste and color, not to mention taste)

gluten free, grain free and butter free

Änisbrötli (Anis breads/cookies )

fat free besides the eggs


And of course there are several other that are just as good and I try to make them too, but without those four, I don’t even care if it snows or not!


image


 Chocolate Balls

Almonds and chocolate, what more could you want?

   Hazelnut Squares

wpid-2012-12-12-09.51.11.jpg


Spitzbuebe (Sablé like, translates to Rascals, I have heard them called Linzer Cookies in the US)

Orange Hearts

And I could go on and on

What is one thing that is absolutely essential to your holidays?


image

Copyright © 2011 Simple Healthy Homemade & Simone Kereit. All rights reserved

Chocolate Pear Overnight Pudding

image

I have been wanting something sweet, but not too sweet. Chocolate-y, but not actually chocolate, difficult right? Since I have drastically reduced my (refined) sugar intake, my taste buds realize just how much added sugar there is in everything. It’s just like salt, once you’re used to using less, you can taste its overabundance in everything. And as for sugar, many items I just plain don’t find enjoyable, no flavor just extremely SWEET. I remember how after every visit back home, I cannot eat commercially made salad dressing for a couple of months, they are sweet and it just tastes funny to me (I get vinegar & oil )

But back to the program: Make this the night before, enjoy as a healthy breakfast cold out of the fridge or heat in the microwave.

Since I started making these, I have been absolutely addicted to them, the pictures don’t do the taste justice. It’s a perfect healthy treat, desert or breakfast, YES all three ;). I’ll have some versions and variations coming up for you soon.

Yay, chocolate pudding any time!!

image

Inspired by Leanne’s Banana Cherry Pudding

Ingredients:

  • 1 ripe pear, diced
  • 1/2 cup almond milk (or regular milk)
  • 2 tbsp flax seed, roughly crushed with mortar and pestle
  • 2 tbsp chia seed
  • 2 tbsp ground almond (aka almond flour)
  • 1 1/2 to 2 tsp cocoa powder
  • 1 tbsp honey or maple syrup (optional, if you like things a bit sweeter)

Directions

  1. Combine chopped pear, cocoa, and almond milk in a glass dish or bowl, stir until cocoa is incorporated
  2. Using your handheld blender, blend until smooth
  3. Add flax seed, chia seed and ground almond, stir, cover and refrigerate overnight
  4. In the morning, eat chilled out of the fridge, or heat in the microwave for about 30 to 45 seconds

Copyright © 2011 Simple Healthy Homemade. All rights reserved

Wild Rice Stuffing with Plums and Chestnuts

image

Happy Thanksgiving everyone!

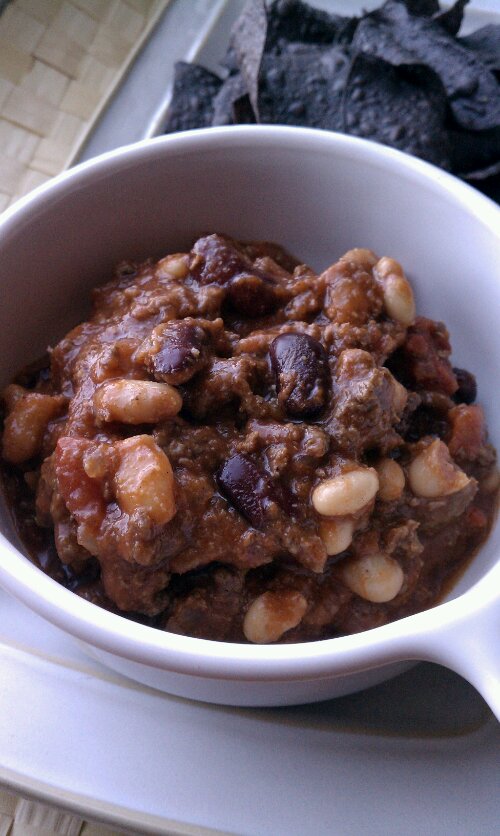
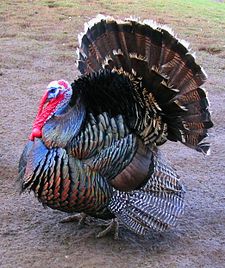
you’re safe, you’re not on my menu today

I am thankful for so many things in my life 🙂 I like to take a moment or two every day to count my blessings, I feel it sets the tone for the day and sometimes even lifts a gloomy mood. Today I am thankful for my friends, my family back home in Switzerland, my adopted family in NY (Nelson’s fam), my health, being in a position to inspire others to lead a healthier life, my ability to create great food and share it with others, the roof over my head, having a job, and living in a free country (huge).

What are you thankful for?

Since it was just going to be me this year, I made a roast chicken, not a turkey for ‘Thanks Giving’. With my work schedule, (yesss! Boot Camp Friday morning at 5:30 am, while the rest of you still wait in line for those elusive deals at the department store) going somewhere other than my own kitchen, just wasn’t going to happen this year. I am glad to say that Nelson’s Dad is doing somewhat better though and there’s hope he might get released from the hospital back to the nursing home soon.

So having all sunny day to myself, I slept in (yay, don’t get to do that very often), had a leisurely breakfast and a not so traditional Thanks Giving feast!

On the menu:

  • Roast chicken with wild rice stuffing (I had gotten an organic, pastured chicken at the Fairgrounds Farmers Market) enough for 2 people, or one plus leftovers 😉
  • Roasted vegetables (carrots, asparagus, parsnips and onions, lazily used as a roasting rack for the chicken= adds flavor to the chicken, and the chicken in turn adds flavor to the veggies, added plus: no extra pan to clean)

(I ended up skipping these two, got too tired from the back splash tiling adventure, and realized, I’d have food for a week)

  • Fresh homemade cranberry sauce
  • Streuseled sweet potato casserole

The advantages of having a Thanksgiving by yourself? I ate the skin off the chicken while carving it, it was soooo good, like the best, crispiest skin ever. Ha! try explaining that to dinner guests “Well, it’s this new thing at the grocery store… you know, ‘skinless chicken’ , muuuch healthier.”

imageIt’s kinda hard to take a pretty picture of stuffing, it’s just so … brown

Wild Rice Stuffing:

makes 3 cups, enough to stuff 1 chicken, plus some extra you can cook on the side. If using for a turkey, triple or quadruple the recipe.

  • 1/4 cup wild rice, uncooked (see note)
  • 1/2 cup chopped roasted or cooked chestnuts
  • 1/4 cup chopped dried plums
  • 2 slices of toast bread,(I used Ezekiel brand) toasted, torn into rough pieces
  • 1 tsp fresh thyme (or 1/2 tsp dried)
  • 2 tsp fresh parsley
  • 1/2 tsp salt

Note: alternately use either a store bought wild rice mix, the wild rice will be pre-cooked and the process will take less time or use 1 cup of leftover cooked wild rice

Directions

  1. In a saucepan, bring 2 cups of water and the wild rice to a boil, reduce the heat and simmer  covered until cooked through about 45 minutes
  2. Don’t drain (unless the wild rice is still swimming in water, then drain off excess) add the chopped chestnuts and chopped plums, spices and salt, cover and let stand for about 20 minutes to soften.
  3. Stir in bread crumbs, mix with a fork
  4. Stuff the chicken cavity, roast the chicken, then remove the stuffing and serve alongside the bird (or add chicken stock until desired moistness is reached and reheat in the oven.

I was really debating adding cranberries to the stuffing, for a all in one kinda deal, maybe next time…

image
Copyright © 2011 Simple Healthy Homemade. All rights reserved

Cocoa Post Workout Recovery Drink

image

I am not a big believer in supplements, protein powders and bars, thinking that most anything you need, you can get from proper nutrition. I resort to recovery drinks and an occasional protein bar, if I really don’t have the time to have something real. And since many of  y clients always ask me what to take, and what to do, I decided to share this post workout recovery drink with you. Can you add a scoop of protein powder? If you like, sure. But the mainstay of this is the D-Ribose. Ribose is a special carbohydrate that is used in the body for energy production in the cells as it plays a critical role in the production of adenosine triphosphate (ATP). ATP is the energy unit that fuels our cells and bodies. It  provides energy needed for short burst of power movements during physical activity, is needed to help our muscles squeeze, heart pump, brains think and countless actions that we don’t consciously control.

Ribose provides a raw material to facilitate ATP production. Many doctors believe that at least part of the problem with chronic illnesses, such as fibromyalgia and chronic fatigue, is a lack of energy production to keep the organs, like the muscles and brain, happy. If the muscles have adequate energy available = less stiffness and cramping. This is similar to having enough money in the bank. If the money is gone, and the roof springs a major leak, no funds are available to fix it. In the end, the whole house is affected. Similarly, if the muscles are undernourished and energy production is down, the muscles will tighten, causing pain. Tight muscles can often pinch nerves, causing greater pain and starting a vicious cycle. One of the main goals of ribose supplementation is to improve symptoms by aiding energy production.

As I said, I generally don’t supplement, but after an extra hard workout, with a full day still ahead of me, I might help myself out a bit by having one of these!

Ingredients

  • 1 cup milk (almond milk is fine, if you are vegan)
  • 1/2 tsp D-Ribose powder
  • 1 tbsp almond butter
  • 1 tsp cocoa powder
  • (optional 2 tsp chia seed, for added protein and fiber, but will turn this in to bubble tea)

Directions

Put everything (except chia seed) into a blender or shaker and mix well. Add chia seed, if using and enjoy!

Copyright © 2011 Simple Healthy Homemade. All rights reserved

Creamy Mushroom Soup

image

One thing that I really love about the colder months is soup! I could live on soup. If all I could eat for the rest of my days is soup, I’d be happy. Ok, maybe something crunchy to go on the side…

Soups are warming when it is cold, easy to make, easy to reheat and mostly pretty cheap to make as well. A lot of times when it is cold, I do not drink as much water as I should and as I do in the summer, I am just not as thirsty and I think soup has that added benefit of liquid 😉

To achieve the creamy consistency without added fat, I used some sweet potato, but since the mushrooms are braised and caramelized first to intensify their flavor, you can’t tell that there is anything except mushroomy goodness in the soup!

image
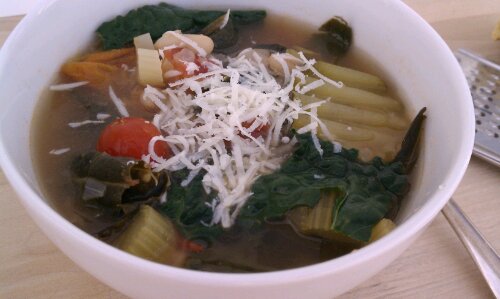
…shown here with Garlic Thyme Sweet Potato Straws

Ingredients

  • 12 oz crimini or baby bella mushrooms, cleaned and sliced
  • 1 md shallot, minced finely
  • 1 md sweet potato, peeled and chopped
  • 2 tbsp Olive oil
  • Salt

Directions

  1. In a heavy pot, heat oil over medium. Add the diced shallot and cook until softened and browned.
  2. Add the sliced mushrooms, sprinkle with salt, stir, cover and turn heat to medium low. Cook for 15 -20 minutes, stirring every couple of minutes. The mushrooms will start to release their juices and cook.
  3. Uncover and cook, stirring occasionally until the liquid is reduced and the mushrooms start to caramelize and brown in bits, about 5 minutes.
  4. Add water and the sweet potato to the pot. Add enough water to cover the mushrooms and sweet potato by 1″ to 1 1/2″ (remember, you can always add more water, trying to boil it off, is much harder). Add 1/2 tsp salt (or to taste) and bring to a boil.
  5. Cook until the sweet potato is very soft.
  6. Remove from the heat, let cool slightly, then using a handheld blender/immersion blender (if you don’t have one, you NEED one, seriously), puree the soup. (alternately you could use your food processor/blender and blend the soup in batches, being careful not to overfill the container)

Serve with Garlic Thyme Sweet Potato Straws, croutons or a slice of hearty home made bread.

If you really want your soup to be super creamy, you could add 1/2 cup half-and-half (or coconut milk to keep it vegan).

Makes 4-6 servings

image

Copyright © 2011 Simple Healthy Homemade. All rights reserved

Roasted pumpkin seeds

image

Had I only tried this sooner. I always thought that it would be way cumbersome to clean the seeds after you scoop them out of the pumpkin, that I would just throw it all on the compost. Well, this year, I (finally) git smart and decided to try roasting pumpkin seeds. Now in my defense, since I am not from here, pumpkins are not the main focus of our entire fall season, so I really did not grow up wit the pumpkin mania that hits the US every year 😉
To make cleaning them easier, scoop the seeds out first, using a spoon. Then remove all the stringy stuff. Place he seeds in a collander and with the water running, using your dish brush, clean and swirl the seeds.
Let them drip a little then spread on paper towels and allow to dry. Season with ingredients below and spread in a single layer on a (aluminium foil lined for easy clean up) baking sheet. Roast in a preheated oven at 325 for 20-25 minutes or until the seeds pop! (Haha, anyone remember ‘ Music & Lyrics‘ ? ), stir after 10 minutes.

But to make your life even easier, I tried it out in the toaster oven, and it works there too, yay for easy and quick! What can I say, I am a busy girl and the toaster oven has served as my version of a microwave lately.

Below recipes are for about  1 cup seeds, use less oil, if your pumpkin had less seeds or you’re using squash seeds. Unless of course, you had a zombie squash, then things are different…

Plain:

  • toss pumpkin seeds with 1-3 tsp oil (depending on amount and size of seeds)
  • 1/2 tsp salt

Spiced:

  • toss pumpkin seeds with 1-3 tsp basting oil
  • 1/2 tsp salt
  • 1/2 tsp paprika, sprinkle on 5 minutes before done roasting*
  • (if you’re really into spice, use cayenne instead)

* Note: If attempting in the toaster oven, put the paprika on AFTER the seeds are roasted

image

Sorry no more toasted seed pictures, the seeds are too tasty to wait and do you know how hard it is to make beige or brown little seeds look pretty in a picture? 🙂

Copyright © 2011 Simple Healthy Homemade. All rights reserved.

Snowstorm Venison Chili

image

On Saturday, we were hit by a super untimely snowstorm. Up to this point from what my research has revealed, the Lehigh Valley (PA) has only had a major snow occurrence (not sure where it goes from minor to major, but that’s what the weather website said) and it was 2.2″ in 1925!!! Well unofficial measurements on my deck for this one: 6.25″
My trees are still mostly green, and with all those leaves, the branches bent almost to the ground. I went out and with the help of a rake, shook the snow off the bending branches before they could snap, like three times yesterday. We lost power around noon, so there goes my ‘corn maze, then lazy weekend on the sofa watching movies…’

The last roses from my yard, dug out of the snow and brought in

No power brings back memories of being out during hurricane Isabel, a few years back, when I lived in a house with a well =fail… (For those of you that don’t know how this works: no well pump=no water, shower, toilet, I practically lived at the gym for 7 days, don’t ask…) and I had an electric stove at the time, double fail. So right now I am feeling blessed to have a gas stove so we can cook and we have lots of candles and today we hooked up my generator, to keep the fridge and freezer alive. They keep promising the power will be back by this evening, keeping my fingers crossed.
🙂
Here’s what we ate, as no power is no excuse for not having a great meal. Even though I had lots of plans for oven roasted squash with shallot finishing butter or basting oil, and a nice braised stew maybe…

image

Candle light dinner, Chili and salad with Spring ‘Fall mix’ salad from the garden (dug out from under 3″ of snow. Surprisingly, I got it before it was too late!)

Ingredients:

  • 1 1/2 pd ground meat (we used venison, but you could use whatever you like, including turkey)
  • 1 can or equivalent serving frozen dark red kidney beans (if using canned, rinse in a colander to remove excess sodium)
  • 1 can or frozen portion great northern beans or other white beans of choice
  • 1 1/2 cups diced tomatoes or a 14.5 oz can diced tomatoes
  • 1 15 oz can of crushed tomatoes (or plain homemade sauce)
  • 1 8 oz can of tomato sauce
  • 1 medium red onion, diced
  • 3-4 tbsp chili powder
  • 3 tbsp corn meal
  • 1 tsp cumin powder
  • 1 tsp chipotle powder or 1 tbsp sauce from a can of ‘chipotle in adobo sauce’ (you can add more for extra heat!)
  • 1/2 tsp oregano
  • salt to taste

Directions

  1. Heat 2 tbsp oil in a big heavy pan, add the onions and cook until softened, not browned.
  2. Add the ground venison and separate into chunks using a fork. Cook, stirring occasionally until you can’t see any more pink.
  3. Add the spices and cook, stirring until fragrant.
  4. Add tomatoes,  1 cup water, crushed tomatoes and tomato sauce. Stir and let simmer for 10-15 minutes, for flavor to blend a little.
  5. Stir in corn meal and cook for an additional 5 minutes or until the Chili becomes nice and thick.
  6. Serve with corn chips or a nice hearty slice of bread

serves 4 hungry folks (5 if you serve more moderate portions)

image
Copyright © 2011 Simple Healthy Homemade. All rights reserved.

Kabocha (or Butternut Squash) Chowder

image

There is simply nothing better than dipping your spoon into a steamy bowl of soup after being outside on a cold and windy day! I had sampled some fabulous roasted butternut squash at one of the grocery stores in the area, and it’s been working its way through my mind for re-creation and sharing soon 😉 However, when I came in after riding my bike today, there was no patience left for roasting anything. And since it was cold, I was hungry and I had a Kabocha squash sitting on the counter waiting for the perfect opportunity to turn into an awesome meal, soup it had to be!

If you’re not familiar with Kabocha Squash, it’s very similar looking to a Buttercup squash in that it has a dark green shell, but you could really use Butternut, Buttercup or Kabocha for this. Kabocha will be sweeter than  the other types and most likely it’s the brightest colored.

image

Ingredients

  • 1 md Kabocha or butternut squash, seeded, peeled and cut into pieces
  • 1 tbsp coconut or olive oil
  • 1/2 cup coconut milk (or regular cream*)
  • 1/2 red onion, chopped
  • 1 tbsp Madras curry powder
  • 1 tsp salt
  • water
* If using cream, recipe is no longer vegan or dairy free

Directions

  1. In a large pot, heat oil on medium and add onions and squash pieces. Cook stirring occasionally until onions are softened but not brown
  2. Add curry powder and cook until flavorful, then add enough water to cover squash by about 1/2″ (you can always add more to thin the soup, but cooking excess liquid off takes a long time.) Bring to a boil, cover half and simmer until squash is very soft.
  3. Remove pot from heat and using an immersion blender, blend until smooth and there are no more pieces (alternately you can blend in batches in your food processor or blender, but make sure you wait for the soup to cool down some first and don’t fill too much)
  4. Return to stove, add salt and 1/2 cup coconut milk (or regular cream) stir until dissolved.
  5. Serve each bowl garnished with a spoonful of coconut milk or cream, using a tooth pick, stir just a little to form a swirl pattern.

Makes 4 to 6 servings.

Pretty eats!

image

Go ahead, connect to your inner Picasso!

Copyright © 2011 Simple Healthy Homemade. All rights reserved.

Four Greens Vegetable Soup

image

Today I got myself a Crinkle Cutter! I know, I know that might not sound very exiting for you, but I am a sucker for kitchen gadgets, especially when they are on sale. And it just so happened that my local grocery store had them on closeout sale… what can I say

image

So now being the proud owner of a brand new crinkle cutter, I realize there are many, many things that could be ‘crinkled’ with this, but to start I decided to try it on something relatively soft, hoping to get an easy start, and picked zucchini. And since tonight they are calling for the first frost of the season a yummy vegetable soup seemed like the perfect fit.

As we are heading into the colder months with people worried about getting sick, many stay cooped up inside more than is good for them and a good many eat less vegetables than in the summer exposing them to higher risk of in fact getting sick, while also being exposed to more recycled air in a heated environment. Soooooo, I wanted to make something to give your system an antioxidant boost and what tastier and better way than greens could there be?

So for this mean-lean-green bad boy we are going to use kale, spinach, celery and zucchini (ok, ok, I know, not a ‘green’ but c’mon, you can see the color, right? 😉 )

image

Ingredients:

  • 1 tbsp oil
  • 1/2 red onion, finely diced
  • 4 stalks celery, chopped
  • 1 small zucchini (crinkle cut, or sliced into 1/4″ rounds)
  • 1 can or 1 qt size bag frozen tomatoes *(if using canned, pick one that is either no salt added or a low sodium version)
  • 1 can canellini beans, drained and rinsed or 1 portion frozen **(snack bag size)
  • 1 good quality vegetable buillon cube, for making 2 cups(I use Rapunzel no salt added)
  • 1/2 to 1 tsp salt
  • 2 good hand fulls lacinato kale, center stalk removed, washed and trimmed
  • 3 to 4 oz baby spinach
  • small amount of whatever other veggie you have on hand that could stand to get used up (I had a little broccoli left)
  • Parmesan for grating on top (optional, note that using Parmesan would make the recipe no longer vegan or dairy free)
* Note: I have had great success dicing and freezing a bumper crop of tomatoes in zip top bags and using it instead of canned for soups and stews in the winter. Leave cherry tomatoes whole.
**Note: To save time, money and cut salt from your diet, buy dried beans, soak and cook them, (I use my pressure cooker) and freeze in snack size baggies to be used like you would canned.

Directions

  1. Heat oil in a soup pan, add the onion and cook over low until glazed and starting to turn soft
  2. Add celery, stir and cook until you can smell the celery, then add the tomatoes
  3. Fill the pot with water until the vegetables are covered by about 2″ of water, add salt and bouillon cube and if using tomato paste and parmesan chunk.
  4. Bring to a boil
  5. Add kale, zucchini and beans, cook until kale is soft.
  6. Divide spinach into serving bowls, using about 1 cup per dish, ladle the hot soup over and serve, if desired, with fresh grated Parmesan.

Makes about 6 bowls ( Serves six as a first course)

image
Copyright © 2011 Simple Healthy Homemade. All rights reserved.

Roasted Red Pepper and Pumpkin ‘Cream’ Sauce

image

Glorious colors of fall! Here the leaves have finally turned color and as I am typing this I can see the red and yellow leaves glow in the sunlight, and the bronze and ‘still green’ leaves add depth to the shadows. The birds have returned to the bird feeder in droves, the nights finally have that crisp quality you only experience on an early morning in fall and I am enjoying the view to say the least.

image
To celebrate fall, with its vibrant orange of pumpkins, golden corn field and that last rest of summer’s warmth int he afternoon, I roasted up a brightly colored, mighty tasty and versatile sauce/dip/spread. Enjoy!

Ingredients

  • 1 red bell pepper
  • 1 cup chopped cooked pumpkin (or canned)
  • 1 tbsp olive oil
  • 1 pinch salt

Directions

  1. Roast whole red pepper until blackened in spots all over by holding it over a gas flame or placing under the broiler, then place in paper bag to cool a bit (the steam will loosen the skin making it easier to peel, added bonus, you won’t burn your fingers as much).
  2. Peel red pepper (don’t have a guy do this, for some reason their hands are not made the same as ours and they cannot handle heat, as per my experience 😉 ) , this works best using a paper towel and literally rubbing the skin off. Cut in half and discard the seeds, then chop flesh.
  3. Place pepper in your food processor or blender. I use a really cute mini processor for sauces and dips. And blend until you have a chunky mess, add the olive oil, blend until fairly smooth.
  4. Add the pumpkin and salt and process some more. The result should not have any chunks left in it but be smooooooth.
  5. Gently reheat to use over pasta, like the Pumpkin Goat Cheese Ravioli for example or chill and use as a spread for sandwiches or serve cold as a dip for veggies.                              Yields about 1 1/2 cups.

image

Copyright © 2011 Simple Healthy Homemade. All rights reserved.