Chocolate Coconut Rounds

image

There they were, sitting timid in the middle of my fruit basket trying to pretend they were not there. Overripe bananas, like the poor step child in an old fairy tale. Since I only like to eat them when they are still a little green, these brown things in my fruit basket are definitely not my thing. But over time I have come up with various ways to use them up, using them for smoothies, pancakes or baking, after all they do provide a great source of natural sweetness without adding sugar. And yes, I have to admit before I did that, sometimes they would get thrown out. So that’s why they are scared. But fret not bananas, I have something yummy to turn you into 🙂

What do you do with your past prime bananas? Any favorites?

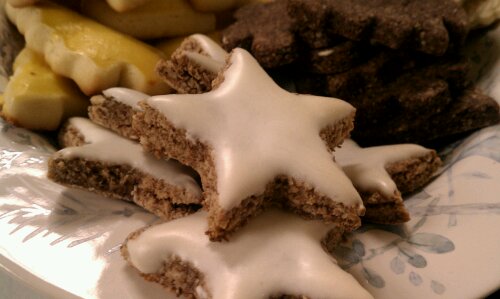
This recipe is grain and sugar free, the only sweetness comes from the banana, so it isn’t your traditional cookie, if you like things sweet, you might want to add 1/4 cup of sugar or some stevia. These are more like a piece of 70% cocoa chocolate, flavorful but just subtly sweet.

image
And without further ado here is how to make them:

Ingredients

  • 1/2 cup egg whites (about 4)
  • 2 ripe bananas, mashed with a fork
  • 2 cups unsweetened, shredded coconut
  • 1 cup ground almonds, natural not blanched
  • 6 tbsp cocoa powder
  • 1/4 cup almond butter (cashew butter or other nut butter would work as well)
  • 1 tbsp coconut oil
  • 1 tbsp coconut flour
  • 1 dash of salt

Directions

  1. Combine shredded coconut, ground almonds, coconut flour and cocoa powder in a bowl
  2. Add the mashed bananas
  3. Melt the coconut oil together with the almond butter and stir until smooth, add to bowl
  4. Add the egg whites
  5. Mix until everything is fully incorporated
  6. Divide dough into two portions and between wax paper, work each one into a roll of about 1 1/2” to 2″ diameter.
  7. Place in the freezer for about 1 hour or until nice and solid.
  8. Preheat the oven to 350°F
  9. Remove one roll from the freezer, and slice into rounds 1/2″ to 3/4″ thick, place ona  lined cookie sheet and bake for 15 to 20 minutes.
  10. In  the meantime, repeat the same with the other roll.
  11. Let the rounds cool down on the cookie sheet for 5 minutes before removing to a cooling rack.

image

Copyright © 2012 Simple Healthy Homemade. All rights reserved

Lazy ‘South of the Border’ Soup

image

You’re wondering on the lazy part here? Well it all started out with me not feeling like doing much but having to eat like everybody else. So from what I had on hand, I concocted a soup, and here is the real lazy part about it: using up half a jar of tomato sauce that was leftover from a ‘quick-take-to-a-friends-house-Lasagna’. Even I, who make most everything from scratch, (often including tomato sauce) do have some jars of good store bought sauce on hand. A word of caution here: Read the labels, I never buy any jarred sauces with sugar or cornstarch or vegetable protein or really anything other than what you would put in it at home. Lets face it, when is the last time you reached for that soy isolate or sprinkled some monosodium glutamate on your food? Alright then, you might not want to eat that I am guessing. I am even weary of ‘spices’ as they can legally stick all kinds of stuff in there under that label, but I am getting off the subject here.

image

Where were we? Lazy, oh yes, so I made a soup for a cold winter day when the soul is longing for some sunshine but you really don’t want to put a lot of thought or energy into the food making process…

image
I added spices and peppers, eggplant and cumin, and I had a name picked out and everything! Life was great. Until I bit myself eating the soup three (yes, 3) times!!?  Montezuma apparently misunderstood the title, I mean it was in English and all…          ‘Lazy Mexican-soup‘ there, happy?

Well I do have to say, I ate all the rest of the soup and no more biting myself…

image

Ingredients

  • 1 medium red onion, diced
  • 4 ribs celery
  • 1/2 medium eggplant, cut into cubes
  • 1 lb campari tomatoes (they are about ping-pong ball sized), quartered
  • 1 red bell pepper, diced (optional: roasted)
  • 1/2  a jar Marinara (Spaghetti) Sauce (about 12oz)
  • 1 tbsp cumin seeds, whole
  • 1 tsp marjoram, dried
  • 1 tsp oregano, dried
  • 1 tsp chili powder, medium or hot, depending on taste
  • 2 tsp chipotle powder
  • 1/2 tsp ground white pepper
  • 2 tsp salt
  • 2 qts plain beef stock (for vegetarian option, use vegetable broth)

Directions

  1. If you are roasting the red pepper: Spread the peppers on a line baking sheet and roast in a 400°F oven until blackened in spots. (You can do this alongside other vegetables, like while making the cumin roasted carrots) or alternately, place under the broiler with the door ajar until some brown spots appear.
  2. Add some oil to a large stockpot, add the diced onion, stir and then cook until softened and browned in parts.
  3. Add the celery, eggplant and cumin to the pot. Cook for about 2 minutes, then add the tomatoes, pepper and all the spices. Stir and wait about 1 minute until adding the broth so the spices have toast a bit and time to release their flavor.
  4. Add the Marinara Sauce and bring to a boil.
  5. Cook until the vegetables are tender, about 8 to 10 minutes. Enjoy!
See? It doesn’t get much easier, lazier or cheaper than that!

image

Copyright © 2012 Simple Healthy Homemade. All rights reserved

Lemon Olive Oil Dressing

Lemon Olive Oil Dressing

  • juice of 1/2 lemon (about 1/4 cup)
  • 1/4 tsp salt
  • 1 pinch white pepper (in a pinch you could use black pepper)
  • 1 tsp parsley, dry
  • 1 tsp thyme, dry
  • 1 tbsp finely minced shallots
  • 1/2 cup olive oil (about 1 1/2 to 2 time lemon juice amount)

Directions

  1. Mix all ingredients in a lidded container and shake well then pour over your salad.

imageGreat on Spinach Salad or try over roasted Brussels sprouts!

Copyright © 2012 Simple Healthy Homemade. All rights reserved

Chicken with Yellow Pepper and Mushrooms

image

Part II of Chicken for every day of the week

See more quick and easy, yet no chance of boring chicken recipes here

Could you use more quick week night meals? Maybe? Well, this one is just as quick as you need at the end of a long day, yet it’s tantalizing flavor will tempt even picky eaters. It takes all of 15 minutes to make, if you got all your duckies lined up 😉 So chop and mix everything before you start and you’re ready to rock the kitchen!

image

Pounding the chicken until it is an even 1/4″ thickness ensures quick and even cooking, saving time and energy. Using a spice mix to rub or sprinkle on the chicken let’s you build flavor without having to add a lot of salt or spend hours roasting and basting.  And using white wine, well, ask the French on that one, it works. The alcohol evaporates before this dish ever gets on your plate, but you could definitely use broth or water instead.

image
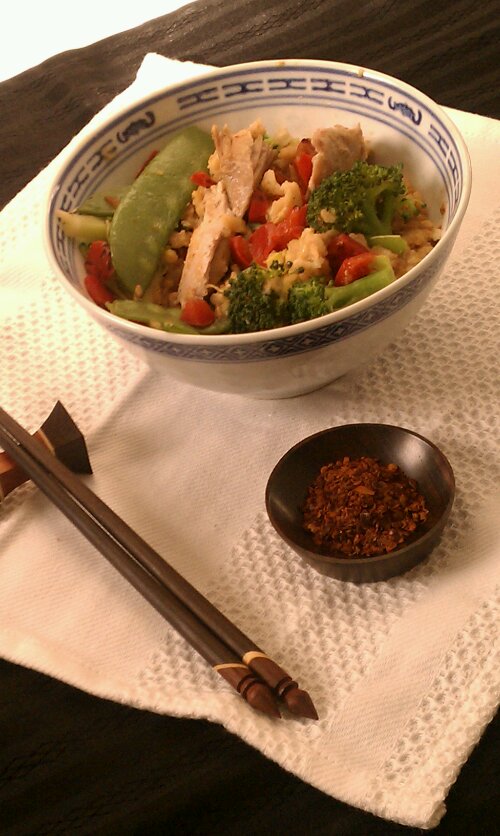
Did I tell you about my new magnificent skillet??? It’s got a slick white ceramic coating, I think I am in love 🙂

The spice mix makes more than what you need for this recipe you can use it on chicken, salmon and it’s awesome on pork chops too.

Serves 2

Ingredients

  • 1 skinless boneless chicken breast half
  • 1/8 tsp cumin
  • 1/8 tsp paprika
  • 1/8 tsp cayenne
  • 1 dash ground pepper (white or black)
  • 1 pinch oregano
  • 1 pinch cilantro
  • 1/2 clove garlic, minced or crushed
  • 1/4 tsp lemon peel
  • 1/4 cup white wine or water
  • 1/4 yellow bell pepper, chopped
  • 1/2 cup mushrooms, sliced ( I used Shiitake and Maitake, but any mix of mushrooms would work)
  • 1/4 cup white wine
  • 1/2 tsp thyme

Directions

  1. In a small bowl, mix cumin through cilantro, set aside
  2. Pound the chicken breast flat in between two layers of cling wrap, using a meat mallet or the bottom of a heavy pot. (Don’t do this after 10, or your neighbors might not like you anymore)
  3. Remove top layer of cling wrap, sprinkle the top of the chicken with the spice mixture
  4. In a skillet, heat a teaspoon oil over medium high, add the chicken, seasoned side down, removing the other layer of wrap from the top, then season that side as well. Cook 3 minutes or until slightly browned on the bottom.
  5. Flip chicken over, add the garlic to the pan (next to the chicken) and cook for about a minute until starting to look golden, then add the lemon peel, mushrooms, bell pepper and thyme.
  6. Cook for 2 minutes, so some of the juices release, then add the wine, cover the pan and give it another 2 minutes, uncover and cook until most of the liquid is evaporated.
  7. Et voilà! Yummy dinner!

image

Copyright © 2012 Simple Healthy Homemade. All rights reserved

Portable Chicken Meatball ‘Muffins’

imageChicken Turkey Meatball Muffins

I came to thinking about this the other day. Can you name a snack that would deliver protein versus carbs, just one thought, on top of your head, …nothing? Right, thought so. Short of  protein bars (mostly containing sugar=CARBS and soy), there really isn’t much we ‘snack’ on that would fall into this category. So when I came across a recipe for a turkey meatloaf a light went on,  and I tinkered around in the kitchen until I came up with this variation.

I’ve made two versions so far, one with chicken breast meat and venison, (all ground) the other with turkey thigh meat and chicken thigh meat with the addition of vegetable.

imageChicken Venison Meatball Muffins, (I think I added some jalapeno, see the green?)

I notice using breast meat and venison makes the muffins denser, the second version is a bit softer and juicier due to either using only thigh meat, or the additional vegetables. For vegetables I used the pulp from my juicer. I like having fresh squeezed vegetable juice in my diet, since the micro nutrient content of fresh homemade vegetable juice is out of this world, but having no compost, feel bad throwing out the dry pulp that is left over. Well, I stuck it in these and let me tell ya, it tastes awesome! If you don’t have a juicer, I am sure you could just shred and/or blend some vegetables, if juicy, squeeze in some paper towels and reduce the egg whites a bit or add some additional oats. Have not tried that, but don’t see why it wouldn’t work.

image

Meatballs to go, now who wouldn’t love that??

Eat them cold or microwave for 20-30 seconds to warm up. You could also put them on a salad as a protein addition, if you like.

Chicken Venison Meatball Snackie

Ingredients

  • 1 lb lean ground chicken thigh meat
  • 1 lb ground turkey thigh meat
  • 1 cup rolled oats
  • 1/2 cup quinoa flakes (optional)
  • 1 cup liquid egg whites (about 5-6)
  • 2 tsp paprika, sweet
  • 1 tsp salt
  • 1 tsp white pepper
  • 1 tsp chipotle* pepper, ground (optional, makes it spicy, yum!)
  • 1/2 tsp ground cumin
  • 1/2 tsp dried thyme

* if you don’t have chipotle pepper, use cayenne

Chicken Turkey Vegetable Meatball Muffins

Ingredients

  • 1 lb lean ground chicken meat (I used breast meat)
  • 1 lb ground venison (which is always lean, you know, no junk food or CAFO’s in nature)
  • 1 cup mixed vegetable pulp (I used a mix of celery,kale, kohlrabi, carrot and golden beet)
  • 1 cup rolled oats
  • 1 cup liquid egg whites (about 5-6)
  • 2 tsp paprika, sweet
  • 1 tsp salt
  • 1 tsp white pepper
  • 1 tsp chipotle pepper, ground (optional, makes it spicy, yum!)
  • 1/2 tsp ground cumin
  • 1/2 tsp dried thyme

Directions

  1. Preheat oven to 375°F
  2. Place meat, egg whites (if using, vegetable pulp and quinoa as well) and oats together in a large bowl.
  3. Mix the spices and salt in a small dish, add to the large bowl and mix into the meat using a fork until well incorporated.
  4. Line a muffin pan with (jumbo) muffin cups or grease well
  5. Form into 12 balls, about baseball sized and place in muffin pan
  6. Bake 30-35 minutes or until cooked through.
  7. Cook in muffin pan for 5 minutes, then place on cooling rack
  8. Keep in the fridge or freeze for later use

Each chicken venison muffin has 20 g protein,  3 g fat, and 5 g carbs, 123 calories

Each chicken turkey muffin has 18.3 g protein,  5.3 g fat, and 8.3 g carbs (includes fiber from the vegetable pulp) 156 cal  (with Quinoa 18.8 g protein)


image

Copyright © 2012 Simple Healthy Homemade. All rights reserved

Braised Brussel Sprouts

image

Winter and all I seem to be eating lately is cabbage, in its various forms. Like Sauerkraut, or this Napa, Kumquat Salad, or Turkey Cabbage Rolls, or Lemony Brussels Sprouts, the list goes on… For versatility of use, the Brassica family of veggies is almost unsurpassed. I am just saying, ‘almost’ because there might be something else out there that I have not come across yet 🙂

image

For the Braised Brussels Sprouts, I added just a bit of Speck and some Thyme Garlic Basting oil for flavor, the rest of the dish is accomplished by the main player, the Brussels sprouts. If you’re worried, the flavor here is not strong, the braising really mellows the flavor and brings out an almost creamy quality in this lovely vegetable.

image

This is soooo good, I think I could live on it for the rest of my life!

Ingredients

  • 1 lb Brussels Sprouts, cleaned
  • 2″ piece of thick cut Speck (or Bacon, 1/4″ thick by 2″ long)
  • 2-3 tblsp garlic thyme basting oil
  • 1/2 tsp salt

Directions

  1. Cut the cleaned Brussels Sprouts into 3-4 slices, (usually I cut from top to stem, length wise, so they don’t totally fall apart, but as you can see in the pictures it works the other way, too)
  2. Dice the Speck piece into stick and then into 1/4″ cubes
  3. Heat a skillet over medium, add the Speck or bacon bits and cook for a minute or until the fatty parts begin to look transparent and start releasing some of the fat. (If you use bacon, there most likely is more fat on the bits and you could reduce the amount of basting oil you add)
  4. Add the Garlic Thyme Basting Oil
  5. Add the Brussels Sprouts and stir. Cook 2-3 minutes, then  add 1/4 cup water and cover the pan. Cook for 6-7 minutes, stirring occasionally or until the Brussels sprouts are tender (Depending on your taste, you can cook them until they still have a bit of a bite to them or cook further until creamy soft)
  6. Uncover, season with salt, stir to combine and serve!

Serves 3-4 as a side dish (depending on love of Brussels Sprouts, here it’s more like 3)

image

Copyright © 2012 Simple Healthy Homemade. All rights reserved

Chocolate Balls

image

Schockolade Kugeln – Chocolate Balls – Swiss Christmas Cookies

You’re not surprised that a lot of Swiss cookies involve chocolate, are you?

This is another no butter recipe. It has an intense chocolate flavor and no added fat (only fat in here is from the almonds, eggs and cocoa powder). And as an added bonus, it just so happens that it is gluten-free, tadaa!

At first I was going to translate the name of these into bullets, as in ‘death by chocolate (bullet)’ but was musing on the whole Christmas and Peace on Earth concept and thought that would seem kinda wrong, but nevertheless they are intensely chocolatey!

image

Ingredients

    • 3 eggs
    • 1 1/2 cups sugar
    • 1 3/4 cups cocoa powder (I used a mix of extra dark and dutch processed)
    • 3 3/4 cups ground almonds (sometimes called almond flour)
    • 2-3 tbsp tapioca or potato starch

Directions

    1. In a big bowl, mix eggs sugar and cocoa until liquid and frothy looking
    2. Add the almonds and the starch and mix until, uniformly incorporated
    3. Chill dough for a few hours (if it’s cold enough where you are, put it on the balcony like we did in Switzerland, if not the fridge works well too)
    4. Form into walnut sized balls between your hands, (being careful to keep your hands cool), and place on a lined baking sheet.
    5. Let the formed balls dry overnight, or to speed up the process, you could also place the whole cookie sheet in the freezer for at least 1 hour.
    6. Bake in a preheated oven at 480°F for 3 to 5 minutes. The balls should only crack slightly
    7. Let cool on the baking sheet for 5 minutes before transferring to cooling rack.

image

Check out the post on more Swiss Christmas Cookies to try other varieties!

Copyright © 2011 Simple Healthy Homemade. All rights reserved

Thai Red Curry Chicken ‘Slow-Cooker Friday’

image

I love Thai food and I am a little bit of a Thai food snob, I have to admit. But I guess it might come as no big surprise, after travelling in South East Asia extensively, and my brother living on an island in Thailand (I know, don’t get me started, he gets to enjoy the sun while we have cold toes here ;P ) While travelling and meandering through Thailand and other South East Asian countries, I ate with local families, and therefore ate some ‘Thai Food’ you’d never see in a restaurant, in short I acquired some first hand knowledge of real Thai cooking. So this recipe really should be called Thai Inspired Red Curry Chicken, since the slow cooker is not traditional, but the flavors are still reminiscent of warmer places, so this is my Americanized Friday evening version 😉

image
Serves 4

Ingredients:

  • 2 chicken legs/thigh quarters, bone in (about 1 1/2lb)
  • 2-4 tbsp red curry paste (if you are very sensitive to spice, use less, for extra spice use more)
  • 1/2 of a 14 oz can of coconut milk
  • 1 cup brown Jasmine rice
  • 1 cup broth
  • 2 cup mixed vegetables, cut into bite size pieces (preferably fresh, I used snow peas, red bell pepper, and broccoli)
  • 1 lime, cut into wedges for garnish

Directions

  1. Heat a heavy frying pan over medium.
  2. Season the chicken with salt and pepper and cook the chicken skin side down until browned, about 4-6 minutes, turn and cook repeat on the other side (Chicken will cook more in the slow cooker, this is just to give it some extra flavor) Transfer to slow cooker
  3. To same skillet, add the coconut milk, half the broth and the curry paste. Stir and loosen any browned bits. Pour over the chicken in the slow cooker insert.
  4. Pour the rice around the chicken , add the remainder of the broth and cover.*
  5. Turn slow cooker on low and cook for 5-6 hours, or until chicken is sift and starts to fall off the bone.
  6. Half hour before you’re ready to eat, place the vegetables on top and turn up to high. Alternately you could also steam the vegetables separate and serve over the chicken and rice from the crock-pot.
  7. Garnish with lime wedges and serve.

* The rice will be soft and flavorful from cooking in the sauce, if you prefer your rice to be less ‘risotto’ , add it about half way through the cooking time.

image

Copyright © 2011 Simple Healthy Homemade. All rights reserved

Zimtstärnli

image

Zimtstärnli – ‘Cinnamon Stars’ – Swiss Christmas Cookies

Another one of my all time favorites are the Zimtstärnli (meaning little cinnamon stars). Besides being super yummy, and they are really not all that hard to make, I think the fact that they are grain free, gluten free and the only fat they contain is from the ground almonds doesn’t hurt either, plus cinnamon has been shown to have blood sugar lowering properties.

Yes, these are cut outs again. And you could really make them any shape you like. You’ll just have to call them cinnamon elephants or whatever 😉 Traditionally rolled out on granulated sugar instead of flour, I suggest you use more ground  almonds instead.

Please be aware that most confectioners sugar contains corn starch.

These really should be made in every American household, just look at what they look like!

image

 Ingredients

  • 3 egg whites
  • 1 pinch salt
  • 2 1/2/ cups confectioners sugar
  • 1 1/2 tbsp cinnamon
  • 1 tbsp Kirsch (optional, you could leave it out or use lemon juice instead)
  • 3 1/2 cups ground almonds (almond flour)


Directions

  1. Preheat oven to 480°F
  2. In a large clean bowl, beat egg white with a pinch of salt until stiff peaks form.
  3. Carefully fold in the sugar. Set aside a 1/4 cup plus 3 tbsp ( a scant 1/2 cup) of the mixture, reserve
  4. Carefully fold almonds, Kirsch (if using) and cinnamon under the rest of the egg white mixture. Form to dough and place in the fridge. Chill for at least 3 hours.
  5. Roll out about 1/4″ thick on more ground almonds/almond flour. Then make cookies using star shaped cookie cutter, place on lines baking sheet and brush with a layer of the reserved egg white glaze.
  6. Bake 5-6 minutes with a wooden spatula in the door of the oven to keep the door cracked and prevent it from closing all the way. This is helping in keeping the tops of the cookies white. (They are perfectly done when the bottom is slightly golden brown but the tops stay a pristine white)
  7. Cool on the cookie sheet for a few minutes before removing to cooling rack.

image

Check out the post on more Swiss Christmas Cookies to try other varieties
Copyright © 2011 Simple Healthy Homemade. All rights reserved

Basler Brunsli

image
Basler Brunsli – ‘Basler Brownies’ – Swiss Christmas Cookies

Holidays are getting closer and no matter what your faith, we all like to celebrate and in line with that, prepare special foods and treats (Oh yeah!)  We share meals and we share time with family and friends.

So does it come as a surprise that coming from Switzerland, I would have treats involving chocolate? Probably not. But maybe it will stun you to known that these contain absolutely no butter, (and no, I did not replace it with margarine or some other fake stuff), are gluten and even grain free, and that the only fat in them comes from the ground almonds (and cocoa)? How is that for a healthy treat? (Now that said, it still IS a treat, almonds though containing healthy fats, still are fatty)

A “Fähri” (small passenger ferry) setting across the Rhine opposite the Münster Cathedral in Basel

Basel, on the cross roads of Europe, has long been a center of trade from exotic spices and tea to more mundane items, and having a traditional cookie involving chocolate and other luxury goods, isn’t surprising. So here adapted for the american kitchen: Basler Brunsli

Did you know?

  •  “Dark chocolate”, also called “plain chocolate” or “black chocolate”, is produced by adding fat and sugar to cocoa. It is chocolate with zero or much less milk than milk chocolate. The U.S. has no official definition for dark chocolate but European rules specify a minimum of 35% cocoa solids.[2] Dark chocolate can be eaten as is, or used in cooking, for which thicker, more expensive baking bars with higher cocoa percentages ranging from 70% to 99% are sold. Dark is synonymous with semisweet, and extra dark with bittersweet, although the ratio of cocoa butter to solids may vary
  • “Hershey process” milk chocolate is popular in North America. It was invented by Milton S. Hershey, founder of The Hershey Company, and can be produced more cheaply than other processes since it is less sensitive to the freshness of the milk. The process is a trade secret, but experts speculate that the milk is partially lipolyzed, producing butyric acid, which stabilizes the milk from further fermentation. This compound gives the product a particular sour, “tangy” taste, to which the American public has become accustomed, to the point that other manufacturers now simply add butyric acid to their milk chocolates.

Ingredients

  • 1 1/4 cup sugar
  • 2 1/2 c ground almonds/almond flour, unblanched
  • 1/2 tsp cinnamon
  • 2 tbsp tapioca starch (or cornstarch)
  • 2 egg whites
  • 3 1/2 oz extra dark or cooking chocolate, melted (use Lindt chocolate if available)
  • 2 tbsp cocoa powder
  • 1 tbsp Kirsch (optional; a clear Cherry Brandy)

Directions

  1. In  a big bowl, mix the first four ingredients.
  2. Beat egg whites until stiff peaks form (being careful not to overwork, you can only do this once)
  3. Add to the bowl with the almond mixture. Carefully fold in the beaten egg whites.
  4. In the meantime, melt the chocolate: Break into smallish pieces and either melt in a double boiler with a tablespoon water or (and this is the easier way) place in a bowl, cover with warm water and microwave at 30 second increments until the chocolate is soft and molten, then carefully pour off the water and stir smooth. Let cool slightly (so as not to cook the egg whites) then mix into the ingredients in the bowl.
  5. Refrigerate overnight or at least for several hours to firm and chill the dough
  6. Roll out on sugar (or sugar mixed with ground almonds) to about 1/2″ to 1/4″ thick.
  7. Cut out shapes using your favorite cookie cutter, place on lined baking  sheet and bake at 480°F  for 4-6 minutes (mine were perfect at 5) (if you bake them too long, they will get rock solid when cold)

image

Check out the post on more Swiss Christmas Cookies to try other varieties

Copyright © 2011 Simple Healthy Homemade. All rights reserved