Sour Cream Chive Dressing

image

Quick Dressing to throw together when you’re in a hurry. I love when one recipe leads to another, as the Guilt Fee Yogurt Chive Sauce inspired this dressing one evening, turning leftovers into something new. I liked it so much that it became its own recipe. It now has a permanent home, you know, instead of leftover land tent city 😉

It makes a wonderful creamy dressing without adding the calories of mayo. Use it on any salad or as a light refreshing dip for veggies.

You need

  • 1/2 cup sour cream
  • 1/2 cup pickle juice or vinegar
  • 1/2 cup chopped chives
  • 1/2 tsp salt
  • 1/2 tsp ground black pepper
  • a very small clove of garlic, minced (optional)
  • 2 tbsp olive oil

Directions

  1. Mix everything in a bowl or shaker cup until well combined

image

Copyright © 2012 Simple Healthy Homemade. All rights reserved

Pumpkin & Flax Seed Granola with Almonds

image

There are many, many versions of granola, and I have made countless of them in the past, but no matter how much I would tinker and change the recipe, I found that they would never get quite like the ones you buy in a box. Lately I was re-inspired to give it another try by seeing such yummilicious recipes as LightlyCrunchy’s chocolate granola (doesn’t that sound super delish?) and I am just intrigued by Leanne’s idea of using sprouted lentils for her granola recipe, on my list to try…

image

So back to my granola story. In the past they either got REALLY crunchy (and I know there are some at the store you better add to the milk or yogurt a good while before you plan on eating it, tried them too) or they are just flavored roasted rolled oats, yummy, oh yes, but what I am looking for are those clumps or clusters that are crunchy, yet you don’t lose a tooth biting into them if you decide to just grab a handful at random. So crunchy clusters that crunch apart when you bite them, if that makes sense. But I have never been able to replicate that, no matter how much I doctored the recipes, that is, at least not until now! (Maestro, drum roll please!) 

image
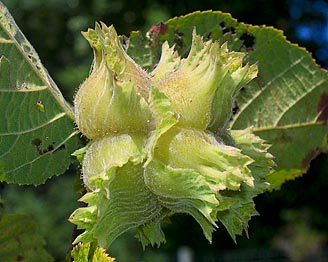
See? Got the clusters I wanted!

Yes, I could just go on and buy some every once in a while (which is what I have been doing), when the urge overcomes me, but you see, besides being quite expensive, in my opinion, there are several problems with most granola. They either contain soy (I am staying away from soy, almost all of it in the US is gmo and besides, unfermented soy contains phytoestrogens, which I try to avoid. Phytoestrogens are plant based estrogen like compounds, and a lot of cancers are hormone fueled…) or soybean oil (or vegetable oil, same difference in the end), gluten, (which normally I have no issue with, but for allergy season, I mostly cut it out of my diet, and what do you know? My accupuncturist was right! Shhhht, but I have been with hardly any seasonal allergy symptoms this year!!!! Yes, I am going and knocking on some wood right now… ) So even though I generally am perfectly capable of eating gluten and have no (visible) symptoms or reactions to it, I know a lot of my readers have to watch it.

And lastly the sugar content upsets my apple-cart, (in the spirit of full disclosure, I admittedly have only a vague idea of what an apple-cart looks like… I am gonna have to google that one) I often wonder, why so awfully sweet? But the answer probably lies in the general over use of sugar and the resulting ‘taste immunity’ to the sweetness of it, so they keep having to add more to all the processed food so people buy theirs over the competition. Once you start moving towards eating cleaner, for starters, less stuff in boxes, less sugar (or better no sugar), you will start to notice the natural sweetness in say carrots or red bell peppers again.

Oh boy am I exited about this one! And the possibilities… can’t wait to play some more with it, I already got some trials running and some definite winners on flavor combinations coming up shortly!

And gosh, it smells so good, you’ll totally want to eat some while it is in the oven, but try and wait, totally worth it 🙂

image

Ingredients

  • 2 cups old fashioned rolled oats
  • 1/2 cup sliced almonds
  • 1/2 cup mixed pumpkin, flax and sunflower seeds
  • 1/2 cup brown rice flour
  • 1/4 cup quinoa flakes
  • 2 tbsp coconut oil
  • 1/4 cup rice syrup
  • 2 tbsp honey or agave syrup (you can start with 1/3 cup and transition down to 2 tbsp, if you still like things conventionally sweet)
  • 3 tbsp ground flax seed/flax meal
  • 6 tbsp water
  • 1 tsp vanilla extract

Directions

  1. Preheat oven to 275º F
  2. Mix oats through quinoa flakes in a large bowl.
  3. In a separate bowl, gently heat brown rice syrup, honey and coconut oil until liquid.
  4. Meanwhile stir water into flax meal, let sit 5 minutes.
  5. Add vanilla and flax mixture to rice syrup, stir then add to the big bowl with the oat mixture. Stir until evenly moistened.
  6. Spread on a lined cookie sheet and bake at 275º F for 15 minutes, stir, bake another 10 minutes then stir again, and bake another 10 minutes. Cool on the baking sheet
  7. Let cool completely before storing so it has a chance to crisp up.

The only downside to this is it makes me want to eat some every time I look at it…

imageCopyright © 2012 Simple Healthy Homemade. All rights reserved

Mango Sweet Pepper Salsa

image

Chives and how to get rid of use them… Okay, one more… now I think I used almost a cup of chopped chives! I can feel a little better about using things up, I think. This one’s super easy and super yummy! Serve over or with chive burgers and guilt free chive sauce

image

Ingredients

  • 1 mango, peeled and pitted
  • 1/8th of a red bell pepper
  • 2 tablespoons lime juice
  • 3-4 tablespoons chopped chives

Directions

  1. Chop the mango, finely dice the red bell pepper
  2. Toss with 2 tablespoons of fresh lime juice and the chives

image

Copyright © 2012 Simple Healthy Homemade. All rights reserved

Finnish Rhubarb Bake

image

This is adapted from an old recipe handed to me by a friend in school who was from Finland. I have made changes to it over the years and adapted the dairy products to something more readily available here in the States.

You bake it in a Lasagne type glass dish (9×13″) or using several smaller ones works as well. The resulting cake is moist, tart and sweet at the same time, and the topping makes for an awesome textural contrast. Soft rhubarb and crunchy almonds. Yum.

image‘Budget Version’ made with Oats

This year my garden has not yet produced a ton of rhubarb, it might still be too young, the stalks are nowhere near the size of what my parents have in their garden, but I had enough to make pie, for the first time this year! So I am extra exited, I love tart things and when I was a kid, when we’d cut up and clean the extra amount to prep it for the freezer, I would sneak a piece or two here and there. Yep, raw, no sugar just like that. I am weird, I know 😉 Depending on the amount of rhubarb your garden (or your neighbor’s garden or farmers market ) gives you, you can add more or less (adjust the sugar down if you use less rhubarb, or up of you like it sweet and you use extra stalks). Just make sure you don’t too drastically reduce the sugar, rhubarb is quuuuuuite tart. I have tried it, and it was not so fun. :S

I also tried greek yogurt instead of sour cream, don’t bother. Unfortunately the savings on the side of fat calories do not justify the flavor you lose by doing so. It’s a treat, so treat it as such. There just aren’t any shortcuts for some things, *sigh*

image

Ingredients

  • 4 eggs
  • 2/3 cup sugar
  • 2 sticks butter, melted, separated
  • 1 1/4 cups sour cream
  • 2 1/2 cups flour
  • 2 tsp baking powder
  • 5 stalks of rhubarb, washed peeled and chopped
  • 2 cups sliced almonds or rolled oats
  • 1/4 cup + 2 tbls light brown sugar

Directions

  1. Preheat oven to 400ºF
  2. Butter a 9″x13″ glass dish (adjust baking temp and time if using metal or ceramic)
  3. Mix eggs and sugar, then add the sour cream and stir until well blended
  4. Stir in 1 stick of melted butter, then add the flour and baking powder
  5. Pour dough into prepared form, top with the chopped rhubarb
  6. Mix remaining molten butter and brown sugar, then stir in the almonds or oats, whatever you are using (Oats will be cheaper)
  7. Spread over the rhubarb in the baking dish
  8. Bake for 30 to 35 minutes or until tester inserted in the center of pan comes out clean.

imageCopyright © 2012 Simple Healthy Homemade. All rights reserved

Zucchini Omelette with Prosciutto and Fontina

image

Quick and easy breakfast or lunch recipe you say? Coming right up!

image

As you all know I am not one to let things go to waste, if I can help it and from my Crab Asparagus Frittata the other day, I still have Fontina laying around my fridge deli drawer. Looking through the rest of said appliance, I also have eggplants, celery root, butternut squash and zucchini that I have to cook. I think sometime at the store my love for veggies gets the better of me, or my good intention to eat more produce, who knows that so exactly? Add some Prosciutto for flavor, and using zucchini seemed the easiest for a quick breakfast. Oh, a word on the zucchini. When I was little and my family first grew zucchini in our harden, it wasn’t called zucchini, no zucchetti is what they were called. And as I learned after some basic Italian, things that end with -etto/-etti should be small or little, (just like -ini as in= smaller, younger; fratello= brother, fratellino=little or younger brother) Uhhmm, so, we did not get that memo and let the darn things grow until they resembled some sort of prehistoric weapon, yep, exactly an edible club to go hunt some sabre-tooth with. Do yourself a favor, pick them small, if you grow them. They taste better and you won’t have them coming out your ears… But I digress, the 1/2 zucchini referenced to here is going to make about a cup grated.  Use a really fine mandolin slicer to julienne or shred the zucchini, otherwise you might have to turn the cooking temp down and cool a bit longer.
Ah I love my pastured hen eggs that I get every week at the farmers market 🙂 Now that the grass is getting lush with spring, you can see the color of the egg yolks intensify to almost an orange hue!

imageMakes 2 servings, unless you worked out really hard and are extra hungry 🙂

 Ingredients

  • 4 large eggs
  • 1/2 zucchini, grated finely using a mandolin sliver
  • (optional gulp of milk)
  • 1 slice Prosciutto (di Parma or San Daniele)
  • 1 0.5 oz piece Fontina, cut into small chunks (piece about 3″x 1″ x 0.5″ )

Directions

  1. Scramble the eggs in a bowl, adding a gulp of milk if you like or they are particularly thick
  2. Grate the zucchini into a separate bowl (I have done this both ways, right into the eggs=the omelette becomes a bit more fluffy and moist)
  3. Heat a little oil in a skillet, then add the scrambled egg, sprinkle/spread the grated zucchini on top, then quickly add the chopped cheese and tear the Prosciutto into pieces and drop on top
  4. Cover the skillet with a lid, and cook until the eggs are set on top and the cheese is melted.
  5. Add some freshly ground pepper, if you like. You don’t even need salt, the Prosciutto and Cheese give it enough flavor!

image

Copyright © 2012 Simple Healthy Homemade. All rights reserved

Totenbeinli (Hazelnut Fingers)

image

I kept wanting cookies, but at the store I’d either forget or promise myself to make some at home, so at least I would have control over the ingredients. And finally I just had to make the time! I love hazelnuts, in an y form I can get them, and these cookies rely heavily on just that. It’s not juts the flavor, I guess it has as much to do with the memories. Of outdoor adventures and hikes with my family.

Memories of my Dad making flutes out of fresh sprouted hazel twigs in early spring, when the sap just started rushing back up from the roots to make the buds sprout and give life to the plant, then in the summer the nuts would still be green, not quite ripe yet, and we’d sometimes cut small branches  (they are perfectly straight) for grilling sausage over an open camp fire for lunch out on a hike, then in early fall, the nuts would start to turn brown inside their green frilly frock and you knew they would be ready soon!

The great thing about these cookies, just like biscotti, they keep for quite some time. That is, i you can keep from eating them. Since they are crunchy all the way through they don’t go hard and stale like chewy cookies often do, (then again maybe I just don’t eat those other ones quick enough?)

image

These can range from crunchy to totally hard, but they keep, like forever (or until someone with less self control finds out where they are kept). Sort of similar to a biscotti. As per my research (thank you fragtdenkoch.ch) apparently the strange name (Toten= Dead,  Bein=Bones) comes from a custom that was mentioned first around 1500, where these would be served after a funeral. People did not have much and would save luxury items such as sugar, hazelnuts and such things for special occasions, later lemon zest, cinnamon and cloves were added and the cookie is now often made during Christmas time.  Although I remember our local grocery store carrying these in big (maybe not for American standards 😉 ) 500 gr bags all year long. I have pretty drastically reduced the sugar from my original recipe, but I think next time I will try and use even less, they are still plenty sweet!

Oh and just today, I got the local bulk store to turn some hazelnuts into hazelnut butter for me, so watch out world, I can see more Hazelnut recipes in my near future 😉

image

Ingredients

  • 1/3 cup butter, unsalted, softened
  • 1 1/2 c sugar
  • 3 eggs, separated
  • 1/2 lemon, grated peel only
  • 1 tsp cinnamon
  • 1 dash ground cloves
  • 1 pinch salt
  • 3/4 cups unblanched hazelnut flour/meal/ground hazelnuts
  • 1 1/2 cups whole hazelnuts
  • 2 cups flour

image

Directions

  1. Toast hazelnuts for a few minutes, then place on a kitchen towel and rub until some of the skins come off, set aside
  2. Stir sugar into softened butter until well mixed
  3. Add 2 eggs and lemon zest, spices, salt and ground hazelnuts, then add flour.
  4. Once everything is well blended, add the whole hazelnuts and stir.
  5. Let rest in the fridge for 30 minutes
  6. Preheat oven to 380ºF
  7. On a flour dusted surface, roll out to a little under 1/2″ thickness and cut into 1/2″ by about 3″ pieces using a bread knife to get easily through the whole hazelnuts.
  8. Place cookies on a lined baking sheet and brush with the lightly beaten remaining egg, bake for 15-18 minutes or until golden brown and crisp all the way through.

imageMakes lots of cookies, but they’re eaten so quickly

image

Copyright © 2012 Simple Healthy Homemade. All rights reserved

Walliser Brot – 100% Swiss Rye Bread

image

Finally, I think I did it!! It only took about 5 or 6 tries, and me eating countless slices of extremely dense or otherwise unsatisfying 100% rye bread. Which, if I were a cat, would most likely be good for keeping my teeth tiptop clean. But anyhow, I think, finally, I can reveal the outcome of this process, and how fitting this would be my 100th blog post!

Can you believe it? I am celebrating the 100th post on Simple Healthy Homemade! I am super exited and would like to thank all my readers and fellow bloggers for their support and interest in what I cook and scribble! Thanks to all of you who have commented and engaged in the conversation! I truly appreciate your feedback 🙂

image

But let’s start at the beginning of the story. For before I could get started making ‘Walliser Brot’ I had to tackle a couple of hurdles I did not expect. First, the flour here is different. After consulting with one of my friends from Switzerland who, as a baker, had done an exchange year in the USA, I realized that making Walliser Brot (a traditional rye bread from the canton of Valais/Wallis is Switzerland) would be a tad more involved than expected, but that has never stopped me before, and was surely not going to hold me back now that I was craving that particular bread. So the flour situation I knew was going to be some trial and error, to determine what would work as a substitute. But the second part of the puzzle, (or actually the first, since without it, I could not even start the trial process) involved the bread not being made with yeast, but a traditional rye sourdough as a starter. To read more on that and learn how to make your very own rye sourdough starter, read my previous post.

image

A little bit of background on the bread we are talking about here. Walliser Rye Bread is a 100% rye grain bread, it is fairly dark and has a dense crumb. And it tastes nothing like what most of you associate with ‘rye bread’ here in the US. The taste many here think is ‘rye’ actually comes from the caraway seeds added to many rye breads (which I am not a fan of, at all) and to a lesser extend from the molasses. Also this bread has no yeast or added wheat flour to help with the lower gluten content of rye. So I knew it was going to be a sticky situation since gluten in wheat is what makes the dough hold together and be elastic and, uuhm, dough-like. Rye bread dough is often very tacky. But I was feeling a little homesick and nothing can hold you back when you crave something that will make you feel  like home. And we all know, there’s no place like home 😉

Here is a picture once I finally got it to turn out just right.

Traditionally the oven in the village would only be fired up 2-3 times a year (!!!) and each family got their turn in using it. Follows that the bread would have been hard as a rock after a while, but it also must have kept quite well. There are stories of people using an axe to get a piece of bread cut! It would then be soaked in hot milk until soft and could still be eaten. Here a link for the curious (in German) about Walliser Roggenbrot (Rye Bread) and its history.

image

Rye was the primary or only grain available since it was the only grain suitable to the high altitude and short growing season. In fact, rye was sometimes referred to as “the poverty grain” since it will grow on soils too poor for other grains. Rye grows more rapidly than wheat, can withstand submersion during floods, and continues to thrive during drought.  Rye therefore became especially popular in colder temperate countries – Russia, Poland, Scandinavia, Canada, Argentina, China, Turkey and elsewhere where it was too cold or wet for wheat to grow dependably, like in the high valleys in Switzerland. Besides being able to grow and mature in adverse conditions, it is also higher in protein, phosphorus, iron and potassium than wheat. It’s high in lysine, low in gluten and a good source of zinc, copper and selenium, and a very good source of Dietary Fiber and Manganese. In the high mountain valleys, rye was harvested with the use of only simple tools, by hand and after dreshing, would be stored in a place like this:

Stadel (Storage Barn for Rye)

Here with view of the Matterhorn

A ‘Stadel’ in this region of Switzerland would be built on stilts, which allowed the people to build on very uneven terrain, and would have a large stone plate (I have often seen them built: stilt, stone, stilt) to prevent mice and other rodents from getting into the grain stored for food. Smart move, given that back in the day, you could not just go and buy more if it went bad and you had to make it through a year before being able to harvest more.

image

But let’s get to the recipe!

Ingredients

  • 1 cup rye sourdough starter, active and fed
  • 4 cups whole rye flour* separated, plus additional for dusting
  • (1/4 cups rye flakes, soaked in water for 2 hours) optional
  • 1 tsp salt
  • 3/4 to 1 cup warm water

*Either freshly ground rye (you need about 1 3/4 cup whole rye berries/grains) or store bought, make sure it is whole grain, not white or dark rye flour

Directions

  1. In a large bowl mix the sourdough starter with 3/4 cups warm water, add 3 cups of rye flour, salt and mix until incorporated. Depending on the wetness of your sourdough (the one I maintain is 100% hydration and therefore, quite wet) At this point the dough will be fairly moist and sticky so stirring with a spoon is a good option. If it seems dry, add another 1/4 cup water.
  2. Cover and let rest and rise in a warm spot until doubled in size. This will take anywhere from 3-6 hours, depending on how active your sourdough is and the ambient temperature. If you run out of time, place in the fridge overnight, let come to room temperature before the next step.
  3. To your dough, add 1 cup of rye flour, the soaked rye flakes, if using. Knead until incorporated. If your dough is still very tacky, add some additional flour, if it feels stiff and is dry add a little more water. (This step varies depending on the moisture content of the flour you are using. If your flour has been stored for a while, it tends to be drier than freshly ground flour, and you might have to add some extra water.)imageNow it’s time to get down and dusty. Knead the additional flour into the dough before shaping it into a ball and placing on a floured baking sheet to rise…
  4. When everything is incorporated, form into a ball, flatten slightly, dust surface with flour place on a flour dusted baking sheet and let rest in a warm place until cracks show on the surface. (To create a warm place for my bread in the colder months, I turn the oven to warm (160º-170ºF) for 2-3 minutes, then turn the oven off. Cover the ‘bread to be’ with the inverted bowl so it doesn’t dry out and place in the warm oven to rise.)imageAfter its final rest and rise, ready for the oven… (notice the characteristic cracks)
  5. There are two ways of baking this bread: Preheat oven to 380ºF for 10 minutes, placing a large cast iron dutch oven in the middle of the oven. When the oven is hot, remove the dutch oven, dust the inside with some flour and gently slide the bread into the pan, cover with the lid, then set back in the oven. (You can also use a cloche, if you happen to have one) Bake 45 minutes, then turn heat down to 365ºF remove the lid and bake an additional 15 to 20 minutes or until the bread is baked through. (Do not lift the lid or peak before the 45 minutes are up, you are trying to create a moist and steamy environment for baking the bread! )
  6. If you do not have a cloche or a dutch oven, you need a metal roasting pan or jelly roll pan. Put that on the bottom shelf of your oven as you preheat. When the oven is preheated, place the bread in the oven (on the baking sheet) and add 2 cups of hot water to the roasting pan on the bottom shelf to create steam and quickly close the door, trapping the steam inside. After 20 minutes, add more water if necessary, be careful not to splatter it on the glass parts of the door or at the light bulb, they could burst or crack. Bake for 45 minutes minutes, turn the heat down to 365ºF, check on your bread an bake an additional 15 minutes, or until done. The bread will sound hollow when tapped on the bottom (careful: HOT!)
  7. Turn off the heat and leave bread in the oven for an additional 20 minutes, then remove from oven, and place on a cooling rack.
  8. Let cool completely and rest for a minimum of 24 hours before cutting into it. It will gunk up your knife and stick together or crumble if you don’t wait (Trust me, I know how hard this is to wait when the house smells like fresh bread)
I like it with cream cheese or other fresh cheese just as much as sweet toppings, my favorite currently (besides butter and prosciutto) is cashew butter and strawberry jam 🙂

image

Copyright © 2012 Simple Healthy Homemade. All rights reserved

Best way to cut up a pineapple

Stop buying those crazy gadgets, people!  There is, in no kitchen in the world, the need for a pineapple corer. Not only do you waste money on the tool, but you waste a whole bunch of yummy pineapple every time you cut one up. No No, nononono!
Here is a much better the best way to go about it, and all you need is a big cutting board, a bread knife (trust me, works the best) and, of course a ripe pineapple.
First you cut the ends off, like such…

image

Then proceed to slicing off just the outer layer, or most of the outer prickly layer…

image

Make sure you leave the prickly  ‘dimples’ in place, they provide a visual clue for the next step…

image

Notice how there is a patter to those ‘eyes’? Yes, they run in a spiral around your fruit. So cut out a few at a time, by holding the knife and cutting diagonally from one, then the other side of the dimples, so as to cut out a wedge containing the prickly bits.

image

And there is your pineapple! Imagine the waste if you had to cut down to the inner level and chuck all the rest?

image

The only thing left to do now is half, then quarter the pineapple, and cut the hard part off of the center as shown in the picture. Feel free to gnaw and chew on it, its yummy! You just can’t eat all of it, too hard.

And there you go. No more unnecessary waste!

Another thing I like to do, after the outer hard shell is cut off and discarded(since I don’t know where this little fruit’s been hanging around) get a pitcher and put all the diagonal/wedge cut pieces plus the center in it, fill with water and let rest a room temperature for at least 4 hours, then refrigerate. Makes yummy pineapple flavored water. Keeps in the fridge for 4 to 5 days.

Would be really yummy on some fresh cheese or yogurt…but we’ll have to make do with plain Kefir, since that’s all my fridge will give me at the moment…

Copyright © 2012 Simple Healthy Homemade. All rights reserved

Osso Buco ‘Slow Cooker Friday’

imageOsso Buco – Braised Beef Shank

This is part of the ‘Slow Cooker Friday’ Series, more recipes are Thai Red curry chicken, Turkey Provençal and Sausage and White Beans.

OMG, this is so super awesome, and easier than pie. And I swear there is no way anyone can tell that you did not labour over a hot stove for four hours or more. Go ahead, bask in the glory, no need to tell them. But it totally cooks itself while you’re at work, the only thing to do when you get home is to make the risotto (or I guess polenta or pasta in a pinch) and I have a maybe not totally authentic but very totally labor saving version for that as well 😉

The flavor factor is off the charts but for one person, well I guess it would have fed two, really, but I like leftovers and if you’re nice you’d probably want to serve one beef shank per person, so get this, the meat for one only cost me $3.55-$1 (coupon)=$2.55. And that really is for two meals. There are also a carrot, a piece of celery, onion and some tomatoes in there, but you all agree the big ticket item is generally the meat. Striving to be more frugal, like ‘K’ over at the $35 a week project. I admire how she can make a dollar last!

image

Even though the recipe tastes like a million bucks, it definitely isn’t one you have to crack the piggy bank open for, so put the hammer down… and get the crock pot out!

The trick to making this taste like the original, comes from two essential steps: browning the meat before cooking and thickening the sauce after cooking. The rest is taken care of while you are gone. Added bonus? The delicious smell all over the kitchen when you get home at night!

image

Ingredients

  • 1 beef shank (about .7lb) (Osso Buco is traditionally veal, but beef works wonderfully)
  • 1/4 cup flour for dredging
  • 2 tbsp butter or oil
  • 1 carrot, cut into 1/4″ rounds
  • 1 small celery stalk
  • 1/2 onion, diced
  • 1 pint of cherry tomatoes, halved, or 1 can (14oz plum tomatoes)
  • 2 sprigs thyme
  • 1 small sprig rosemary
  • 1 cup dry white wine
  • about 1  1/2 to  2 cups beef broth (depending on the size of your beef shank)
  • salt& pepper to tast
  • 1 tbsp lemon peel, finely diced
  • 1 tbsp fresh parsley, finely diced
  • 1 tsp minced garlic (from on small clove)

image

Directions

  1. Season beef shank all over with salt and pepper. Put flour in a wide, shallow dish, dregdge the beef shank in the flour, then shake off excess flour.
  2. Heat 2 tbsp butter (or oil) in a skillet, when hot, add the beef shank. Cook until golden brown, turning once (It is important you don’t go and turn it over multiple times, or it will not brown properly) about 8 minutes. Beef will cook more later, this is just to give it more flavor. Transfer beef to slow cooker.
  3. Add white wine and the broth to same skillet, scrape up any browned bits, then add the onion, carrot, tomato and celery. Bring to a boil, then transfer all to slow cooker insert.
  4. Cook for 6-8 hours
  5. To thicken the sauce, pour it out of the slow cooker (careful, insert is HOT, use gloves) into a sauce pan and boil on the stove top for 15 minutes or until thickened. No need to make sure it’s just the liquid, if the vegetables come along, that’s fine. (If you used too much broth,  and it is still very liquid after 15 minutes, you could always thicken it with some flour or corn meal)
  6. To make Gremolata: Finely chop the lemon zest, garlic and parsley, serve the Osso Buco topped with Gremolata and a side of Risotto Milanese

imageThis is when I remembered the sauce and the gremolata to put on top, with extra lemon peel, because it’s so good 😉

imageAnd yes, I did lick the plate… Shhht!, no one saw me…

Copyright © 2012 Simple Healthy Homemade. All rights reserved

Naturally Dyed Easter Eggs

image

With Spring arriving so early this year, my egg dyeing project will be so much easier! *dancing around in my kitchen* I remember a few years back, looking for anything that grew already outside, and short of some blades of grass I couldn’t find a thing. 🙁 But this year, even though it’s gotten cold again, I will be able to beautifully decorate my eggs, and naturally too, using items you could eat, well mostly (onion peels, anyone?), but nothing chemical or artificial. The colors we can make are just as beautiful, although not quite as bright or unnatural looking.

For this adventure, you will need some small leaves or flowers from outside. Clover, and fern leaves work well, as do wild violets. What you are looking for is anything small that will lie (mostly) flat, so a round, puffy flower like the pink one in ‘Horton hears a who‘ would not work well. If you are wondering, just what the heck is going on, it will all become clear soon, promise. You will also need some cheap stockings or pantyhose/tights, (or use the ones you were going to throw out, the ones with the toe hole, you know, some string and the ingredients for whatever color you choose to try!

This is how my Mom used to dye eggs with us, when we were little, and gathering the decorations outside is half the fun! And isn’t it awesome that you don’t have to worry about artificial colors getting into your eggs or tummy of your family members? What Easter traditions from when you were little do you remember and cherish?

image

For the onion skin version you need to first decorate your eggs with the leaves you gathered (Making them a little wet helps the leaves stick better), holding the leaf in place, stretch the tights/pantyhose over the egg, pinning the leaf in place, twist on the opposing side or bottom of the egg (The part where the nylon crimps will not get colored evenly) and tie with some string. If you are using the red beets or the turmeric, hard boil the eggs before then decorate once cooled down.

imageAll the eggs with stockings on and ready for their bath 😉

The easiest and my favorite first:

Onion Skins = Sienna/Reddish Brown (12 o’clock):

image

You need about 3 cups of dry onion skins. Surprisingly the red onion skins make pretty much the same color, so it doesn’t seem to matter which ones you use. Next year I will know not to eat red onions for a month to get red onion peels

    • To make the dye with onion skins: In a stainless saucepan, place a good 2 cups onions skins and 2 tablespoons of white vinegar in a quart of water and bring to a boil. Lower heat and simmer, covered, for 30 minutes.
    • Strain to remove onion skins and discard, and let dye cool to room temperature. (Don’t be fooled by the orange color.)
    • In a stainless saucepan, add the cooled strained dye and eggs at room temperature (up to 1 dozen). The eggs should be in one layer and covered by the dye.
    • Bring to a boil over medium heat. When boiling, reduce heat, and keep at a simmer for 10 minutes, turn off the heat and let eggs sit in the dye for an additional 2-3 minutes.
    • Dyeing time will be affected by the color of the eggs. Start checking for color at 12-15 minutes.
    • Remove eggs with a slotted spoon and cool on racks. The remove the stocking and leaves, rinse quickly and dry.
    • When they can be handled, you can coat them lightly with olive (or other edible) oil.
    • Refrigerate until ready to hide, or eat.

Turmeric = Yellow

image

Yellow you can get from Turmeric, use 2 tbsp per quart of water, bring to a boil and stir until the turmeric is all dissolved, then add the already hard boiled eggs. Mine did not get as yellow as I have seen this get. But I had tried to make them blue before, using red cabbage (it’s supposed to work) the color however was rather disappointing, more of a very faint barely visible pale sky blue, even after a looooong time in the brew, no real color and no more patience, and off into the yellow they went. Since they were already hard boiled and I did not want them to become, I don’t know, dusty and dry, I made the whole thing less hot and that combined with the faint blue made them a nice juicy yellow with a hint of green. very spring-like 🙂

image

Red Beets = Dusty Rose/Pinkish Color (on the left)

image

This one was a tad unsatisfying. You know how beets stain everything staring with your hands, the cutting board and the kitchen back splash if you drop them? Well, I expected a bit more from this one… Instead of boiling the chopped beets in water, I decided that beet juice would be a fantastic substitute, but after 5 hours in the fridge, the eggs still only had a dusty rose color.

image

The great thing about any of these natural colors is, that even if the egg cracks or the white takes on the color you dyed the egg, it’s perfectly fine to eat, since all the dyes are food material. Egg shells are porous and I am always concerned about the bright chemical colored eggs, and just how much of that might have gotten into the egg?

Overall I’d say onion skins give the most vibrant color and the best contrast. The turmeric would have been brighter yellow, had I either boiled the eggs in it ( I might try that next year) or at least had the ‘soup’ real hot to start. I might try the red cabbage again  too,  even if it is mainly because I don’t like being defeated, by cabbage. Maybe if I let the stuff sit overnight…

image

Copyright © 2012 Simple Healthy Homemade. All rights reserved