Swiss Barley Soup (Bündner Gersten Suppe)

image

Before winter is totally gone I wanted to make one of my favorite Swiss soups just oooone more time. This recipe is a traditional from the Kanton Graubünden, or Grison, the home of famous ski resorts such as Arosa, Davos and St.Moritz, a region that also hosts Switzerland’s fourth official language: Romansch (speak ‘romansh’ in english)

A very mountainous region in the eastern part of Switzerland (this is where Heidi in the original story is from, and no, she did not have blond tresses but black curly hair in the written story. Seriously, I’ve read it 😉

This region is also home to other yummy specialties, like ‘Tuorta da Nusch’ (Nut CAke or Tart) Bündner Fleisch (Air dried Beef that get’s sliced transparent thin), Pizokel and more… Now I am starting to get home sick 🙁

But back to today’s favorite: Soups. This one is a staple at most ski resort restaurants, and I would often have it for lunch, with a good slice of bread, what more do you need?  It’s hearty and filling and makes me think of home 🙂

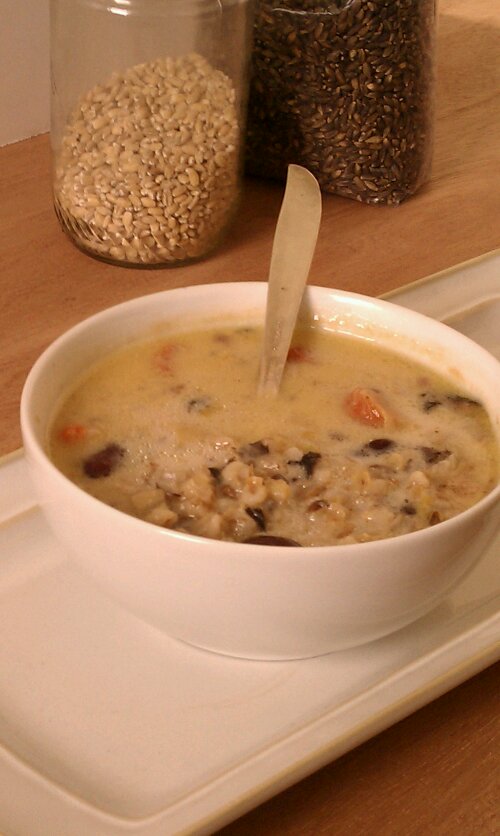
I had to make mine a bit thicker so the picture would show something. But be careful it’s very easy to make this into a stew or even a solid-something. It doesn’t look like there is that much barley when you starts out, but it swells almost exponentially once cooked. The soup should end up being creamy-thick, if that’s a technical term. But not to the point where there is just barley, it’s  a soup after all.

image

It can be made totally vegan, but I usually prefer to have a sausage of sorts with it. In ski resort mountaintop restaurants, this is usually one of the cheaper lunch choices and comes with one, sometimes two franks.

image

Ingredients

  • 1 small red onion, diced
  • 1/2 cup barley
  • 1-2 Leeks, depending on size, white and light green parts only, cleaned and cut
  • 2 medium carrots, cut into rounds
  • (optional: 3 medium potatoes, diced)
  • 3 oz Speck (or pork belly, or salt pork, or thick cubed bacon), diced
  • 1 1/2 cups (or 1 can rinsed) dark red kidney beans
  • 4 cups Beef or vegetable broth
  • water
  • 1 cup milk or some cream to finish the soup
  • salt and pepper to taste
  • Optional: 2 Franks per person and some hearty crusty bread

image

Directions

  1. Heat a little olive oil in a large stock pot, add the onions and cook over medium until translucent, add the cubed speck or bacon, and cook until the onions are slightly browned
  2. Add barley and diced vegetables, stir to coat, then add the broth and about 2 cups of water
  3. Bring to a boil, reduce the heat and simmer, partially covered until barley is almost tender, adding additional water as needed.
  4. Add the beans and keep cooking until barley is tender but not falling apart.
  5. If you are going to have the Franks, add them to the soup at this time until they are heated through, or cook any other way you prefer.
  6. Season the soup with salt and pepper and stir in the milk or cream just before serving.
  7. (This soup can be frozen, in portions, before adding the milk or cream. To reheat, let it defrost in the fridge then heat stirring frequently, add the cream or milk just before serving.)

image

Copyright © 2012 Simple Healthy Homemade. All rights reserved

Sourdough Starter

Making your own Sourdough Starter

image

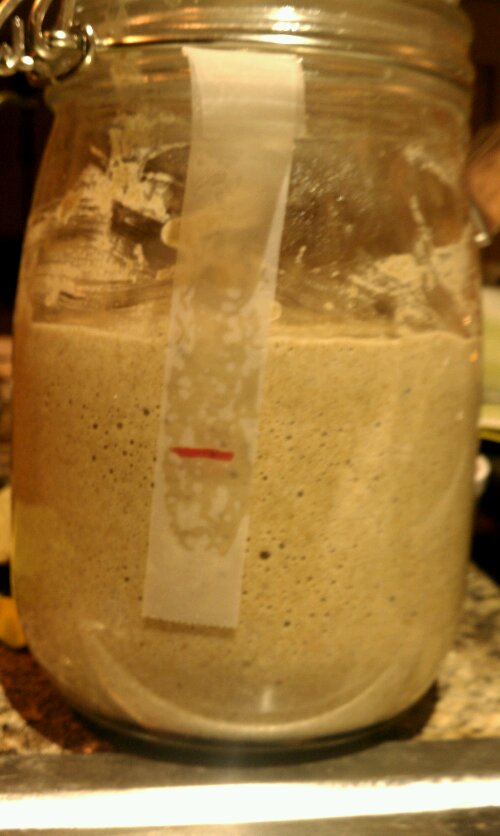
My starter when it was still a baby, just getting some little bubbles…

I have been on a mission to recreate one of my favorite breads of all times: Walliser Brot! It’s a dark dense 100% rye bread from Switzerland. Let me finish before you say, I don’t like rye bread: I don’t like any rye bread except this one myself 🙂 What is called Rye bread here is like Arizona compared to, I don’t know, Alaska, yes, that far apart. Most bread labeled rye in this part of the world contains some rye flour, lots of regular wheat flour and the part I think most people don’t appreciate: Carraway seeds. The one I long for does have none of that going on.

Well step number one in the recreation process is to get my hands on a sourdough starter, and not just any sourdough starter, but a Rye Sourdough starter.

Why not just use bakers yeast from the store? Well first, since ‘Walliser’ Bread (from the Swiss Kanton Wallis/Valais), where the river Rhône has its source technically now has an AOC (from controlled origin, kinda like Champagne can only be from the Champagne region in France hence we have Prosecco and terms like Sparkling Wine, Scotch from Scotland, etc) and the technical details advise it has to be 100% Rye, and to be made with Sourdough, and can only be called that if the Rye was grown in Valais (well, total fail on that one, for sure, but I am going to try my best to follow the rest, maybe without actually, officially calling it Walliser Brot, since as we now know, that would not be appropriate 😉

Secondly, Sourdough, is fascinating, and once you have it started much cheaper than buying yeast over and over, keeps the bread fresher and more moist for longer and due to the lactic acid that is produced during fermentation that bread won’t go stale or grow moldy nearly as quickly as yeast bread. It makes a great easy care pet, takes only about as much care as a plant once you got it well fed and going strong.

Below are some quotes I found that give a bit more detail on the health benefits of making bread with your own sourdough starter. You can make one, buy one or you can adopt one from a friend, that has one in the fridge.

“The history of bread making is a good example of the industrialization and standardization of a technique that was formerly empiric….It was simpler to replace natural leaven with brewer’s yeast. There are numerous practical advantages: the fermentation is more regular, more rapid, and the bread rises better. But the fermentation becomes mainly an alcoholic fermentation and the acidification is greatly lessened. The bread is less digestible, less tasty and spoils more easily”         Claude Aubert Les Aliments Fermentes Traditionnels

“Baking with natural leaven is in harmony with nature and maintains the integrity and nutrition of the cereal grains used… The process helps to increase and reinforce our body’s absorption of the cereal’s nutrients. Unlike yeasted bread that diminished, even destroy’s much of the grain’s nutritional value, naturally leavened bread does not stale and, as it ages, maintains its original moisture much longer. A Lot of that information was known pragmatically for centuries; and thus when yeast was first introduced in France at the court of Louis XIV in March 1668, because at that time the scientists already knew that the use of yeast would imperil the people’s health, it was strongly rejected. Today, yeast is used almost universally, without any testing; and the recent scientific evidence and clinical findings are confirming that ancient taboos with biochemical and bioelectronic valid proofs that wholly support that age-old common sense decision”.              Jacques DeLangre

Essentially you are propagating a living organism, bacteria and wild yeast that feed on the sugars found in the flour, giving off gas as they do so, hence the bubbles that leaven the bread. Since it is alive, you have to feed your new pet(s), but the nice thing is, they do everything slower at lower temperatures. So once established, you can keep it in the fridge and take it out to feed once every couple of days, once a week at the minimum.

The King Arthur Flour Website has some great info on how to revive a neglected starter, de-sour one that has gotten too sour (discard most and feed 2 cups flour, 1 1/2 cups water) and I think they also sell one (not rye though)

There are many recipe’s for this out there, and some make it sound like it is super complicated, also a lot of instructions have you discard half of the starter at every ‘feeding’ which I think is just wasteful.  I had a wheat sourdough that I ‘made’ at some point and I remember it took a while to get it going, but the one I made with rye, was up and ready in no time. Apparently rye ferments more readily. But there is luck involved and it might not always work, depending on the organism that lie dormant on the grain or happen to float through the air at the time. Time of year, temperature, all those variables come into play.

So let’s get started:

You will need: Whole grain, unbromated, unbleached Rye flour (you could use pumpernickel flour for some of the feedings), Water, Glass container to keep the starter, something to stir, tape and pen to mark the level so you can check how much it came up

Day 1:

    • 1/2 cup whole grain rye flour (or if you have a grain mill, grind some fresh)
    • 1/2 cup warm filtered water (try to avoid chlorine if you can)
    • Stir the flour and water together in a the glass container, cover loosely with a lid or plastic wrap and set aside (room temp!)

Day 2:

    • add 1/4 cup Rye flour, 1/4 cup luke warm water, place the tape on the outside of the glass, make a line where the ‘dough’ ends so you can check if anything is happening yet (on mine it did start to make bubbles)

Day 3 & after:

    • add another 1/4 cup rye flour, and 1/4 cup water, if nothing much happened (If it got very bubbly and then fell again, add 1/2 cup flour/1/4 cup water, your pet is hungry!) Remove the tape and re-position so the line marks the dough level again.

Your goal is to get the starter to double in size, with my starter, that now takes about 6 hours. So keep feeding once a day until the starter gets really bubbly. If you run out of space, remove half of the starter, discard and then feed flour to the rest. And if after 6 days still nothing happened, you might have to call it quits and try again at a later time, or ask around, someone might have one, they most likely will be able to give you a piece you can feed into your own starter.

imageActive and bubbly!

From the King Arthur Website: on Storing your sourdough starter:

Storing

Refrigerating – Once your sourdough starter is safely in the refrigerator, it will need a little attention, although once it’s cold and relatively dormant, it can survive quite a long time between “feedings.” It is certainly not as demanding as children or more traditional pets, but it won’t just sit for months on end like a packet of commercially dried yeast either.

Freezing – You may be able to ignore your starter for a month or even much longer, but if you know you’re going to be away for a time, you can store it, unlike children or pets, in the freezer. You may want to transfer it to a plastic container first since it will expand as it freezes.

When you are ready to use it again, give it a day to revive, feed it a good meal, give it another day to build up an armada of fresh, new wild siblings and it will be ready to go to work.

Drying – An alternative storage method is to dry your starter by spreading it out on a piece of heavy plastic wrap or waxed paper. Once it’s dry, crumble it up and put it in an airtight container. Store it someplace cool or, to be safe, in the freezer.

To reactivate the culture, place the dried starter in a mixture of flour and water as described in the first section. To help the dried chunks dissolve, you can grind them into smaller particles with a hand cranked grinder, a blender or a food processor before you add them to the flour/water mixture.

Walliser Roggenbrot (in French: Pain au Seigle) with the traditional cracks on the surface. Let’s see how well I will do…

Copyright © 2012 Simple Healthy Homemade. All rights reserved
3 Pepper Bean Soup

image

Some days it just has to be a quick and easy soup. I literally made this one in between answering emails and studying. Like many soups the active time is minimal and the result is totally worth it.

For me soups can be eaten any time of year and day, for that matter (I had this one for breakfast the other day and it was delicious, and yes, I know I am wierd). And usually the ingredient list goes by the content of my refrigerator and freezer in the colder months, my garden or the farmers market the rest of the year.

This particular recipe ends with kind of a ‘build your own’ option, a more brothy one with hearty chunks or a little thicker and more creamy option. Depending on the mood and/or the outside temperature you can vary it accordingly. Okay, you can’t go back from creamy to chunky, but it works the other way round. Either way, you can’t go wrong.

If you feel like it, you can add some cooked, shredded or diced chicken or beef.

imageIt’s very hard to take pretty soup pictures 🙁 the taste will have to make up for it

Ingredients

  • 1 medium red onion, diced
  • 1 large garlic clove, thinly sliced
  • 1/2 red bell pepper
  • 1/2 yellow bell pepper
  • 1-2 small Thai chili peppers (or other hot pepper), sliced thinly
  • 4 cups beef broth (or vegetable broth for vegetarian option)
  • 2 1/2 cups red beans, cooked, such as dark red kidney beans, or small red beans (if you don’t cook them and freeze them, from 2 cans)
  • 1/2 tsp dried oregano
  • salt & freshly ground pepper to taste (I used 1 tsp, but the broth I used, has no salt in it)
  • 1 tbsp apple cider vinegar
  • water, to thin the soup if it get’s too thick

image

Directions

  1. In a large stock pot, heat up some oil over medium heat. Add onions and cook until translucent. Add garlic and cook juts until it changes color to light golden
  2. Add bell pepper and hot pepper, cook 8 minutes or until onions are tender.
  3. Add broth and beans. (If using canned beans, rinse them before adding)
  4. Cook about 10 minutes or until slightly thickened, then remove about 1 cups of the soup including beans, and puree, or mash the beans with a fork for a very chunky soup. If you want a thick and creamy soup, puree 2 cups.
  5. Add the cider vinegar and cook for another 2 minutes. (trust me on that one, it is essential)

image

Happy to say that my Rye Sourdough seems to finally take off 🙂 More on that later though

imageCopyright © 2012 Simple Healthy Homemade. All rights reserved

Nut Filled Braid

image

Turn your kitchen into a European Bakery. This ‘bread’ would traditionally be served as a snack with coffee, but of course you could have it for breakfast as well. I have also experimented with slicing and freezing parts of this for later, in convenient portion sizes, just defrost in the microwave and voilà! instant homemade treat to the envy of your surprise guests. Or of course just that afternoon coffee snack for yourself 🙂 Looks pretty AND tastes great!

imageDough rolled out ‘rectangular’, with filling. And roll it up…

imagecut with a sharp knife…

image... twist and set into your prepared cake pan

imageApples and Nuts and just a little sugar turn this bread into a breakfast anytime treat!

Ingredients

    • 2 1/2 cups unbleached, all purpose flour
    • 1/2 tsp salt
    • 2 tbsp coconut sugar, sucanat or sugar
    • 1/2 cup milk
    • 1/2 stick butter
    • 1 egg
    • 1 1/2 tsp instant yeast
    • 1 1/2 cups ground nuts ( I usually use almonds or hazelnuts)
    • 3 tbsp sucanat or sugar
    • 1 md apple (if using the bagged kind, usually they are smaller, use two)
    • 2 tbsp lemon juice
    • 4-6 tbsp milk or cream

Directions

    1. To make the dough: In a large bowl, combine 1/2 cup flour, sugar, yeast and milk, stir until smooth. Let rest 2 hours in a warm spot until bubbly.
    2. Gently melt the butter, set aside to cool. Add remaining flour, egg, salt and cooled butter to large bowl. Stir from the middle, incorporating more and more flour, then knead the dough until smooth and elastic.
    3. Cover and place in a warm spot until doubled in size (You can also do this stage in the refrigerator overnight, it will take significantly longer for the dough to double in size)
    4. For the filing, grate the apple and add to a bowl with the ground nuts, sugar, milk or cream and lemon juice. Mix with a fork until uniformly moist (it should not be liquid)
    5. Roll out the dough into a 1/8″ thick rectangle, spread the filing on top, stopping 1″ from the edge.
    6. Roll up the dough lengthwise, then press ends to seal.
    7. Using a sharp knife, cut the roll all the way through and twist the two strands (with the cut side facing up) around each other.
    8. Place braided bread into a parchment paper lined cake form, let rest and rise for about half an hour.
    9. In the meantime, preheat the oven to 380°F.
    10. Bake for 30-40 minutes or until browned and baked through. (Tapping the bottom of the braid should sound hollow, you can also insert a tester to check if it is done)
    11. Let cool for half an hour on a cooling rack before cutting into and devouring.

image

That made me hungry, I think I will go get myself a slice or two from my freezer stash… And then on to my sourdough experiment!

Copyright © 2012 Simple Healthy Homemade. All rights reserved

Seed and Nut Cracker (grain free)

image

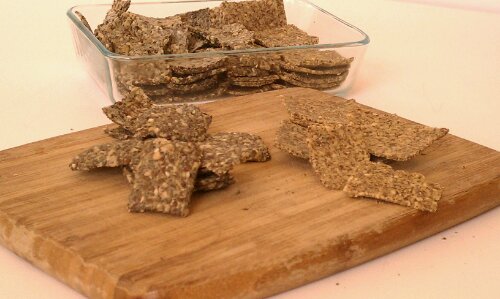
Seed or nut based crackers are yummy I daresay even addictive. But the price for a girl on a tight budget, is rather prohibitive… 🙁 So after tinkering in my kitchen (batch one and two shown here) batch 3 was the winner, hands down.

imagebatch one & two

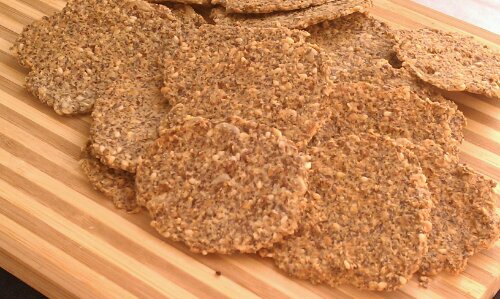
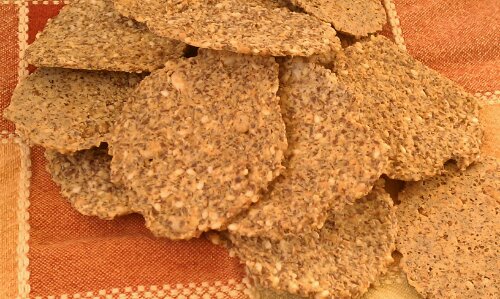
You can make them square or round, depending on your preference. Square is a bit less work, but takes a little longer to get to that perfect crunchy state. For either one, flatten or roll out on the prepared cookie sheet (preferably lined with a silicon baking mat, that’s how I made them, if you don’t have one of those, at least use baking parchment) by covering with wax paper and rolling out, then peeling the paper layer gingerly from the top.

imagethe only downside? You could always eat more than there are left…

Ingredients

  • 1/4 cup cashews
  • 3 tbsp sun flower seeds, divided
  • 1/2 cup ground flax seeds (flax meal)
  • 1/4 cup ground almonds, natural not blanched
  • 1/4 cup quinoa flakes
  • 3/4 cup water
  • 3/4 tsp sea salt
  • 1 1/2 tbsp sesame seeds
  •  1 tbsp flax seeds, whole (golden or brown)
  • 1 tbsp butter or coconut oil, melted

Directions

  1. Preheat oven to 300°F
  2. Prepare baking sheet (if you are making these round, it will make two cookie sheets) by lining it with a silicone baking mat
  3. In a blender or a mini food processor, combine the cashew and 1 tbsp sun flower seeds, blend until it forms a coarse meal
  4. Add ground almonds, flax meal, and quinoa flakes and pulse until combined
  5. Add the water and salt, blend until well mixed
  6. If you have enough space in your mini processor, add the remaining ingredients and pulse 2-3 times, until mixed but not chopped.
  7. Round: drop onto prepared cookie sheet, 1 level teaspoon at a time, distancing about 1 12/” to 2″ apart, cover with waxpaper and roll out until less than 1/8″ thick, basically as thin as you can get it.
  8. Square: Scrape or drop dough onto cookie sheet, spread out, then cover with wax paper, and roll out super thin, (less than 1/8″ thick)
  9. Bake 30 minutes in the middle of the preheated oven, or until no longer soft and pliable. then finish baking another 5 minutes on the bottom rack
  10. Let cool before crunching away!

image

Copyright © 2012 Simple Healthy Homemade. All rights reserved

Kale Mushroom and Meatball Skillet

image

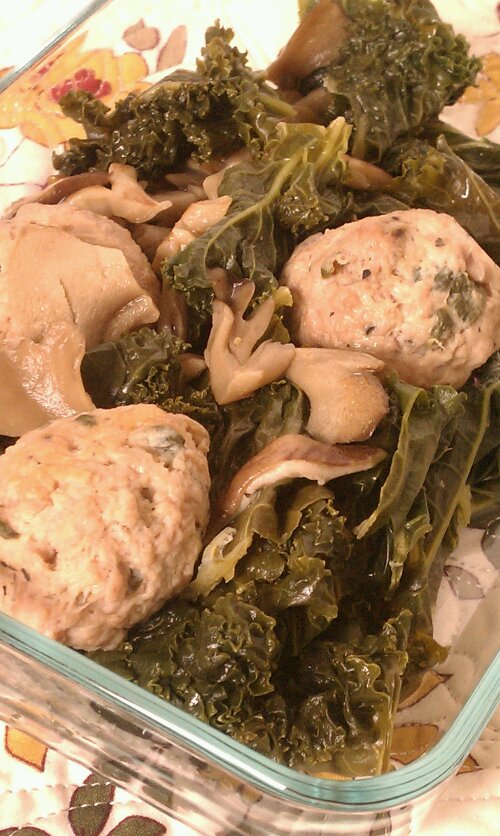
The darker the green the more nutritious a plant is, we have all heard that. And as far as color goes, you can’t get much darker than kale. Now for many this is sort of a strange new vegetable. Your Mom never made it unless you happen to be from Northern Europe or maybe Italy. If you grow it in your own garden and it’s young, it can be eaten raw on a salad. But this time of year and coming from the store, the leaves are more made for cooking. Here I made mushrooms and chicken meatballs to round out the meal. All done and only one pot to clean. I am including a simple meatball recipe, but I have also made this using ready made chicken sausage from Carl, my favorite poultry guy at the farmers market.
image

The true advantage of using sausage is it comes on its own ‘keep your hands mostly clean’ dispenser 😉 just squeeze off a portion and ‘dispense’ into the pan, one meatball at a time, kinda like squeezing toothpaste. (If you go with sausage, make sure you know what is in them, as sausage can be an excuse to use up whatever is on hand… The ones I get are awesome, made from skinless chicken breast meat, spinach, feta and some salt, that’s it! )

imageleftovers, ready to take to work

Serves 2 hungry mouths

Ingredients

  • 1 bunch of kale
  • 1 lb of chicken breast, ground (or sausage)
  • 1/4 cup feta cheese, crumbled
  • 1 cup baby spinach, lightly packed,
  • 1 1/2 cups mixed mushrooms, chopped ( I had shiitake and maitake that needed to be used)
  • 2 tbsp Apple cider vinegar

Directions

  1. To make the meat balls:
  2. Mix ground chicken, chopped spinach and crumbled feta in a bowl, and form into ping-pong ball sized meat balls. If you wet your hand a little, the whole thing sticks less. (If you are using sausage, skip this step)
  3. Clean and wash the kale, then separate the leaves from the tough stems. I usually rip the leaf off, or even strip it off the stem by pulling the stem through between thumb and index finger. Or you can use a knife. Cut or tear into pieces
  4. Heat a little oil in a skillet, add the chopped mushrooms and saute until lightly brown.
  5. Add the meatballs, cook until browned on one side.
  6. Pile the kale on top, all of it (if it looks like it is going to come out of the pan, just add half, wait for it to cook down a bit, then add the rest), add 1/2 cup if water, place (or balance, if there’s a mountain in your pan) a lid on top and allow to cook covered.
  7. After 5 minutes, check to see if there is still any water left, if not, add a little more. Cook until the kale is tender and the meatballs are cooked through.
  8. Add apple cider vinegar, toss and cook another 2 minutes to allow the flavors to blend.

image

Copyright © 2012 Simple Healthy Homemade. All rights reserved

Lazy ‘South of the Border’ Soup

image

You’re wondering on the lazy part here? Well it all started out with me not feeling like doing much but having to eat like everybody else. So from what I had on hand, I concocted a soup, and here is the real lazy part about it: using up half a jar of tomato sauce that was leftover from a ‘quick-take-to-a-friends-house-Lasagna’. Even I, who make most everything from scratch, (often including tomato sauce) do have some jars of good store bought sauce on hand. A word of caution here: Read the labels, I never buy any jarred sauces with sugar or cornstarch or vegetable protein or really anything other than what you would put in it at home. Lets face it, when is the last time you reached for that soy isolate or sprinkled some monosodium glutamate on your food? Alright then, you might not want to eat that I am guessing. I am even weary of ‘spices’ as they can legally stick all kinds of stuff in there under that label, but I am getting off the subject here.

image

Where were we? Lazy, oh yes, so I made a soup for a cold winter day when the soul is longing for some sunshine but you really don’t want to put a lot of thought or energy into the food making process…

image
I added spices and peppers, eggplant and cumin, and I had a name picked out and everything! Life was great. Until I bit myself eating the soup three (yes, 3) times!!?  Montezuma apparently misunderstood the title, I mean it was in English and all…          ‘Lazy Mexican-soup‘ there, happy?

Well I do have to say, I ate all the rest of the soup and no more biting myself…

image

Ingredients

  • 1 medium red onion, diced
  • 4 ribs celery
  • 1/2 medium eggplant, cut into cubes
  • 1 lb campari tomatoes (they are about ping-pong ball sized), quartered
  • 1 red bell pepper, diced (optional: roasted)
  • 1/2  a jar Marinara (Spaghetti) Sauce (about 12oz)
  • 1 tbsp cumin seeds, whole
  • 1 tsp marjoram, dried
  • 1 tsp oregano, dried
  • 1 tsp chili powder, medium or hot, depending on taste
  • 2 tsp chipotle powder
  • 1/2 tsp ground white pepper
  • 2 tsp salt
  • 2 qts plain beef stock (for vegetarian option, use vegetable broth)

Directions

  1. If you are roasting the red pepper: Spread the peppers on a line baking sheet and roast in a 400°F oven until blackened in spots. (You can do this alongside other vegetables, like while making the cumin roasted carrots) or alternately, place under the broiler with the door ajar until some brown spots appear.
  2. Add some oil to a large stockpot, add the diced onion, stir and then cook until softened and browned in parts.
  3. Add the celery, eggplant and cumin to the pot. Cook for about 2 minutes, then add the tomatoes, pepper and all the spices. Stir and wait about 1 minute until adding the broth so the spices have toast a bit and time to release their flavor.
  4. Add the Marinara Sauce and bring to a boil.
  5. Cook until the vegetables are tender, about 8 to 10 minutes. Enjoy!
See? It doesn’t get much easier, lazier or cheaper than that!

image

Copyright © 2012 Simple Healthy Homemade. All rights reserved

Chicken à la moutarde

image

Part III of the series: Chicken for every day of the week!

Chicken à la moutarde (chicken with creamy mustard sauce)

A staple in French kitchens and served all over Europe is mustard sauce, or Dijon sauce. A creamy flavorful sauce usually served with chicken or rabbit. And as fancy as it sounds, my version here be made very simply and even better, quickly. I used home made white wine mustard, (yes I’ll do a post on that soon) but any Dijon style mustard would work. I generally like to have both a creamy and a whole grain version on hand, but this sauce works well with just the smooth style as well.

image

Ingredients

  • 1 boneless chicken breast half, pounded flat between two sheets of cling wrap
  • 1/2 cup flour
  • 2 tbsp mustard, divided
  • 1/2 tsp thyme
  • salt and pepper to taste
  • 1/2 cup white wine (or water)
  • 1/2 cup milk

Directions

  1. Rub the chicken breast all over with 1 tbsp of mustard (I like to use the old fashioned kind for this)
  2. In a shallow dish combine the flour with 1 tsp salt and dredge the chicken breast until covered in a thin layer of flour. Season with pepper and thyme.
  3. Heat 1 tbsp of oil in a large skillet, then add the chicken and cook undisturbed until the edges start to look cooked and the bottom is browned. Turn the chicken breast and cook until cooked through.
  4. Add the wine to the pan, gently stir to loosen up any browned bits. Remove the chicken from the pan and set aside, keeping it warm.
  5. Mix the additional tablespoon of mustard with a tablespoon flour until a paste forms, add to the pan, and add the milk.
  6. Stir to dissolve any pieces of flour and mustard and bring sauce to a boil, simmer until sauce thickens, and serve over chicken

image

Copyright © 2012 Simple Healthy Homemade. All rights reserved

Cumin Roasted Carrots

image

I have to admit I was addicted to this recipe for a while last year. Yep, ‘Addictive veggies’, who would have thought? Somehow the way the coarse salt flakes make the cumin taste on those carrots is just beyond description. You have to try it to believe it, but around here, I always make extra so I have leftovers.

And it’s so easy, in fact it only takes 4 ingredients, including the carrots!

I love to bake and roasting is, uhm, almost like baking. Riiight, you’re saying. Well maybe it’s a bit wishful thinking. I have been going sugar and grain free for a while, that sorta limits the baking. One thing you start noticing is your taste buds rejuvenate and become more sensitive. You will be able to taste the natural sweetness in carrots or beets for example, or even milk. It’s quite astonishing how dulled our senses have become to sugar, (read a 1996 study on sugar preference and consumption  between rural and urban population groups in Iraq) apparently the more sugar you eat, the duller your senses become to it and the more you need over time. Works kinda like drugs that way, a  bit scary, ain’t it? But I digress. The roasted carrots are a must try, even if you’re not a big carrot fan, roasting them caramelizes the sugars and renders them sweeter. Part of why roasted carrots have a higher glycemic index than raw or even steamed carrots.

image

Ingredients

  • 1 lb Carrots (about), cut into pieces
  • 2 tbsp olive oil
  • 1 1/2 tsp coarse flake salt (such as french grey sea salt, or fleur du sel)
  • 2 tsp cumin seeds

Directions

  1. Preheat oven to 380°F
  2. In a bowl, drizzle the carrot pieces with the 2 tbsp olive oil, and toss to coat. (Trust me, you don’t want to skip this step and just drizzle them on the baking sheet, won’t work, I tried, take it from a cumin roasted carrot addict), then add the cumin seeds.
  3. Line a baking sheet with aluminum foil (easy clean up makes me happy)
  4. Transfer the carrots to the baking sheet, making sure you scrape out all the cumin seeds. Sprinkle with the salt and place in the preheated oven
  5. Bake for 35-45 minutes, depending on the size of your carrots and the desired softness. (Mine usually are perfect after 40)
What’s your favorite vegetable to roast?

Copyright © 2012 Simple Healthy Homemade. All rights reserved

Colorful Vegetable Soup with Celery Root

image

Celery Root or Celeriac is what we use back home as winter vegetable for soups, salads, stews, you name it. It’s cheap, readily available and has a great flavor both raw and cooked. You could most definitely use regular green celery, which has a bit more of a pungent flavor, compared to the almost a bit nutty or earthy flavor of the root crop.

Cerliac

Making vegetable soup from scratch could not be easier, and I am giving you a basic recipe that can be made in as many variations as there are cooks.

For this particular soup I chose colorful veggies, and I am foregoing the usual potato for the sake of the ‘getting lean in the new year’ and all the paleo eaters out there and I am using, as I just said, celery root instead, which has a much lower Glycemic Index (GI) than a potato. choosing vegetables (and foods in general that are low on the glycemic scale keeps you full longer, therefore helping to control your appetite. In very simple words (yes there is more to it, but I’ll spare you) the idea behind the glycemic index is to measure how quickly a particular food affects your blood sugar/insulin response, meaning how quickly the sugars in it get digested and find their way into your blood stream.
image

Alright, now that we fed the brain, let’s look at our tummy 🙂

Ingredients

  • 1/2 medium onion, peeled and chopped
  • 1/2 celery root, peeled and cut into chunks
  • 3-4 large tomatoes, diced * see note
  • 2 carrots, diced
  • 1/4 to 1/2 a head of cauliflower, separated into florets (depending ont he size of the cauliflower you get)
  • 1/4 of a head of a medium savoy cabbage, cut into chunks (or use some leaves off a large one)
  • 4-5  stalks Swiss Chard, chopped(any color you like, rainbow colors look pretty)
  • 1 tsp salt

* I used frozen ones from my Garden in the summer: when they are at the peak of ripeness, just chop and put in zip top bags for soup in the winter. Alternately you could use a can of no salt added diced tomatoes)

Makes one 3 1/2 qt pot full

Directions

  1. In a stock pot (mine is 3 1/2 qts, or so it says on the bottom) heat one tablespoon on olive or coconut oil over medium, then add the onions,a dn cook until translucent but not brown
  2. Add the celery and carrots, stir and cook until the onions are beginning to brown
  3. Add the tomatoes, with any juice that collected on the cutting board (if using frozen, partially thaw in the fridge overnight) stir and allow to cook 5 minutes to allow some of the juices to come out
  4. Add water to cover the vegetables and bring to a boil, cook 5 minutes, then add the cauliflower and chopped Swiss Chard, bring to a boil again,then reduce the heat, add the salt and simmer until celery, carrot and cauliflower are tender when pierced with a fork.
  5. Serve hot with some crackers or a slice of rustic bread, or enjoy as a first course.

To make this your own:

  • Instead of celeriac, use 2-3 stalks of celery and a medium potato
  • Use kale instead of Swiss Chard (but remove the tough stems)
  • Use spinach,  but add right before serving into individual bowls, ladle hot soup over
  • Don’t like cabbage? Leave it out
  • Instead of cabbage and kale, use thin cut or quartered Brussel sprouts
  • Add green beans or snow peas towards the end of cooking time
  • Leave out the tomatoes
  • Go through your fridge, anything vegetable can most likely be used up in your yummy soup, the potions are endless 🙂

image

Copyright © 2012 Simple Healthy Homemade. All rights reserved