Campfire Chili

imageCooking under the stars always makes things have a special taste. Whether cooked over the fire or on a camp stove does not seem to matter. I guess you could even get ok good results at home, IF you really have to 😉 but I strongly believe the view and therefore the mood you’re in while cooking influences the result and how could anything not be fantastic, having a view like that?  ‘Cooked with love’ as my Peruvian friend likes to say. Or maybe ‘with peace in your heart’ would be more fitting.image

For this easy and quick dinner I am using a variety of beans, to add some visual as well as textural interest, and you can certainly substitute your favorite beans for what was used here. Making this at home I would totally use frozen beans (I cook dried beans and freeze them in portions) but since this was going to be one of our optional meals, I brought some cans along so it wouldn’t spoil if we decided against it. If using cans just make sure you rinse them really well, they usually pack quite a punch of sodium. To get ‘the look’ below, use 3 different types of beans and some corn (the regular size can, US 15.5 oz) just understand that variety comes at a price: This dish feeds half an army (6 people) And since it was just the two of us, we ate it three times, with a side of cheddar corn muffins. The really awesome part about the quantity is we had leftovers (stored on the ice in the cooler) to take home and have for dinner after our trip. Nothing like coming back from an active vacation and dinner is ready 🙂

image

You may have notices that there is no onion in this recipe, and you could certainly add onion. We wanted to. Sadly for us however, the onion sat safely back at home in a bag with the extra cucumbers from the market, in the crisper drawer of the refrigerator. But as I learned, with the right (rest of the) ingredients, that isn’t a problem at all and we could not even tell it was missing at all. Use a big can of San Marzano tomatoes if available, they are awesome for Chili. Yes, I am aware that they are Italian :), but trust me, makes all the difference. That and my secret ingredient, the steak seasoning.

imagecooking with wind guard and view of the lake

Ingredients

  • 1 can dark red kidney beans (15,5 oz)
  • 1 can butter beans (15.5 oz)
  • 1 can small red beans (15.5 oz)
  • 1 can no salt added corn (15.5 oz)
  • 1 can San Marzano tomatoes whole peeled (or stewed, chopped tomatoes) 28 oz (big can)
  • 2 lb mixed ground meat (half venison, half beef is fab)
  • 4-6 tablespoons medium to hot chili powder (Penzey’s makes an awesome one)
  • 1 tsp chipotle powder
  • 2 tsp steak seasoning (such as the one from La Cense or  Chicago Steak Seasoning)
  • salt and pepper to taste

Directions

  1. Heat some oil in a pot over medium, add the ground meat, and proceed to cook and break apart using a spatula until the meat is cooked and not pink anymore.
  2. Add the spices and the tomatoes, then stir in the rinsed beans and corn (don’t open all the cans before hand, in case you run out of space, you can pass on one of the cans, bug make sure the ones you use are well rinsed)
  3. Cook until slightly thickened, taste and adjust seasonings if necessary. The longer you stew it the more the flavors will blend (or heat, cook 10 minutes, and wait for the leftovers to do that)
  4. Serve with some Cheddar Corn Muffins and maybe a glass of full bodied red…

By the way, this is soooo easy to make, even a novice cook can whip it up in no time!

image

© 2012 SimpleHealthyHomemade

English Muffin Breakfast Eggs

Breakfast is a very important meal and can start your day right or set you up for hunger bangs by 10 am. And as anyone knows, when you are outdoors a lot hiking, kayaking or even just relaxing by the water, food tastes twice as good. Or maybe you get twice as hungry? Who knows. In order to fill our bellies and give us some energy for the hiking and whatever else we could come up with to fill the day ahead, we dug through the cooler and found some of our yummy supplies that had lived through my boyfriend’s searches for snacks. Okay, we planned a bit better than that, but you never know with hungry guys, they can mess up meal plans 😉 Eggs keep pretty well in a cooler, so we had ourselves some of those for breakfast on day three of our last camping trip. Prosciutto and cheese are also stuff that keeps rather well and luckily were not all gone from snacking or making our Campfire Chili.

Ingredients

(per person)

  • 1 english muffin, split
  • 2 eggs
  • 2 slices of prosciutto (or sliced ham)
  • 1 oz of cheddar*, thinly sliced

*it works with other types of cheese that melt as well, and we have even tried feta with good results

Directions

  1. Place a skillet over medium high heat, add a little oil, then carefully crack the eggs into the skillet.
  2. When the eggs are near ready, place the english muffin pieces face down next to the egg to heat up, then turn over and layer the prosciutto and cheese onto of the bread and slide the eggs on top.
  3. Enjoy by a waterfall (optional, but recommended)

and if the egg white gets out of hand, just flip it over like we did!

© 2012 SimpleHealthyHomemade

Healthy Camping Pt1

So many think that when you take food along or cook outside your kitchen that forcibly the quality of your food has to go down, as in unhealthy and bad for you. But there is really no reason for that, whatsoever. As proven by or most recent camping trip and many hikes before that (I made Vietnamese summer rolls on time, put the peanut sauce right into them), you can definitely ‘rough it’ without sacrificing on the food side of things.

This time we only had a few days so it was sadly much shorter than we would have liked. But hey, that was in June (yes, sometimes that’s how long it takes me to get a post completed) and now it’s only August, and even if you are cold easily, camping season extends till at least the end of September.
We set off on a blistering hot weekend where temps here in the Lehigh Valley topped out just short of the triple digit mark, drove through several fronts of thunderstorm and heavy downpour ( there was an inch of water in my kayak by the time we got there! ) up to the Catskills which proved to be cooler and therefore much more agreeable with everybody. Oh and the best part? It did not rain one drop once we got there!

We went with friends and the cooking duties were split evenly: we were responsible for one dinner and one breakfast.

But first, here are some general guidelines for meal planning, away from you regular kitchen:
Use seasonal produce for fresh and healthy meals. Most produce can be kept at room temperature for a period of time ( unless it’s berries, which we did put on ice in the cooler) Things like cucumbers, tomatoes, potatoes, bananas, apples, grapefruit, oranges, watermelon , cantaloupe , red bell pepper, onions or green beans, even kale if wrapped in a moistened paper towel before put in a plastic bag will happily keep a while. And if you end up having more space than expected, you can always store them on top of the rest in your cooler. ( don’t refrigerate your tomatoes or bananas)

Breakfast:

Mix up the dry ingredients for pancakes and store in a zip top bag, all you need to add is the liquid stuff (a liquid like milk, oil and eggs, if you are making them with eggs)

Omelettes are always a good choice, easy and versatile that can be made with pretty much anything added.
Desert: doesn’t have to be roasted marshmallow or smores either, branch out. Try fruit salad with watermelon or mixed berries with yogurt the first couple of nights. Yogurt keeps fairly well, it’s fermented. Folks used to turn milk into cheese and yogurt in order for it to keep before there was no refrigeration. Keep it cool, but you can also bring it along for a picnic on a hike, no need to panic about it. When you get down to the end of your supplies and the more delicate things are gone, make these chocolate bananas over the fire. Or make a fruit compote topped with granola for crunch!

Dinner choices beyond the hot dog and chips: Pieces of meat are healthier than mystery meat in a casing. That said this time we did have chicken sausage the one night. Carl at the farmers market is a sausage genius and I know for a fact that his chicken sausage is made from chicken breast he sells right there alongside the sausage made from it. Steak, pork chops and chicken breast can all be easily grilled but need to be kept cold on ice in your cooler until you are ready for them. In my experience, meat, like ground beef, sausage or steak. (Oh yes, I said we did it in style, didn’t I?) keeps well right on the ice or bottom of the cooler, submerged in the water. To make doubly sure and make it keep longer, freeze it solid at home, then place in a zip top bag to keep it from getting ‘watered’ or in one of those Rubbermaid ‘take alongs’ (storage containers), they seal the water out and keep the meat inside cool and dry. You can cook chicken breast pieces in an aluminium foil pack with vegetables and seasonings included. Potatoes do well cooked that way, too, although they do take a while, sweet potato seems quicker.

Oh and remember, aluminium foil is your friend, as is a good set of grill thongs and a mitt 😉

imageWild Blue berries along the hiking route

Serves 4

Breakfast:

We decided to go with an omelette with spinach and feta for sustenance and flavor. I cooked these over a camp stove, not the open fire. And it ended up being easier to make one at a time since the pan i have, makes it hard to put more than 3 eggs on at a clip and still have it cook through. Wasn’t a problem at all since other really only takes minutes to cook.

Basic Spinach Omelette:

  • 12 eggs (3 per person)
  • Spinach ( about 2 hand full per person)
  • 4 oz Feta Cheese, cut into 1/2″ cubes

Variations on a theme:

  • Use Swiss Chard or Kale, instead of Spinach
  • Add some deli ham, or prosciutto for additional flavor
  • Use cheddar, Fontina or Swiss instead of Feta

imagewith Fontina and Prosciutto

This one’s with Swiss Chard from the garden & Ham

Desert:

© 2012 SimpleHealthyHomemade

Grilled bananas with chocolate

image

 And for an easy camping desert, bananas with chocolate:

  • Cut in to the top of the banana, making sure not to cut through.
  • Use 1 row of fine quality semi dark or milk chocolate (Lindt is excellent) and push the single pieces into the top of the banana
  • Wrap in a rectangle of aluminium foil: Place banana in the center, flip the foil up on both sides and fold down twice, then fold in ends
  • Place on a hot grill until bananas are tender and yield gently to the touch, about 10 to 15 minutes (depends on the heat of the embers)
  • Carefully open packets, and eat with a spoon. Careful very hot!!

Waking up to sunlight…

image…and some lovely scenery from the kayak cockpit!

image

Looking up through the rocks at where we will end up, after the uphill hike. And of course I had brought some Trail mix Granola Bars!

imageSunset Rock, overlooking North South Lake. You can’t see it from here, (I know this from the map) out of sight, off to the left there, are the Kaaterskill Falls, the lake water drains over the rocks into a fantastic multi level waterfall

© 2012 SimpleHealthyHomemade

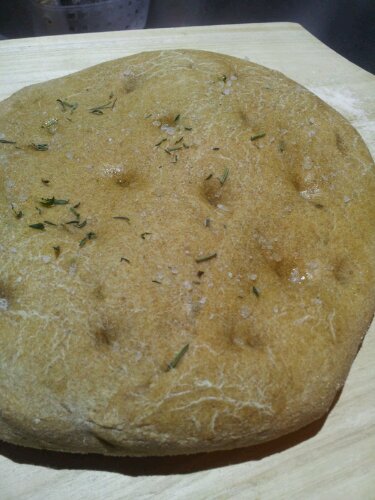
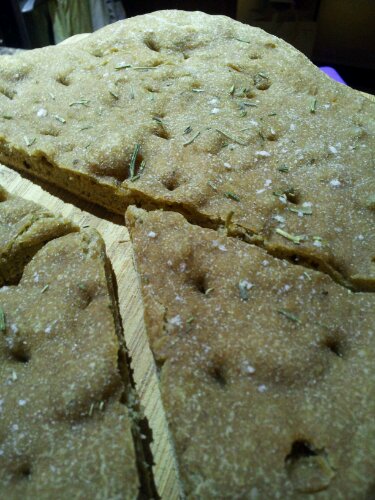
Grilled Rosemary Focaccia

image

Craving bread is what I remember when I first moved to the United States, the kind of bread I had taken for granted back home. I seems that when you’ve only lived in a very limited part of the world, you automatically assume, everyone in the western world does things the same way, including breakfast. I had been to Asia and knew that in some eastern cultures anything goes for breakfast (Remind me to write about this awesome rice soup I had in Thailand sometime), but I guess I somehow figured that the western cultures, namely central Europe and the US, where very similar and it came as a surprise to find that in my new home, no, there was no bread to be found. 🙁

In Switzerland, a normal breakfast is bread. Slices of crusty bread, with butter, meat, cheese or homemade jams, or delicate buns or croissants. Depending on the day of week, the region, your mood or the time of year there are countless variations on the theme of bread (oh yeah, there are some awesome pastries too). And when I first moved here, I could not handle eggs for breakfast, just couldn’t stomach it in the morning and I was looking for bread. By now, luckily there are bakeries that offer ‘artisan’ breads and it’s possible to get similar items in many grocery stores across the country, but for the first few years (and I did not live in a large metropolis), it was me trying to recreate breads to glimpse a taste of home. Can you tell, I was homesick sometime? 🙂 Well that’s a long time ago and I have successfully recreated and made many breads, using available ingredients to make up for what I was told was not available quite the same way. But I digress, all I really wanted to say here was this, I love bread! Fresh baked, crusty bread; and the smell of it, it just makes me happy.

image

So summer can be a bit of a trying time, when it stays hot for months here and heating up the house by using the oven to make bread just seems silly. So what is a bread loving girl supposed to do? Take it outside, that’s right! Now, I have played with the thought of building a stone oven out back, but due to space constraints (I want to keep my little raised bed garden, after all) lack of knowledge and mainly proper mason skills, I have had to abandon that thought, along with the flock of backyard chickens… for now.

Next best thing? Use the grill! I have had this pizza stone sitting around. I had used it sometimes to bake bread on, but after some internet research felt I could give this a whirl. After all, if the darn thing breaks, I thought, I just end up with more space in my cabinets. But after three or four tries, it’s still whole. Preheating gently seems to do the trick 🙂

This makes one round, flat loaf of about 10″ diameter. Keeps me happy for three to four days, that’s saying you could make it as a bread to go with a dinner for four.

image

Ingredients

  • 1/4 up sourdough starter from the fridge
  • 3/4 cup warm water
  • 1 cup bread flour
  • 1 cup spelt flour
  • 1/2 tsp sea salt
  • 1 tbsp fresh rosemary, cut finely
  • coarse sea salt for sprinkling on top

imageDirections

  1. In  a large bowl, stir the sourdough with 1/2 cup warm water
  2. Add the flours, salt, rosemary and remainder of the water (If you are using all purpose flour, 1/2 cup total might be enough) mix together and knead until a smooth dough forms. Form into a ball and let rest in warm spot until doubled in size.*
  3. Shape into a flat round, about 1″ thick, place on a corn flour dusted pizza peel and let rest in a warm spot for another 20 minutes to half and hour before proceeding. (You want the dough to raise again after shaping)
  4. Place the pizza stone on the grill and preheat on low, indirect heat for 10 minutes.
  5. Right before baking, dimple the surface of the focaccia with your finger, brush or spray the surface with some olive oil and sprinkle with coarse sea salt and more rosemary if desired.image
  6. Slide bread off of the pizza peel onto the hot stone and cover the lid. Turn the burners under the stone on, but at low flame for 10 minutes.
  7. Then turn up the heat to medium, and bake for another 10 to 15 minutes or until the bread is done and sounds hollow when you tap the bottom of it.
  8. Remove the bread and set on a rack to cool completely before serving, (leaving the stone in place as you turn off the grill) and enjoy!

* The time for this depends on the warmth as well as the level of activity level of your sourdough. In the summer this takes about an hour, and I sometimes will place the covered bowl outside.
image© 2012 SimpleHealthyHomemade

Edith’s Quinoa Pilaf

image

Once upon a time, it was during a rather difficult time in my life, my dear friend Edith introduced me to quinoa. At a time when I really needed good friends, she was more supportive than I could ever have wished for a friend to be. We all have times where we have to lean on others to be our strength, depend on others or where we just need to have someone’s support and company. I spent some long evenings over at her place and on one of those occasions, I helped her whip up a simple Pilaf that can be used as a vegetarian main or as a side.

imageHere a meal made possible by friends 🙂 Quinoa Pilaf and grilled buck tenderloin from my friends Rebecca & Marc
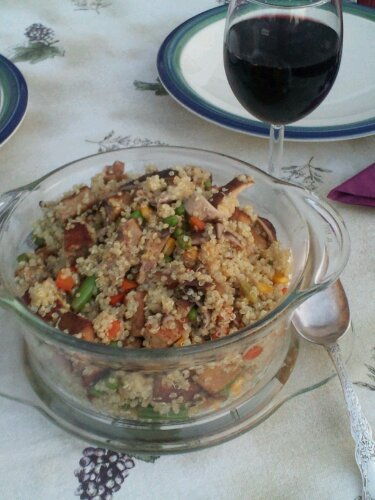
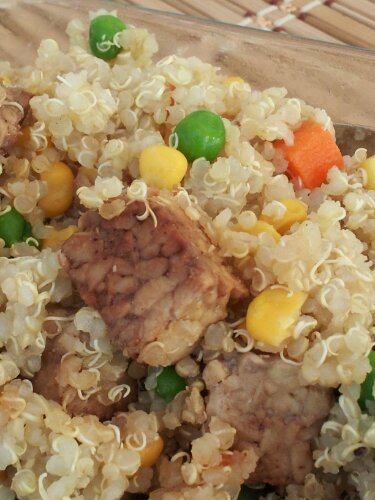
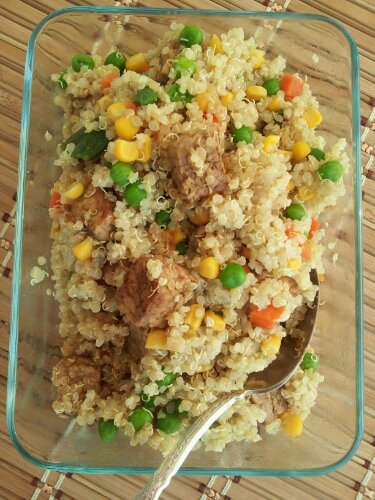
I am not claiming that this is exactly the way she made it, since who knows how well my memory serves me, and I have made various versions over the years, but to this day, anytime I make this dish, I say a little prayer of thanks to her and it warms my heart to know that I am blessed enough to have good friends that are there for me, when I need it most 🙂

image

Ingredients

  • 1 cup quinoa (uncooked)
  • 2 cups shiitake mushrooms
  • 1/2 lb (1/2 pack) frozen mixed vegetables (peas, corn, baby lima and green beans)
  • 1 pack Tempeh, cut into cubes
  • 3-4 tbsp Shoyu or Tamari (Soy Sauce)
  • 1/2 cup water
  • coconut oil for cooking

image

Directions

  1. Carefully rinse the quinoa in several changes of cold water to remove the saponins. (If you have a really fine meshed sieve, you can use that).
  2. Place in a medium sauce pan and cover with water by 3/4″ (You are adding about 2 cups water), bring to a boil on medium, then cover and simmer until done and most of the water is absorbed.
  3. In the meantime, place tempeh in a dish and drizzle with Shoyu or Tamari Soy Sauce, set aside to marinade.
  4. Cut the stems off of the mushrooms, then slice the mushroom caps, set aside.
  5. Heat some coconut oil in a big skillet, and add the tempeh pieces, (don’t pour the soy sauce in, pick the pieces out) reserve the soy sauce.
  6. Cook until browned on one side, then flip each piece and cook on the other side.
  7. Add the mushrooms, soy sauce, 1/2 cup water to the skillet and cook until the mushrooms are tender.
  8. Add the frozen vegetables and cook until heated through. Combine the cooked quinoa with the mushroom and vegetables, and serve.

image Here’s to good friends and those unexpected people that are there for you an of course the good food that connects us all!
© 2012 SimpleHealthyHomemade

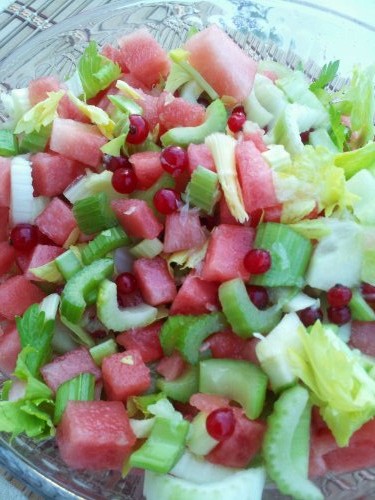
Celery Watermelon Salad

image

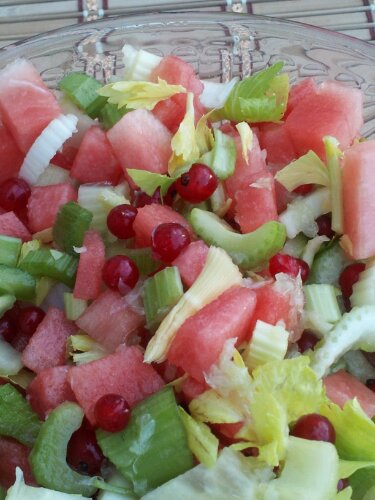
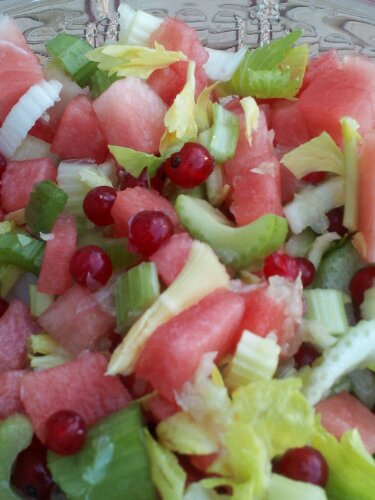
It’s really pretty simple: When it’s hot we want cool foods (Ice cream and fruits anyone?) and when it’s cold out we crave hot. It may not be scientifically proven, but there is truth to needing balance. In everything…but since here we are talking a bit more specific about food and eating, I wanna share a something that I often share with my nutrition and personal training clients. Even if you take the healthiest food on earth, but you eat 17 times more than necessary you will still not loose fat. Balance is the key, and everything in moderation. Same is true for the indulgences in life, for depriving yourself always does not send a healthy message to your brain or body. And as Paracelsus already knew that ‘the dose makes the poison’ But no worries, with this recipe here, you’re pretty safe on the scale of healthfulness. So dig in, have some of this cooling summertime salad!

image

Since my red currant bushes did not grace me with a whole lotta berries this year, and I won;t have enough to make my grandma’s ‘Trübeli Kueche” I had to find another home for my backyard bounty. And a salad seemed as good a place as any. (I know I could have just eaten them with cream poured over top, like my Mom used to serve berries for desert sometime)

imageYup, who wants to cook and heat up the house more when it is blistering outside?

Ingredients

  • 5-6 stalks (the individual pieces, not sure on the official term, even googled it) celery, diced small
  • 2 cups seedless watermelon, diced into 1/2″ peices
  • 1/4 cucumber, cut into small chunks (if using a pickling cucumber, use half)
  • 2 limes, fresh juice only
  • (optional: 1/2 cup red currants)

imageDirections

  1. Toss all the ingredients gently in a large bowl and serve.
  2. Yes, it’s that simple 🙂

© 2012 SimpleHealthyHomemade

Whole Wheat Animal Crackers

imageYes, I know you saw it coming, I mean after the Berry Ice populated with Lions and Giraffes (Ostrich looking, if you ask my boyfriend, but then again, he’s no biologist 😉 there was no question that the rest of the animal kingdom would soon show up on my blog as well. What can I say, they are just too darn cute!

image

I had searched for the perfect cutters for this recipe for  a while, square was just not an option, but plain old animal crackers from the store didn’t cut it either. Do you get that craving for crunchy as well? And I can;t shut it up with a crunchy apple, no it’s a different crunch I am after. So I set out to revamp and recreate animal crackers, surely there would be a better version one could come up with than the store  sold ones. Starting with a lot less sugar than any commercial product would contain, I added ground almond and flax meal to boost the nutrient and flavor and whole wheat to give them some substance.

image

Animal crackers on Very Merry Black Berry Ice are the best!

image

Ingredients

  • 2 cups stone ground whole wheat pastry flour
  • 1/2 cup almond meal/ground almonds
  • 1/2 cup palm sugar (dry) or rapadura
  • 1/4 cup millet or oat flower
  • 1/4 cup half & half (or cream or milk)
  • 1/4 cup flax meal
  • 2 lg eggs
  • 1/2 tsp vanilla extract
  • 1 tsp baking powder
  • 1/4 cup coconut oil
  • 1/2 tsp salt

Directions

  1. Mix dry ingredients in a bowl, set aside.
  2. Gently soften or melt coconut oil, if it is hard. Mix in the vanilla, eggs and 1/4 cup half and half.  Add the wet ingredients to the dry and mix until a  cohesive dough forms. If it is too crumbly, add a little more half & half.
  3. Form dough into ball, cover and refrigerate for at least 2 hours or until dough isn’t soft anymore.
  4. Preheat oven to 350ºF.
  5. Roll out to 1/4″ thickness, press the cookie cutters into the dough (mine have a plunger to stamp the design onto the cookies after they are cut) and place the cookies onto a lined cookie sheet.
  6. Bake for 10-13 minutes, or until slightly browned on the bottom
  7. Let cool on rack before devouring them all 🙂

image

© 2012 SimpleHealthyHomemade

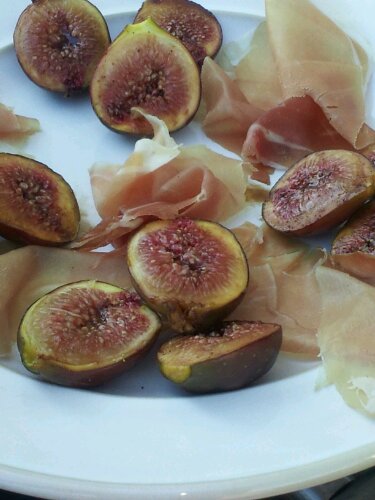
Balsamic Roasted Figs with Prosciutto

image

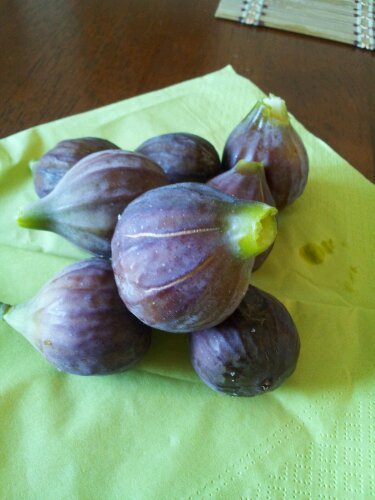
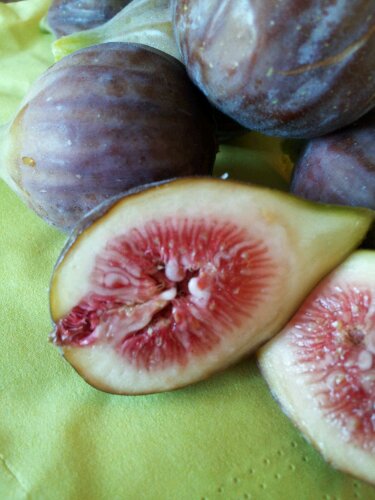
Few things spell summer like ripe figs on my tree. Undemandingly it lives in its, admittedly pretty big pot, on my deck in the summer and indoors in the winter, due to me not knowing if it would actually make it outdoors in the ground, or not. So rather than taking my chances, I lift weight so I can move the fig tree 😉 There you have it, the true reason for me to stay in shape. Well, thanks to the recent heat waves, we have been able to enjoy a handful of figs a day for the past week or so!

Summer cooking for me means lots of meals outside, fresh and simple ingredients and since I do want to make most of the beautiful weather, I don’t want to spend lots of time in the kitchen. It’s all about fresh, fast and easy for me these days! Of course without sacrificing taste!

imagefresh from the tree!

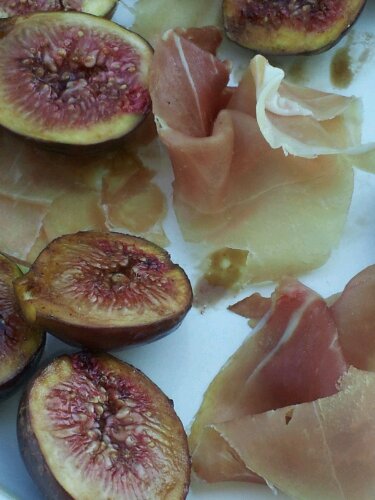
Roasting and adding balsamic vinegar intensifies the sweet taste and the bright flavors of the balsamic balance nicely with the caramelized fig juices; add something salty and you’re set!

image

So here is a quick and easy appetizers that is going to wow everyone at your next gathering but is quick enough to whip up for a surprise visit or even just a week night meal

image

Ingredients

  • Fresh Figs, cut in half as shown (I used about two hand full for two people, or about 10 medium size)
  • 2 tablespoons balsamic vinegar
  • freshly ground pepper and sea salt to taste
  • 1-2 slices Prosciutto (get the real stuff, from Italy (Parma or San Danielle is what I generally use), US domestic Prosciutto is cheaper, but super extremely salty. Since you only need a little, this is not the place to be stingy.

image

Directions

  1. Slice figs in half.
  2. Drizzle with balsamic vinegar
  3. Grind fresh pepper overtop and sprinkle with a little sea salt
  4. Place on a lined baking sheet and place in the toaster oven. Toast until hot and just starting to brown (it took a little under 5 minutes for me), serve with ripped pieces of Prosciutto.

image

© 2012 SimpleHealthyHomemade

Granola Power Bars

image

Hiking or kayaking was on my list for the past weekend, but the weather has been a little , shall we say, un-cooperative. Since last night it literally thunderstorms every hour. So I have been limited to moving out onto the deck with book, cookie and tea, then back in, then back out with juice and book, then back in…  My poor kitty ‘Einstein’ is terrified of thunderstorms. He runs into the basement and hides. He’s been there pretty much all day 🙁 saw him once, I think I will take some water and food down to his little corner… Poor fellow.

image

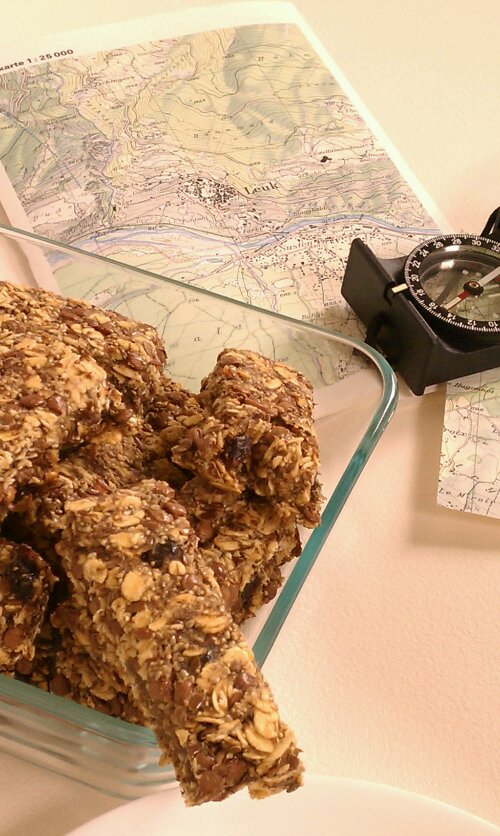
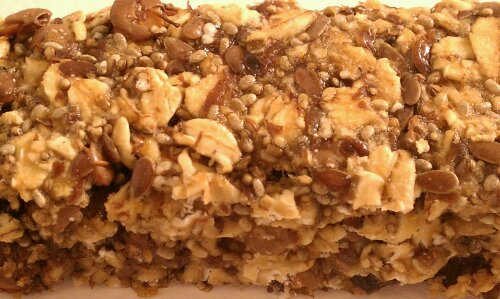
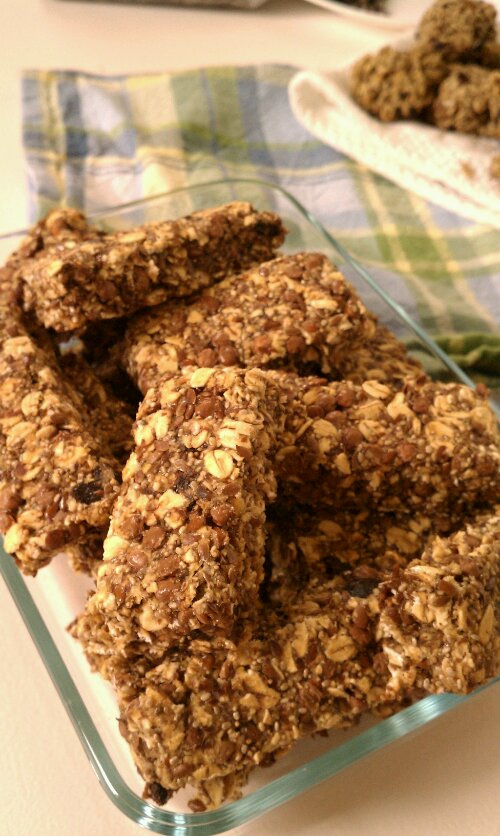
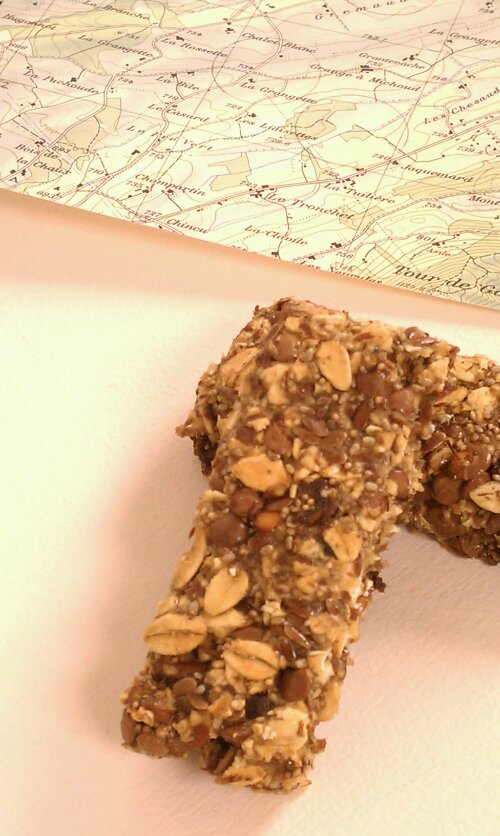
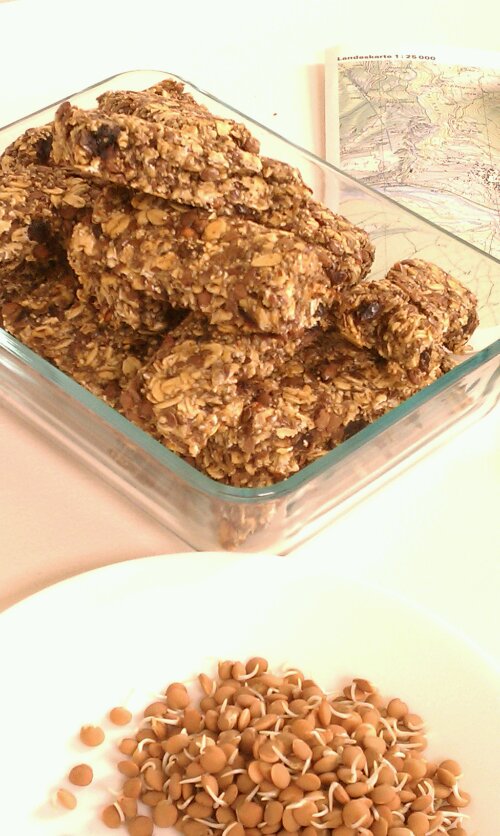
But on the upside of things, being limited to close to the house, I had plenty of time coming up with something that would be yummy (criteria number one), give me some sustained energy (i.e. complex carbs) and would be portable enough to take along, you know on hikes and such. Like a power bar. And since I really, really liked the granola I made recently (and this one), I started there with my ingredient list… And as an added bonus I supplemented with sprouted lentils for protein. To try lentils was an idea I got from Leanne’s Beach Bum Trail Mix Doesn’t that just look awesome? Heck, if they can go into trail mix, imagine how they would be sprouted and put into bars!

image

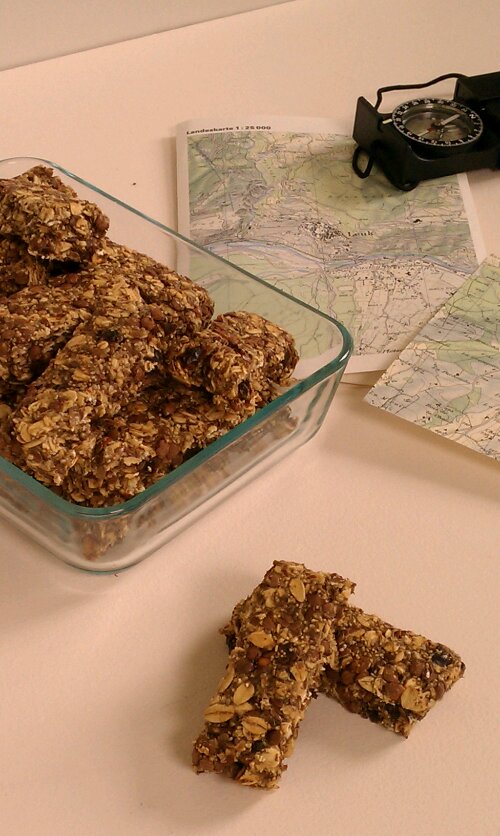
Ready for outdoor adventures! If only it stopped pouring…

imageEven my boyfriend, who’s not all that concerned with healthy eating, loves these!
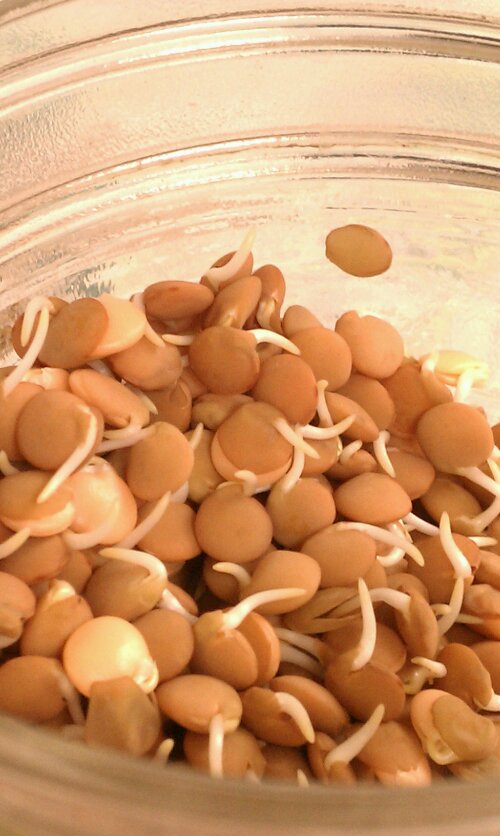
imageSprouted Lentils, before drying

Ingredients

  • 2 cups old fashioned rolled oats
  • 1/2 cup popped amaranth grain (buy or do it yourself)
  • 3/4 cup sprouted (and dried*) red lentils
  • 3/4 cup date pieces or chopped dates
  • 1/2 cup sweet brown rice flour
  • 1/4 cup flax seed
  • 1/4 cup flax meal
  • 1/4 cup chia seeds
  • 1/4 cup apple sauce
  • 1 cup water
  • 1/4 cup peanut butter
  • 1/4 cup rice syrup
  • 1/4 cup honey or agave nectar

* to dry the lentils after sprouting, preheat oven to 350F and place sprouted lentils out on a baking sheet. Cook for about 25 minutes, until crunchy. imageOk, so I got a bit picture happy. Did I mention, it was raining all day?

Directions

  1. Mix oats through brown rice flour in a large bowl, set aside
  2. Mix flax seed, flax meal, chia seed, water and apple sauce, let rest 20 minutes. Then add the sweeteners and the peanut butter and mix until well combined.
  3. Add the wet mixture to the dry ingredients in the bowl and stir until incorporated.
  4. Spread on a lined baking sheet (a US quarter sheet or half of a bigger cookie sheet works well) until about 3/4″ thick
  5. Bake at 350 for 60 to 65 minutes, checking and turning the sheet after 40. Then turn oven off and leave them in the oven overnight.
  6. In the morning, cut into rectangles roughly 1″x 4″, makes about 24

imageI used one side of a US half sheet size. Spread it out, it won’t go anywhere. And makes for some odd shaped bars at the end, you know, the ones YOU have to eat right away, to make it neat 😉
imageCopyright © 2012 Simple Healthy Homemade. All rights reserved