Fish Wellington

image

I have been eyeing these recipes for Beef Wellington for months now, but never had an occasion to try myself at it. But since this was going to be a Friday meal, fish seemed like the more appropriate (and quite honestly also quicker to prepare) route to take, and boy was it a good choice!

It looks so fancy and tastes super yummy! Shhht! don’t tell your guests just how easy it was to make! Just a heads up folks, this is not going to be an exact recipe, you might or might not use all the dough, depending on the size of the fish fillet. It took me a while to get this post done, because frankly, I don’t really know how much fish it was 🙁 I had three fillets, one long and narrow, but quite thick and the other two a bit more ‘regular restaurant piece of fish’ shaped. My best guess is that is was about two pounds? I am going backwards off of the half pound per person  It easily feeds four, if you want to make less, you only need one sheet of puff pastry. I froze the rest, since there were two people eating but there was about half leftover. Will update on whether or not baked puff pasty freezes well, once I try it out.

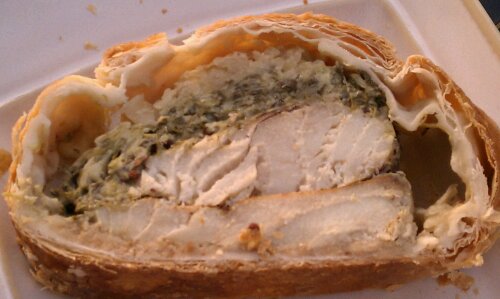
imageWhat it looked like coming out of the oven…

Fish Wellington, fancy was of saying: Fish in Puff Pastry, either way it is totally worth the time hunting the frozen food aisles for puff pastry. In Switzerland you can get this fresh in the dairy section, so it took me a few years of looking, hoping and experimenting with making my own until I found it, by chance sitting there in the frozen aisle. You can make your own and I do on occasion since it tastes soooo fantastic. And yes, there are versions that use the entire GDP of a small developing nation in butter, but there are also versions using various other dairy products that are not quite as ridiculously high in fat. Although I have to say to make croissants, the butter is a must. But back to our subject… Fish. For this recipe, you could most likely use salmon, (adjust cooking time according), haven’t had a chance to try that, so if you do, let me know how it works out!

image

Ingredients

  • 1 pack frozen puff pastry (you might not use all)
  • 2 lbs (about 3 pc) firm white flesh fish fillets such as pollock, cod or similar
  • 1 cup Spinach Artichoke Dip
  • 1 sweet onion
  • 3 tbsp bread crumbs
  • 1 egg, lightly beaten
  • 2-3 tbsp whole grain Dijon mustard (such as Maille à l’ancienne)

image

Directions

  1. Chop onions and cook over medium until translucent, then turn up to medium-high and cook until starting to brown. Set aside
  2. Pad fish dry with paper towel. Salt and pepper fillets all over, set aside
  3. Roll out pastry on a floured surface, sprinkle the center with bread crumbs then place the fillets on top. This depends on the shape and size of your fillets. If they have thinner and thicker ends, overlap the thin ends, and cut the third fillet in half, place on top. (What you are trying to do is make the fish layer uniformly thick, so it will all cook at the same time)
  4. Spread the mustard on top of the fish, then top with 1 cup Spinach Artichoke Dip, and layer all with the cooked onion.
  5. Brush edges of pastry with egg, the top with the second sheet of puff pastry, crimp edges using the tines of a fork to seal. (If your parcel is rather small after layering the fish, just fold up the edges of the pastry and crimp on top, or top with just part of a second sheet making sure you seal all the seams
  6. Preheat oven to 425ÂșF.
  7. Brush top of pastry with egg, cut several vents in the top to allow steam to escape while baking.
  8. Bake 30-40 minutes or until fish is cooked and contents are bubbly.

image

Copyright © 2012 Simple Healthy Homemade. All rights reserved

Mango Cheesecake

image

All Mangoes are not created equal.

What I am trying to get at here is, this is a very seasonal dish, not all mangoes will be up for the task at hand, and the kind you need for this cheesecake are not always readily available. First, the common grocery store variety, you know the big green and red ones are NOT going to work. I know. I speak from experience, I had to find out the hard way, as I happily agreed to bring a cheesecake to a good friend’s birthday party. Even blending cannot get rid of the stringy fibers inside that fruit and unless you’re a cat and you don’t mind getting hair between your teeth or you like getting hairballs…(And juuust on the off chance that you are, I bet your dinner guests might not )

The Mighty Mango, an infographic← Just to give you an idea, the Mango varieties out there are in the hundreds, if not thousands. Over 500 varieties are known in India, the largest producer of mango in the world.

Okay, so now that we know what not to do, let’s get to what you do need 😉 There’s a variety called Champagne or Ataulfo Mango, it’s smaller, flatter and oblong in shape and yellow. Indian grocers might be a good source, they also carry a shortcut item I’ll cover a bit later here. If you live in other parts of the world, you might be lucky and get your fingers on any number of varieties of tasty mangoes that would work, but in the US there seems to be not that much choice. So after you got yourself the perfect mango to make the cake, you will need to start the day before you want to eat this, since it requires to get chilled and set in the fridge overnight.

image

Ingredients

Crust:

  • 1 1/2 cups graham cracker crumbs
  • 2 tbsp sugar
  • 3/4 stick unsalted butter, melted

Filling:

  • 3 packets of cream cheese (8oz each), softened and brought to room temperature
  • 1/2 cup sugar*
  • 4 large eggs
  • 1 tsp vanilla extract
  • 2 cups pureed mango (from 4-5 Champagne Mangoes)*

*lazy version/or when the proper mango cannot be found: Get Kesar Mango pulp from an Indian Grocer, omit the sugar in the filling, since the canned Mango pulp is sweetened already. Works great and is less messy. Get 1 mango to decorate the top of the cake

Directions

  • Preheat oven to 325°F.
  • Butter a 9″ Ø Spring form pan.
  • To make the crust,  stir together crumbs and the 2 tbsp sugar. Add the melted butter and mix until evenly moistened. Then press crumb mixture into bottom of prepared pan (only bottom, not up the sides)

imageMake sure you pack the crumb crust down firmly. Push progressively more as the crust starts to hold together

  • Bake until set, 12 minutes, then cool completely
  • For filling, peel and chop mango, then blend until smooth
  • (If you turned off the oven and did this in two steps, preheat the oven to 325°F again.)
  • Mix softened cream cheese, sugar and vanilla in a large bowl until completely creamy and no little chunks remain.
  • Add eggs one at a time, beat well after each addition.
  • Add the mango puree, beat until well blended, then pour filling over crust into springform. Wrap bottom of springform pan in a layer of aluminum foil. Then bake until the edges are golden and puffed and the cake is set (it should only move very slightly when the pan is shaken gently, if the whole thing jiggles, it’s not set yet) about 1 hour and 25 minutes
  • Cool cake one hour. Refrigerate uncovered overnight.
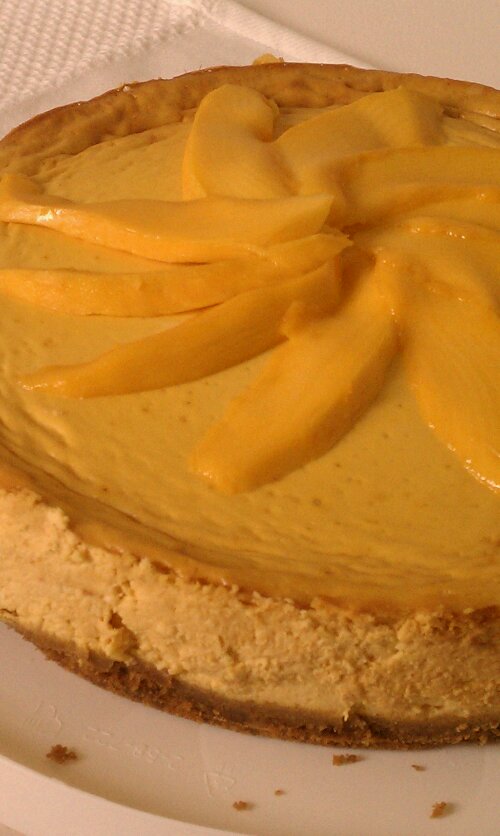
  • Before serving, run a sharp thin knife around the edges of the pan to loosen cake. Remove ring. Transfer cake to serving dish and garnish with additional sliced magoes

Copyright © 2012 Simple Healthy Homemade. All rights reserved

Sourdough Starter

Making your own Sourdough Starter

image

My starter when it was still a baby, just getting some little bubbles…

I have been on a mission to recreate one of my favorite breads of all times: Walliser Brot! It’s a dark dense 100% rye bread from Switzerland. Let me finish before you say, I don’t like rye bread: I don’t like any rye bread except this one myself 🙂 What is called Rye bread here is like Arizona compared to, I don’t know, Alaska, yes, that far apart. Most bread labeled rye in this part of the world contains some rye flour, lots of regular wheat flour and the part I think most people don’t appreciate: Carraway seeds. The one I long for does have none of that going on.

Well step number one in the recreation process is to get my hands on a sourdough starter, and not just any sourdough starter, but a Rye Sourdough starter.

Why not just use bakers yeast from the store? Well first, since ‘Walliser’ Bread (from the Swiss Kanton Wallis/Valais), where the river RhĂŽne has its source technically now has an AOC (from controlled origin, kinda like Champagne can only be from the Champagne region in France hence we have Prosecco and terms like Sparkling Wine, Scotch from Scotland, etc) and the technical details advise it has to be 100% Rye, and to be made with Sourdough, and can only be called that if the Rye was grown in Valais (well, total fail on that one, for sure, but I am going to try my best to follow the rest, maybe without actually, officially calling it Walliser Brot, since as we now know, that would not be appropriate 😉

Secondly, Sourdough, is fascinating, and once you have it started much cheaper than buying yeast over and over, keeps the bread fresher and more moist for longer and due to the lactic acid that is produced during fermentation that bread won’t go stale or grow moldy nearly as quickly as yeast bread. It makes a great easy care pet, takes only about as much care as a plant once you got it well fed and going strong.

Below are some quotes I found that give a bit more detail on the health benefits of making bread with your own sourdough starter. You can make one, buy one or you can adopt one from a friend, that has one in the fridge.

“The history of bread making is a good example of the industrialization and standardization of a technique that was formerly empiric
.It was simpler to replace natural leaven with brewer’s yeast. There are numerous practical advantages: the fermentation is more regular, more rapid, and the bread rises better. But the fermentation becomes mainly an alcoholic fermentation and the acidification is greatly lessened. The bread is less digestible, less tasty and spoils more easily”         Claude Aubert Les Aliments Fermentes Traditionnels

“Baking with natural leaven is in harmony with nature and maintains the integrity and nutrition of the cereal grains used
 The process helps to increase and reinforce our body’s absorption of the cereal’s nutrients. Unlike yeasted bread that diminished, even destroy’s much of the grain’s nutritional value, naturally leavened bread does not stale and, as it ages, maintains its original moisture much longer. A Lot of that information was known pragmatically for centuries; and thus when yeast was first introduced in France at the court of Louis XIV in March 1668, because at that time the scientists already knew that the use of yeast would imperil the people’s health, it was strongly rejected. Today, yeast is used almost universally, without any testing; and the recent scientific evidence and clinical findings are confirming that ancient taboos with biochemical and bioelectronic valid proofs that wholly support that age-old common sense decision”.              Jacques DeLangre

Essentially you are propagating a living organism, bacteria and wild yeast that feed on the sugars found in the flour, giving off gas as they do so, hence the bubbles that leaven the bread. Since it is alive, you have to feed your new pet(s), but the nice thing is, they do everything slower at lower temperatures. So once established, you can keep it in the fridge and take it out to feed once every couple of days, once a week at the minimum.

The King Arthur Flour Website has some great info on how to revive a neglected starter, de-sour one that has gotten too sour (discard most and feed 2 cups flour, 1 1/2 cups water) and I think they also sell one (not rye though)

There are many recipe’s for this out there, and some make it sound like it is super complicated, also a lot of instructions have you discard half of the starter at every ‘feeding’ which I think is just wasteful.  I had a wheat sourdough that I ‘made’ at some point and I remember it took a while to get it going, but the one I made with rye, was up and ready in no time. Apparently rye ferments more readily. But there is luck involved and it might not always work, depending on the organism that lie dormant on the grain or happen to float through the air at the time. Time of year, temperature, all those variables come into play.

So let’s get started:

You will need: Whole grain, unbromated, unbleached Rye flour (you could use pumpernickel flour for some of the feedings), Water, Glass container to keep the starter, something to stir, tape and pen to mark the level so you can check how much it came up

Day 1:

    • 1/2 cup whole grain rye flour (or if you have a grain mill, grind some fresh)
    • 1/2 cup warm filtered water (try to avoid chlorine if you can)
    • Stir the flour and water together in a the glass container, cover loosely with a lid or plastic wrap and set aside (room temp!)

Day 2:

    • add 1/4 cup Rye flour, 1/4 cup luke warm water, place the tape on the outside of the glass, make a line where the ‘dough’ ends so you can check if anything is happening yet (on mine it did start to make bubbles)

Day 3 & after:

    • add another 1/4 cup rye flour, and 1/4 cup water, if nothing much happened (If it got very bubbly and then fell again, add 1/2 cup flour/1/4 cup water, your pet is hungry!) Remove the tape and re-position so the line marks the dough level again.

Your goal is to get the starter to double in size, with my starter, that now takes about 6 hours. So keep feeding once a day until the starter gets really bubbly. If you run out of space, remove half of the starter, discard and then feed flour to the rest. And if after 6 days still nothing happened, you might have to call it quits and try again at a later time, or ask around, someone might have one, they most likely will be able to give you a piece you can feed into your own starter.

imageActive and bubbly!

From the King Arthur Website: on Storing your sourdough starter:

Storing

Refrigerating – Once your sourdough starter is safely in the refrigerator, it will need a little attention, although once it’s cold and relatively dormant, it can survive quite a long time between “feedings.” It is certainly not as demanding as children or more traditional pets, but it won’t just sit for months on end like a packet of commercially dried yeast either.

Freezing – You may be able to ignore your starter for a month or even much longer, but if you know you’re going to be away for a time, you can store it, unlike children or pets, in the freezer. You may want to transfer it to a plastic container first since it will expand as it freezes.

When you are ready to use it again, give it a day to revive, feed it a good meal, give it another day to build up an armada of fresh, new wild siblings and it will be ready to go to work.

Drying – An alternative storage method is to dry your starter by spreading it out on a piece of heavy plastic wrap or waxed paper. Once it’s dry, crumble it up and put it in an airtight container. Store it someplace cool or, to be safe, in the freezer.

To reactivate the culture, place the dried starter in a mixture of flour and water as described in the first section. To help the dried chunks dissolve, you can grind them into smaller particles with a hand cranked grinder, a blender or a food processor before you add them to the flour/water mixture.

Walliser Roggenbrot (in French: Pain au Seigle) with the traditional cracks on the surface. Let’s see how well I will do…

Copyright © 2012 Simple Healthy Homemade. All rights reserved

Raspberry White Chocolate Oatmeal Quick ‘Cake’

image

This chewy little treat can be eaten as much as a quick breakfast, on those gray and cold days, where the snooze button is your BFF and your feet are deadly afraid of the cold floor outside the cozy covers. You could even try to tell yourself it is all healthy by serving it topped with some greek yogurt. Or you can just face the facts that everyone needs a treat sometime, morning or night, and enjoy it as a quick desert or snack bake anytime you need a ‘cheer me up’.  Very similar to the Snack Bakes shown here, it uses a ripe banana for sweetness, but I am splurging and adding white chocolate chips and some frozen raspberries that miraculously turned up in my freezer today 🙂 Isn’t is great when you find things you didn’t know you had? Like the $20 bill in the pocket of your winter coat when you take it out of ‘summernation’ (yes, I just made that up) in October

imageBecause heart-shaped things make me happy 🙂

Makes 2

Ingredients

  • 1/2 really ripe banana
  • 1/2 cup rolled oats*
  • 2 tbsp white chocolate chips,
  • 2 tbsp frozen raspberries * you can also use rolled quinoa or other rolled grains
  1. Grease 2 ramekins or other heat proof little bowls/forms
  2. In a larger bowl, mash the ripe banana with a fork, until it doesn’t look dry anymore.
  3.  Mix in the rolled oats, then add the chocolate chips and the frozen raspberries.
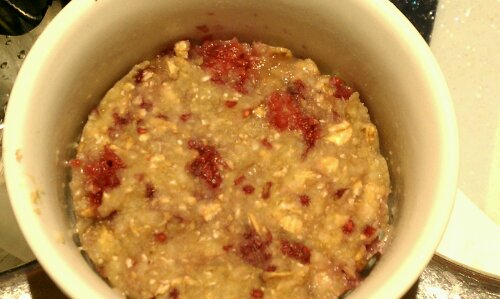
  4.  Divide among prepared ramekins, and microwave for 3-4 minutes, depending on the power of your device, until the top looks no longer moist and the sides pull away from the ramekin.  Like in the picture below. (Mine usually take 3 minutes)
  5. Let cool down before quickly eating all enjoying, whoever you are trying to hide these from will smell them anyway 😉

image

You can flip it over on a plate to serve or just eat with a spoon right out of the bowl after you have given it enough time to cool down a bit.

My ‘sweet seduction’ speed cooking contribution is ready in under 10 minutes! That should be an incentive to enjoy life and have desert, even after a long day or week!

Blog-Event LXXV - Speed-Cooking (Einsendeschluss 15. MĂ€rz 2012)

This is my contribution to a blog event over in the German speaking world of food blogs. Every submission has to be prepared in under 30 minutes, or the time it takes the average pizza delivery to get to you. Here is the whole list of all the goodies that can be made super quick! This sweet treat is ultra quick, and I am hoping it will sweeten up many a tired after work meal!

Nachwort auf Deutsch: Leider hatte ich keine Zeit den ganzen Beitrag auf Deutsch zu = Übersetzen, hier nur kurz: Oatmeal/Rolled Oats= Haferflocken, eine ‘1/2 cup/ ist etwa ein Deciliter, white chocolate chips= weisse Schokolade, in kleine StĂŒcke oder WĂŒrfelchen geschnitten. Ich hoffe das diese kleine sĂŒsse VerfĂŒhrung hier manchen langen Tag ertrĂ€glicher macht, wenigstens im RĂŒckblick oder aber da man schlauerweise geplant hat, von wegen transportfĂ€hig und so 🙂 Einfach einpacken und mitnehmen!

Copyright © 2012 Simple Healthy Homemade. All rights reserved

Nut Filled Braid

image

Turn your kitchen into a European Bakery. This ‘bread’ would traditionally be served as a snack with coffee, but of course you could have it for breakfast as well. I have also experimented with slicing and freezing parts of this for later, in convenient portion sizes, just defrost in the microwave and voilĂ ! instant homemade treat to the envy of your surprise guests. Or of course just that afternoon coffee snack for yourself 🙂 Looks pretty AND tastes great!

imageDough rolled out ‘rectangular’, with filling. And roll it up…

imagecut with a sharp knife…

image... twist and set into your prepared cake pan

imageApples and Nuts and just a little sugar turn this bread into a breakfast anytime treat!

Ingredients

    • 2 1/2 cups unbleached, all purpose flour
    • 1/2 tsp salt
    • 2 tbsp coconut sugar, sucanat or sugar
    • 1/2 cup milk
    • 1/2 stick butter
    • 1 egg
    • 1 1/2 tsp instant yeast
    • 1 1/2 cups ground nuts ( I usually use almonds or hazelnuts)
    • 3 tbsp sucanat or sugar
    • 1 md apple (if using the bagged kind, usually they are smaller, use two)
    • 2 tbsp lemon juice
    • 4-6 tbsp milk or cream

Directions

    1. To make the dough: In a large bowl, combine 1/2 cup flour, sugar, yeast and milk, stir until smooth. Let rest 2 hours in a warm spot until bubbly.
    2. Gently melt the butter, set aside to cool. Add remaining flour, egg, salt and cooled butter to large bowl. Stir from the middle, incorporating more and more flour, then knead the dough until smooth and elastic.
    3. Cover and place in a warm spot until doubled in size (You can also do this stage in the refrigerator overnight, it will take significantly longer for the dough to double in size)
    4. For the filing, grate the apple and add to a bowl with the ground nuts, sugar, milk or cream and lemon juice. Mix with a fork until uniformly moist (it should not be liquid)
    5. Roll out the dough into a 1/8″ thick rectangle, spread the filing on top, stopping 1″ from the edge.
    6. Roll up the dough lengthwise, then press ends to seal.
    7. Using a sharp knife, cut the roll all the way through and twist the two strands (with the cut side facing up) around each other.
    8. Place braided bread into a parchment paper lined cake form, let rest and rise for about half an hour.
    9. In the meantime, preheat the oven to 380°F.
    10. Bake for 30-40 minutes or until browned and baked through. (Tapping the bottom of the braid should sound hollow, you can also insert a tester to check if it is done)
    11. Let cool for half an hour on a cooling rack before cutting into and devouring.

image

That made me hungry, I think I will go get myself a slice or two from my freezer stash… And then on to my sourdough experiment!

Copyright © 2012 Simple Healthy Homemade. All rights reserved

Seed and Nut Cracker (grain free)

image

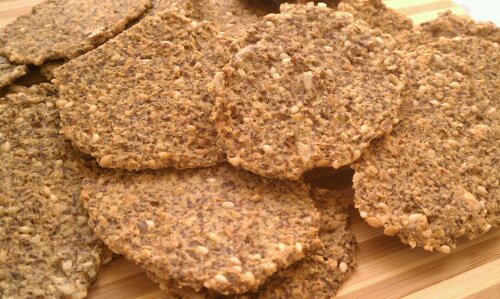
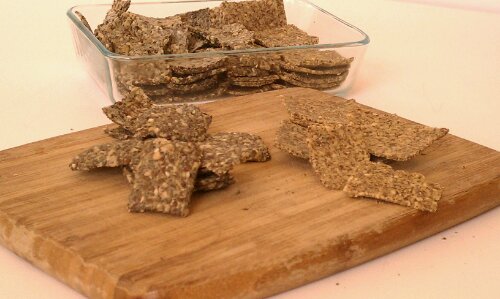
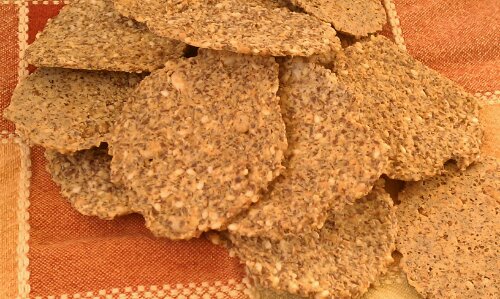
Seed or nut based crackers are yummy I daresay even addictive. But the price for a girl on a tight budget, is rather prohibitive… 🙁 So after tinkering in my kitchen (batch one and two shown here) batch 3 was the winner, hands down.

imagebatch one & two

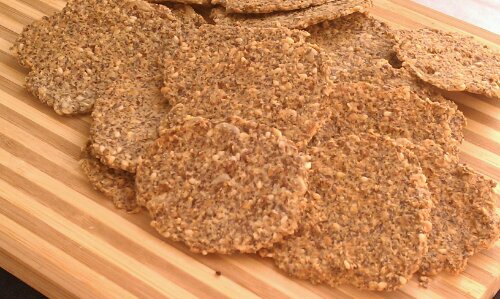
You can make them square or round, depending on your preference. Square is a bit less work, but takes a little longer to get to that perfect crunchy state. For either one, flatten or roll out on the prepared cookie sheet (preferably lined with a silicon baking mat, that’s how I made them, if you don’t have one of those, at least use baking parchment) by covering with wax paper and rolling out, then peeling the paper layer gingerly from the top.

imagethe only downside? You could always eat more than there are left…
Ingredients

  • 1/4 cup cashews
  • 3 tbsp sun flower seeds, divided
  • 1/2 cup ground flax seeds (flax meal)
  • 1/4 cup ground almonds, natural not blanched
  • 1/4 cup quinoa flakes
  • 3/4 cup water
  • 3/4 tsp sea salt
  • 1 1/2 tbsp sesame seeds
  •  1 tbsp flax seeds, whole (golden or brown)
  • 1 tbsp butter or coconut oil, melted

Directions

  1. Preheat oven to 300°F
  2. Prepare baking sheet (if you are making these round, it will make two cookie sheets) by lining it with a silicone baking mat
  3. In a blender or a mini food processor, combine the cashew and 1 tbsp sun flower seeds, blend until it forms a coarse meal
  4. Add ground almonds, flax meal, and quinoa flakes and pulse until combined
  5. Add the water and salt, blend until well mixed
  6. If you have enough space in your mini processor, add the remaining ingredients and pulse 2-3 times, until mixed but not chopped.
  7. Round: drop onto prepared cookie sheet, 1 level teaspoon at a time, distancing about 1 12/” to 2″ apart, cover with waxpaper and roll out until less than 1/8″ thick, basically as thin as you can get it.
  8. Square: Scrape or drop dough onto cookie sheet, spread out, then cover with wax paper, and roll out super thin, (less than 1/8″ thick)
  9. Bake 30 minutes in the middle of the preheated oven, or until no longer soft and pliable. then finish baking another 5 minutes on the bottom rack
  10. Let cool before crunching away!

image

Copyright © 2012 Simple Healthy Homemade. All rights reserved

Pennsylvania Dutch Fasnachts

image

Since today is ‘Mardi Gras’ the day before Ash Wednesday, traditionally the Pennsylvania Dutch (which are descendants of German and German speaking Swiss settlers to this area: Dutch comes from the German word for German: Deutsch) eat fried pastries called Fasnachts. It’s a free form donut type treat, that was traditionally made to use up the sugar and lard before Lent and fasting started. And since Judy told me all about how to recognize a real ‘Fasnacht’ and how to distinguish them from all the impostures (for one, don’t trust the ones at the grocery store, they are not real unless they are made with POTATO)

Having lived in PA, albeit not in Dutch country for the last 12 years, it is about time to have one of those. And today is the day. So I scoured the internet for recipes and came up with one that seems authentic enough to me. I decided to give it a whirl myself and see if I can’t make some that would stand up to the scrutiny of my dear ‘Dutchies’. After all, I am from Switzerland, I speak German, so… Looks like that might give me some points towards credentials to make these 😉

Recipe from: bellaonline

I did make my own adjustments, some to return the recipe to a more authentic state (like using lard instead of Crisco) others since the modern kitchen is a bit different and I often find, that older recipes need less liquid in today’s kitchen. I am guessing this might be because back in the day, most houses would be heated with wood, and wood heat is very dry, the flour people would have used would have been drier, and during the rising time, the drier air would have affected everything as well. I think next time I would use 1/2 cup less milk to start and see how that goes. In this recipe I ended up using a whole cup more flour, and even this way, the dough was very sticky and hard to manage. I ended up making Fasnachts (or Fastnachts, translates to ‘fasting night’ or more accurately here, the night before the fast/lent) from about half the dough, turning the rest into baked concoctions.

imageas you can see, the dough is very soft and cutting it into squares, was a bit of a challenge

imageafter that the pieces got to rest and rise, here ready for frying (Note: the recipe suggest to put them on wax paper, which I did. The result? The whole thing sticks, I think next time I will not use wax paper ever again. Floured cookie sheet might work better…

imagesome leftover dough pieces getting fried…

imagethe finished product, here I tossed some in sugar, left some plain. They are also delicious with cinnamon and sugar, but I hear traditionally, some folks cut them in half and butter or syrup them up. Yes, you heard right, syrup 🙂 I don’t think I’d survive that much sugar, but by all means, go try it.

image

imagethey end up pretty airy, I think the recipe could easily get away with less yeast. But they are delicious! Now off to the office to have them authenticated by the experts 😉

imageIngredients

  • 2 cups milk
  • 1 cup mashed potatoes (no salt, milk, or butter added)
  • 1/2 cup sugar + 1/2 tsp. sugar
  • 1 stick margarine, softened
  • 1 packet rapid rise yeast
  • 1/4 cup lukewarm water
  • 6-1/2 cups flour (divided, 2 cups + 4 1/2 cups)
  • 1 egg, lightly beaten
  • 1-1/2 tsp. salt
  • 1 can (3 pounds) CriscoÂź or similar vegetable shortening for frying  (to make them really traditional, you have to use lard)

Directions

To make the mashed potatoes, either peel and boil or steam, cool and then peel. Mash with a fork. In a large mixing bowl, combine the milk with the mashed potatoes.

Add 1/2 cup sugar plus the margarine. Mix with an electric mixer at low speed. If the mixture is still warm, cool to about room temperature before proceeding with next step. – Dissolve the yeast and 1/2 teaspoon sugar in barely warm water. Add to the potato mixture and mix well. Add 2 cups flour and mix again. Cover with a towel and let rise in a warm place for 25 minutes.

Add the lightly beaten egg and salt to the mixture. Add 4-1/2 cups flour, stirring it into the mixture with a large spoon. Turn onto a well floured board and knead for about 3 to 5 minutes. Add a small amount of extra flour if necessary so the dough can be handled without sticking to your fingers. Grease a large bowl. Place the dough in the greased bowl. Cover with a thin towel, and let rise in a warm, draft free place for about 2 hours or until it is at least double in size.

On a lightly floured surface, roll the dough 3/4″ thick. You can use a doughnut cutter to cut the dough or cut as typical Fastnachts – Cut the dough into 3″ to 4″ wide strips, then cut the strips into 3″ to 4″ pieces. To allow the center of Fastnacht to fry completely, cut a small slit in the center of each piece, using a sharp paring knife. Arrange the pieces of dough, about 1-1/2″ to 2″ apart, on large wax paper lined trays. Cover each tray with a thin towel. Place the trays in a warm place for 45 minutes to an hour, or until the dough pieces have raised to about double in size. (In the picture on the right, the dough has raised sufficiently and the doughnuts are ready to fry.)

Heat the shortening lard to 365Âș. Be very careful adding the Fasnachts to the oil, lower gently on a wire spoon, do not drop in the oil, it will splatter and can burn you very badly. Deep fry until both sides are golden brown, turning one time. Drain on white paper towels. Cool completely before serving. Store in a covered, airtight container.

Makes about 20 to 24 Fastnachts, depending on size. 

image

Copyright © 2012 Simple Healthy Homemade. All rights reserved

Chocolate Balls

image

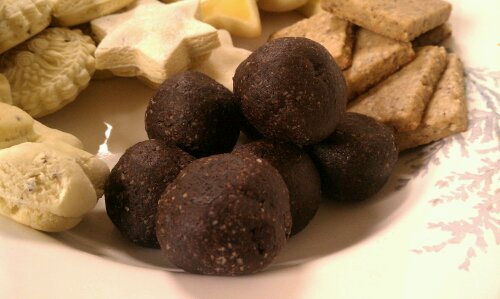
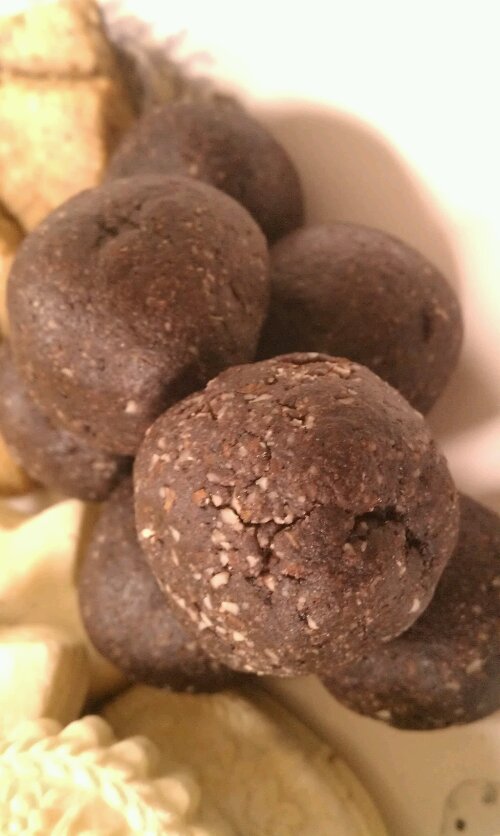
Schockolade Kugeln – Chocolate Balls – Swiss Christmas Cookies

You’re not surprised that a lot of Swiss cookies involve chocolate, are you?

This is another no butter recipe. It has an intense chocolate flavor and no added fat (only fat in here is from the almonds, eggs and cocoa powder). And as an added bonus, it just so happens that it is gluten-free, tadaa!

At first I was going to translate the name of these into bullets, as in ‘death by chocolate (bullet)’ but was musing on the whole Christmas and Peace on Earth concept and thought that would seem kinda wrong, but nevertheless they are intensely chocolatey!

image

Ingredients

    • 3 eggs
    • 1 1/2 cups sugar
    • 1 3/4 cups cocoa powder (I used a mix of extra dark and dutch processed)
    • 3 3/4 cups ground almonds (sometimes called almond flour)
    • 2-3 tbsp tapioca or potato starch

Directions

    1. In a big bowl, mix eggs sugar and cocoa until liquid and frothy looking
    2. Add the almonds and the starch and mix until, uniformly incorporated
    3. Chill dough for a few hours (if it’s cold enough where you are, put it on the balcony like we did in Switzerland, if not the fridge works well too)
    4. Form into walnut sized balls between your hands, (being careful to keep your hands cool), and place on a lined baking sheet.
    5. Let the formed balls dry overnight, or to speed up the process, you could also place the whole cookie sheet in the freezer for at least 1 hour.
    6. Bake in a preheated oven at 480°F for 3 to 5 minutes. The balls should only crack slightly
    7. Let cool on the baking sheet for 5 minutes before transferring to cooling rack.

image

Check out the post on more Swiss Christmas Cookies to try other varieties!

Copyright © 2011 Simple Healthy Homemade. All rights reserved

Änisbrötli

image

Änisbrötli – Anis Bread Cookies- Swiss Christmas Cookies

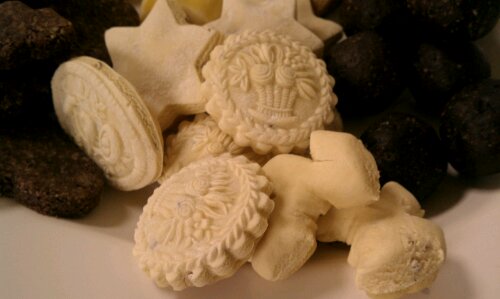
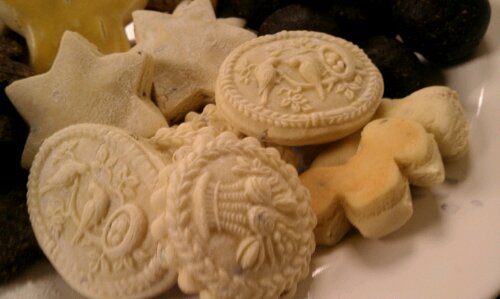
Änisbrötli (or Springerle as they are called in  Germany, but since I am from Switzerland we’re going with the former 😉 ) are flavored with, as the name implies anis. Make sure you get cleaned anis seeds, not fennel seeds. Many times I see fennel (the vegetable) labeled as anis in the store, but no no, not the same.

These are the coolest to make, and have been my favorite on and off for many years. So I am just writing this because originally I wanted to say they are my favorite, but realized that I think I might have said that about at least one two other cookies as well, soooo… But truthfully, they are all my favorites 🙂

image
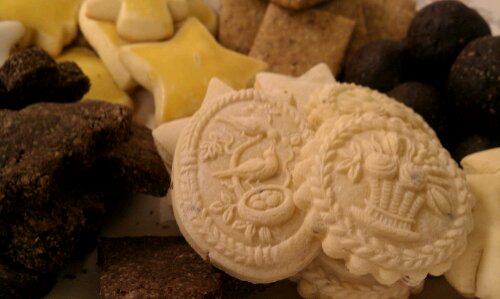
Please don’t think you can’t make these just because you don’t have one of the special pretty molds (called “Model” in German) I used here. You could of course, depending on what part of the country you live in, look for antique molds at yard sales or flea markets, or I think these lovely folks might ship overseas as well. But as you can see in the picture, they are fabulous also when made with regular cookie cutters, or turned into “ChrĂ€beli” by forming dough pieces into a 3/4″ roll, cutting into 2″ pieces and cutting 2-3 times into each piece diagonally. Then bend them a little and proceed just like for all the other shapes.

image
One thing that is super important, you have, have, HAVE to make these on a greased cookie sheet. No parchment paper, no silicone mat, greased cookie sheet. Otherwise they will not rise properly when baked and won’t form the characteristic ‘foot’ as seen in the picture above.

image

Ingredients:

  • 4 eggs
  • 3 cups confectioners sugar
  • 1 tbsp anis seeds
  • 1 pinch salt
  • 4 1/4 cups flour

Directions

  1. Beat eggs and confectioners sugar together until very bubbly/frothy (By hand this can take 10 minutes or more, if you are using a hand held mixer, make sure to stir in the confectioners sugar before turning on, or you’ll have the potential for a dust explosion on hand, not good for your kitchen or your respiratory system, trust me)
  2. Stir in Anis and salt
  3. Mix in the flour, and using your hands if necessary, form into a ball
  4. Let rest in the cold for 1 hour
  5. To form the cookies, roll out dough on a floured surface until about 1/2″ thick, dust surface with some flour and press the mold deeply into the surface, cut out using a cutter or knife and place on a prepared greased cookie sheet.**
  6. Allow cookies to dry overnight
  7. The next day, preheat your oven to 305°F (yep, very low threehundredandfive, no typo)
  8. Bake at 305°F for 11 – 13 minutes. Cookies are supposed to get light brown on the bottom

**If you happen to not have any of the pretty form used, no worry. You can still make them, either just use regular cookie cutters, or make “ChrĂ€beli” by rolling the dough into a 1/2″ thick roll, and cut 3″ sections off, then using a sharp knife, make perpendicular slices being careful to not cut all the way. Bend slightly and place on the cookie sheet. You can see what a  “ChrĂ€beli” looks like in the first picture, bottom right.

image

Pretty and yum!

image

Check out the post on more Swiss Christmas Cookies to try other varieties

Copyright © 2011 Simple Healthy Homemade. All rights reserved

MailÀnderli

image

MailĂ€nderli – Lemon Scented Swiss Christmas Cookies

MailĂ€nderli are one of the quintessential Swiss Christmas cookies. The are just slightly sweet and appeal also to the folks in your life that don’t particularly have a sweet tooth. As kids we would eagerly await when my Mom would make these, and we’d help, help making the cutouts, mainly in the center of the freshly rolled out area (I am sure to my Mom’s delight) and of course, help eat the dough 🙂 To this day, my favorite cookie dough ever. It’s an awesome cookie to make with your little ones, just chill the dough well in between rolling out, since little helpful fingers and the extra time it takes doing this with kids, will warm it up and the MailĂ€nderli dough gets sticky when warm.

Traditionally these are just brushed with egg yolk, hence the pretty yellow color. But you can also bake them as is, and decorate them after they are cold (I used to do this with my babysitting kids, just like my Mom used to with us) by brushing them with a glaze made from  a couple of tablespoons confectioners sugar and a few teaspoons lemon juice or water, and a squeeze of beet juice for color (or food coloring, your choice). Add chocolate coffee beans, sprinkles or silver decorating pearls.

image

Ingredients

  • 2 sticks butter, unsalted
  • 1 1/4 cups sugar
  • 3 eggs
  • 1 lemon, grated peel
  • 1 pinch salt
  • 4 1/4 cups + 1 tbsp flour
  • 1 egg yolk for glaze

Directions

  1. Stir butter until soft and creamy
  2. Add sugar and stir until well mixed and there are little ‘bubbles’ forming on the bottom of the bowl
  3. Add the eggs, one at a time, stirring until mixed
  4. Add salt and lemon zest, then sift flour into mixture, stirring between additions. (The dough will seem rather soft for rolling out at this point) From into a ball, cover the bowl and refrigerate overnight
  5. Roll half the dough out on a little flour until a little over 1/4″ thick. Using your favorite cookie cutters, cut out shapes and place on lined baking sheet
  6. Place the sheet in the cold for a few minutes (specially if you are making cookies with kids) then brush the surface with the egg yolk and bake 6-10 minutes in the middle of the 400°F oven, or until just lightly golden brown on the bottom and the tops are shiny and yellow.

For a list of some other ones to try go to Traditional Swiss Christmas Cookies.

Copyright © 2011 Simple Healthy Homemade. All rights reserved