Warm Winter Salad

image

Now that the holidays are coming to a close, and New Years is staring to wave at us with all its new beginnings and good resolutions. Why not indulge in something reminiscent of comfort food, but without the guilty pleasure price tag? This salad is just right for that. Sustaining enough to not leave you looking through the cookie jars in the break room, but nourishing and light at the same time. It’s a salad for those that don’t like salad. Like my one friend that doesn’t see why anyone would want to eat ‘crunchy water’. This would even work for her, a no greens salad!

image

And of course, where would we be with our healthy living resolutions if it were not going to be convenient? So this one packs neatly into a jar, dressing and all. When ready, just shake, remove the lid and heat up ( I like mine warm), or enjoy cold!

imageper serving you will need:

Ingredients

  • 1 small sweet potato
  • 3 tbsp chick peas (cooked or canned)
  • 5 small mushrooms, quartered
  • 1/2 small zucchini, diced into cubes
  • 3-4 tsp roasted garlic dressing
  • 2 cup mason jar

image

Directions

  1. Prick sweet potato with a fork, wrap with 2 paper  towels, drizzle some water on the paper towel for moisture and microwave until soft and cooked through. (Alternately use  some leftover roasted sweet potato, peeled) Once cool enough to handle, peel and cube and set aside to cool completely.
  2. Heat a teaspoon olive oil in a small skillet, add mushrooms to pan and quick sauté for 1 minute. Set aside to cool. Add zucchini to pan, and sauté for another minute, set aside to cool completely.
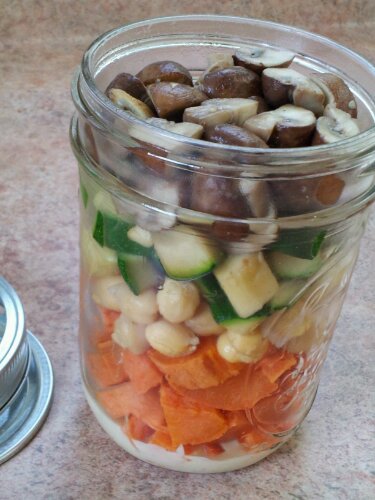
  3. Layer ingredients into a  2 cup mason jar in the following order:
  • creamy roasted garlic dressing
  • sweet potato
  • chick peas
  • zucchini
  • mushrooms
  • lid

You can assemble this salad completely and store in your fridge for up to 4 days!

image

Copyright © 2012 Simple Healthy Homemade. All rights reserved

Roasted Garlic Dressing

Let’s face it, most of us like creamy dressings to go with our salads, at least every once in a  while. I have lately been hooked on lemongrass-mint white balsamic from Seasons and could eat salad with just that on it. Yep, nothing else, no oil, just that. It’s especially good on baby spinach with pomegranate seeds. But I digress, back to the subject: creamy dressings. The problem with salad dressing and especially the creamy kind is the caloric impact they tend to have. So you decided to have a ‘light’ lunch, a salad, but guess what, that commercial dressing you just poured on made it have more calories and in some cases more fat than a burger. So what to do? Your ticket is flavor, the more flavor your dressing has, the smaller the amount you need, plus making it at home allows you to control exactly what goes in it. For days like today, when it’s snowing and sleeting, when a cold meals just isn’t the answer you need something hearty that can stand up to a warm winter salad. Greek yogurt provides the creamy texture and garlic and Parmesan the flavor. Slow roasting the garlic makes it surprisingly mellow, totally taking any bite out of the taste. This one will keep in the fridge for about a week (it might keep longer, but it never lasts that long in my house), the only thing is the olive oil gets solid in the fridge, so let the dressing come to room temp before using, or heat like in the recipe above.

Makes about 1/2 cup

Ingredients

  • 4 cloves garlic, thinly sliced
  • 1/4 cup extra virgin olive oil
  • 3 tbsp cider vinegar
  • 1 tbsp grated Parmesan
  • 1/4 tsp salt
  • 1 pinch white pepper
  • 3-4 tbsp Greek yogurt
  • (optional) Pancetta crumbles

Directions

  1. Gently heat oil in a small skillet or shallow pan over low (yes, trust me) add the sliced garlic in one layer. Slow roast until starting to turn golden and beginning to caramelize, about 20 minutes, turning pieces over about half way through. Set aside to cool.
  2. In a mini food processor, combine roasted garlic and olive oil from the skillet, salt, pepper and cheese and pulse to blend, then add the Greek yogurt and vinegar and run the machine until well blended and thick.
  3. If desired, stir crumbled roasted Pancetta pieces into the finished dressing (you can cook them in the same skillet you just used for the garlic, no need to add any oil)

Copyright © 2012 Simple Healthy Homemade. All rights reserved

Citrus Salad Dressing

wpid-2012-12-09-15.57.50.jpg

Ingredients

  • 1/2 lime, juice only
  • 2 tbsp olive oil
  • 1 tsp Dijon mustard
  • 1 tsp honey
  • 1 pinch to 1/4 tsp salt

Directions

  1. Stir honey and salt into lime juice until dissolved
  2. Stir in mustard, then add he olive oil and stir until well blended

Use on salads, particularly anything with avocado, to keep them from turning brown

Copyright © 2012 Simple Healthy Homemade. All rights reserved

making Butter

A while back I discovered that my farmers market offers raw milk, and I started drinking raw milk again. I switch back and forth between regular (cow) milk and goat milk. I have made goat cheese and fromage blanc and mozzarella, and butter. You’d be surprised to find just how easy this is, using modern convenience tools like a blender. No shaking a barrel for hours and NO, nononono, you do not get one of these: 

         or 

To me, raw milk is the only milk worth drinking, hands down, and not just due to the taste (more here). Not only are my food decisions based on how any given food tastes, but also how it is raised. And raw milk dairies are (at least in this country) organic, my milk is from pastured, grass fed cows (you know, happy out on the pasture vs. in a dark stable tied up somewhere), so far all the raw milk diaries I have visited care a great deal about their animals and take care of them like you and I would. From a regulatory stand point, raw dairies are generally under much more scrutiny, for cleanliness, safety etc. The cows have names. Ok that part might not make the milk taste better, but wouldn’t you agree that if you name your animals, they are closer to your heart than if they just have a number? 🙂

04_23-AntVollon-MndOfButter

Mound of butter, by painter Antoine Vollon

Ever read the label of supermarket butter? One of the most surprising ingredients often is coloring. Now why would there be food coloring in your butter making it, presumably prettier, more buttery looking maybe, that is more yellow? Do we and if so why do we think it’s better if it’s yellow? If butter isn’t yellow after it’s made, then why would we think it needs to be? Complex questions you are asking, or then again not. Butter USED to be more yellow, at least in 1875 (see the painting above) when the cows where still out on the field, eating what they were meant to eat : Grass. Since most of your generic super market cows here in the US are kept indoors and fed a mixture of corn and cornstalks fortified with vitamins and minerals, the color doesn’t turn out quite the same. And it seems that people are smarter than we give ourselves credit for and somehow remember that butter is supposed to be yellow and it is more nutritious that way and this is where we get duped: color is added and our little  minds are happily appeased into thinking yummy healthy butter. A little sad, I know. BUT since it is soooo easy to make your own, from good fresh cream, you can have great butter again in less than 15 minutes of work. When you start making butter you will notice that the color of the resulting product changes throughout the season, in the spring when the cows are out on the lush, fast growing spring pasture, the butter is a sunflower yellow, almost orange! But no matter what time of  year, there still is more color in it than the regular stuff from the store. And taste!

First off, you do need cow milk to start. Goat milk is higher in fat,but naturally homogenized, so that the cream does not separate and rise to the top.

  vs 

Brown Swiss (Cow)                                           Domestic Goat

Juuuuust in case you were doubting your animal knowledge 😉

After bringing the milk home (it comes in half-gallon glass bottles) I pour it into a wide mouth glass container that I keep for just that purpose and stick it in the fridge. It needs to sit overnight since the transport home and the pouring it from on e in to another container mixes up the milk, like I do by shaking it before pouring a glass, if I am not going for butter. Wide mouth because the next morning, I can easily scoop the cream off the top using my silver gravy ladle from the thrift store.

Gently skim the top layer off the milk, it will appear a bit darker, cream colored instead of white (no pun intended) and put it right into the blender bowl.

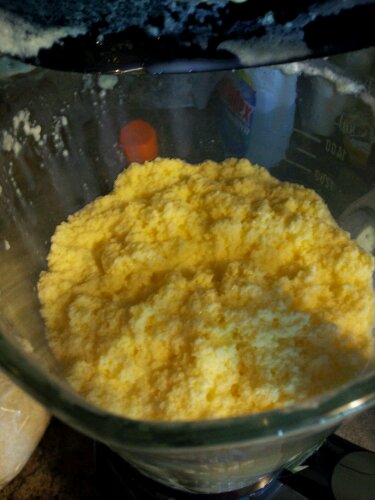
After that all that’s left to do is whirl the cream until the fat particles start clumping together.

image

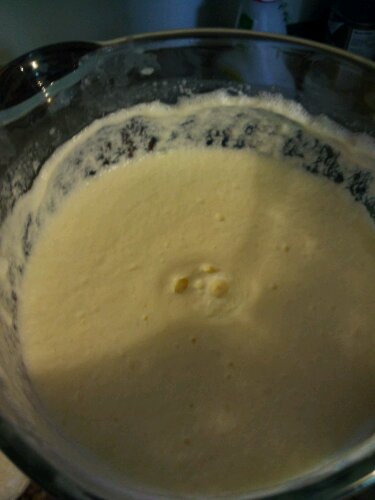
The process goes in stages, at first the cream is liquid and gets sloshed around, then it becomes thicker and has a creamy consistency (In my blender it never get’s whipped like when using egg beaters, but noticeably thicker, but if you use egg beaters, it becomes whipped cream first, the kind Grandma used to make, thick and rich, juts keep going you’re not there yet)
image

keep blending on low, if you have that setting and the cream will start to get liquid again, separating into lumps of yellow goodness and buttermilk.

image

it’s just starting…

image

here you can see from the side, how it separates

image

image

You can rinse the butter in a bowl with ice water, using your hands to ‘knead out’ the rest of the buttermilk but I find the automated way a tad easier and since the blender needs to be washed anyways…image

just make sure you rinse all the butter milk out, or it will go rancid.

 My lump of butter!
image

© 2012 SimpleHealthyHomemade


Sour Cream Chive Dressing

image

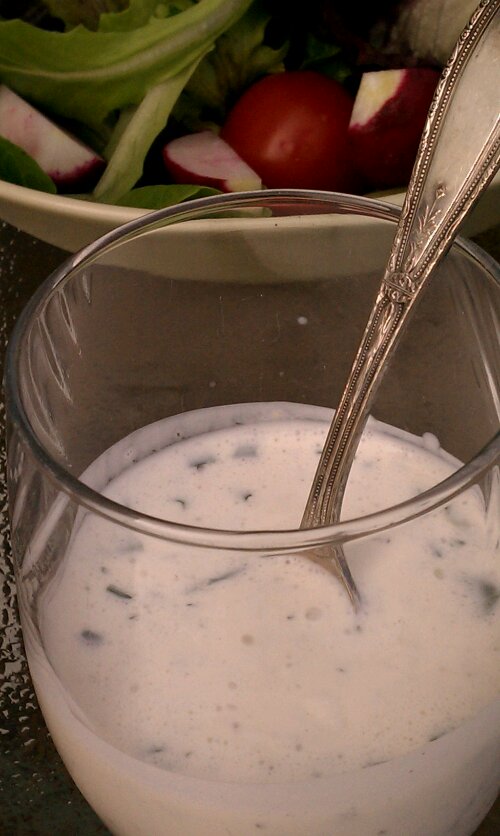
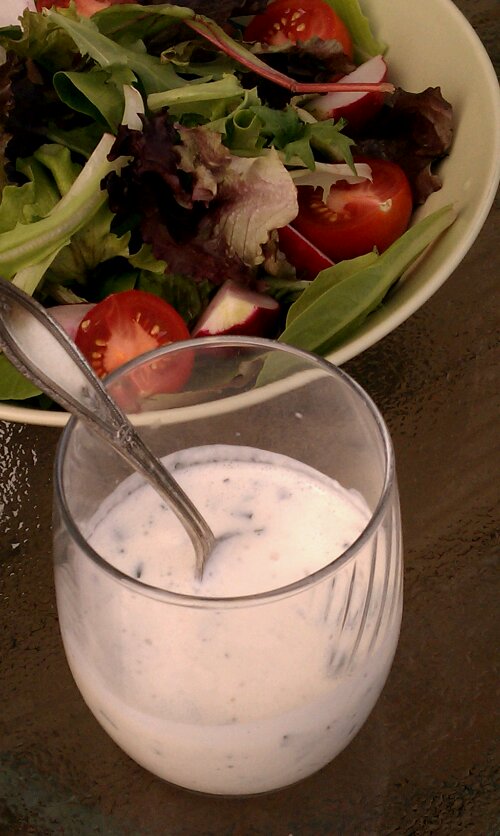
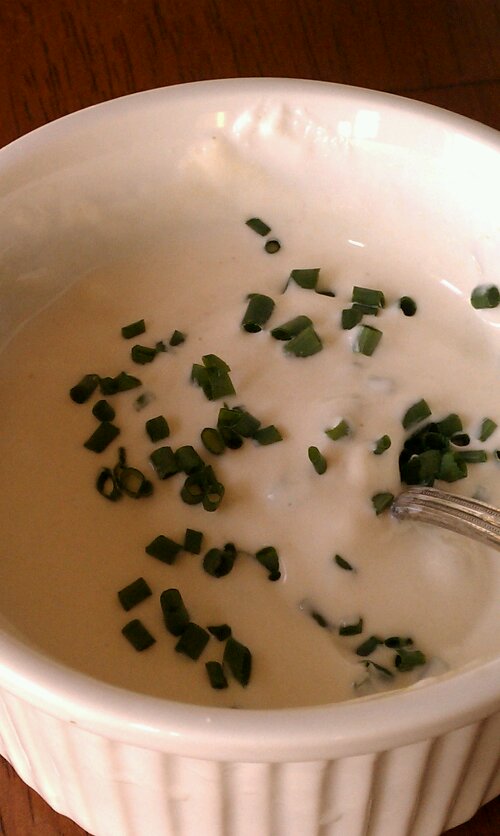
Quick Dressing to throw together when you’re in a hurry. I love when one recipe leads to another, as the Guilt Fee Yogurt Chive Sauce inspired this dressing one evening, turning leftovers into something new. I liked it so much that it became its own recipe. It now has a permanent home, you know, instead of leftover land tent city 😉

It makes a wonderful creamy dressing without adding the calories of mayo. Use it on any salad or as a light refreshing dip for veggies.

You need

  • 1/2 cup sour cream
  • 1/2 cup pickle juice or vinegar
  • 1/2 cup chopped chives
  • 1/2 tsp salt
  • 1/2 tsp ground black pepper
  • a very small clove of garlic, minced (optional)
  • 2 tbsp olive oil

Directions

  1. Mix everything in a bowl or shaker cup until well combined

image

Copyright © 2012 Simple Healthy Homemade. All rights reserved

Mango Sweet Pepper Salsa

image

Chives and how to get rid of use them… Okay, one more… now I think I used almost a cup of chopped chives! I can feel a little better about using things up, I think. This one’s super easy and super yummy! Serve over or with chive burgers and guilt free chive sauce

image

Ingredients

  • 1 mango, peeled and pitted
  • 1/8th of a red bell pepper
  • 2 tablespoons lime juice
  • 3-4 tablespoons chopped chives

Directions

  1. Chop the mango, finely dice the red bell pepper
  2. Toss with 2 tablespoons of fresh lime juice and the chives

image

Copyright © 2012 Simple Healthy Homemade. All rights reserved

Guilt Free Yogurt Chive Sauce

image

I don’t like to waste things and have been practicing opportunistic eating the last few weeks. What I mean is I am really trying to only eat what is in my fridge, cabinets and seemingly bottomless freezer. Because, let’s face it, the more space one has the more ‘special buys’ find their way into said space. Hard to resist the buy-one-get-one deal on blueberries or roasts, whether you need them that week or not… I do claim complete innocence here and blame my ‘hunter-gatherer’ genes. More the gatherer part here, but hey, it’s not like I can change that, right 😉 And along with emptying out everything to make space for this years garden bounty, I am also trying to be more conscious of using the stuff as it grows instead of storing it for later. Not that I can eat all the chives, but heck am I going to try! And since we all got so many chives, here’s another recipe that will help accomplish that.

This one for  a burger sauce. Wait, it would probably be pretty awesome on baked potato as well… or fish! Hmmm I will have to come back to this one… Also a great one for Potlucks and Barbeques, much safer than any Mayo based stuff for sitting outside in the warmth. And totally guilt free, in fact it ups the protein since most of the sauce is Greek Yogurt, and believe it or not, the couple fo spoons of sour cream completely make it super creamy, you wouldn’t even know that you went for the much lower fat Greek Yogurt.

image

lighter accompaniment for burgers and more…

Ingredients:

  • 1/4 cup chives, chopped
  • 1/2 cup Greek yogurt, try not to use anything below 4%*
  • 2 tbsp sour cream
  • 2 tsp pickle juice (from your cucumber pickles)
  • 2-3 tsp mustard
  • 1/4 tsp salt

* for those of you not familiar with Greek Yogurt, it’s thicker and higher in protein because it is left to drain in cheesecloth. Yes, you could most likely drain your own yogurt and get a pretty good result.

image

Directions

  1. Mix everything except chives until smooth and homogenized.
  2. Stir in chives and serve! How’s that for easy?

imageCopyright © 2012 Simple Healthy Homemade. All rights reserved

Lighter Spinach Artichoke Dip

image

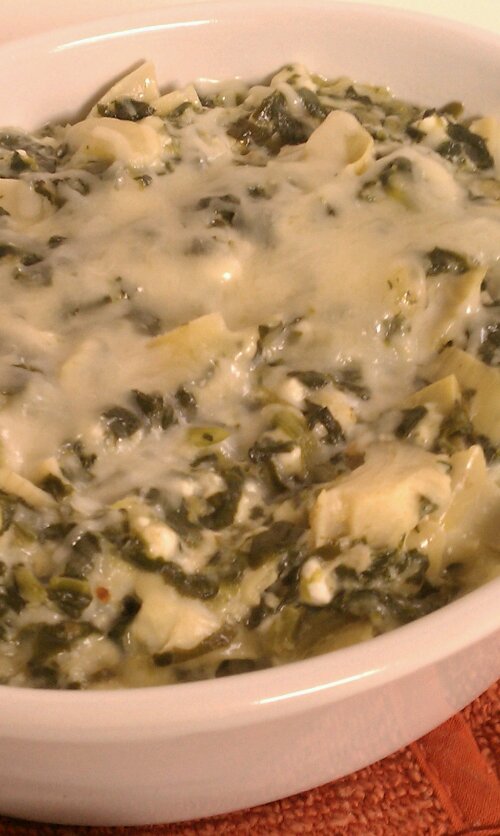
This proves that Spinach Artichoke Dip does not have to be a totally unhealthy indulgence. Well, it’s not quite diet food either, but besides being much lower in sodium than any restaurant version out there, this also has a lighter hand on piling on the fat calories and you get a good bit of veggies.

imagePlus you get waaaaaaaaaaayyy more Artichokes when you make it yourself 😉

imageMake extra, it makes a terrific layering ingredient to so many things     (like Fish Wellington, and Spaghetti Squash Bake)
Ingredients

  • 1 pack frozen chopped spinach (10 oz), thawed
  • 1 pack frozen artichoke hearts (9 oz), thawed or canned (if using canned, drain and rinse)
  • 1 clove garlic
  • 1/2 cup cottage cheese
  • 1/2 cup thick fromage blanc (or sour cream)
  • 1 cup Italian cheese blend, shredded (mine had 5 cheeses in it) + some for topping …sometimes when I am really hungry, I use 2 cups 😉

image

Directions

  1. Squeeze the defrosted spinach until mostly drained. set aside.
  2. Chop the artichoke hearts into small pieces (chunks are fine, just remember you have to be able to ‘dip’ it up)
  3. In  a pan, heat a tablespoon oil, then add the minced garlic and stir, cooking carefully until golden, but not brown.
  4. Add the Spinach, Artichokes and the Fromage Blanc, stir then add the cottage cheese and heat until it gets stringy.
  5. Add the Italian cheese mix, and heat until melted, pour into a serving dish or oven proof form and sprinkle with some more cheese, cover and allow the cheese topping to melt. Serve with veggies or corn chips for dipping.
  6. Can be made in advance, cover and refrigerate, then reheat in the oven at 350 until hot and melted, or microwave until hot.

image

Copyright © 2012 Simple Healthy Homemade. All rights reserved

Fromage Blanc

image

It took me years to figure out what the elusive desert ‘cheese’ was we had back home, it was called ‘Blanc Battu’ short for fromage blanc battu and it is delicious with some fresh berries! Helpful but uninformed people over the years suggested farmers cheese and friendship cheese, but nehh, not the same AT ALL. Turns out you can make it at home here in the US quite easily with ingredients that are not too hard to come by. * Happy  dance* ( In am doing that a lot lately, hmm)

Fromage Blanc culture is available from New England Cheese Making and the process couldn’t be simpler.

You need:

Milk, culture (see above) stainless steel cauldron (just kidding, you only need a pot) Thermometer, a colander and butter muslin. For a fresh and soft desert cheese (ok you can also drain it more and mix it with herbs or drop spoons full into your Spinach Salad, but if you leave it a little more moist it makes the best desert, and healthy too!) Again, for a fresh and soft cheese like this, the fresher the milk the better the cheese is going to taste. If you have access to a farm, where you can get yourself some raw milk that would taste the best. If you’d like to make it fat free or at least with less than the whole fat content, let your raw cow milk sit for 12 hours in the fridge, then skim off the layer of cream that forms on top (and make butter with it for example)

    • 1 gallon milk
    • 1 pack fromage blanc culture

image

Directions

    • In a large pot heat the pasteurized milk to 86 degrees.The best and easiest way to do this is by placing the pot in your sink and filling the sink with warm (not hot) water. (86°F isn’t all that hot…)

image

    • Once at temperature, sprinkle the direct set fromage blanc culture over top, let sit 2 minutes then stir and mix in well.
    • Cover and let the milk sit undisturbed at 72°F for 16 hours (you can do as little as 12 hours, but I have found I like the taste best after about 16), in the colder month you want to add some warm water to the sink every so often.
    • After the required time, you will have something like this, kinda like a thick yogurt consistency

image

    • Ladle into butter muslin lined sterilized colander and drain for 3-4 hours (if you are going for more of a cream cheese texture, you can let the whey drain out for up to 12 hours), scraping the sides of the butter muslin every so often if the cloth becomes clogged. (One trick to draining this properly is to hang the knotted cheesecloth from your kitchen faucet)
    • For true Blanc Battu, place the drained curd in a bowl and using your handheld mixer/egg beaters, beat until smooth.

image

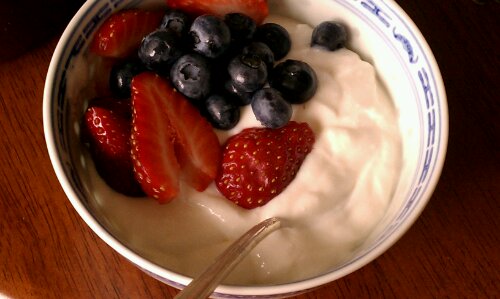
I know I have mainly berry pictures, but it is super yummy on a nice piece of crusty bread with some chives sprinkled over

image

    • Use fromage blanc instead of sour cream in your favorite recipe or dressing.
    • Whey makes a terrific fertilizer for your plants: Unless you are going to use it for something else, don’t juts dump it, give it to your (indoor or outdoor) plants. The year I started making cheese, my fig tree had the most figs ever!

Copyright © 2012 Simple Healthy Homemade. All rights reserved

Naturally Dyed Easter Eggs

image

With Spring arriving so early this year, my egg dyeing project will be so much easier! *dancing around in my kitchen* I remember a few years back, looking for anything that grew already outside, and short of some blades of grass I couldn’t find a thing. 🙁 But this year, even though it’s gotten cold again, I will be able to beautifully decorate my eggs, and naturally too, using items you could eat, well mostly (onion peels, anyone?), but nothing chemical or artificial. The colors we can make are just as beautiful, although not quite as bright or unnatural looking.

For this adventure, you will need some small leaves or flowers from outside. Clover, and fern leaves work well, as do wild violets. What you are looking for is anything small that will lie (mostly) flat, so a round, puffy flower like the pink one in ‘Horton hears a who‘ would not work well. If you are wondering, just what the heck is going on, it will all become clear soon, promise. You will also need some cheap stockings or pantyhose/tights, (or use the ones you were going to throw out, the ones with the toe hole, you know, some string and the ingredients for whatever color you choose to try!

This is how my Mom used to dye eggs with us, when we were little, and gathering the decorations outside is half the fun! And isn’t it awesome that you don’t have to worry about artificial colors getting into your eggs or tummy of your family members? What Easter traditions from when you were little do you remember and cherish?

image

For the onion skin version you need to first decorate your eggs with the leaves you gathered (Making them a little wet helps the leaves stick better), holding the leaf in place, stretch the tights/pantyhose over the egg, pinning the leaf in place, twist on the opposing side or bottom of the egg (The part where the nylon crimps will not get colored evenly) and tie with some string. If you are using the red beets or the turmeric, hard boil the eggs before then decorate once cooled down.

imageAll the eggs with stockings on and ready for their bath 😉

The easiest and my favorite first:

Onion Skins = Sienna/Reddish Brown (12 o’clock):

image

You need about 3 cups of dry onion skins. Surprisingly the red onion skins make pretty much the same color, so it doesn’t seem to matter which ones you use. Next year I will know not to eat red onions for a month to get red onion peels

    • To make the dye with onion skins: In a stainless saucepan, place a good 2 cups onions skins and 2 tablespoons of white vinegar in a quart of water and bring to a boil. Lower heat and simmer, covered, for 30 minutes.
    • Strain to remove onion skins and discard, and let dye cool to room temperature. (Don’t be fooled by the orange color.)
    • In a stainless saucepan, add the cooled strained dye and eggs at room temperature (up to 1 dozen). The eggs should be in one layer and covered by the dye.
    • Bring to a boil over medium heat. When boiling, reduce heat, and keep at a simmer for 10 minutes, turn off the heat and let eggs sit in the dye for an additional 2-3 minutes.
    • Dyeing time will be affected by the color of the eggs. Start checking for color at 12-15 minutes.
    • Remove eggs with a slotted spoon and cool on racks. The remove the stocking and leaves, rinse quickly and dry.
    • When they can be handled, you can coat them lightly with olive (or other edible) oil.
    • Refrigerate until ready to hide, or eat.

Turmeric = Yellow

image

Yellow you can get from Turmeric, use 2 tbsp per quart of water, bring to a boil and stir until the turmeric is all dissolved, then add the already hard boiled eggs. Mine did not get as yellow as I have seen this get. But I had tried to make them blue before, using red cabbage (it’s supposed to work) the color however was rather disappointing, more of a very faint barely visible pale sky blue, even after a looooong time in the brew, no real color and no more patience, and off into the yellow they went. Since they were already hard boiled and I did not want them to become, I don’t know, dusty and dry, I made the whole thing less hot and that combined with the faint blue made them a nice juicy yellow with a hint of green. very spring-like 🙂

image

Red Beets = Dusty Rose/Pinkish Color (on the left)

image

This one was a tad unsatisfying. You know how beets stain everything staring with your hands, the cutting board and the kitchen back splash if you drop them? Well, I expected a bit more from this one… Instead of boiling the chopped beets in water, I decided that beet juice would be a fantastic substitute, but after 5 hours in the fridge, the eggs still only had a dusty rose color.

image

The great thing about any of these natural colors is, that even if the egg cracks or the white takes on the color you dyed the egg, it’s perfectly fine to eat, since all the dyes are food material. Egg shells are porous and I am always concerned about the bright chemical colored eggs, and just how much of that might have gotten into the egg?

Overall I’d say onion skins give the most vibrant color and the best contrast. The turmeric would have been brighter yellow, had I either boiled the eggs in it ( I might try that next year) or at least had the ‘soup’ real hot to start. I might try the red cabbage again  too,  even if it is mainly because I don’t like being defeated, by cabbage. Maybe if I let the stuff sit overnight…

image

Copyright © 2012 Simple Healthy Homemade. All rights reserved