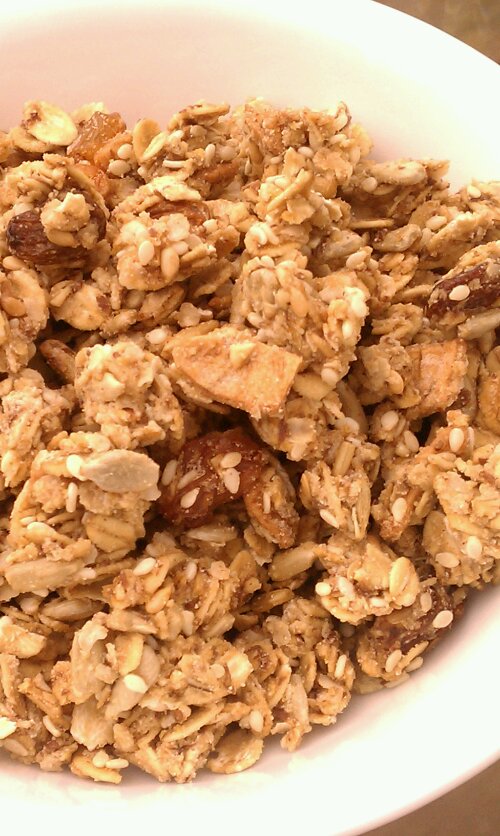
Apple Raisin Granola

image

I am back after taking a mini vacation up to a beautiful Bed & Breakfast in New Hampshire. Right on Lake Winnisquam. Sometimes you just need to get away from it all… Ahhh! It’s just the best to have someone make a lavish breakfast for you, and there were always freshly baked cookies. It’s like visiting your favorite Grandma, without having to help out in the kitchen 🙂 More on that soon! But before leaving, I had to make a few things that I could bring, for snacks and since I really did not know about the whole cookie thing they had going until we got there… And besides we were going to be on the road for six or seven hours. So I decided on another granola. Thanks to Heidi over at LightlyCrunchy who made this fantastic Apple Cranberry Granola, I was inspired to add the apple rings to my granola instead of just indiscriminately munching on them. I had never thought of using up my dried apple rings in a granola, what an ingenious idea!  

imagebefore adding milk or yogurt, can’t decide which I like best…

I go through phases, I find something, love it eat a whole bunch and then, not sure, but forget about it for a while? or get kind of tired of the taste? Anyhow I found myself with a good size bag of dried apple rings living in my cupboard, so now it can find its way into my breakfast and snacks 🙂 Delicious! The only thing I will work on for next time? Portability. Try eating granola while in the car… Not easy!

image

Ingredients

  • 2 cups rolled oats
  • 1/2 cup quinoa flakes
  • 1/2 cup dried apple rings, chopped
  • 1/4 cup sesame seeds
  • 1/4 cup golden raisins
  • 1/2 cup sunflower seeds
  • 1/2 cup brown rice flour
  • 1/4 cup brown rice syrup
  • (1/4 cup agave nectar or honey, optional*)
  • 3 tbsp coconut oil, melted
  • 4 tbsp flax meal/ground flax seeds mixed with 6 tbsp water, let rest 5 minutes

* If you are making this for the first time, use the additional sweetener (the honey or agave syrup) especially if you are trying to transition kids or the ‘I don’t have a sweet tooth’ husbands to a lower sugar diet, then over time gradually reduce the amount of sweetener added

Directions

  1. Preheat oven to 275º F
  2. Mix all the flakes, flour and seeds with the raisins and the apple pieces
  3. In a separate bowl, mix the wet ingredients: rice syrup, honey/agave, coconut oil and the flax meal mixed with the water.
  4. Add the wet ingredients to the oat mixture, stir well until evenly distributed, spread on a lined baking sheet and bake for 20 minutes. Stir, bake 10 minutes, stir again and bake for an additional 10 minutes.

image

Copyright © 2012 Simple Healthy Homemade. All rights reserved

Pumpkin & Flax Seed Granola with Almonds

image

There are many, many versions of granola, and I have made countless of them in the past, but no matter how much I would tinker and change the recipe, I found that they would never get quite like the ones you buy in a box. Lately I was re-inspired to give it another try by seeing such yummilicious recipes as LightlyCrunchy’s chocolate granola (doesn’t that sound super delish?) and I am just intrigued by Leanne’s idea of using sprouted lentils for her granola recipe, on my list to try…

image

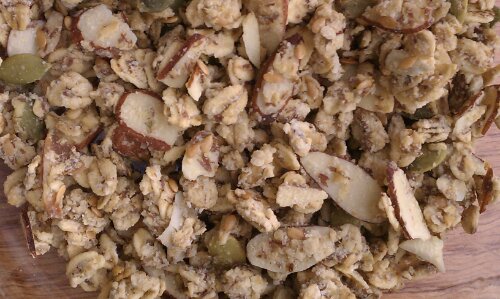
So back to my granola story. In the past they either got REALLY crunchy (and I know there are some at the store you better add to the milk or yogurt a good while before you plan on eating it, tried them too) or they are just flavored roasted rolled oats, yummy, oh yes, but what I am looking for are those clumps or clusters that are crunchy, yet you don’t lose a tooth biting into them if you decide to just grab a handful at random. So crunchy clusters that crunch apart when you bite them, if that makes sense. But I have never been able to replicate that, no matter how much I doctored the recipes, that is, at least not until now! (Maestro, drum roll please!) 

imageSee? Got the clusters I wanted!

Yes, I could just go on and buy some every once in a while (which is what I have been doing), when the urge overcomes me, but you see, besides being quite expensive, in my opinion, there are several problems with most granola. They either contain soy (I am staying away from soy, almost all of it in the US is gmo and besides, unfermented soy contains phytoestrogens, which I try to avoid. Phytoestrogens are plant based estrogen like compounds, and a lot of cancers are hormone fueled…) or soybean oil (or vegetable oil, same difference in the end), gluten, (which normally I have no issue with, but for allergy season, I mostly cut it out of my diet, and what do you know? My accupuncturist was right! Shhhht, but I have been with hardly any seasonal allergy symptoms this year!!!! Yes, I am going and knocking on some wood right now… ) So even though I generally am perfectly capable of eating gluten and have no (visible) symptoms or reactions to it, I know a lot of my readers have to watch it.

And lastly the sugar content upsets my apple-cart, (in the spirit of full disclosure, I admittedly have only a vague idea of what an apple-cart looks like… I am gonna have to google that one) I often wonder, why so awfully sweet? But the answer probably lies in the general over use of sugar and the resulting ‘taste immunity’ to the sweetness of it, so they keep having to add more to all the processed food so people buy theirs over the competition. Once you start moving towards eating cleaner, for starters, less stuff in boxes, less sugar (or better no sugar), you will start to notice the natural sweetness in say carrots or red bell peppers again.

Oh boy am I exited about this one! And the possibilities… can’t wait to play some more with it, I already got some trials running and some definite winners on flavor combinations coming up shortly!

And gosh, it smells so good, you’ll totally want to eat some while it is in the oven, but try and wait, totally worth it 🙂

image

Ingredients

  • 2 cups old fashioned rolled oats
  • 1/2 cup sliced almonds
  • 1/2 cup mixed pumpkin, flax and sunflower seeds
  • 1/2 cup brown rice flour
  • 1/4 cup quinoa flakes
  • 2 tbsp coconut oil
  • 1/4 cup rice syrup
  • 2 tbsp honey or agave syrup (you can start with 1/3 cup and transition down to 2 tbsp, if you still like things conventionally sweet)
  • 3 tbsp ground flax seed/flax meal
  • 6 tbsp water
  • 1 tsp vanilla extract

Directions

  1. Preheat oven to 275º F
  2. Mix oats through quinoa flakes in a large bowl.
  3. In a separate bowl, gently heat brown rice syrup, honey and coconut oil until liquid.
  4. Meanwhile stir water into flax meal, let sit 5 minutes.
  5. Add vanilla and flax mixture to rice syrup, stir then add to the big bowl with the oat mixture. Stir until evenly moistened.
  6. Spread on a lined cookie sheet and bake at 275º F for 15 minutes, stir, bake another 10 minutes then stir again, and bake another 10 minutes. Cool on the baking sheet
  7. Let cool completely before storing so it has a chance to crisp up.

The only downside to this is it makes me want to eat some every time I look at it…

imageCopyright © 2012 Simple Healthy Homemade. All rights reserved

Daifuku

image

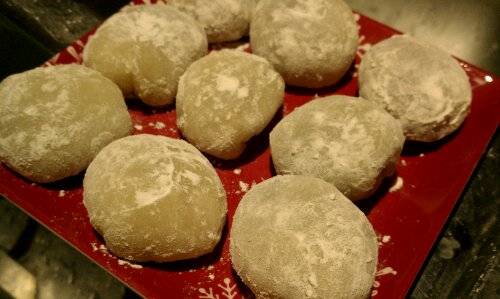
Glutinous rice cakes or Daifuku are something you can find at Asian markets all over the world, and that’s where I found them first. But if you know me a little, at some point I can’t leave it at that. I gotta know how it’s made.To ease your fears, no, I wasn’t the kid that opened up the belly of my dolls to find out what was inside. But I suspect that one of the reasons as to why not, might have had to do with me understanding that it would destroy them and my mom most certainly would not find willful destruction (no matter how lofty and glorious the reason behind it might have been) a good enough reason to buy another one. Oh yeah, from the days before the entire living room turned into a toy store when folks have children.

So, back to the subject at hand, I am just intrigued by how things are made, and why. You know that show on tv ‘how things are made’? If I had a tv, totally down my ally :). So of course that does not stop at food either and since part of my philosophy is if you can’t make it yourself, don’t eat it, I had to give this one a shot.

I searched the internet and found tons of recipes, some traditional, using a stove top method, some very elaborate on how to decorate, color or shape into flowers. So this recipe is adapted from various internet sources and in the end, I opted for an easy microwave option to make the dough…

image

Not quite as pretty and uniform as from the store…

You need to get Mochiko, or glutinous rice flour, which is the main ingredient in these, and something to fill the little cakes with. Traditionally Koshi-an, a sweetened Adzuki (red) bean paste is used, or a, also sweetened, smooth white bean paste, but I have in the past made them using sweetened chestnut puree. Besides sugar, the only other thing you need is potato starch, so the dough doesn’t stick to everything

imageI have a nagging feeling that the translator flunked English class…

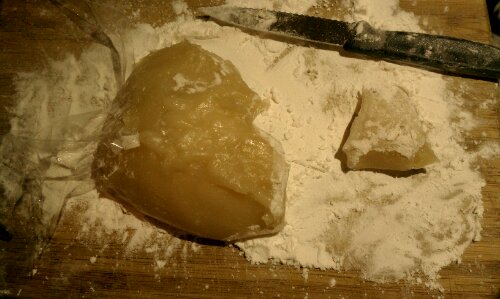
imageMake sure the entire work surface is covered in corn, I mean potato starch. Cut off a chunk of dough…

image…place the filling in the center…

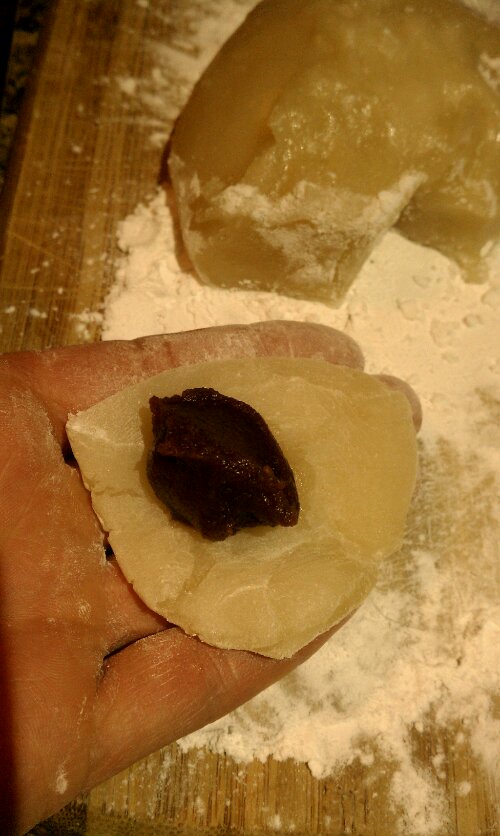
imagethen  wrap the dough around it, making a little pillow… And finished!

Ingredients:

  • 3/4 cup Mochiko (sweet rice flour, also called glutinous rice flour)*
  • 1/4 cup sugar
  • 3/4 cups minus one tablespoon Water
  • 1 tsp pandanus leaf or vanilla extract (optional)
  • about 1 cup Red Bean paste (or other sweet filling)
  • Potato starch or other ‘..starch’ to keep the cakes from sticking to everything

* even though the name suggests it, there is not gluten in rice.

Directions:

  1. Mix the M0chiko, sugar, water and extract (if using) in a bowl, and mix well with a fork
  2. Microwave on high for 2 minutes, carefully remove the bowl (HOT) and stir, then return to microwave and cook another 1 1/2 to 2 minutes (depending on the power of your device). The dough should now be smooth and super hot.
  3. Cover a cutting board (or other work surface) with potato starch (or whatever else they sold you at the Asian market 😉 and leave the dough on it to cool slightly.
  4. When it can be touched, cut a piece of dough off (about egg yolk sized, out of lack for a better comparison), flatten into a disc and place a tablespoon fo filling in the center. Make sure the dough piece and your hands are covered in starch before you start. Note: To start, until you get the hang of it, use a teaspoon of filling, it’s a bit easier.
  5. Cover the filling with the edges of the disc so as to encase the filling completely. Set aside, seam side down, on a potato starch dusted tray or plate, and repeat until all the dough is used up.

imageCopyright © 2012 Simple Healthy Homemade. All rights reserved

Zucchini Omelette with Prosciutto and Fontina

image

Quick and easy breakfast or lunch recipe you say? Coming right up!

image

As you all know I am not one to let things go to waste, if I can help it and from my Crab Asparagus Frittata the other day, I still have Fontina laying around my fridge deli drawer. Looking through the rest of said appliance, I also have eggplants, celery root, butternut squash and zucchini that I have to cook. I think sometime at the store my love for veggies gets the better of me, or my good intention to eat more produce, who knows that so exactly? Add some Prosciutto for flavor, and using zucchini seemed the easiest for a quick breakfast. Oh, a word on the zucchini. When I was little and my family first grew zucchini in our harden, it wasn’t called zucchini, no zucchetti is what they were called. And as I learned after some basic Italian, things that end with -etto/-etti should be small or little, (just like -ini as in= smaller, younger; fratello= brother, fratellino=little or younger brother) Uhhmm, so, we did not get that memo and let the darn things grow until they resembled some sort of prehistoric weapon, yep, exactly an edible club to go hunt some sabre-tooth with. Do yourself a favor, pick them small, if you grow them. They taste better and you won’t have them coming out your ears… But I digress, the 1/2 zucchini referenced to here is going to make about a cup grated.  Use a really fine mandolin slicer to julienne or shred the zucchini, otherwise you might have to turn the cooking temp down and cool a bit longer.
Ah I love my pastured hen eggs that I get every week at the farmers market 🙂 Now that the grass is getting lush with spring, you can see the color of the egg yolks intensify to almost an orange hue!

imageMakes 2 servings, unless you worked out really hard and are extra hungry 🙂

 Ingredients

  • 4 large eggs
  • 1/2 zucchini, grated finely using a mandolin sliver
  • (optional gulp of milk)
  • 1 slice Prosciutto (di Parma or San Daniele)
  • 1 0.5 oz piece Fontina, cut into small chunks (piece about 3″x 1″ x 0.5″ )

Directions

  1. Scramble the eggs in a bowl, adding a gulp of milk if you like or they are particularly thick
  2. Grate the zucchini into a separate bowl (I have done this both ways, right into the eggs=the omelette becomes a bit more fluffy and moist)
  3. Heat a little oil in a skillet, then add the scrambled egg, sprinkle/spread the grated zucchini on top, then quickly add the chopped cheese and tear the Prosciutto into pieces and drop on top
  4. Cover the skillet with a lid, and cook until the eggs are set on top and the cheese is melted.
  5. Add some freshly ground pepper, if you like. You don’t even need salt, the Prosciutto and Cheese give it enough flavor!

image

Copyright © 2012 Simple Healthy Homemade. All rights reserved
Spaghetti Squash Leftover Bake

image

It’s a glorified leftover dish everyone will be exited about. It’s vegetarian, its cheap and it uses leftovers, option for no leftovers following as well. I mean, who has spinach artichoke dip leftovers? Pffffft!

For a long time I did not dare to eat this interesting item, it just seemed… wrong and I had no idea what to do with it once it would find its way into my kitchen. Stringy things are not usually a good thing when it comes to veggies, like stringy beans or the wire like strings in tough snowpeas that quite nearly strangle unsuspecting eaters. But finally curiosity won out and I have departed from the ‘just put spaghetti sauce over it’ approach that is generally the extend of creativity people come up with when confronted with the ‘what to do after it’s cooked’ question.

image

So while this particular squash can’t quite keep up nutrition wise with some of the other members of the winter squash family, its high water content kinda work against it there. Not to say it’s unhealthy, by no means, it’s just not as nutritionally dense as some of the other ones, but it’s a great low calorie, low carb choice!

One of the issues I have with this, like some of the other winter squashes as well, is what to do with it all? I am a one person household on most days and I really, really would like to not have to eat the same for lunch and dinner all week. Maybe I am weird that way, but hey, there’s worse 😉 Well, I have found that cooked spaghetti squash freezes quite happily for a couple of months, stored in zip top sandwich baggies. That way it’s ready to defrost in my fridge for whenever I need it.

So first, yes you do need to bake (or microwave) the thing to cook its interior.  Prick it with a fork all over so it doesn’t blow up on you, and either cut in half, scoop the seeds and discard and place cut side down on a baking sheet in the 350ºF oven until tender, or microwave without cutting in half until tender and easily cut in half (Careful, extremely freakin’ hot)

Once it’s cooled to an acceptable temperature, using a fork, scrape the stringy flesh into a bowl. Portion up as convenient and freeze until needed!

image

For two people as a side (or small meal) or 1 hungry eater

You need:

  • 1 cup cooked Spaghetti Squash (defrosted if frozen)
  • 1 cup Spinach Artichoke Dip (or 1/2 cup chopped artichoke hearts, 1 cup chopped fresh baby spinach, chopped & 1/2 cup italian cheese mix, microwave until cheese is melted and spinach wilted not quite as creamy, but works)
  • 1/2 of a 8 oz can tomato sauce
  •  1/4 cup of Italian cheese for the top (use a mix that has more than just mozzarella, so you get better flavor

Directions

  1. Preheat oven to 350ºF
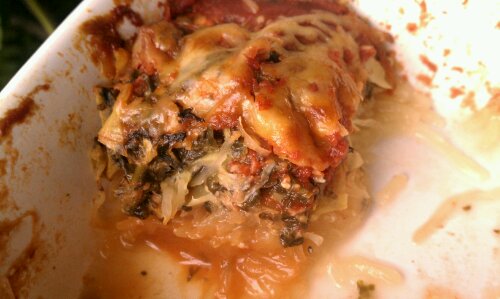
  2. In an oven proof 2 cup square dish layer spaghetti squash, then top with Spinach Artichoke Dip, followed by tomato sauce by the spoonfuls. Top all of it with a handful of cheese.
  3. Bake until heated through and bubbly, cheese is melted and beginning to brown (about 15-20 minutes)

image

Copyright © 2012 Simple Healthy Homemade. All rights reserved

Lighter Spinach Artichoke Dip

image

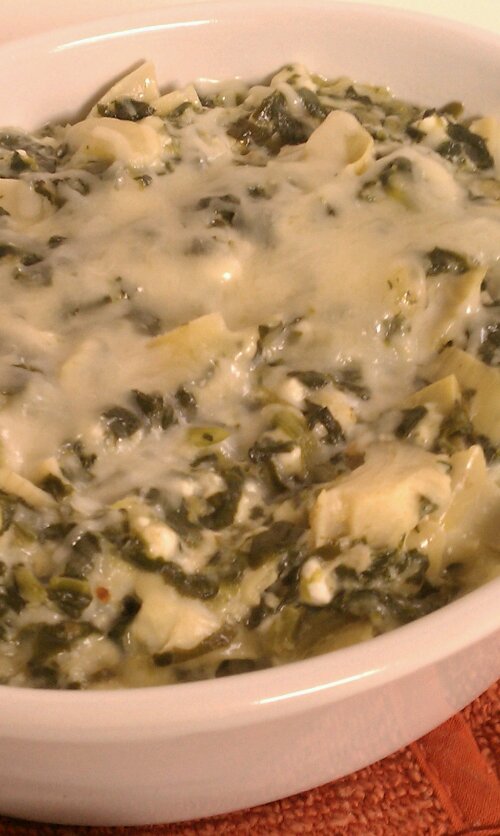
This proves that Spinach Artichoke Dip does not have to be a totally unhealthy indulgence. Well, it’s not quite diet food either, but besides being much lower in sodium than any restaurant version out there, this also has a lighter hand on piling on the fat calories and you get a good bit of veggies.

imagePlus you get waaaaaaaaaaayyy more Artichokes when you make it yourself 😉

imageMake extra, it makes a terrific layering ingredient to so many things     (like Fish Wellington, and Spaghetti Squash Bake)

Ingredients

  • 1 pack frozen chopped spinach (10 oz), thawed
  • 1 pack frozen artichoke hearts (9 oz), thawed or canned (if using canned, drain and rinse)
  • 1 clove garlic
  • 1/2 cup cottage cheese
  • 1/2 cup thick fromage blanc (or sour cream)
  • 1 cup Italian cheese blend, shredded (mine had 5 cheeses in it) + some for topping …sometimes when I am really hungry, I use 2 cups 😉

image

Directions

  1. Squeeze the defrosted spinach until mostly drained. set aside.
  2. Chop the artichoke hearts into small pieces (chunks are fine, just remember you have to be able to ‘dip’ it up)
  3. In  a pan, heat a tablespoon oil, then add the minced garlic and stir, cooking carefully until golden, but not brown.
  4. Add the Spinach, Artichokes and the Fromage Blanc, stir then add the cottage cheese and heat until it gets stringy.
  5. Add the Italian cheese mix, and heat until melted, pour into a serving dish or oven proof form and sprinkle with some more cheese, cover and allow the cheese topping to melt. Serve with veggies or corn chips for dipping.
  6. Can be made in advance, cover and refrigerate, then reheat in the oven at 350 until hot and melted, or microwave until hot.

image

Copyright © 2012 Simple Healthy Homemade. All rights reserved
Sticky Rice with Mango (Khao Neeow Mamuang)

image

Sticky rice, also called glutinous rice (even though there is absolutely no gluten in rice) is eaten sweet as a snack or desert a lot of places in Thailand, in the northeast of the country it is also served along your meal, unsweetened of course. That rice finds its way into meals from breakfast to desert isn’t surprising for a country where rice is a main staple in the diet, after all the verb ‘to eat’ in Thai is tantamount to ‘to eat rice’

image

For me, nothing says Thailand more than getting a serving of sticky rice with mango from a small place off a street corner somewhere. Vendor’s specialize in this dish and often you will find a line of people when mangoes are in season. That’s what I look for 😉 where the locals eat, it’s always the best. It’s served with sweetened coconut milk and is just delicious! Back home I would order it at Thai restaurants any chance I’d get, but alas it was often unavailable due to seasonal availability and because, unfortunately the restaurant often thought that ‘common’ food was not what should be served to guests in their establishment. 🙁 Imagine my joy when a few years back, I finally figured out that this exotic desert was actually pretty simple and easy enough to make at home. Cheaper and available whenever the lovely grocery store carries yummy mangoes. Win & win! Now I just have to figure out how to make the taro desert I can only get in Thailand…

image

You need to start this several hours before you want to indulge, since the rice is first soaked, then steamed.

Ingredients

  • 1 cup sticky rice*
  • 2-3 ripe mangoes, cut into bite sized pieces
  • 1 can coconut milk (not the light kind)
  • 2-3 tbsp palm sugar

Directions

  • Soak the rice in cool water overnight or at a minimum 4 hours
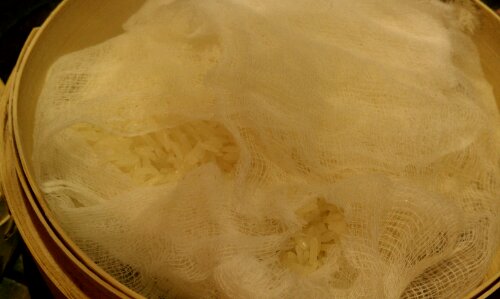
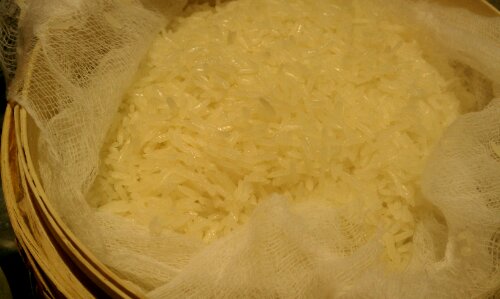
  • Line a bamboo steamer with cheesecloth and over the sink pour the rice into it to drain. Fold the cheesecloth over the edges so it doesn’t hang down and catch fire (tried that, and no, it doesn’t improve the flavor). Cover with the steamer lid.image
  • Set your bamboo steamer over a pot or wok of boiling water, and steam until the rice is cooked and yields softly to the bite. It will have a tacky consistency, will be slightly shiny and the rice grains will stick together. Takes about 15 minutes.

image

  • In the meantime, gently heat 3/4 of the can of coconut milk in a sauce pan, add the coconut sugar and stir to dissolve.
  • When the rice is done, transfer to a bowl and add the rest of the can of coconut milk, stir to mix. Let stand a couple of minutes until evenly moistened, then serve with mango and sweetened coconut milk.

If I get a good deal on mangoes, like I did this week, (hence the mango cheesecake, and this) I will make a good batch of this and keep the rest in the fridge, to reheat as needed for a quick exotic snack or desert anytime 🙂

*You can get this type of rice at most Asian stores, look for glutinous rice, sticky rice or sweet rice. Regular rice won’t work. It comes in white as well as purple!

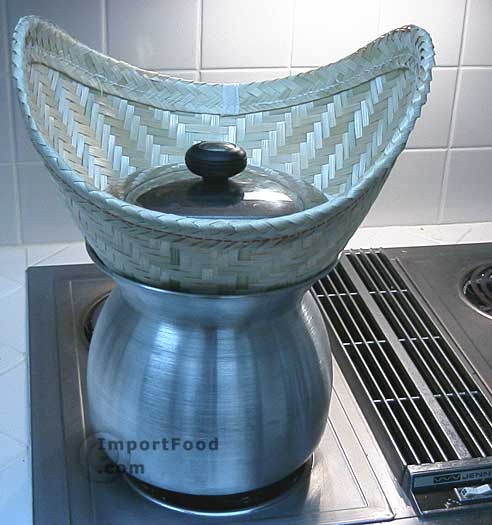
If you find you end up making this a lot, you can get yourself an authentic sticky rice steaming contraption at Importfood.com as seen in the picture to the right here. I so far have used my regular (Chinese) bamboo steamer with results that make me happy 🙂

Nomnomnom nom nom…image

Copyright © 2012 Simple Healthy Homemade. All rights reserved

Risotto milanese

Not quite conventional saffron risotto.

The creaminess of a good risotto is pure comfort food, at least to Europeans. However you look at it though, usually the recipe involves days of stirring over low flame (ok, I’m exaggerating slightly here) to reach that creamy state any self respecting risotto cook strives for. Since time isn’t always that easy to come by in my life, I needed something less traditional (sadly), but no less delicious or authentic tasting and most of all time saving, or at least work saving. I can see you frown, my purist friends, but since I made Osso Buco in the slow cooker, and therefore am already in the purgatory of purist cooks, I figured a little more deviation from the conventional path couldn’t hurt too much more.

image

So instead of adding water by the spoonful and being shackled to your pot for the purpose of slow and steady stirring, my quick version let’s you complete other tasks since it takes much less work. To make up for the blasphemy of bastardizing the preparation technique, I tried appeasing the food gods by adding extra saffron. You know: give some, take some. 😉
It’s utterly creamy and delicious, even without the long stirring and I think it can hold its own next to any traditional risotto, especially considering it’s weeknight fare!

image

Saffron is the most expensive spice by weight (worth thousands of dollars per pound!!) which isn’t surprising given that only about 5-7 pounds can be produces a year from an acre of land and the harvesting process is delicate and labor intensive. Saffron threads are the dried stigma of a fall flowering crocus variety and they have to be harvested by hand. By use however it isn’t all that expensive, since a little goes a long way and you only need about a pinch for a nicely flavored and colored risotto. And if you have a little land, (a flowerbed works perfect) you could order yourself some saffron crocus bulbs like me and harvest some of your own each year. I dry them on paper towels on top of my fridge, where they are out of the way.

image (this makes enough for 2 people/servings or to go with the slow cooker Osso Buco)

Ingredients

  • 1/2 cup Arborio, Vialone or Carnaroli rice
  • 1 small shallot, finely diced
  • 1 tbsp olive oil
  • 1/2 tsp salt
  • water (or broth)
  • 1 pinch of saffron threads
  • Parmiggiano Reggiano (Parmesan), to shave on top

Directions

  1. In a medium sauce pan heat the oil, the  add the shallot and cook until translucent. Add the rice and stir until all grains are coated.
  2. Add 2 cups of water and bring to a slow boil, stirring every couple of minutes, season with the salt, turn down if it starts to boil to rapidly.
  3. Cook for about 10 minutes, stirring every couple of minutes, then remove about 3-4 tbsp liquid, let cool slightly, add the saffron threads to hydrate and let sit for a couple of minutes before adding back to the rice.
  4. Add water, 1/2 cup at a time, while you are cooking the risotto, as the water gets absorbed. Your goal is to cook the rice to a nice and soft consistency and not have it swimming in water, keep stirring every so often.
  5. Cook until the rice is tender and creamy, adding water if necessary and stirring as above, total time is about 20 to 25 minutes, depending on the amount you make and I think also, the age of the  rice.
  6. If there is just a little liquid left when the rice is done, cover and let sit off the heat, the high starch content will absorb the excess moisture while it sits.
  7. Serve topped with shaved Parmiggiano Reggiano

image

Copyright © 2012 Simple Healthy Homemade. All rights reserved
Banana Chocolate Raw Pudding

image

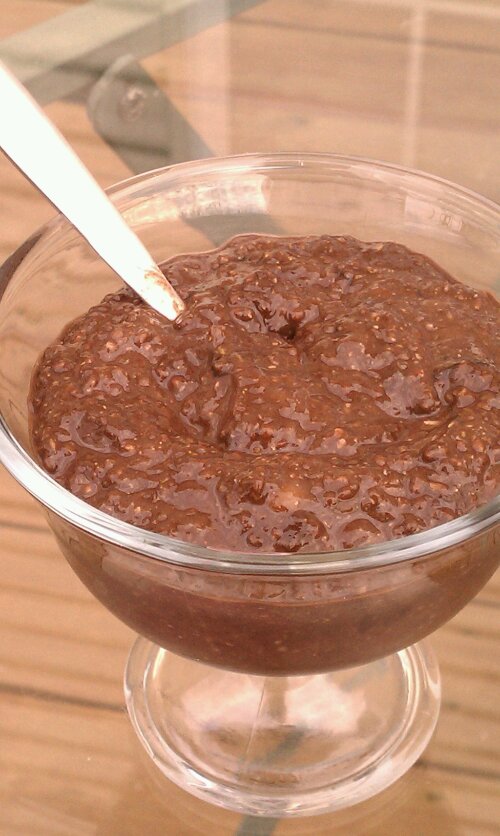
There are days when chocolate is the only thing that will do. And today I had one of those days. To make up for it, there is nothing like treating yourself with something yummy, delicious even decadent! Yay, treat time! Decision made, but good things don’t have to be bad for you. And yes, you can have this even if you don’t eat sugar. The only sweetness comes from the bananas! Let them get nice and ripe  over-ripe brown, and you’re in business! Easy to make and guilt free too 🙂

image

Ingredients

  • 2 over ripe bananas, mashed with a fork
  • about 1/2 cup milk (dairy or almond)
  • 2 tbsp cocoa powder
  • 2 tbsp ground flax seeds
  • 2 tbsp chia seeds

Directions

  1. Mash the banana with a fork
  2. Add the milk, stir until well blended
  3. Add the cocoa powder, flax seed and chia seed and stir it all together until mixed
  4. Refrigerate overnight

image
Copyright © 2012 Simple Healthy Homemade. All rights reserved

Seed and Nut Cracker (grain free)

image

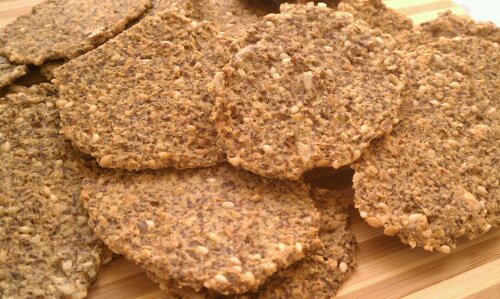
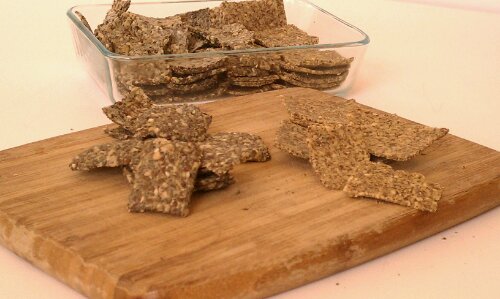
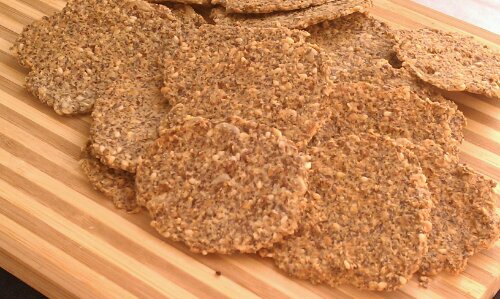
Seed or nut based crackers are yummy I daresay even addictive. But the price for a girl on a tight budget, is rather prohibitive… 🙁 So after tinkering in my kitchen (batch one and two shown here) batch 3 was the winner, hands down.

imagebatch one & two

You can make them square or round, depending on your preference. Square is a bit less work, but takes a little longer to get to that perfect crunchy state. For either one, flatten or roll out on the prepared cookie sheet (preferably lined with a silicon baking mat, that’s how I made them, if you don’t have one of those, at least use baking parchment) by covering with wax paper and rolling out, then peeling the paper layer gingerly from the top.

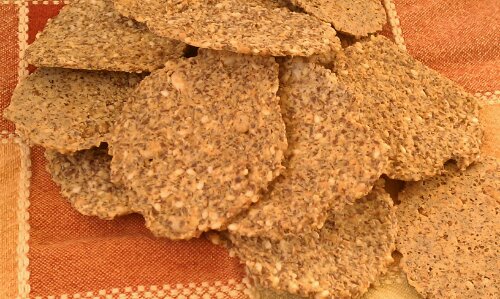
imagethe only downside? You could always eat more than there are left…
Ingredients

  • 1/4 cup cashews
  • 3 tbsp sun flower seeds, divided
  • 1/2 cup ground flax seeds (flax meal)
  • 1/4 cup ground almonds, natural not blanched
  • 1/4 cup quinoa flakes
  • 3/4 cup water
  • 3/4 tsp sea salt
  • 1 1/2 tbsp sesame seeds
  •  1 tbsp flax seeds, whole (golden or brown)
  • 1 tbsp butter or coconut oil, melted

Directions

  1. Preheat oven to 300°F
  2. Prepare baking sheet (if you are making these round, it will make two cookie sheets) by lining it with a silicone baking mat
  3. In a blender or a mini food processor, combine the cashew and 1 tbsp sun flower seeds, blend until it forms a coarse meal
  4. Add ground almonds, flax meal, and quinoa flakes and pulse until combined
  5. Add the water and salt, blend until well mixed
  6. If you have enough space in your mini processor, add the remaining ingredients and pulse 2-3 times, until mixed but not chopped.
  7. Round: drop onto prepared cookie sheet, 1 level teaspoon at a time, distancing about 1 12/” to 2″ apart, cover with waxpaper and roll out until less than 1/8″ thick, basically as thin as you can get it.
  8. Square: Scrape or drop dough onto cookie sheet, spread out, then cover with wax paper, and roll out super thin, (less than 1/8″ thick)
  9. Bake 30 minutes in the middle of the preheated oven, or until no longer soft and pliable. then finish baking another 5 minutes on the bottom rack
  10. Let cool before crunching away!

image

Copyright © 2012 Simple Healthy Homemade. All rights reserved